Español
Saludos amigos creadores 🙋☀🎄
¡Feliz y bendecida Navidad!
Hoy, a sólo instantes de una reunificación familiar para degustar una deliciosa cena navideña , he decido traerle un sencillo tutorial, dónde les mostraré el paso a paso del confeccionado de un brazalete y diadema de corazones, utilizando la técnica de papel maché.
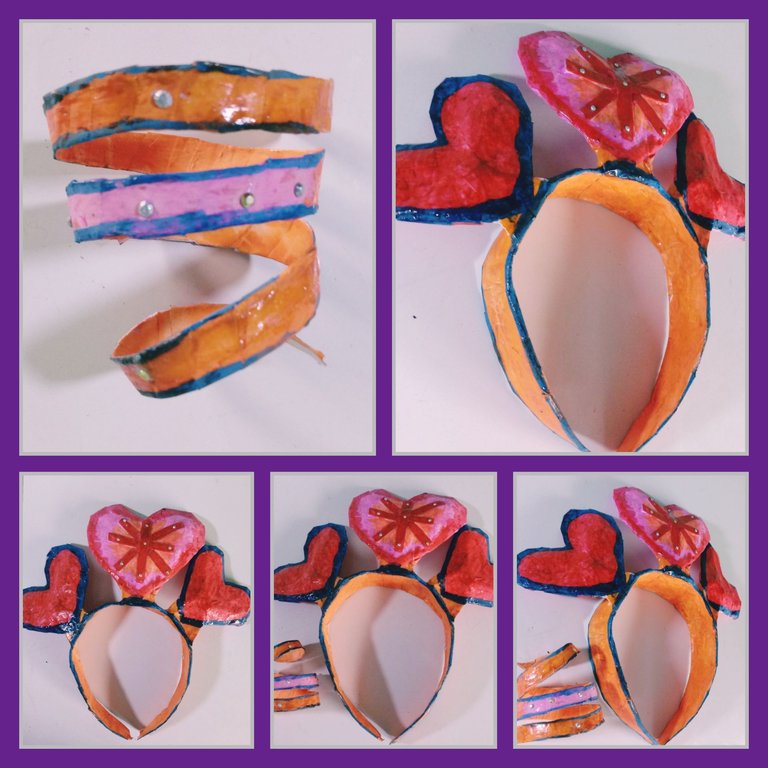
Esta diadema será un obsequio para mi primita , quién ama la navidad y las manualidades. ¡Comencémos!.
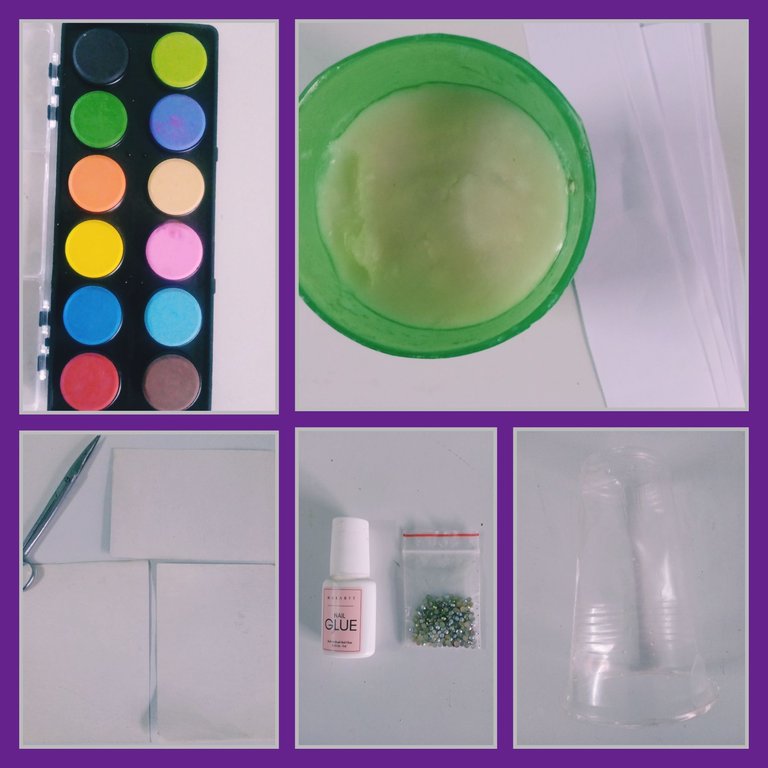
Materiales
.Cartulina
.Papel
.Tiras de papel blanco
.Vaso desechable
.Pega elaborada de harina
.Pegamento
.Tijera
.Acuarelas
.Pequeñas piedras brillantes
.Barniz
Modo de confección
Para la diadema
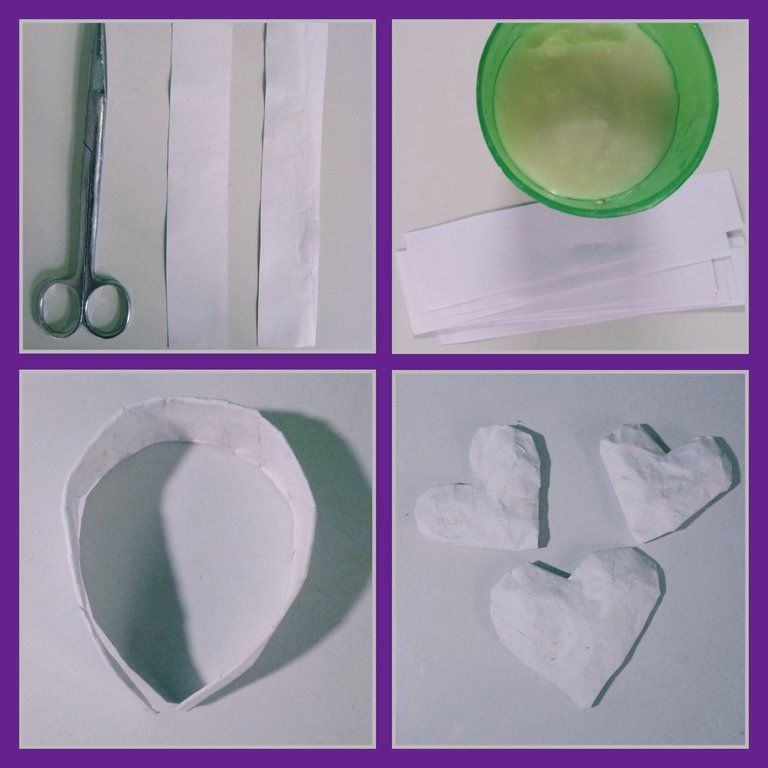
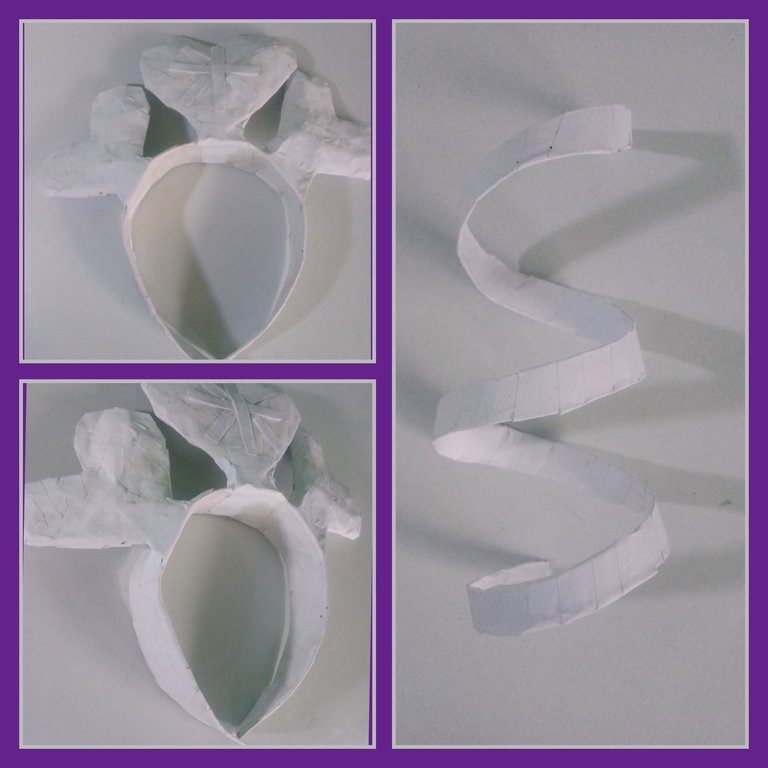
1-Cortar dos listones de cartulinas, que varián según el ancho y largo que deseemos para nuestra diadema.
2-Utilizando el pegamento, unir los dos listones por uno de sus vértices.
3-Darle tres capas de empapelado completamente, utilizando tiras blancas y pega elaborada de harina. Dejar secar por ocho horas.
Hasta aquí tenemos creado nuestro cintillo, ahora pasaremos a confeccionar los corazones que la decorarán.
Pasos
1-Cortar seis cuadrados medianos de cartulina y ponerlos por parejas.
2-Dibujar sobre la cartulina los corazones deseados, y utilizando la tijera, cortar por la guía marcada.
3-Colocar entre cada pareja de corazones un relleno con papel estrujado y pega elaborada de harina para proporcionarle relieve.
4-Darle una capa de empapelado a los corazones y dejarlo secar por cinco horas.
5-Adherir con el pegamento los corazones al cintillo y darle una capa de empapelado en su totalidad para generarle dureza y firmeza.
Para el brazalete
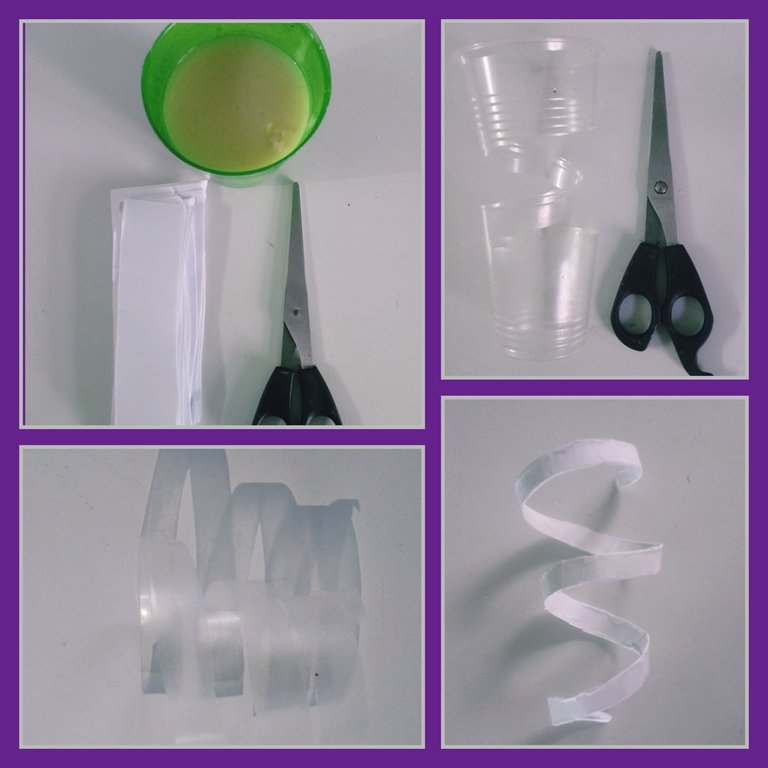
1-Tomar un vaso desechable y utilizando una tijera realizarle cortes continúos hasta lograr una estructura semejante a una pulsera.
2-Utilizando tiras de papel blanco y la pega elaborada de harina, darle tres capas de empapelado a la estructura completa. Dejar secar por cinco horas.
Nuestro brazalete y diadema se encuentran listos para decorar utilizando acuarelas y temperas.
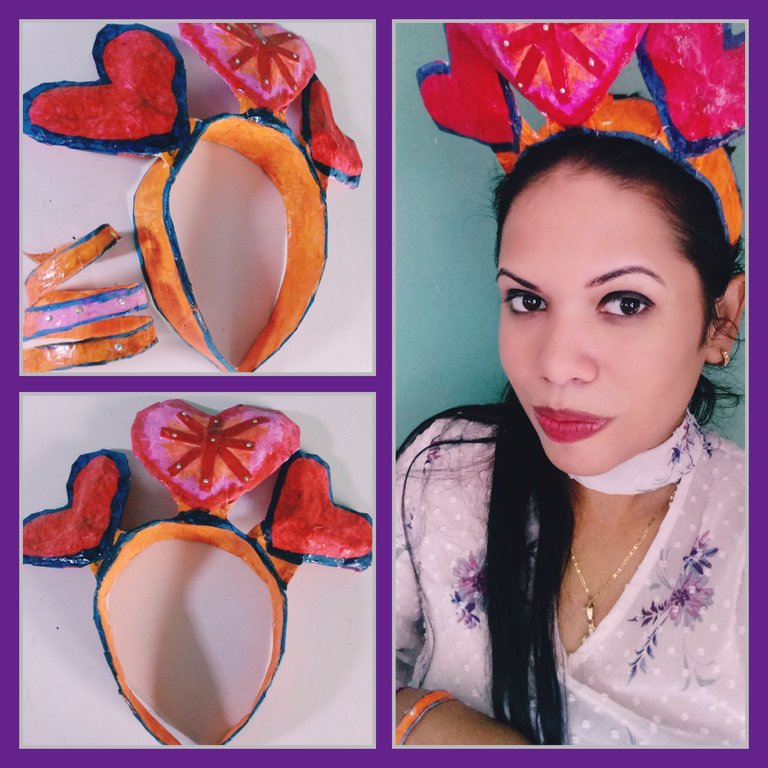
Los colores que empleé fueron el naranja, rojo , azul, ¡colores alegres, amigos!, que combinados y con pequeñas piedras
brillantes adheridas con pegamento, hacen lucir hermoso a quién los porte.
Espero que les haya gustado este método para confeccionar diademas y brazaletes, los empleados por ustedes,¡ me encantaron!.
Les deseo una navidad familiar cargada de sorpresas positivas donde la salud, éxito, amor, prosperidad se encuentren abrazándolos fuertemente.
¡Feliz Navidad!🙋🎄
Confecciones y fotografías propias.
English
Greetings fellow creators 🙋☀🎄
Merry and blessed Christmas!
Today just moments before a family reunion to taste a delicious Christmas dinner, I decided to bring you a simple tutorial, where I will show you the step by step of making a bracelet and a heart headband, using the papier mache technique.

This headband will be a gift for my little cousin, who loves Christmas and crafts. Let's get started!.
Materials
.Cardboard
.Paper
.White paper strips
.Disposable cup
.Paste made of flour
.Glue
.Scissor
.Watercolors
.Small shiny stones
.Varnish

Mode of preparation
For the headband
1-Cut two strips of cardboard, which will vary according to the width and length we want for our headband.
2-Using the glue, join the two slats at one of their vertices.
3-Give it three layers of wallpaper completely, using white strips and paste made of flour. Leave to dry for eight hours.
So far we have created our ribbon, now we will go on to make the hearts that will decorate them.
Steps
1-Cut six medium squares of cardboard and put them in pairs.
2-Draw the desired hearts on the cardboard, and using the scissors, cut along the marked guide.
3-Place between each pair of hearts a filling with squeezed paper and paste made of flour to provide relief.
4-Give a layer of wallpaper to the hearts and let it dry for five hours.
5-Adhere the hearts to the ribbon with the glue and give it a layer of wallpaper in its entirety to generate hardness and firmness.

For the bracelet
1-Take a disposable cup and using a scissors make continuous cuts until you achieve a structure similar to a bracelet.
2-Using strips of white paper and the glue made of flour, give three layers of wallpaper to the complete structure. Leave to dry for five hours.

Our bracelet and headband are ready to decorate using watercolors and tempera.

The colors I used were orange, red, blue, happy colors, friends!,which combined and with small stones
shiny attached with glue, they make look beautiful to whoever wears them.

I hope you liked this method for making headbands and bracelets, the ones used by you, I loved them!.
I wish you a family Christmas full of positive surprises where health, success, love, prosperity are hugging you tightly.
Happy Christmas!🙋🎄
Own clothing and photographs.
Hola amiga, hermosa diadema y con materiales que siempre tenemos en casa, una opción para reciclar y cuidar el planeta.
!DIY
Así es amigo, la técnica del papel maché nos permite reciclar. Muchas gracias. Excelente y feliz semana🙋☀
This looks really interesting
You did a great job friend
Thank you very much. Greetings and blessed week🙋🎄☀.
Your paper Mache technique is quite fascinating. The braceley an headband looks nice. Bravo.
Thank you very much from my heart🙋☀. Blessings.
This is quite unique and beautiful too, you did a great job and am impressed. Well done
Thank you very much.Greetings🙋🎊
You can query your personal balance by
@samuell12 just sent you a DIY token as a little appreciation for your post dear @marydeluz! Feel free to multiply it by sending someone else !DIY in a comment :) You can do that x times a day depending on your balance so:!DIYSTATS