Español
Saludos amigos amantes de las manualidades.🙋💜🌈
¡Comencemos una nueva semana poniendo nuestro corazón en nuestras creaciones!.
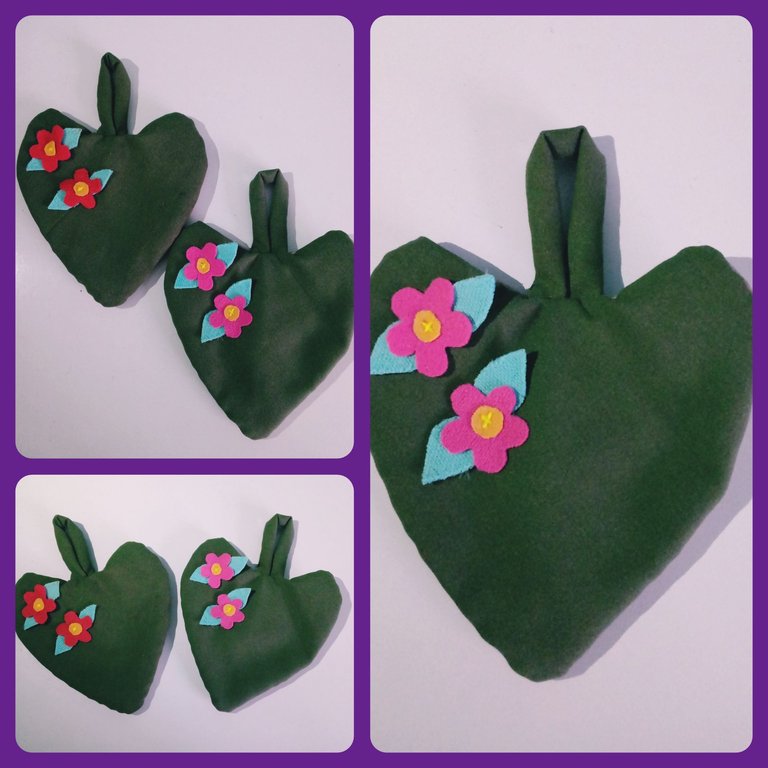
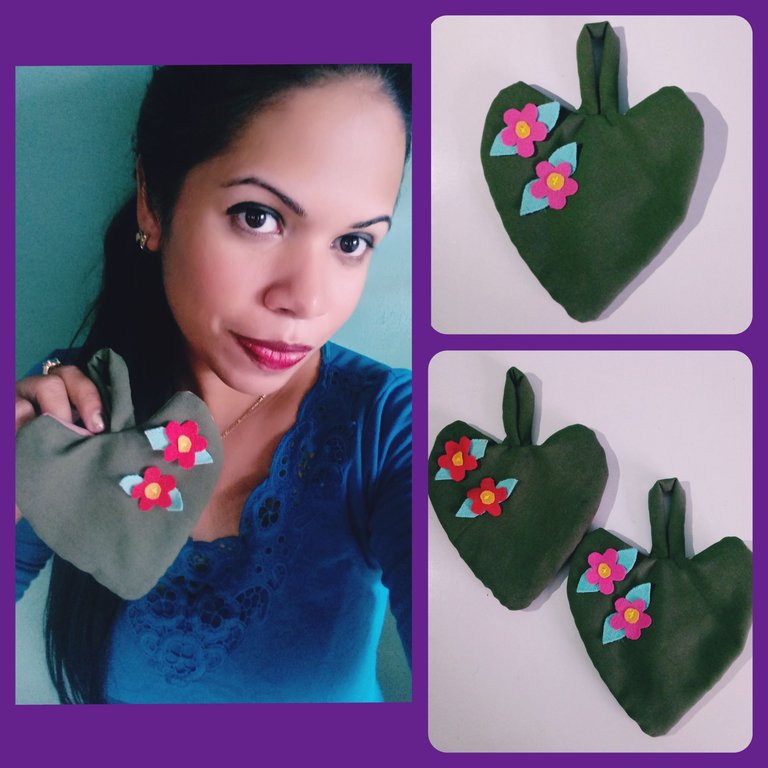
Hoy, les quiero compartir mediante un tutorial, el paso a paso de las agarraderas de corazones, que confeccioné para obsequiar a mis familiares y decorar mi cocina, este pasado 14 de febrero, día de los enamorados.
Los invito a que me acompañen a conocer este proceder sencillo, que nos permitirá reciclar los retazos de telas guardados , dándoles utilidad.
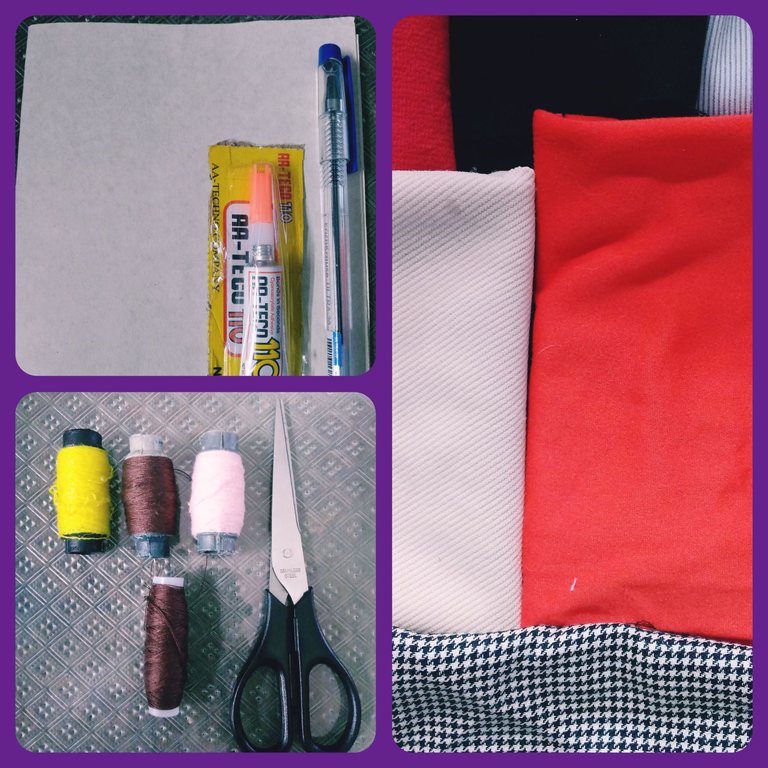
💜Materiales💜
.Retazos de tela
.Cartón
.Tijera
.Hilo
.Aguja
.Regla
💜Modo de confección💜
1-Primeramente dibujaremos un corazón en la cartulina , que conformará despues de cortado, nuestra guía para trabajar en nuestros retazos.
2-Ya teniendo nuestra guía conformada, la colocaremos sobre tres cuadrantes de telas previamente cortados, y procedemos con un lapicero a marcar el corazón en cada uno.
(Aquí, tenemos que tener en cuenta que un cuadrante debe ser de tela gruesa.).
3-Ya teniendo nuestros corazones dibujados en tela, pasaremos con ayuda de la tijera a cortarlos siguiendo la guía, logrando tres corazones bien conformados.

Hasta aquí tenemos los corazones que conformarán el cuerpo para nuestra agarradera, ahora los resguardamos unos instantes, y realizaremos: el asa, para colgarlas y pequeñas flores, para decorarla.
💜 Pasos para hacer el asa
1-Cortamos un rectángulo de tela de 12 centímetros de largo, y 3 centímetros de ancho.
2-Doblamos por su mitad, y con ayuda de aguja e hilo, cosemos por todo el borde uniendo sus laterales.
3-Luego, viramos la estructura , obteniendo conformada nuestra asa.
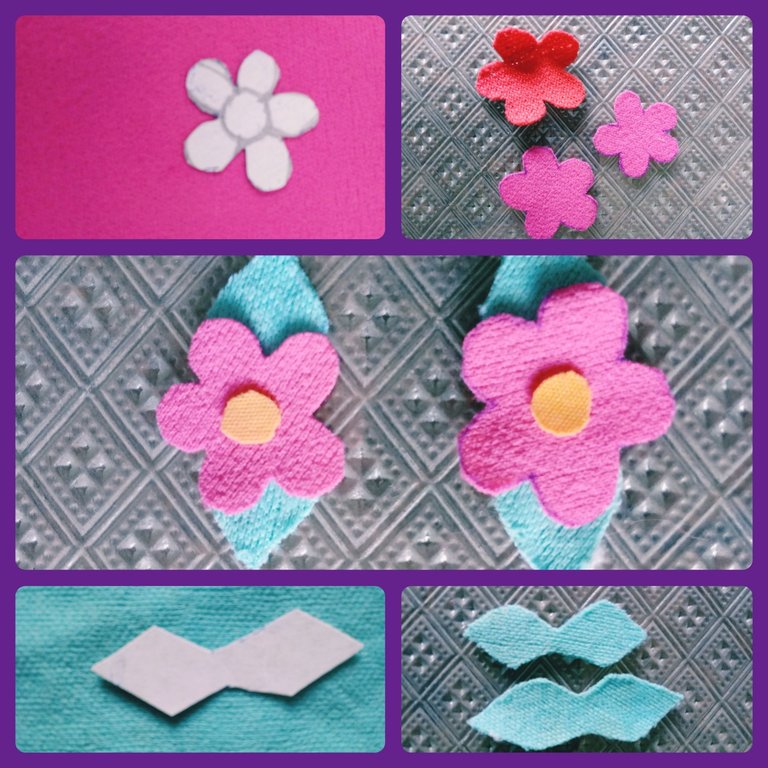
💜 Pasos para hacer las flores
1-En la cartulina vamos a dibujar modelos de flores y hojas a nuestro gusto, que nos servirán después de cortadas, como guía para trabajar en nuestra tela.
2-Marcamos con nuestra guía de flor y hojas los retazos de telas escogidos, y luego, pasamos a recortarlos.
3-Teniendo lista todas las partes de la flor, pasamos a ensamblarla con hilo y aguja en el corazón, que conformará la parte delantera del cuerpo de nuestra agarradera.
Habiendo logrado el asa, y nuestro decorado de flor en el corazón delantero de nuestra agarradera , nos encontramos listos para unificarla de la siguiente forma:
1-Colocamos un primer corazón, que constituirá su parte posterior, seguido de un corazón central de tela gruesa .
2-Encima de este corazón central, colocaremos nuestra asa doblada en forma de curva , que quedará hacia la región interna , con sus dos extremos unidos en el borde central del corazón.
3- Seguidamente colocaremos el tercer corazón con nuestro decorado hacia dentro, y pasamos a coser con aguja e hilo por todo el borde, unificando los tres corazones.
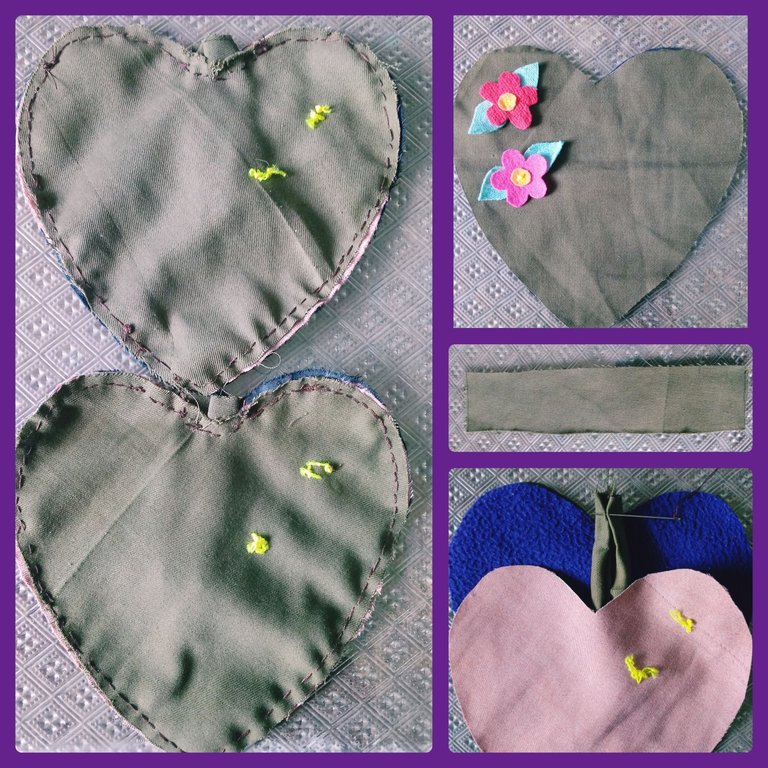
4-Ya teniendo unidos los corazones, con la tijera realizaremos un corte en el corazón que constituye la parte posterior, y viraremos completamente la estructura , logrando obtener una agarradera de corazón decorada, y con su asa.
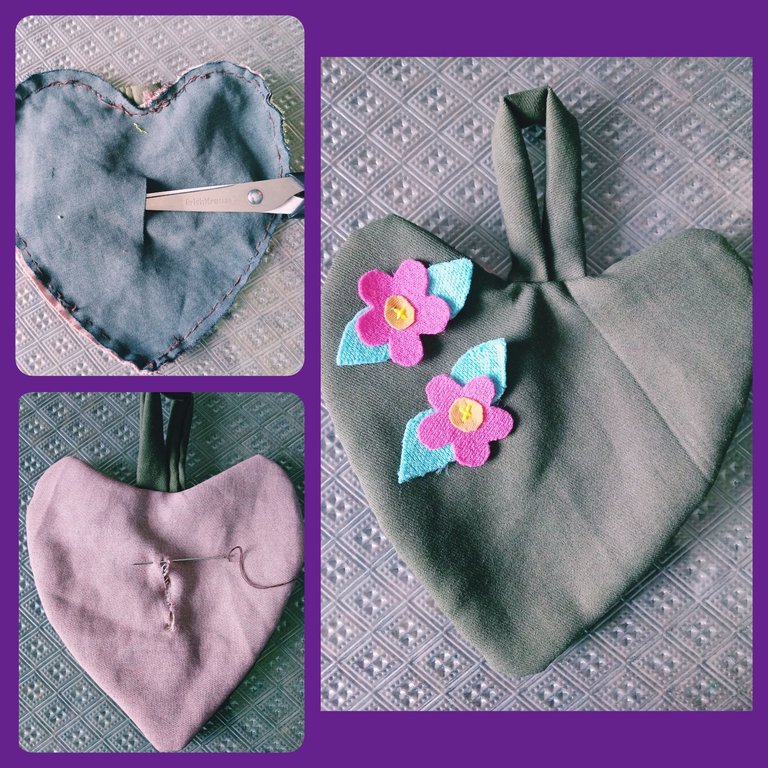
Ya teniendo la agarradera, podemos optar por dejarla de ese grosor ó aumentarlo, rellenándola con algodón por la grieta realizada, la que cerraremos seguidamente cosiendo, con aguja e hilo.
Las agarraderas de corazón quedaron hermosas decorando mi cocina , además de causar encanto a mis tías y a mi madre, a quienes les obsequié por esta bonita fecha de amor.
Espero que les hayan gustado y los exhorto amigos, a que se anímen a su confección.
Una excelente semana para todos🙋💜
Confecciones y fotografías propias.
English
Greetings friends who love crafts.🙋💜🌈
Let's start a new week by putting our heart into our creations!.
Today, I want to share with you through a tutorial, the step by step of the heart potholders that I made to give to my relatives, and decorate my kitchen this past February 14th, valentine's day.
I invite you to join me to learn about this simple procedure, which will allow us to recycle the saved fabric scraps, making them useful.
💜Materials💜
.Scraps of fabric
.Cardboard
.Scissor
.Thread
.Needle
.Rule
💜Mode of preparation💜
1-First we will draw a heart on the cardboard, which will form after cutting, our guide to work on our scraps.
2-Already having our guide shaped, we will place it on three previously cut fabric squares, and proceed with a pencil to mark the heart on each one.
(Here, we have to keep in mind that a quadrant should be made of thick fabric.).
3-Already having our hearts drawn on fabric, we will pass with the help of scissors to cut them following the guide, achieving three well-shaped hearts.
So far we have the hearts that will make up the body for our potholder, now we will save them for a few moments, and we will make: the handle, to hang them and small flowers, to decorate it.
💜 Steps to make the handle
1-We cut a rectangle of fabric 12 centimeters long, and 3 centimeters wide.
2-Fold in half, and with the help of needle and thread, sew along the entire edge joining its sides.
3-Then, we turn the structure, obtaining shaped our handle.
💜 Steps to make the flowers
1-On the cardstock we are going to draw models of flowers and leaves to our liking, which will serve us after cut, as a guide to work on our fabric.
2-We marked with our flower and leaves guide the chosen fabric scraps, and then, we cut them out.
3-Having all the parts of the flower ready, we pass to assemble it with thread and needle in the heart, which will form the front part of the body of our potholder.
Having achieved the handle, and our flower decoration on the front heart of our handle, we are ready to unify it as follows:
1-We place a first heart, which will constitute its back, followed by a central heart of thick fabric.
2-On top of this central heart, we will place our bent handle in the form of a curve, which will be towards the inner region, with its two ends joined at the central edge of the heart.
3- Then we will place the third heart with our decoration inside, and we will sew with needle and thread all over the edge, unifying the three hearts.
4-Already having the hearts together, with the scissors we will make a cut in the heart that constitutes the back, and we will completely turn the structure, managing to obtain a decorated heart handle, and with its handle.
Already having the handle, we can choose to leave it of that thickness or increase it, filling it with cotton through the crack made, which we will close next by sewing, with needle and thread.
The heart potholders were beautiful decorating my kitchen, as well as causing charm to my aunts and my mother, to whom I gave them for this beautiful love date.
I hope you liked them and I urge you, friends, to encourage yourself to make them.
A great week for everyone🙋💜
Own clothing and photographs.
Congratulations @marydeluz! You have completed the following achievement on the Hive blockchain And have been rewarded with New badge(s)
Your next target is to reach 200 posts.
You can view your badges on your board and compare yourself to others in the Ranking
If you no longer want to receive notifications, reply to this comment with the word
STOPUn saludo muy grande!!Esos corazones quedaron muy bien, @marydesign
Saludos, muchas gracias, fueron confeccionados con amor❤.Excelente y bendecida semana, amigo.🙋🌈
Great way to make use of your lefetover fabrics. These potholders would be super helpful in the kitchen. Well done and thanks for sharing your lovely work with us.
Thank you very much community, always learning from your shared creations.A blessed week to all.🙋💗