Español
Saludos amigos amantes de las manualidades🙋❤
¿Ya Cupido 👼 llegó a sus hogares?.Y con esta interrogante he decidido comenzar mi publicación de hoy , pues inspirada en esta hermosa fecha cercana del día del amor , quise realizar pequeños colgantes decorativos con forma de Cupidos, utilizando el papel, como material principal. Si desean decorar con estos mini Cupidos sus hogares, o lucirlos adornando carteras, llaves, ó mochilas, pues acompañenme amigos a su paso a paso. ¡Comencemos!.
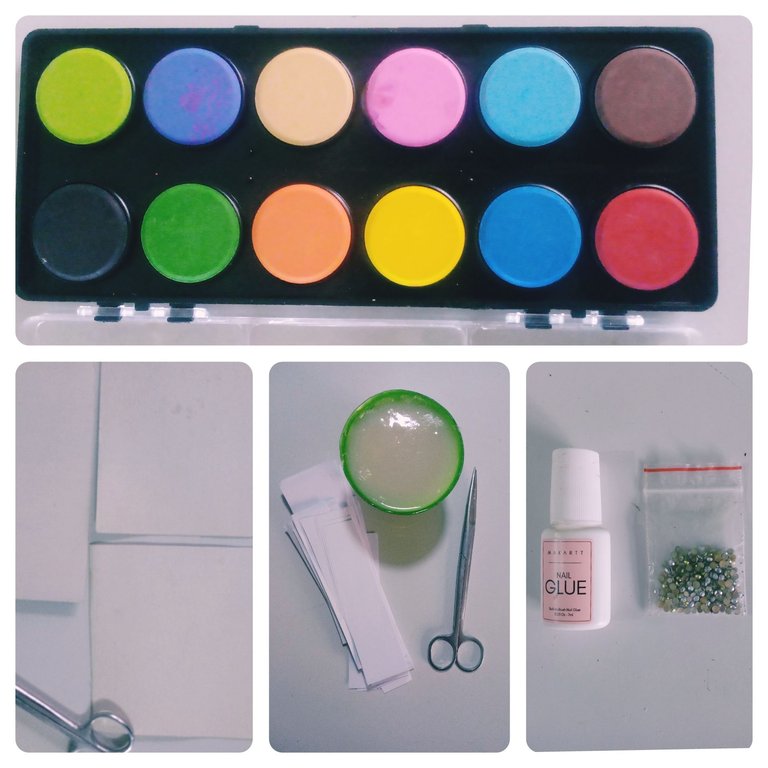
✨Materiales✨
.Papel
.Cartulina
.Tiras de papel blanco
.Pega elaborada de harina.
.Pegamento
.Piedras coloridas
.Tijera
.Temperas
✨Modo de confección✨
1-Primeramente, tomamos papel y comenzamos a estrujarlo conformando dos bolitas, una redonda, que hará la función de la cabeza, y otra en forma ovalada, para su cuerpo.
2-Luego, utilizando tiras de papel blanco y pega elaborada de harina, le daremos dos capas de empapelado a la estructura completa, y las dejaremos secar por cuatro horas.

3-Ya teniendo nuestra cabeza y cuerpo conformados, utilizando el pegamento los unificaremos.
4-Seguidamente, pasaremos a confeccionar los rasgos faciales y extremidades, que nos permitirán personalizarlo.
Para hacer las extremidades, cortamos cuatro delgados rectángulos, y lo adherimos con pegamento al cuerpo.
Para hacer nariz, boca: Enrollamos papel en forma de tabaquito y lo adherimos con pegamento a la parte delantera de la cabeza.
Para hacer el pelo: Estrujamos papel junto con la pega elaborada de harina, que varía en cantidad según el vulúmen y largo que lo deseemos, y luego, lo adherimos con pegamento en la parte superior de la cabeza.
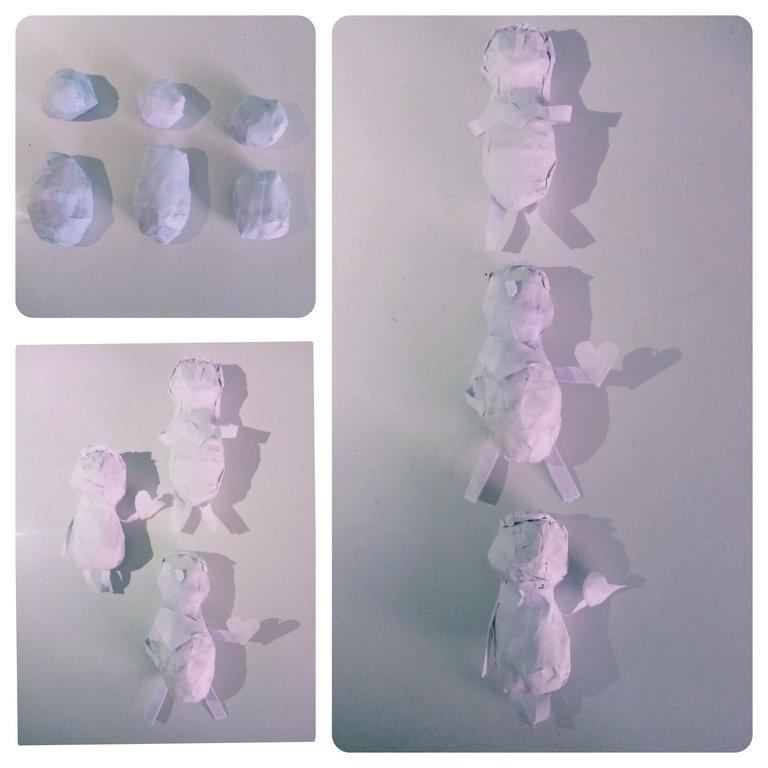
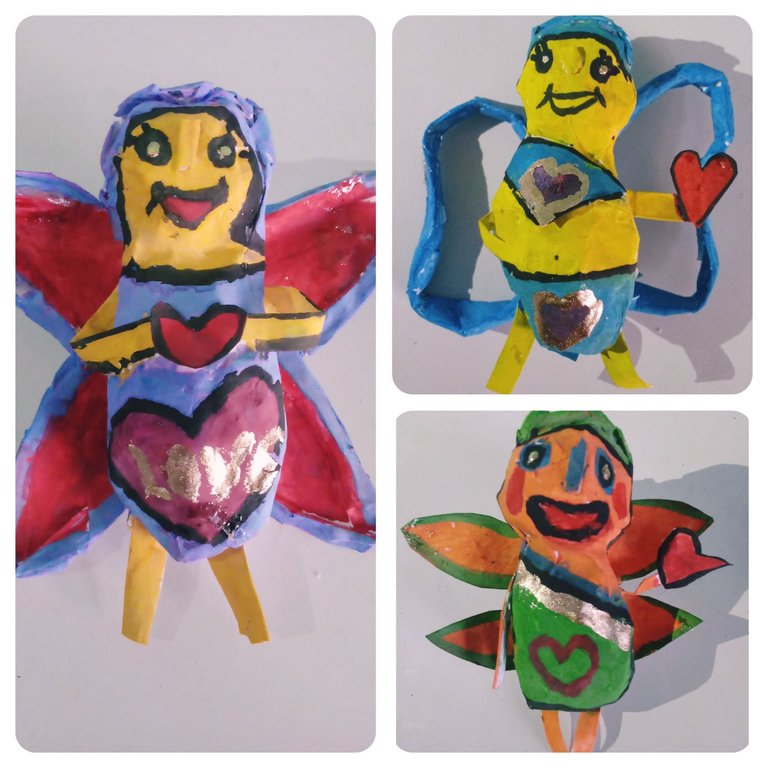
Hasta aquí tenemos conformados nuestros pequeños Cupidos, yo confeccioné dos varones y una hembra. Ahora pasaremos a crearles sus alitas , que pueden variar en estilos. Para crearlas empleé dos métodos:
1-Un primer estilo se realiza, dibujando con nuestro lápiz sobre la cartulina el modelo de alas deseadas, luego, cortamos con nuestra tijera siguiendo la guía, y le agregamos rollitos de papel con pega elaborada de harina, donde deseemos relieve en las alas.
2-El segundo, es enrollar papel logrando un tabaquito largo, lo doblamos conformando el estilo de las alas deseadas, y le damos una capa de empapelado en su totalidad, para darle firmeza y mantener la estructura.
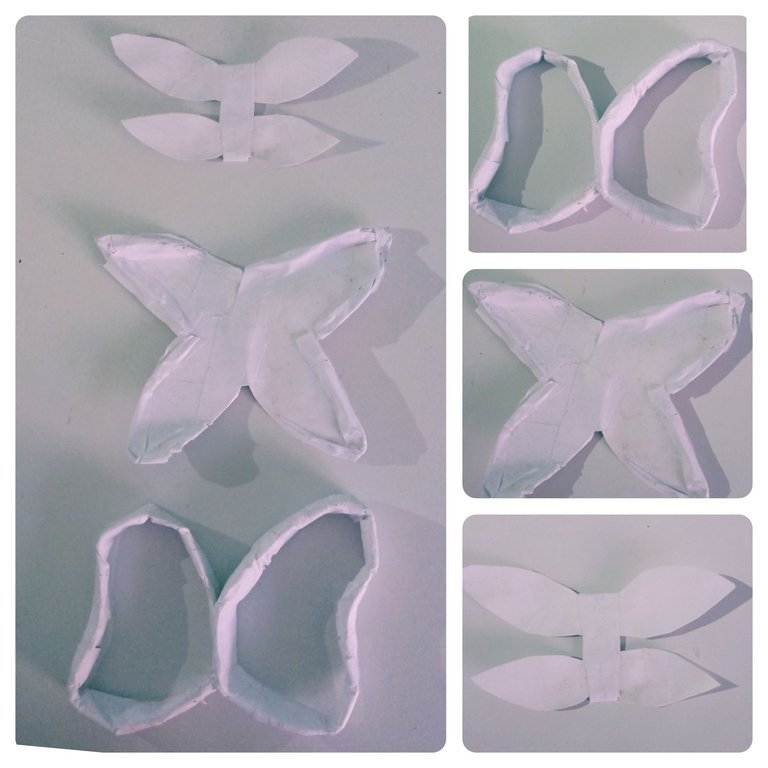
Ya teniendo nuestros Cupidos y alas listas, los unificamos con pegamento, y le daremos dos capas de empapelado completamente para generarle dureza. Dejamos secar por ocho horas, y transcurrido este tiempo nuestros pequeños Cupidos están listos para pintar.

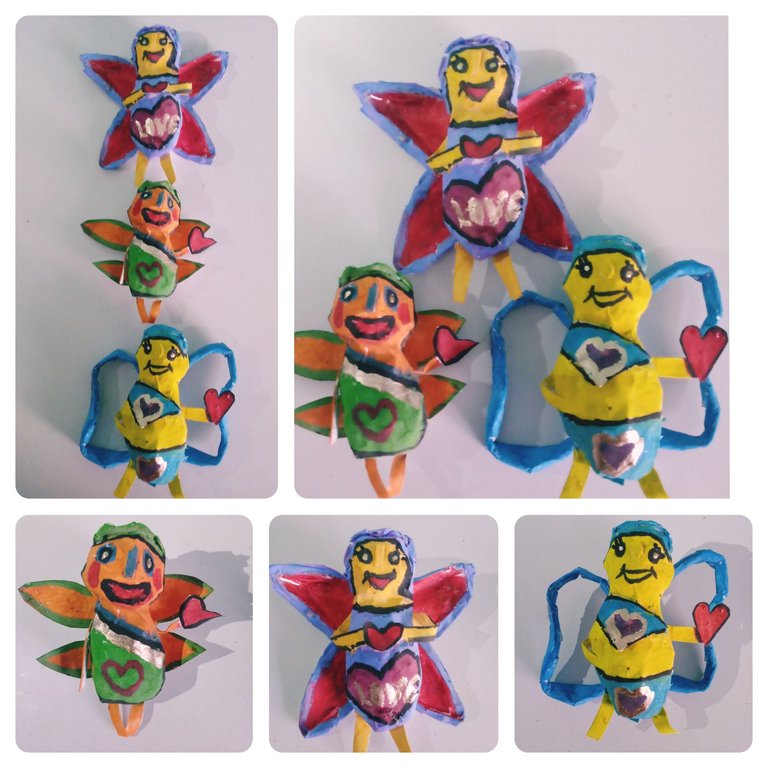
El azul, amarillo, verde , púrpura, fueron los colores que le dieron vida a los pequeños Cupidos, junto a un hermoso corazón rojo. Para resaltar sus ojitos, les adherí pequeñas piedras con pegamento, que lograron junto a los colores, un hermoso contraste y un bonito resultado.
Para confeccionar sus asitas que son opcionales porque hay estilos de alas que nos permiten su colgado : Cortamos cinco centímetros de alambre, y lo doblamos uniendo sus extremos formando una curvatura. Luego, con pegamento, la adherimos en la parte posterior de nuestro Cupido.
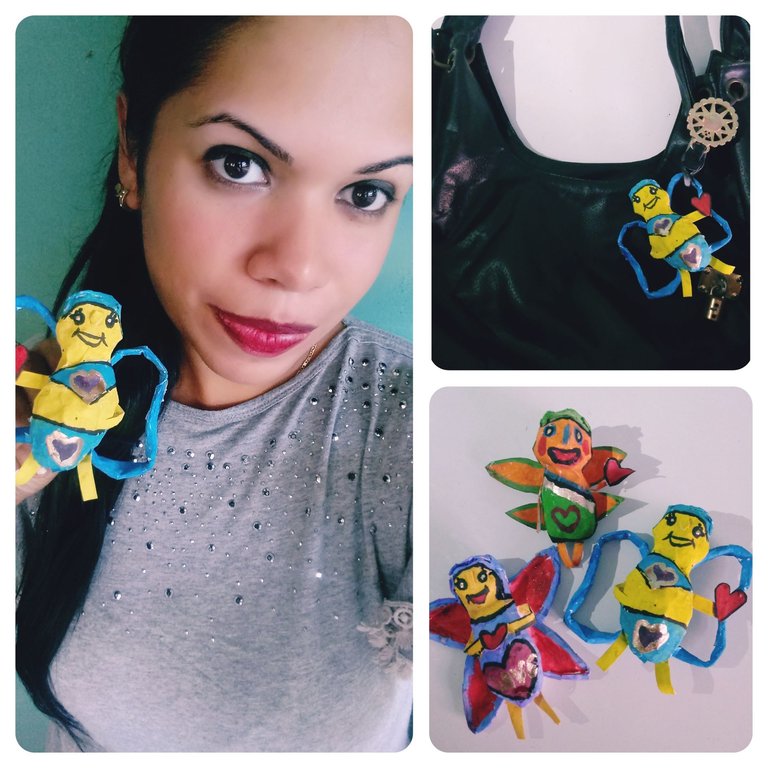
Ya está listos nuestros pequeños Cupidos para lucir en nuestros carteras y demás accesorios que utilizamos en nuestro diario. Además, que por simbolizar amor, podemos obsequiarlos como un hermoso regalo de valor sentimental a quiénes amamos en este 14 de febrero.
Los exhorto a que se anímen, y pongan su espíritu creativo, confeccionando a estos pequeños angelitos del amor, que buenas energías traen a nuestros hogares.
Una excelente semana de amor para todos. 🙋💝👼
Confecciones y fotografías propias.
English
Greetings friends who love crafts🙋❤
Has Cupid arrived at home yet?.And with this question I have decided to start my publication today, because inspired by this beautiful close date of the day of love, I wanted to make small decorative pendants in the shape of Cupids, using paper, as the main material. If you want to decorate your homes with these mini Cupids, or show them off by decorating wallets, keys, or backpacks, then come with me friends to your step by step. Let's get started!.
✨Materials✨
.Paper
.Cardboard
.White paper strips
.Paste made of flour.
.Glue
.Colorful stones
.Scissor
.Temperas
✨Way of making✨
1-First, we take paper and start squeezing it into two balls, one round, which will do the function of the head, and another oval-shaped, for your body.
2-Then, using strips of white paper and elaborate flour glue, we will give two layers of wallpaper to the complete structure, and let them dry for four hours.
3-Already having our head and body shaped, using the glue we will unify them.
4-Next, we will go on to make the facial features and limbs, which will allow us to customize it.
To make the limbs, we cut four thin rectangles, and glued it to the body.
To make nose, mouth: We roll paper in the shape of a cigarette and stick it with glue to the front of the head.
To make the hair: We squeeze paper together with the glue made of flour, which varies in amount according to the vulumen and length that we want, and then, we adhere it with glue on the top of the head.
So far we have our little Cupids shaped, I made two males and one female. Now we will move on to create your wings, which may vary in styles. To create them I used two methods:
1-A first style is made, drawing with our pencil on the cardboard the model of desired wings, then, we cut with our scissors following the guide, and we add rolls of paper with glue made of flour, where we want relief on the wings.
2-The second, is to roll paper achieving a long tobacco, we fold it conforming the style of the desired wings, and we give it a layer of wallpaper in its entirety, to give it firmness and maintain the structure.
Already having our Cupids and wings ready, we unify them with glue, and we will give two layers of wallpaper completely to generate hardness. We let it dry for eight hours, and after this time our little Cupids are ready to paint.
Blue, yellow, green, purple, were the colors that gave life to the little Cupids, along with a beautiful red heart. To highlight their little eyes, I attached small stones with glue, which achieved together with the colors, a beautiful contrast and a nice result.
To make their asitas that are optional because there are styles of wings that allow us to hang them : We cut five centimeters of wire, and we bend it joining its ends forming a curvature. Then, with glue, we adhered it on the back of our Cupid.
Our little Cupids are ready to show off in our wallets and other accessories that we use in our daily life. In addition, because they symbolize love, we can give them as a beautiful gift of sentimental value to those we love on this February 14th.
I urge you to cheer up, and put your creative spirit, making these little angels of love, which good energies bring to our homes.
An excellent week of love for everyone. 🙋💝👼
Own clothing and photographs.
I never cease to be amazed by the work you share in this community. Thank you for always giving your best, and being true to what you love to create the most. Bravo, this is worth gold!...
Thank you very much, I am glad that the little Cupids liked and touched the hearts of the members of this beautiful community of creators. Greetings my friend, happy week to you and community 🙋🌈.
These Cupid pendants are a creative and charming way to celebrate love. A great DIY project for Valentine’s Day. Well done
Thank you very much. May love always prevail and grow in Hive.Greetings and a blessed week with love, community🙋💞.