Español
Saludos amigos creadores 🙋🌼
¡Excelente y feliz semana para todos!.
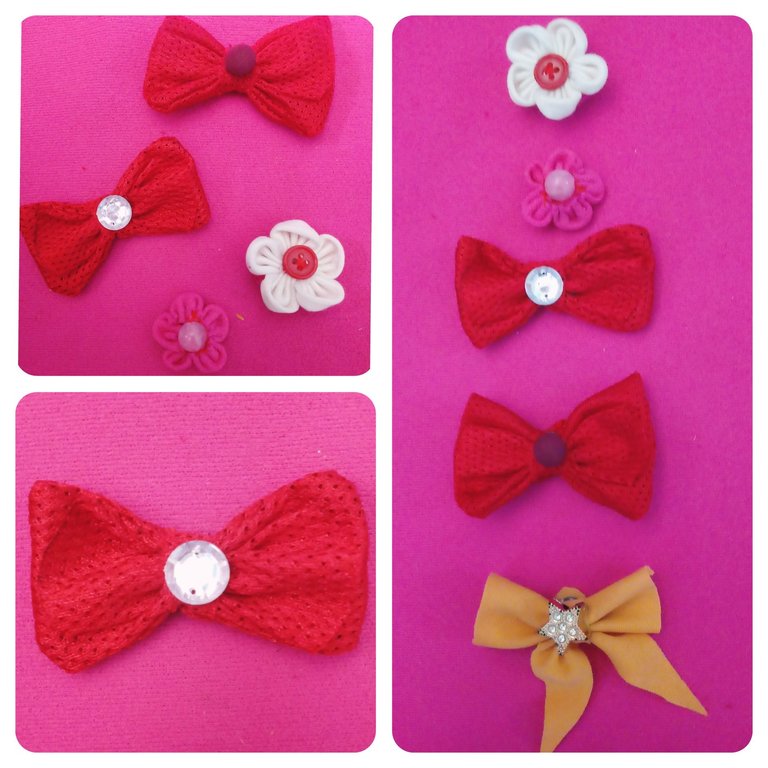
Hoy les quiero compartir un tutorial , en el que podremos reciclar esos retazos de tela, botones, lentejuelas, guardados, mediante la confección de forma sencilla de bellos prendedores de lazos, que nos servirán para decorar nuestro vestuario y cabello. ¡Comencémos!
Materiales
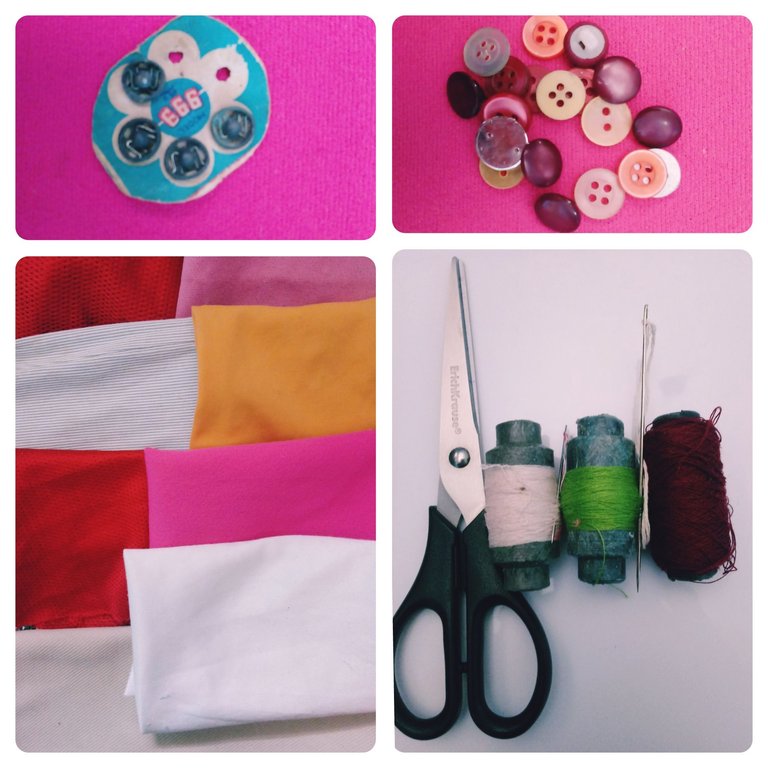
.Retazos de tela
.Broches
.Hilo
.Aguja
.Tijera
.Cartulina
.Lapicero
.Decoraciones: botones, lentejuelas, pequeñas piedras brillantes.
Modo de confección
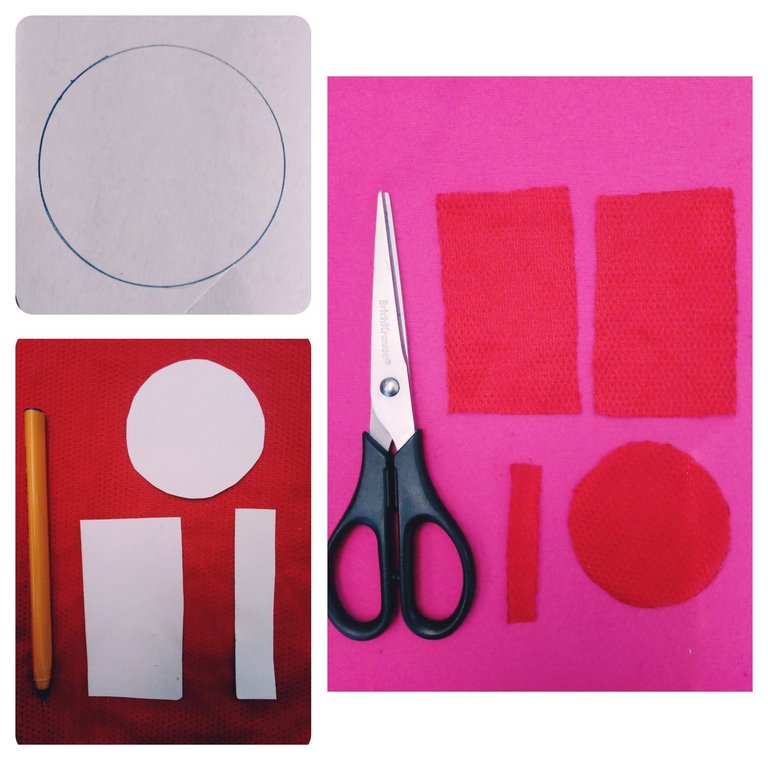
1-Primeramente tomamos el lapicero y en la cartulina trazaremos: un círculo, de seis centímetros de diámetro,dos rectángulos, de
ocho centímetros de largo y cinco de ancho, un rectángulo, de seis centímetros de largo y uno de ancho.
Estas medidas pueden variar según el tamaño que deseemos para nuestros prendedores.
2-Seguidamente, tomamos la tijera y cortamos nuestros círculos y rectángulos seguiendo la guía trazada, logrando obtener lo que constituirá nuestros modelos para trabajar en la tela.
3-Teniendo nuestros modelos listos , los pondremos sobre el retazo de tela escogida y marcaremos ayudándonos de nuestro lapicero, luego, siguiendo la guía cortaremos con la tijera.
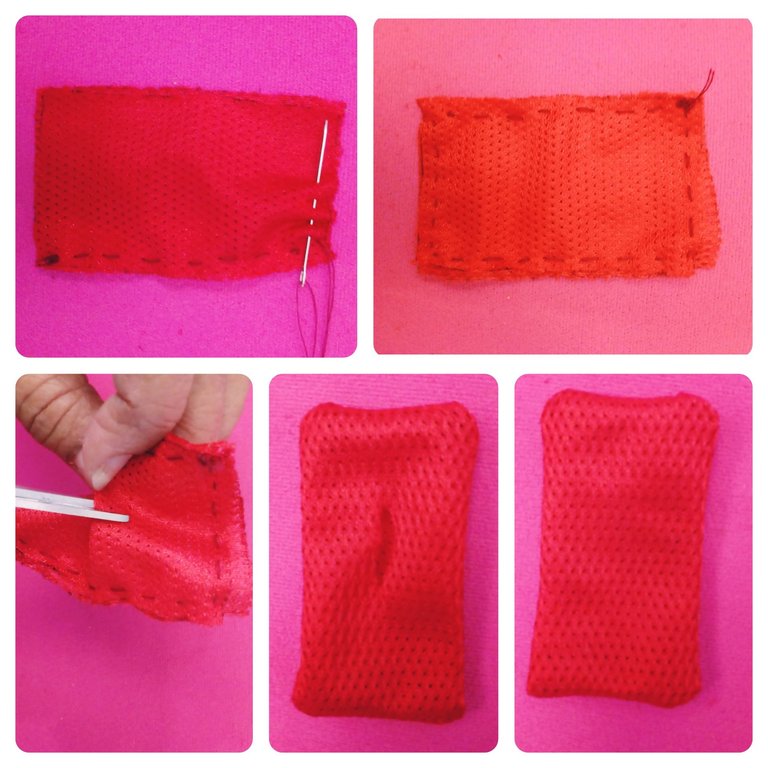
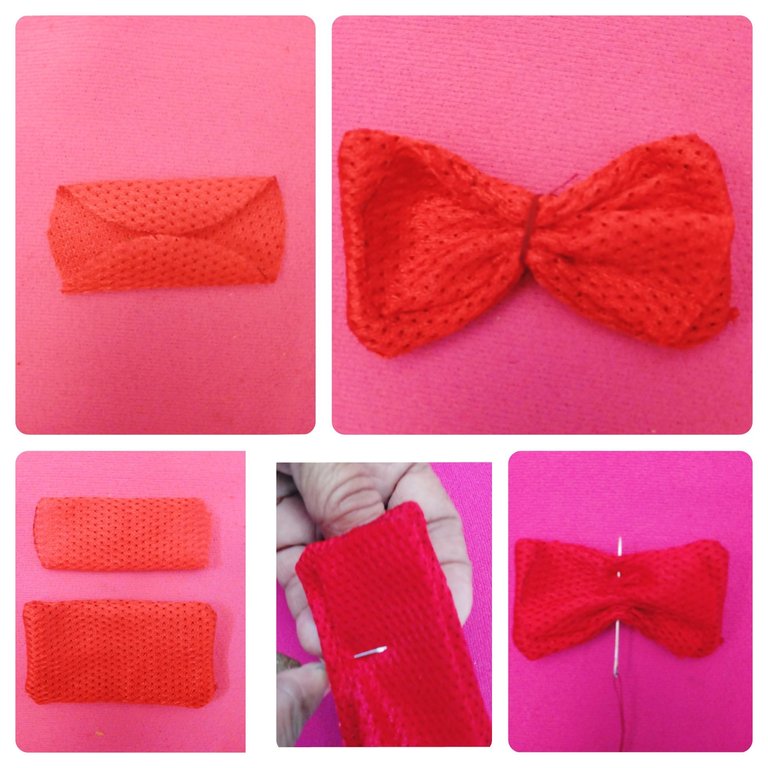
Ya tenemos las piezas para nuestro lazo, ahora pasamos a conformarlo.
5- Tomamos nuestros dos rectángulo con iguales diámetros,y con la aguja e hilo cosemos por todo su borde cuidadosamente.
5-Teniendo el rectángulo completamente cosido, realizamos un pequeño corte con la tijera en su centro y lo viramos completamente.
6-Luego, tomamos nuestro círculo de tela y le doblaremos hacia su centro dos de sus vértices , y en esta posición lo podremos encima de nuestro rectángulo confeccionado.
7-Utilizando nuestra aguja , pasamos una hebra de hilo por todo el centro de las dos estructuras, uniéndolas y estrechando su centro, al alar y anudar la hebra.
8-Seguidamente, cosemos el rectángulo sobrante sobre la región estrechada, y encima de él, cosemos una de las partes de nuestro broche, la otra la coseremos en un pequeño cuadrado de tela.
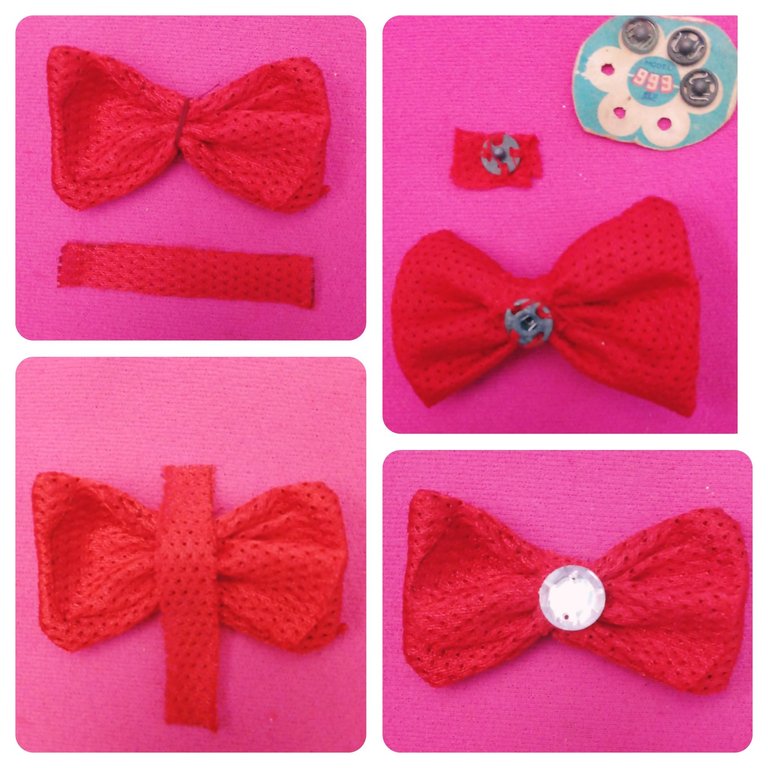
9- Ya teniendo listo nuestro lazo , pasamos a decorarlo adhiriéndole con pegamento ó cosiéndole: lentejuelas, botones, piedras , todo lo que gustemos y nos ayude a reciclar.
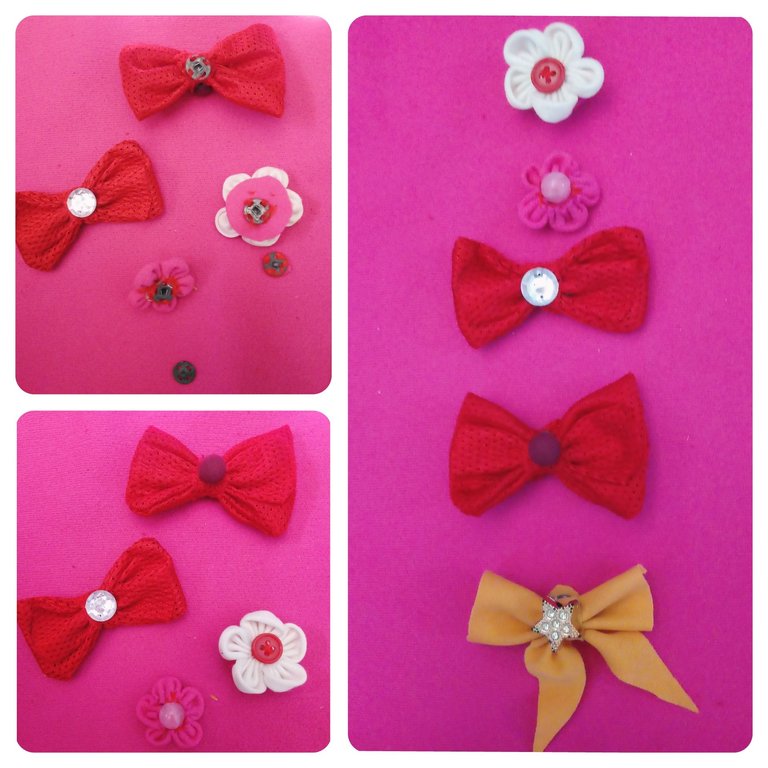
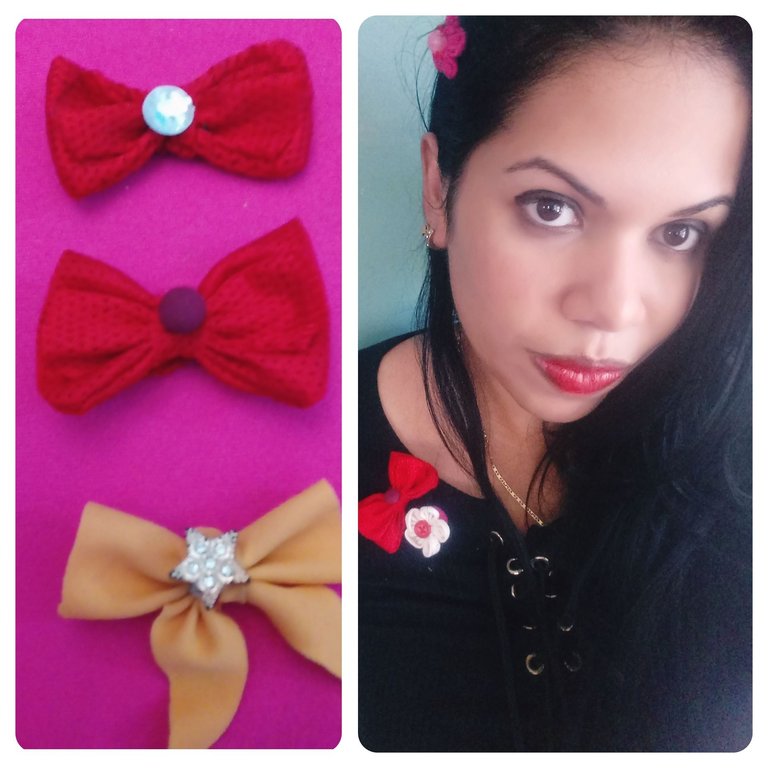
Como pueden apreciar es un método sencillo para confeccionar prendedores de tela.¡Anímense amigos a su creación!, les aseguro que lucirán hermosos tanto estos en forma de lazos , como flores , corazones y demás figuras, resultadas de su inspiración.
Agradecerles a ustedes por sus bellas publicaciones útiles e instrutivas donde siempre aprendo algo nuevo.¡Bendiciones !🙋🎆
Fotografías y confecciones propias .
English
Greetings fellow creators 🙋🌼
Excellent and happy week to everyone!.
Today I want to share a tutorial, in which we will be able to recycle those scraps of fabric, buttons, sequins, saved, by making beautiful bow pins in a simple way, which will serve us to decorate our wardrobe and hair. Let's get started!
Materials
.Scraps of fabric
.Brooches
.Thread
.Needle
.Scissor
.Cardboard
.Pen holder
.Decorations: buttons, sequins, small shiny stones.
Mode of preparation
1-First we take the pencil and on the cardboard we will draw: a circle, six centimeters in diameter, two rectangles, of
eight centimeters long and five wide, a rectangle, six centimeters long and one wide.
These measurements may vary depending on the size we want for our pins.
2-Next, we take the scissors and cut our circles and rectangles following the traced guide, managing to obtain what will constitute our models to work on the fabric.
3-Having our models ready, we will put them on the piece of chosen fabric and we will mark using our pen, then, following the guide we will cut with the scissors.
We already have the pieces for our bow, now we go on to shape it.
5- We take our two rectangles with equal diameters, and with the needle and thread we sew along its entire edge carefully.
5-Having the rectangle completely sewn, we make a small cut with the scissors in its center and turn it completely.
6-Then, we take our fabric circle and we will fold two of its vertices towards its center, and in this position we will be able to put it on top of our made rectangle.
7-Using our needle, we pass a strand of thread through the entire center of the two structures, joining them and narrowing their center, by alar and knotting the strand.
8-Next, we sew the leftover rectangle on the narrowed region, and on top of it, we sew one of the parts of our brooch, the other we will sew on a small square of fabric.
9- Once we have our bow ready, we go on to decorate it by adhering it with glue or sewing it: sequins, buttons, stones, everything that we like and helps us recycle.
As you can see it is a simple method to make cloth pins.Encourage your friends to your creation!, I assure you that they will look beautiful both these in the form of bows, as flowers , hearts and other figures, resulting from your inspiration.
Thank you for your beautiful useful and instructive publications where I always learn something new.Blessings!🙋🎆
Photographs and own clothing.
Hi Mary! Wow you are multitalented. Everything looks great here, thanks for sharing it in our DIYHub community, your presence here is very welcome and synonymous with quality 🙏
Thank you very much friend.These days I've decided to venture out for new técnicas.Me I'm glad you liked it.Blessed week 🙋☀
Estan muy bonitos
Muchas gracias.Saludos y bendecida semana🙋☀
Congratulations @marydeluz! You have completed the following achievement on the Hive blockchain And have been rewarded with New badge(s)
Your next target is to reach 400 comments.
You can view your badges on your board and compare yourself to others in the Ranking
If you no longer want to receive notifications, reply to this comment with the word
STOPAmazing and indeed very creative too, well done and it's perfectly made.
Thank you very much friend.Greetings☀
It is always a pleasure for us to see your many talents. These colorful pins look great and are very useful, thank you so much for sharing the creative process on DIYHub.
I always learn about new useful techniques in this beautiful community of creators, so it's a pleasure to interact with you, friends. Thank you very much and happy week to everyone🙋🎆.
Great content! Thanks for sharing it on Hive.
We’d love to see you join Block Horse Racing and start winning!
There’s a reward waiting in your wallet to kick off your journey in the BHR-Game multiverse !BHRT .
Let’s enjoy building a healthy movement together on the Hive Blockchain!
!HUESO
Thank you very much.I will put all my effort to continue learning and contribute to the growth of this great and beautiful Hive ecosystem. Greetings🙋☀