Español
Saludos amigos creadores🙋🎄🎊.
Es un gusto enorme interactuar con ustedes aprendiendo y compartiendo sobre diferentes técnicas personalizadas.
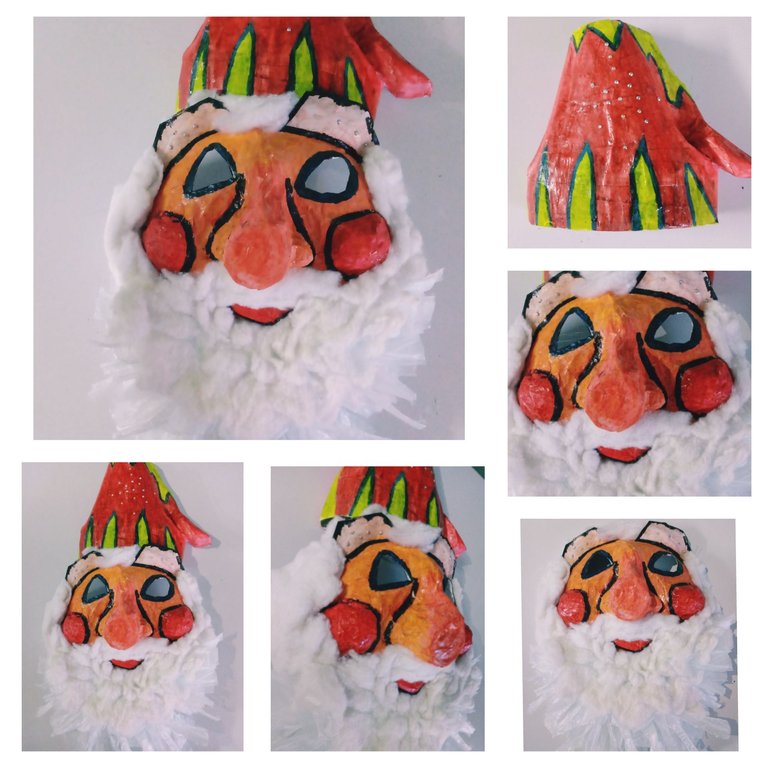
Hoy, manteniendo nuestro espíritu navideño en alto, he querido traerle un tutorial sencillo, donde reciclando y utilizando la técnica de papel maché, les expondré el paso a paso de confeccionar pequeñas máscaras de Santa Claos, y sombreros navideños. ¡Comencémos!
Materiales
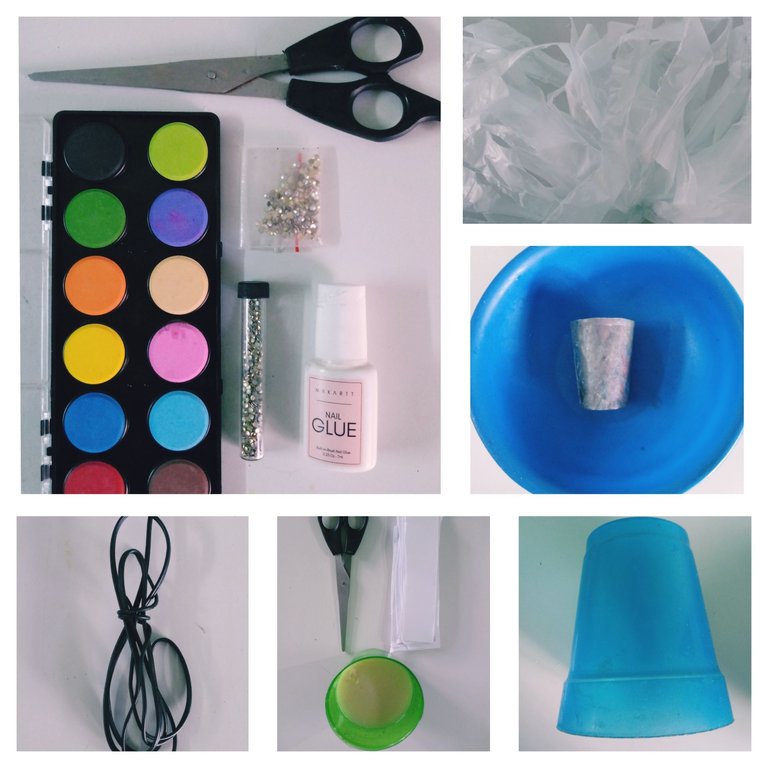
.Molde:Plato mediano, vaso mediano, vaso pequeño
.Cartulina
.Tiras de papel blanco
.Pega elaborada de harina
.Pegamento
.Tijera
.Acuarelas
.Pincel
.Piedras de colores pequeñas
.Cable ó hilos
.Tiras de nailon
.Algodón
.Barniz
Modo de confección
Para la máscara de Santa Claos:
Pasos:
1-Tomamos los moldes del plato y vaso pequeño, y utilizando un pequeño algodonsito humedecido en aceite, impregnamos toda su superficie.
2-Luego, tomamos las tiras de papel blanco y en unión con la pega elaborada de harina, le damos tres capas de empapelado a ambas estructuras. Dejar secar por ocho horas.
3-Utilizando la tijera, realizamos grietas pequeñas en el vaso y plato, que nos permitirá desmontarlos. Seguidamente, le realizamos una cuarta capa de empapelado, obteniendo firmeza en las estructuras que constituirán la cara y nariz.
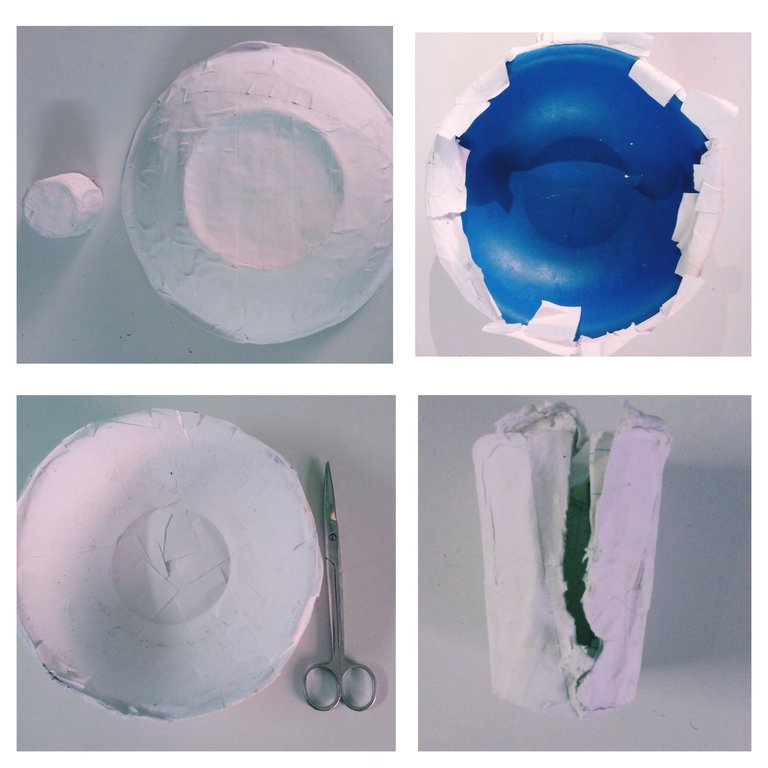
4-Ya teniendo nuestra cara y nariz , pasamos a confeccionar las cejas, cortando de la cartulina, dos cuadrados de igual diámetro, al que le daremos forma de nubes ovaladas.
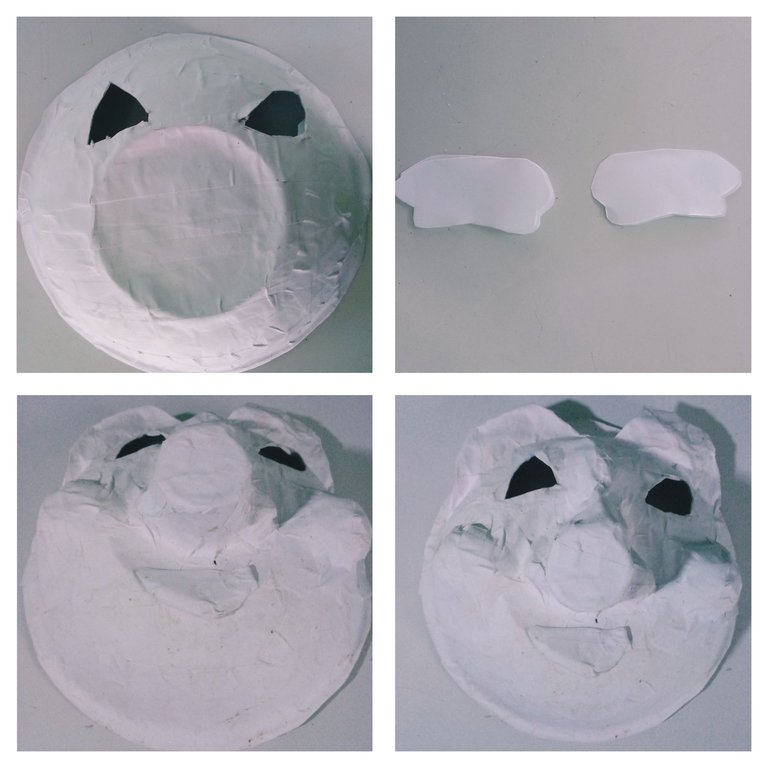
5-Unificamos cara, nariz, cejas, utilizando el pegamento, y le agregamos rollitos de papel en el lugar de los cachetes y la boca, para generarle relieve.
6-Darle una capa de empapelado con tiras de papel blanco, y la pega elaborada de harina a toda la estructura, logrando su dureza, después de cinco horas de secado.
Para los sombreros navideños
Pasos:
Parte superior
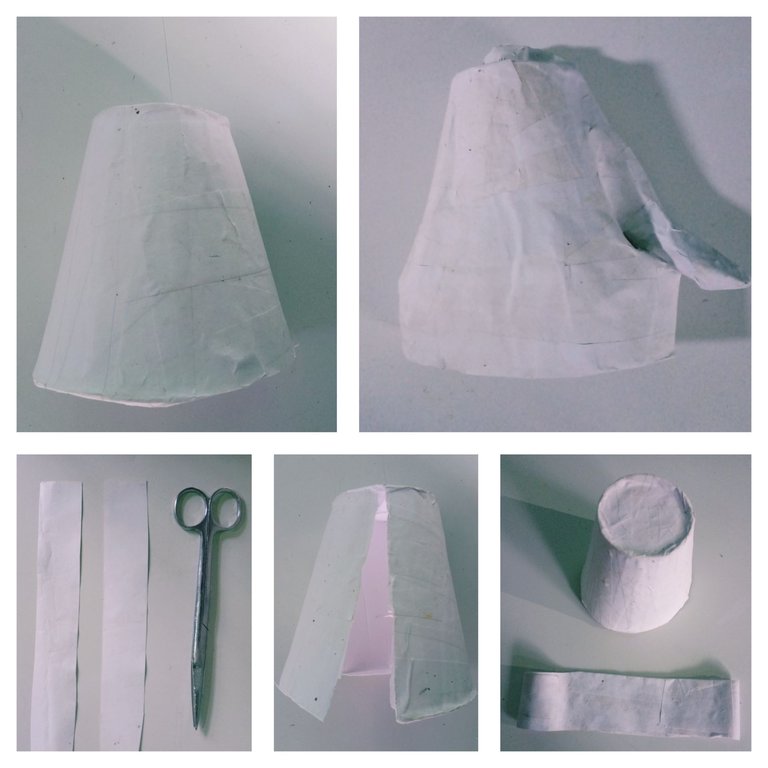
1-Tomar el vaso mediano y utilizando un algodonsito humedecido en aceite , impregnar toda su superficie.
2-Darle tres capas de empapelado en su totalidad y dejarlo secar por ocho horas.
3-Con ayuda de la tijera realizamos una pequeña grieta y desmontamos del molde.
4-Cerramos nuestra grieta, utilizando tiras de papel y pega elaborada de harina.
Hasta aquí tenemos la parte superior de nuestro sombrero. Ahora pasaremos a la parte inferior que varia según el ancho de nuestra cabeza.
Parte inferior
1-Marcamos en una cartulina los centímetros deseados para nuestro sombrero.
2-Luego, a partir de la medida, recortamos un listón grueso, al que doblaremos y pegaremos sus vértices, con el objetivo de obtener una circunferencia.
Unificamos parte superior e inferior, utilizando tiras de papel blanco y pega elaborada de harina, y le agregaremos detalles con papel estrujado según el diseño que deseemos para nuestro sombrero. Para proporcionarle firmeza, le damos una capa de empapelado en su totalidad.
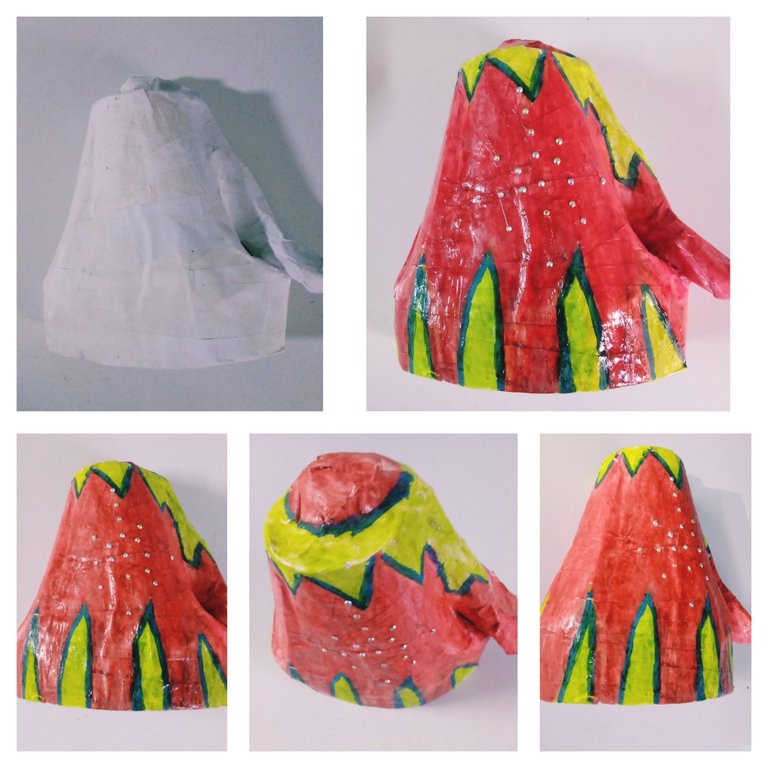
Ya teniendo listas nuestra máscara y sombrero, pasamos a decorar con pinceles y acuarelas. Los colores escogidos fueron el naranja, rojo, verde, colores que considero muy alegres amigos, ideal para estas hermosas fechas. Para generarle brillo utilicé barníz y piedras coloridas.
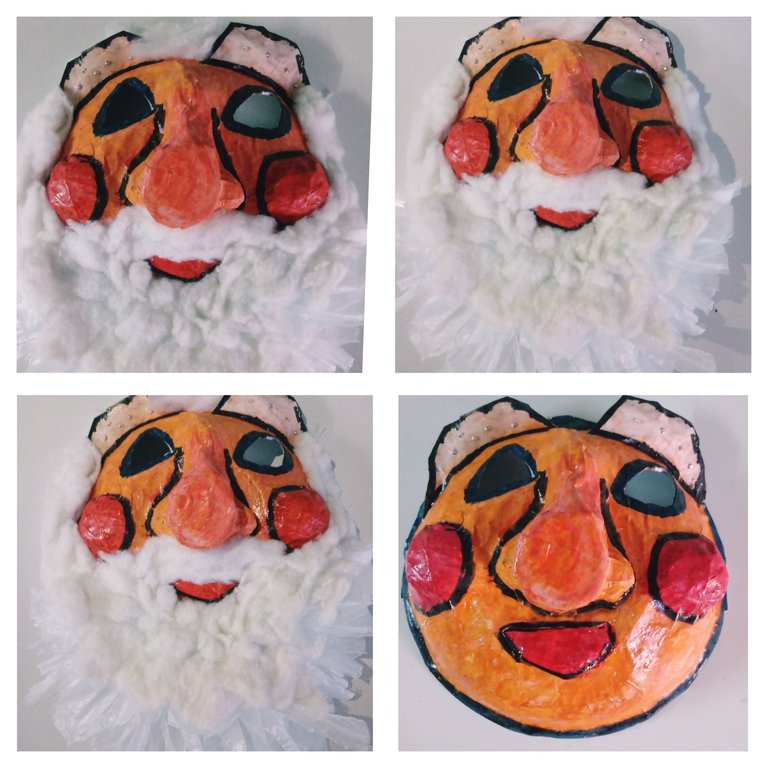
A nuestra máscara de Santa Claos, aún le falta su enorme y tupida barba blanca, que la obtendremos adhiriéndole con pegamento, finas tiras de nailon previamente cortadas, y pequeños algodones.
Para el sostén de la máscara:
1-Abrir dos agujeros finos en cada extremo de la máscara, e introducir dos cables finos ó hilos que nos permitirán fijarlas a nuestro rostro.
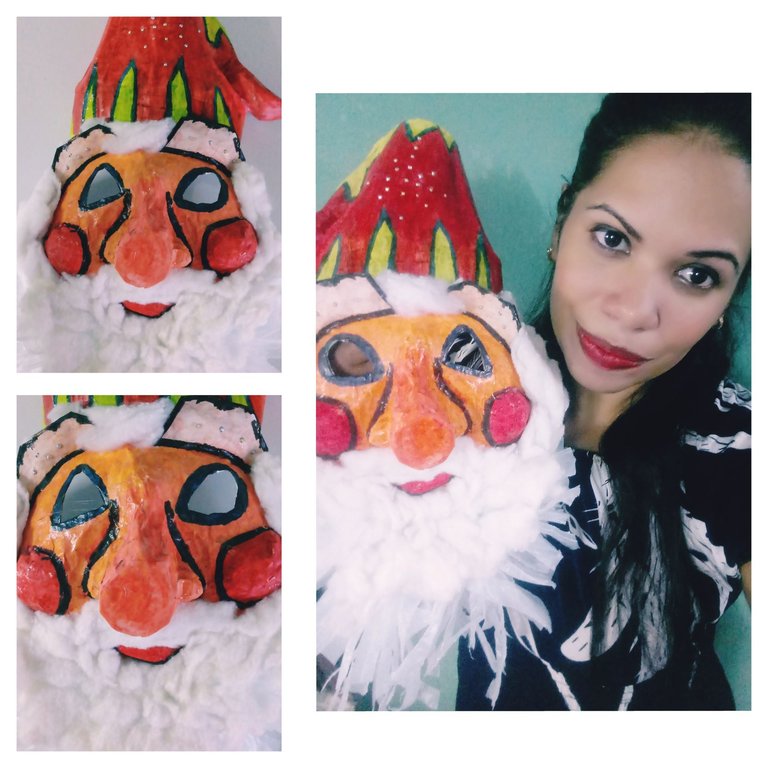
Ya tenemos nuestro disfraz de Santa Claos listo para estrenar junto a familiares y amigos en está navidad. Espero que les guste y sirva de utilidad algunas de las técnicas empleadas, para sus futuras confecciones inspiradoras.
Bendecidos y excelentes días a todos☺☀.
Confecciones y fotografías propias.
English
Greetings fellow creators🙋🎄🎊.
It is a great pleasure to interact with you by learning and sharing about different personalized techniques.
Today, keeping our Christmas spirit high, I wanted to bring you a simple tutorial, where recycling and using the papier mache technique, I will show you the step by step of making small Santa Claus masks, and Christmas hats. Let's get started!

Materials
.Mold: Medium plate, medium glass, small glass
.Cardboard
.White paper strips
.Paste made of flour
.Glue
.Scissor
.Watercolors
.Brush
.Small colored stones
.Cable or wires
.Nylon strips
.Cotton
.Varnish

Mode of preparation
For the Santa Claus mask:
Steps:
1-We take the molds of the plate and small glass, and using a small cotton ball moistened in oil, we impregnate its entire surface.
2-Then, we take the strips of white paper and together with the glue made of flour, we give three layers of wallpaper to both structures. Leave to dry for eight hours.
3-Using the scissors, we make small cracks in the glass and plate, which will allow us to disassemble them. Then, we make a fourth layer of wallpaper, obtaining firmness in the structures that will constitute the face and nose.

4-Already having our face and nose, we go on to make the eyebrows, cutting from the cardboard, two squares of equal diameter, to which we will give the shape of oval clouds.
5-We unify face, nose, eyebrows, using the glue, and we add paper rolls in the place of the cheeks and mouth, to generate relief.
6-Give it a layer of wallpaper with strips of white paper, and glue it made of flour to the entire structure, achieving its hardness, after five hours of drying.

For the Christmas hats
Steps:
Upper part
1-Take the medium glass and using a cotton ball moistened in oil, impregnate its entire surface.
2-Give it three layers of wallpaper in its entirety and let it dry for eight hours.
3-With the help of the scissors we make a small crack and disassemble from the mold.
4-We close our crack, using strips of paper and glue made of flour.
So far we have the top of our hat. Now we will move on to the lower part that varies according to the width of our head.
Bottom part
1-We mark on a cardboard the desired centimeters for our hat.
2-Then, from the measurement, we cut a thick ribbon, to which we will bend and glue its vertices, in order to obtain a circumference.
We unify the top and bottom, using strips of white paper and elaborate flour glue, and we will add details with squeezed paper according to the design we want for our hat. To provide it with firmness, we give it a layer of wallpaper in its entirety.

Already having our mask and hat ready, we went on to decorate with brushes and watercolors. The chosen colors were orange, red, green, colors that I consider very cheerful friends, ideal for these beautiful dates. To generate shine I used varnish and colorful stones.

Our Santa Claus mask is still missing his huge and bushy white beard, which we will get by attaching it with glue, thin strips of nylon previously cut, and small cottons.

For the support of the mask:
1-Open two thin holes at each end of the mask, and introduce two thin cables or threads that will allow us to fix them to our face.
We already have our Santa Claus costume ready to wear with family and friends this Christmas. I hope you like and find useful some of the techniques used, for your future inspiring confections.

Blessed and excellent days to all ☺☀.
Own clothing and photographs.
Sure looks like you Mastered the papier mache technique. The costumes looks super realistic. Fine work
Thank you very much from my heart. Blessed and excellent week.🙋🎆
This is real craft
You did an amazing job
Thank you very much. Christmas inspires. Blessings🙋🎄☀
Congratulations @marydeluz! You have completed the following achievement on the Hive blockchain And have been rewarded with New badge(s)
Your next target is to reach 10000 upvotes.
You can view your badges on your board and compare yourself to others in the Ranking
If you no longer want to receive notifications, reply to this comment with the word
STOP