Hello my dear readers! These last few weeks have been complicated, full of personal errands, family issues to solve and more, but finally my favorite month of the year has arrived, December * gets excited * is that Christmas is the best of all holidays (no, I do not accept arguments about it {laughs}) and it's also my birthday, guess what day? Anyway, today I'm back with lots of great Christmas ideas and of course to join the theme of the contest of our beautiful community, that's why I want to share with you the step by step of a beautiful Christmas decorative mobile I made with recycled materials.
Versión Español
¡Hola mis queridos lectores! Estas últimas semanas han sido complicadas, llenas de diligencias personales, asuntos familiares que resolver y más, pero por fin llegó mi mes favorito de todo el año, Diciembre * se emociona * es que navidad es la mejor de todas las fiestas (no, no acepto discusiones al respecto {risas}) y además también es mi cumpleaños ¿adivinas qué día? En fin, hoy vuelvo con muchas ideas geniales y navideñas y por supuesto a unirme al tema del concurso de nuestra bonita comunidad, es por ello que quiero compartirles el paso a paso de un hermoso móvil decorativo navideño que hice con materiales de reciclaje.
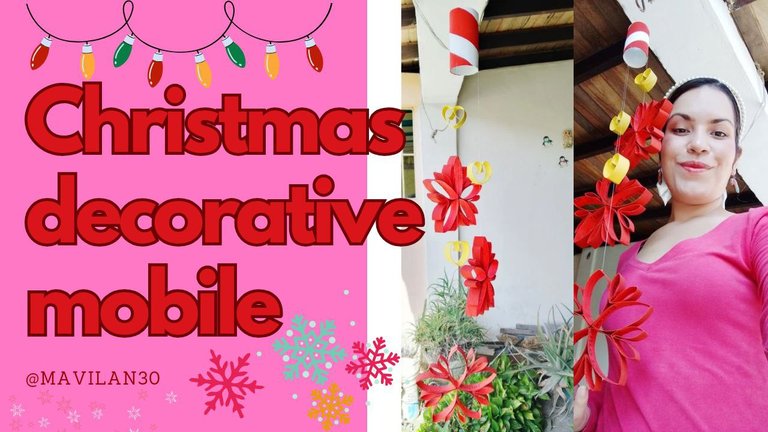
Imagen creada por mí en Canva / Image created by me in Canva
Materials:
- Toilet paper cardboard tubes.
- Cold paints
- Nylon
- Hot Silicone
- Brush
- Needle
- Scissors
- Pencil
- Ruler
Process:
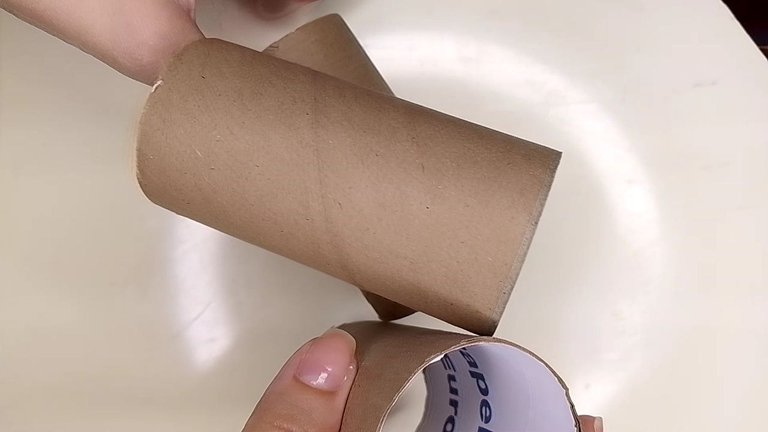
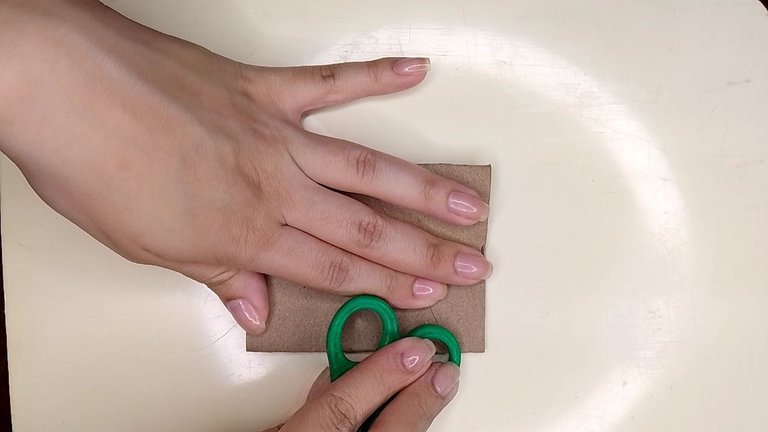
We start by taking several tubes of toilet paper, we will flatten them, so that they will look like rectangles. To help us to make the fold as marked as possible, we can use some tool to slide pressing on top, in my case I used the handle of the scissors.
Versión Español
Materiales:
- Tubos de cartón del papel higiénico
- Pinturas al frío
- Nilón
- Silicón caliente
- Pincel
- Aguja
- Tijeras
- Lápiz
- Regla
Proceso:
Iniciamos tomando varios tubos de papel higiénico, los mismos los aplanaremos, de forma que nos quedarán como rectángulos. Para ayudarnos a que el doblez quede lo más marcado posible, podemos emplear alguna herramienta para deslizar presionando por encima, en mi caso usé el mango de la tijera.
 |  |
|---|
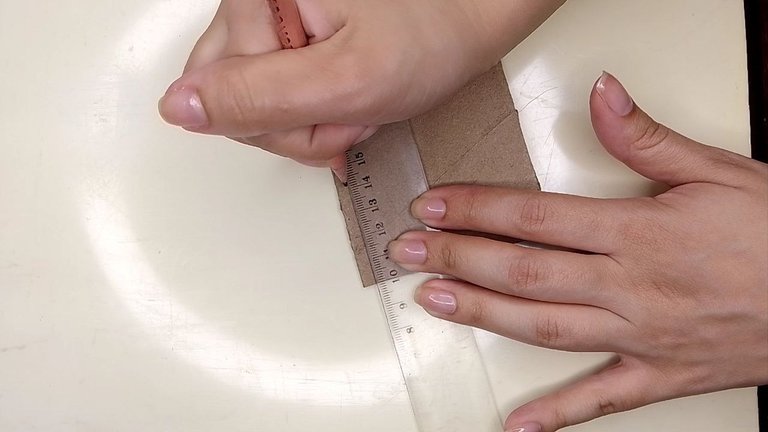
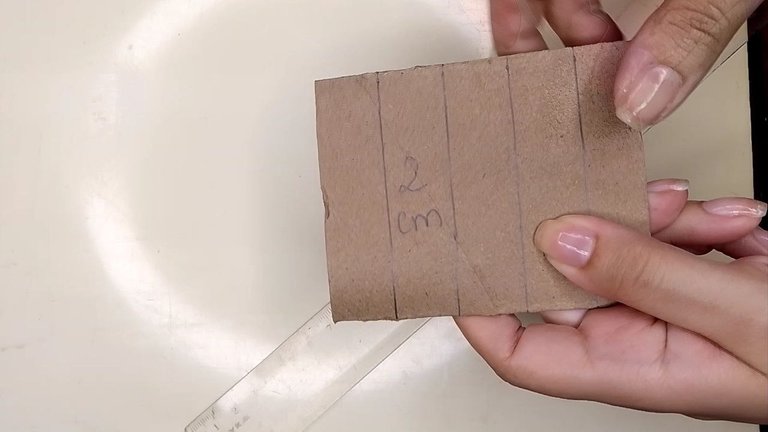
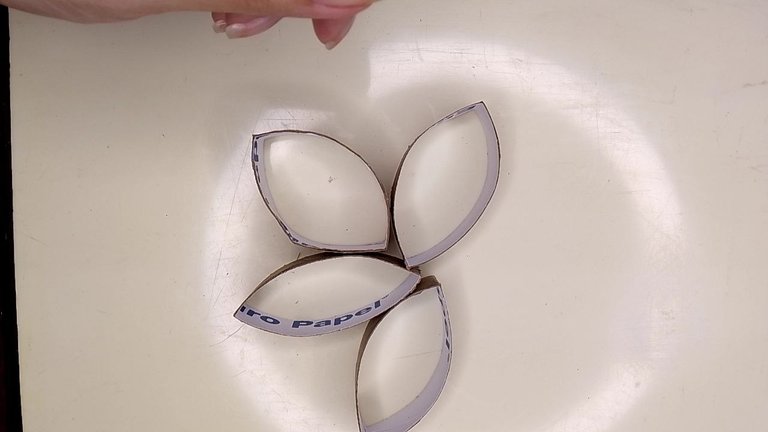
Now, with the pencil and the ruler, we will draw transverse lines on the cardboard every 2 centimeters. We will be left with pieces similar to the outline of flower petals.
Versión Español
Ahora, con el lápiz y la regla, trazaremos líneas transversales en el cartón a cada 2 centímetros. Nos quedarán unas piezas similares al contorno de unos pétalos de flor.
 |  |  |
|---|
The pieces that we have previously cut out, we are going to glue them together at the end that is towards the center. I have glued 5 pieces, but you can glue more or less pieces according to your taste. Now it really looks like a flower, don't you think?
Versión Español
Las piezas que hemos recortado previamente, las vamos a pegar entre ellas en el extremo que queda hacia el centro. Yo he pegado 5 piezas, pero puedes pegar más o menos piezas según tu gusto. Ahora sí parece una flor ¿no creen?
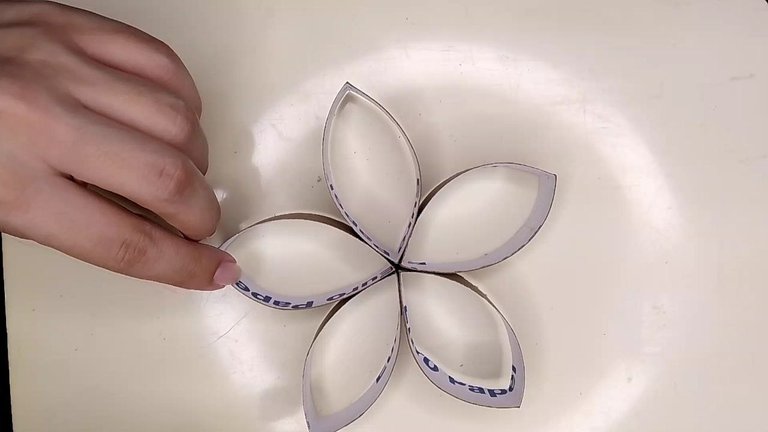
Pétalos pegados / Glued petals
With another of these pieces, we proceed to join one of the ends that is folded with its opposite and close it in a heart shape. Initially I glued the two folded ends with silicone, but later I realized that it was not essential, so I leave that to your discretion.
Versión Español
Con otra de estas piezas, procedemos a unir uno de los extremos que se encuentra plegado con su opuesto y cerramos de modo que de esta forma como de corazón. Inicialmente pegué con el silicón los dos extremos plegados, pero más adelante me di cuenta que no era indispensable, así que eso lo dejo a tu criterio.
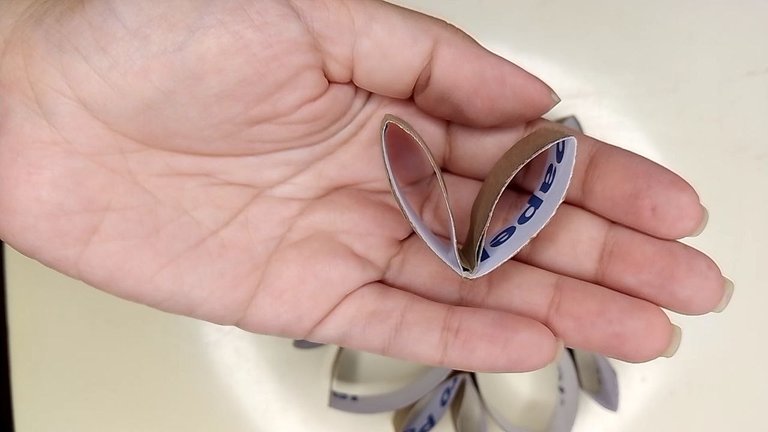
Corazón plegado / Folded heart
The next step is to take a heart and glue it in the space formed between each petal and repeat until all the spaces have been filled.
Versión Español
Lo siguiente es tomar un corazón y pegarlo en el espacio que se forma entre cada pétalo y repetir hasta haber llenado todos los espacios.
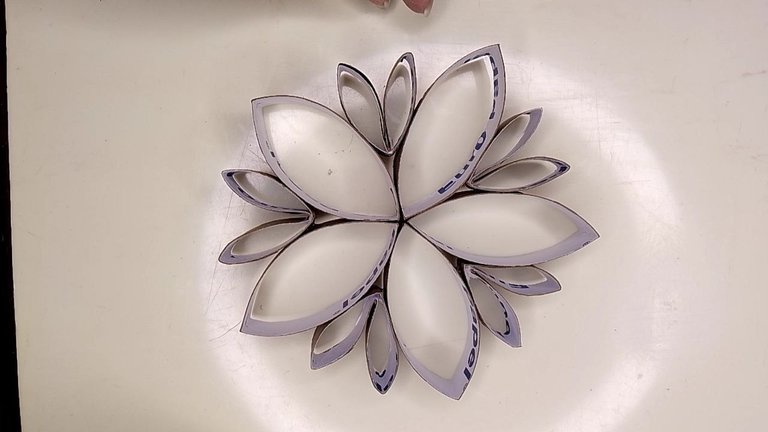
Pegando corazones / Gluing hearts
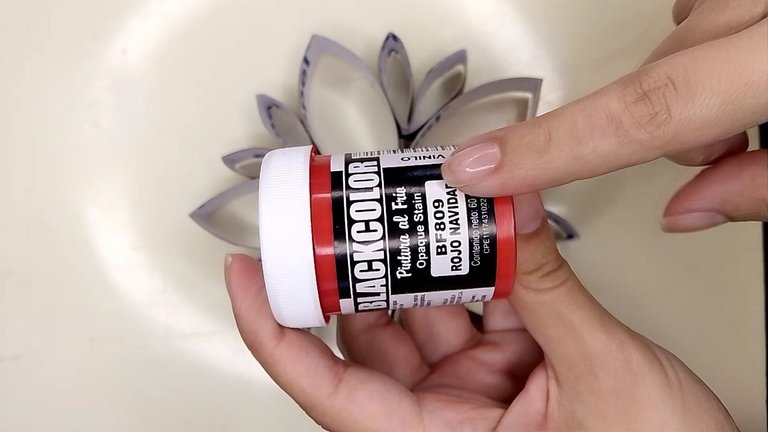
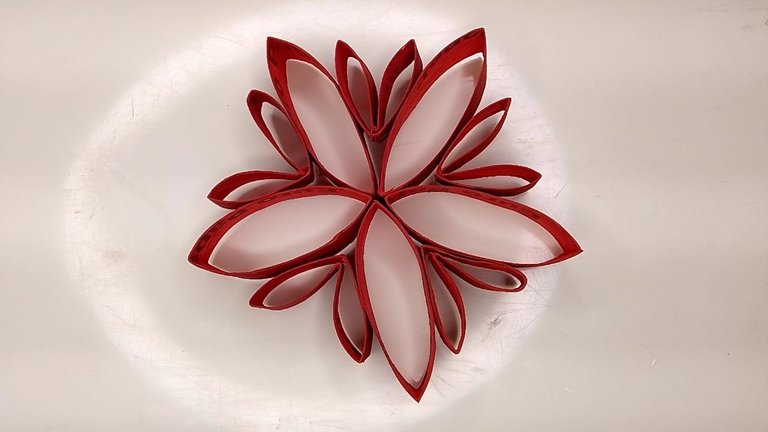
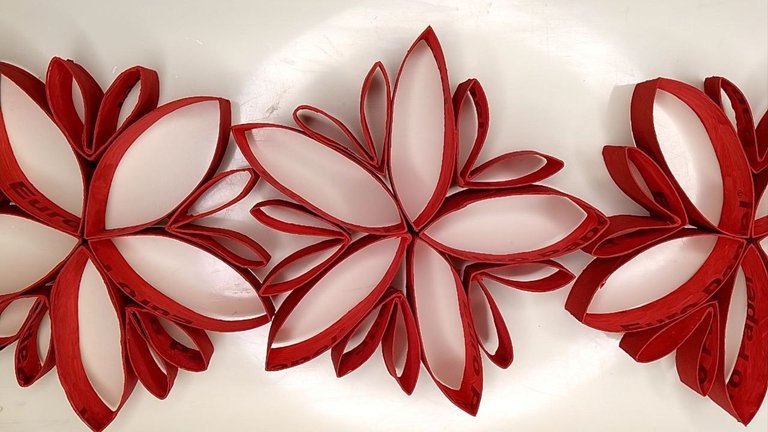
It's time to paint (Yeeeeeeeeeeiiiiiiii!) I chose red and used cold paint for it. Then I repeated all the previous steps until I got three of these figures.
Versión Español
Es momento de pintar (¡Yeeeeeeiiiiii!) Yo elegí color rojo y usé pintura al frío para ello. Luego repetí todos los pasos anteriores hasta obtener tres de estas figuras.
 |  |  |
|---|
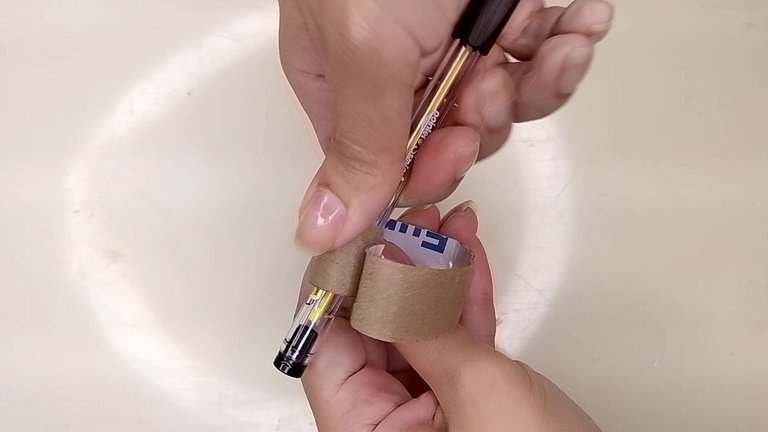
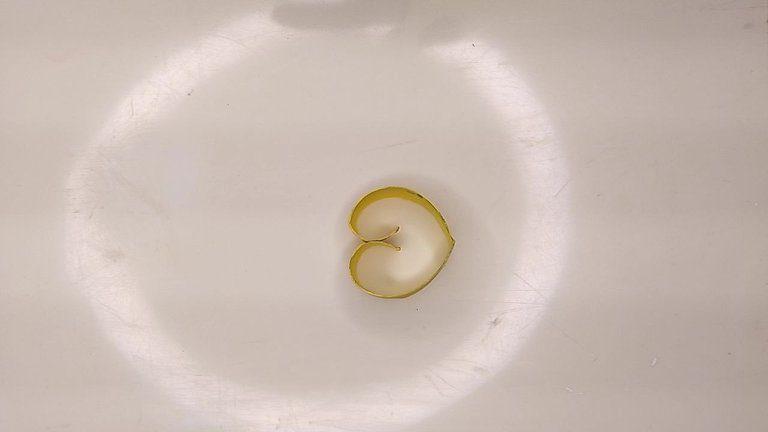
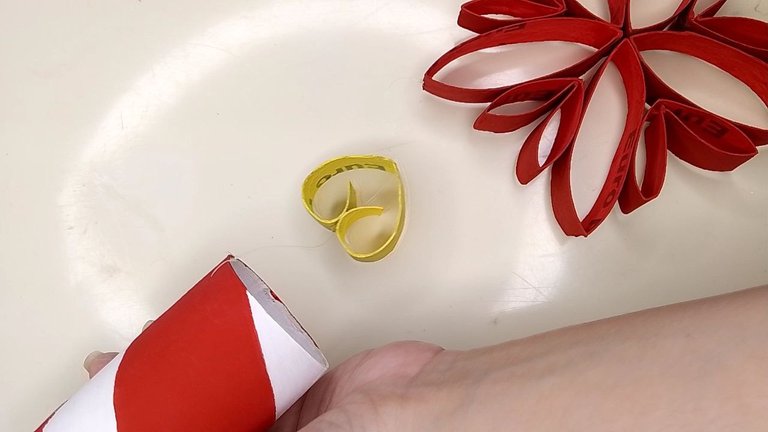
Now, we will take another of the initial pieces, those that looked like petals, remember? We will cut them at one of the folding ends and with the help of a cylinder such as a pencil or pen, we will curve the loose ends inward. With silicone we will glue those ends forming a heart and we will paint it yellow with cold paint. I made 3 of these.
Versión Español
Ahora, tomaremos otra de las piezas iniciales, esas que parecían pétalos ¿recuerdan? Esas mismas las recortaremos por uno de los extremos plegador y con ayuda de algún cilindro como un lápiz o bolígrafo, curvaremos los extremos sueltos hacia adentro. Con silicón pegaremos esos extremos formando un corazón y lo pintaremos de amarillo con pintura al frío. Hice 3 de estos.
 |  |
|---|
With a new cardboard tube we will make the base from which everything will hang. I thought it would look lovely painted like a candy, besides I could follow the diagonal lines of the same tube to trace the bands with the pencil and then paint them with white and red cold paint, inside I painted it only in white.
Versión Español
Con un nuevo tubo de cartón haremos la base de donde colgará todo. Me pareció que se vería encantador pintado como un caramelo, además pude seguir las líneas diagonales del mismo tubo para trazar las bandas con el lápiz y posteriormente pintarlas con pintura al frío blanca y roja, por dentro lo pinté solo de blanco.
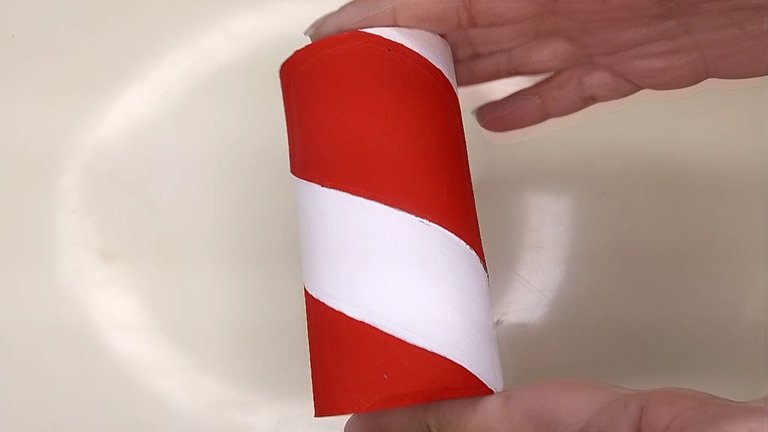
Tubo caramelo / Candy tube
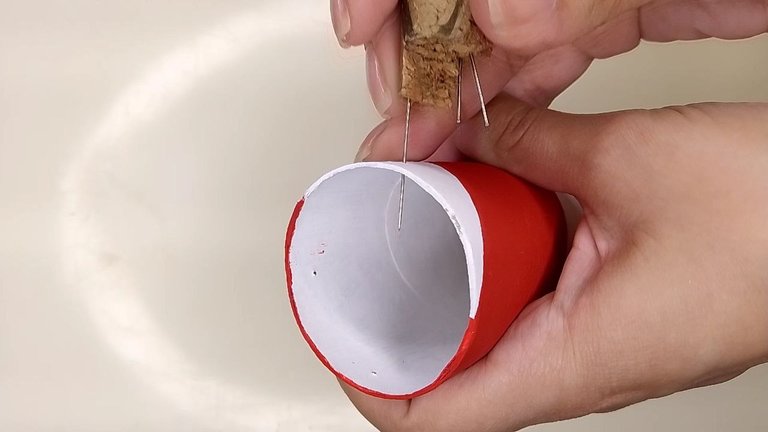
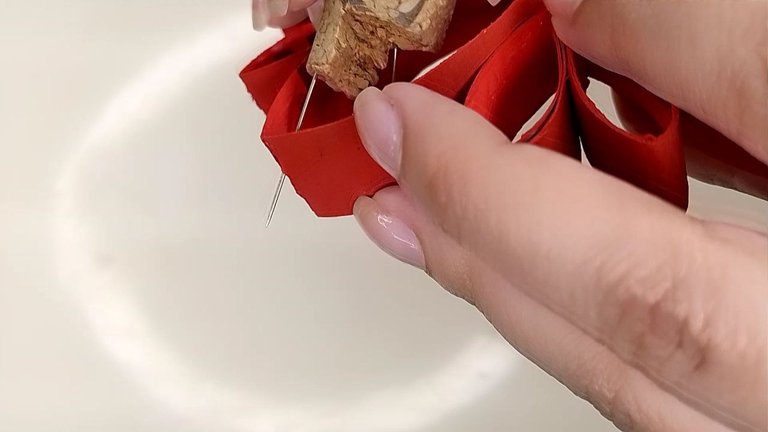
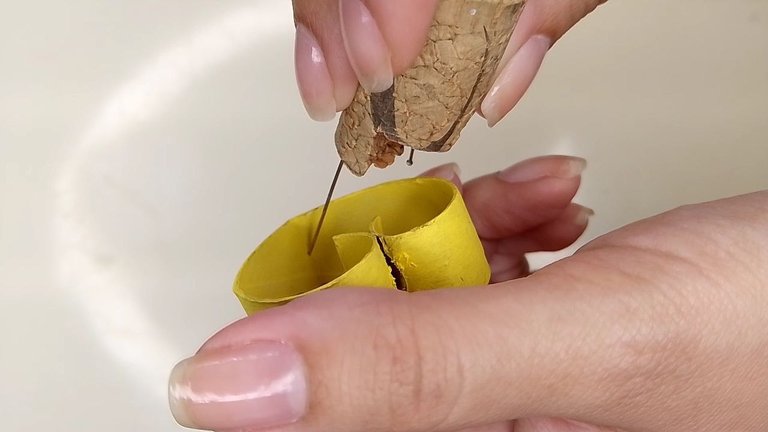
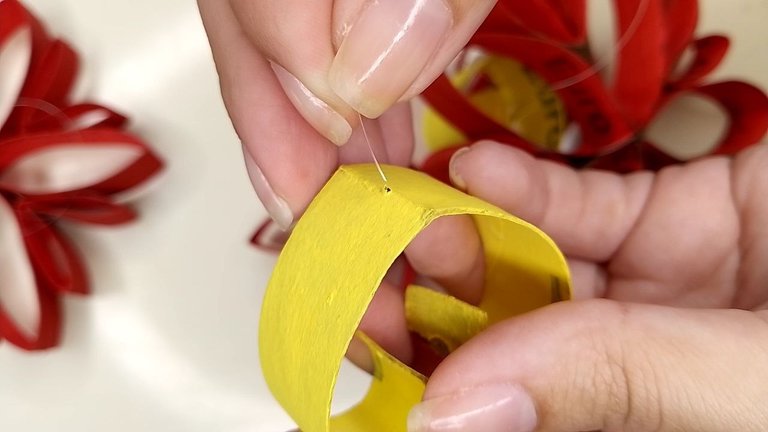
With the help of a slightly thick needle we will make holes in both ends of the candy tube, 4 holes in the upper part and 3 in the lower part, we will also make holes in the flower figures in one of its main petals and in the yellow hearts in its lower tip.
Versión Español
Con ayuda de una aguja un poco gruesa haremos agujeros en ambos extremos del tubo caramelo, 4 agujeros en la parte alta y 3 en la parte inferior, también haremos agujeros a las figuras de flor en uno de sus pétalos principales y a los corazones amarillos en su punta inferior.
 |  |  |
|---|
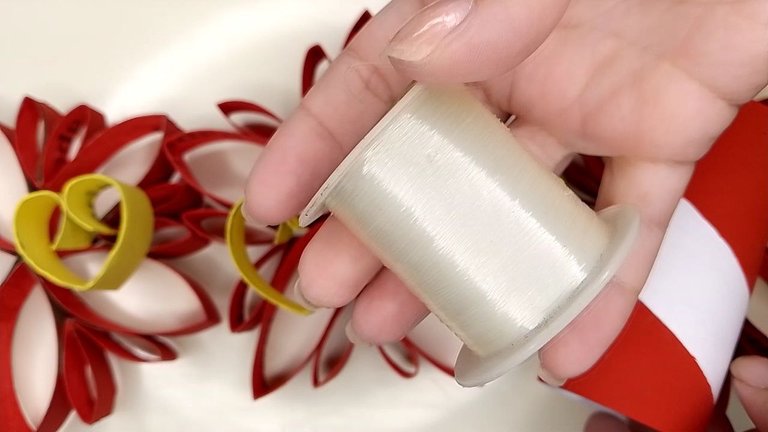
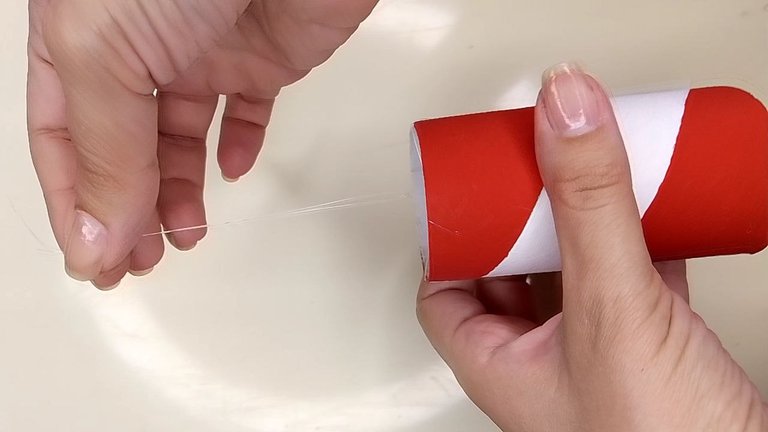
Now it's time to use the nylon. In the candy tube, we will pass enough nylon to allow us to go through the 4 upper holes forming a cross and that on a couple of strips in the center to make the final tie forming the eyelet through which the ornament will be hung. Then, we will make the respective tie in the petal of the flower, at the distance of our preference, we add the heart and finally, we tie to the candy tube in one of the lower holes.
Versión Español
Es momento de usar el nilón. En el tubo caramelo, pasaremos suficiente nilón, que nos permita atravesar los 4 agujeros superiores formando una cruz y que sobre un par de tiras al centro para hacer el amarre final formando el ojal por donde se colgará el adorno. Luego, haremos el respectivo amarre en el pétalo de la flor, a la distancia de nuestra preferencia, agregamos el corazón y finalmente, amarramos al tubo caramelo en uno de los agujeros inferiores.
 |  |  |  |
|---|
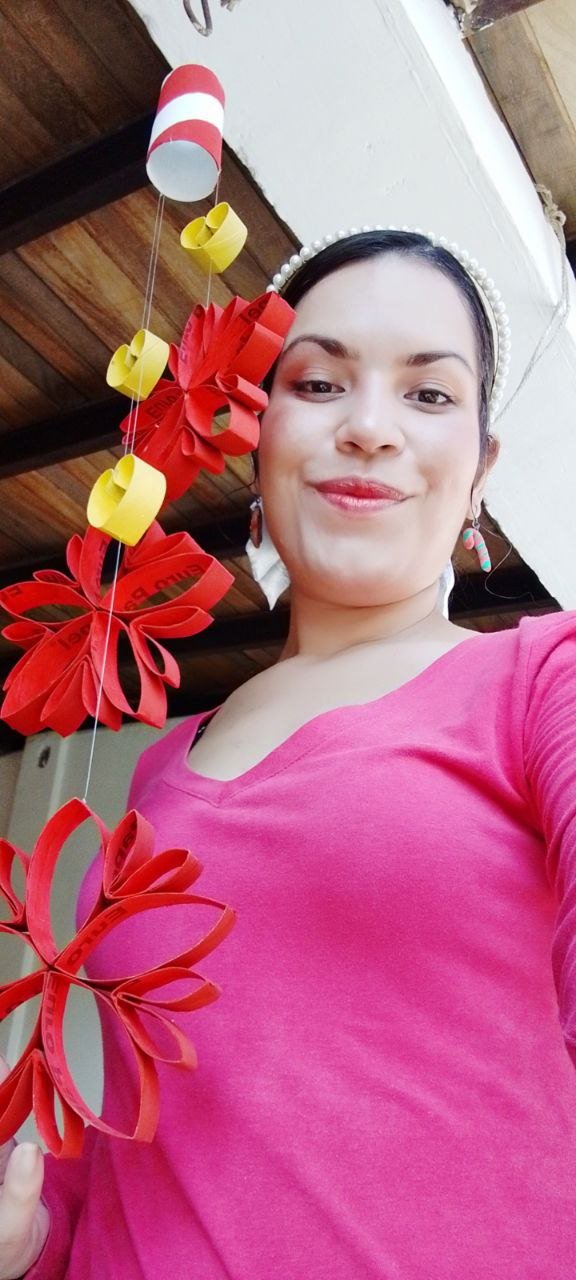
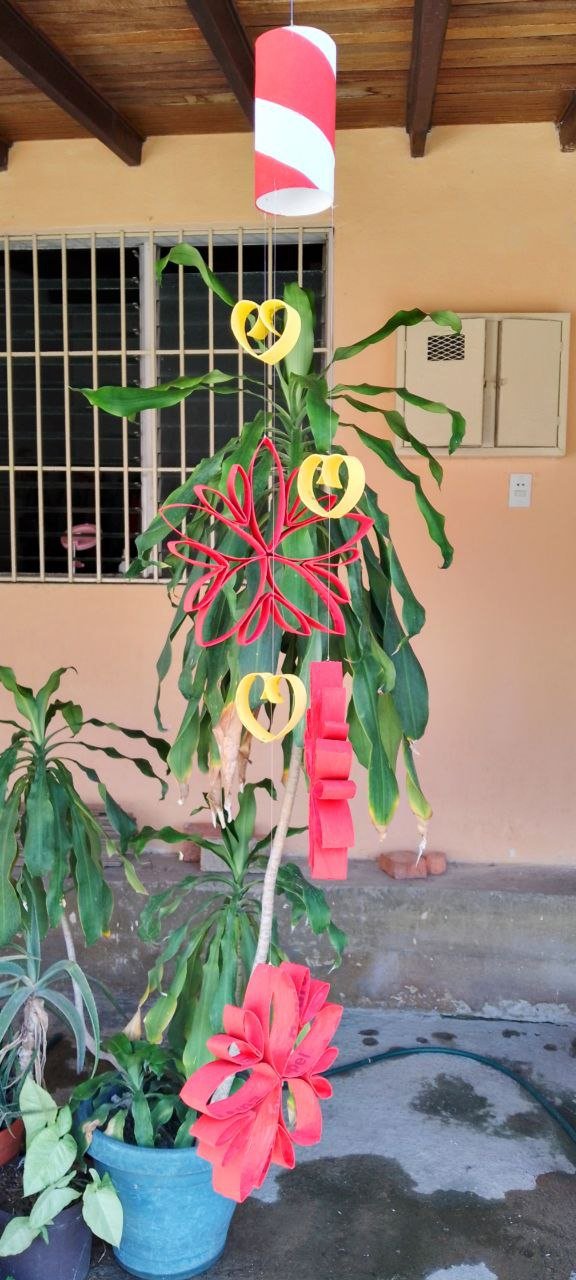
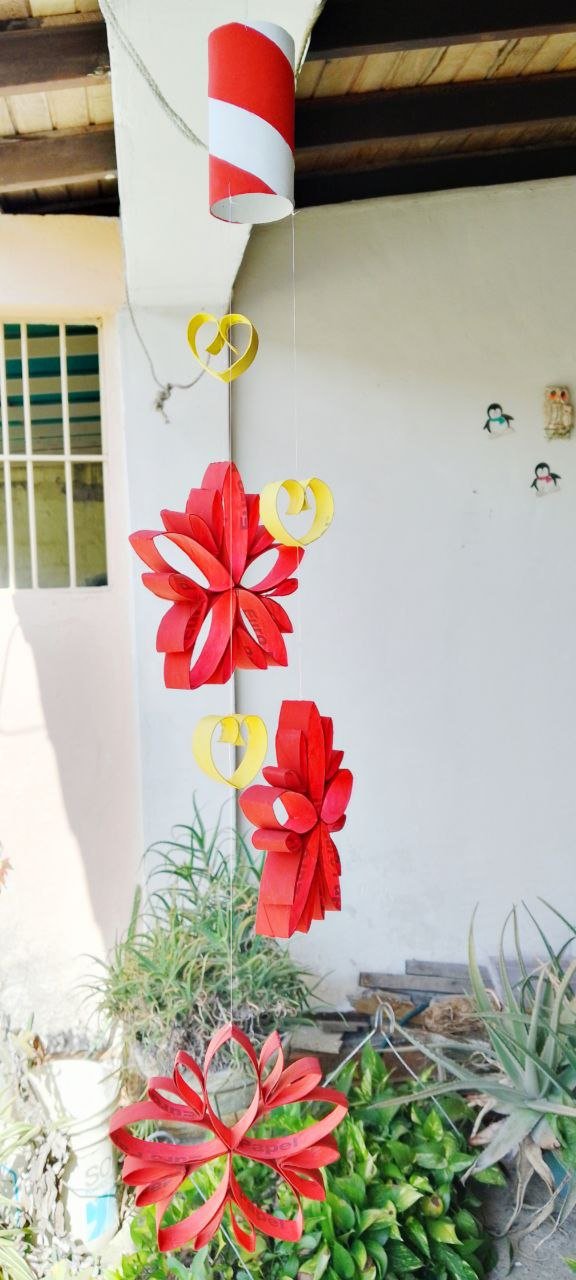
We repeated this action with the three flower and heart shapes using lengths of nylon (short, medium and long) and this is the result:
Versión Español
Repetimos esta acción con las tres figuras de flor y corazones usando longitudes de nilón (corto, medio y largo) y este es el resultado:
 |  |  |
|---|
And here's a gif so you can see the movement because what's the joke of seeing a cell phone without moving (laughs).
Versión Español
Y aquí una gif para que vean el movimiento porque ¿cuál es el chiste de ver un móvil sin moverse? (risas).

Gif realizada por mí en Gif Maker / Gif made by me in Gif Maker
Final comments:
In the case of the flowers, I made 2 holes at a prudent distance to make the tie and that it would be centered, so that the flower would not look positioned forward or backward but totally vertical.
For the yellow hearts, as I continued the process, I realized that it was easier not to glue the loose ends at the beginning, but rather to go through with the nylon, decide the height at which we want to leave it and there place the silicone portion, in order to fix the nylon and the figure.
The white color required 2 coats of paint, the yellow 3 coats and the red I think it looks good with only one coat for the flowers but I implemented 2 coats on the candy.
Versión Español
Comentarios finales:
En el caso de las flores, hice 2 agujeros a una distancia prudente para realizar el amarre y que quedara centrado, de modo que la flor no se viera posicionada hacia adelante o hacia atrás sino totalmente vertical.
Para los corazones amarillos, al continuar el proceso, me di cuenta que era más fácil no pegar los extremos sueltos al comienzo, si no más bien atravesar con el nilón, decidir la altura a la que lo queremos dejar y allí colocar la porción de silicón, para así fijar el nilón y la figura.
El color blanco requirió 2 capas de pintura, el amarillo 3 capas y el rojo me parece que se ve bien con una sola capa para las flores pero implementé 2 capas en el caramelo.
¡Muchas gracias por leerme!
Thank you so much for reading me!
Own photographs, taken with my Tecno Spark 10C.
Translated to English with DeepL.
Versión Español
Fotografías propias, tomadas con mi Tecno Spark 10C.
Traducido al inglés con DeepL.

Banner creado por mí en Canva / Banner made by me in Canva
Que bonito quedó el móvil amiga ! ,creo que algo me dice que te gusta un poco diciembre 😸 , no sé cuál fecha es tu cumpleaños pero felicidades adelantado jejeje 🎉🎂 @mavilan30 ⭐✨
Jajajaja muchas gracias querida Mily! Abrazos para ti🤗✨
It is so beautiful, lovely and charming. Its design and color are eye-catching. It shows your skills. You did a wonderful job! Thanks!
Thank you very much for your kind comment✨ I am very glad you liked it 🤗
Congratulations @mavilan30! You have completed the following achievement on the Hive blockchain And have been rewarded with New badge(s)
Your next target is to reach 600 upvotes.
You can view your badges on your board and compare yourself to others in the Ranking
If you no longer want to receive notifications, reply to this comment with the word
STOPCheck out our last posts:
están lindas, excelentes para decorar en estas fechas
they are beautiful, excellent for decorating at this time of the year.
Muchas gracias amiga ✨ ya las tengo decorando mi porche jeje☺️
Que bonito quedo todo 😊
Muchas gracias✨
Indeed you are so talented.
Thank you so much✨☺️
Saludos amiga, un lindo y útil adorno para decorar en Navidad.
!DIY
Muchas gracias por tu comentario y apoyo amigo✨
You can query your personal balance by
@samuell12 just sent you a DIY token as a little appreciation for your post dear @mavilan30! Feel free to multiply it by sending someone else !DIY in a comment :) You can do that x times a day depending on your balance so:!DIYSTATS