¡Hola querida comunidad! Hoy les traigo una nueva manualidad para participar en la iniciativa propuesta sobre Fan Art y de nuevo, mi temática es Sailor Moon, mi amado anime de la infancia. Uno de los accesorios que más me gusta de la protagonista es su hermoso lazo rojo que lleva en el pecho de su traje, en este, también se encuentra un prendedor con el que realiza su transformación, así que decidí hacer uno para mí, pero para usarlo en el cabello aprovechando que están tan de moda los lazos coquette. Elegí hacer el primer prendedor de esta historia, ya que con esto inicia todo. Acompáñame en este post para que seas una Sailor scout que lucha por el amor y la justicia (risas).
Hello dear community! Today I bring you a new craft to participate in the proposed initiative on Fan Art and again, my theme is Sailor Moon, my beloved childhood anime. One of the accessories that I like the most of the protagonist is her beautiful red ribbon that she wears on the chest of her costume, in this, there is also a pin with which she performs her transformation, so I decided to make one for me, but to use it in my hair taking advantage that are so fashionable the coquette ribbons. I chose to make the first pin of this story, since this is how it all starts. Join me in this post so you can be a Sailor scout who fights for love and justice (laughs).
Imagen creada por mí en Canva / Image created by me in Canva
Materiales:
- Tela satinada color rojo
- Tijeras
- Cúter
- Regla
- Palito de altura
- Lápiz/Color/Marcador
- Hilo de coser
- Aguja
- Porcelana fría
- Pinturas al frío (Amarillo, azul, rojo)
- Sombra dorada
- Top coat
- Lámpara UV/LED
- Silicón caliente
Procedimiento:
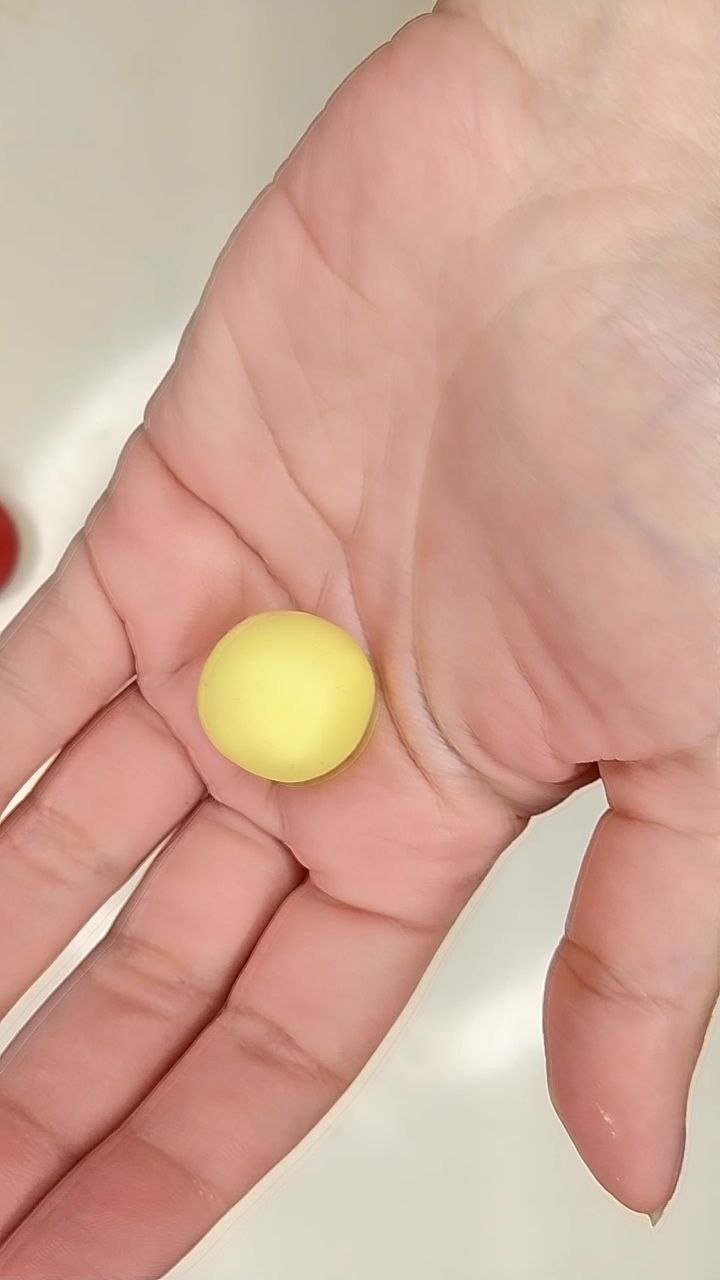
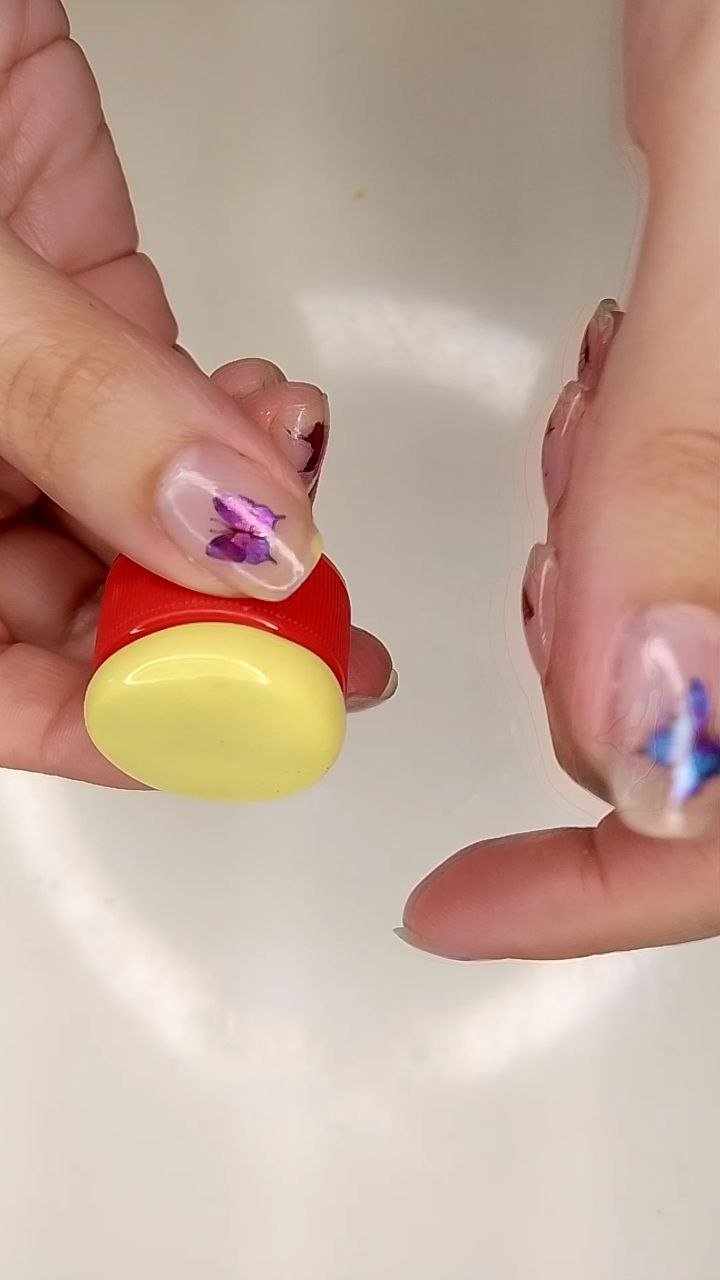
Iniciamos tomando una bolita de porcelana fría color amarillo, la aplanamos con alguna superficie plana, yo he usado una tapa de refresco. La hice de este tamaño porque como será un accesorio para el cabello, no quiero que sea tan grande.
Materials:
- Red satin fabric
- Scissors
- Cutter
- Ruler
- Height stick
- Pencil/Color/Marker
- Sewing thread
- Needle
- Cold porcelain
- Cold paints (yellow, blue, red)
- Gold eye shadow
- Top coat
- UV/LED lamp
- Hot Silicone
Procedure:
We start by taking a small ball of cold porcelain yellow color, we flatten it with some flat surface, I used a soda cap. I made it this size because as it will be a hair accessory, I don't want it to be so big.
 |  |
|---|
Ahora formaremos una tira con la misma porcelana fría amarilla para hacer un relieve alrededor. Para que este se adhiera a la pieza anterior, solo debemos humedecer un poco si ya está muy seca la superficie o agregar una capa fina de pegamento. Y finalmente cortamos el excedente de la tira, además, debemos humedecer un poco la parte de la unión entre los extremos de la tira para que no quede tan marcado.
Now we will form a strip with the same yellow cold porcelain to make a relief around it. For this to adhere to the previous piece, we only need to moisten a little if the surface is already very dry or add a thin layer of glue. And finally we cut the excess of the strip, in addition, we must dampen a little the part of the union between the ends of the strip so that it is not so marked.
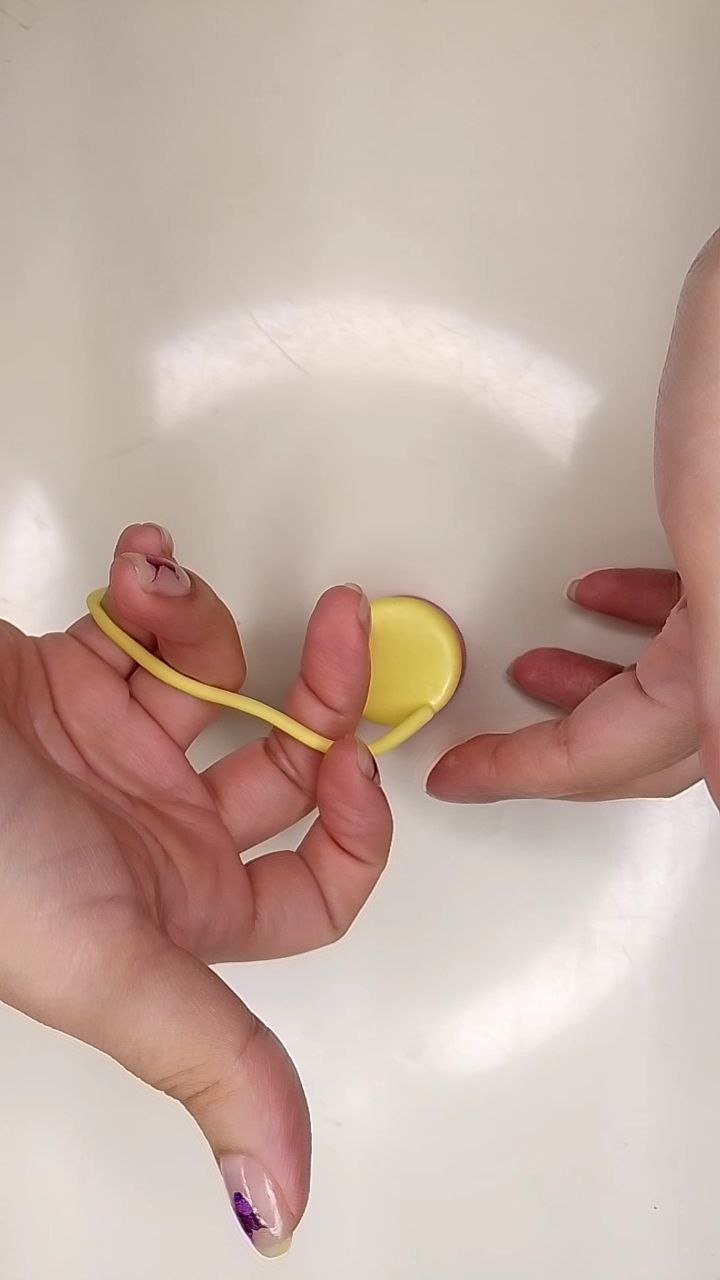
Relieve del contorno / Contour relief
Con una herramienta fina y redondeada (yo he usado la punta de un pincel), hacemos pequeñas marcas redondas en cuatro puntos opuestos del borde que acabamos de formar, en estas irán colocadas las “gemas” redondas de colores.
With a fine rounded tool (I used the tip of a paintbrush), we make small round marks in four opposite points of the border we have just formed, where the round colored “gems” will be placed.
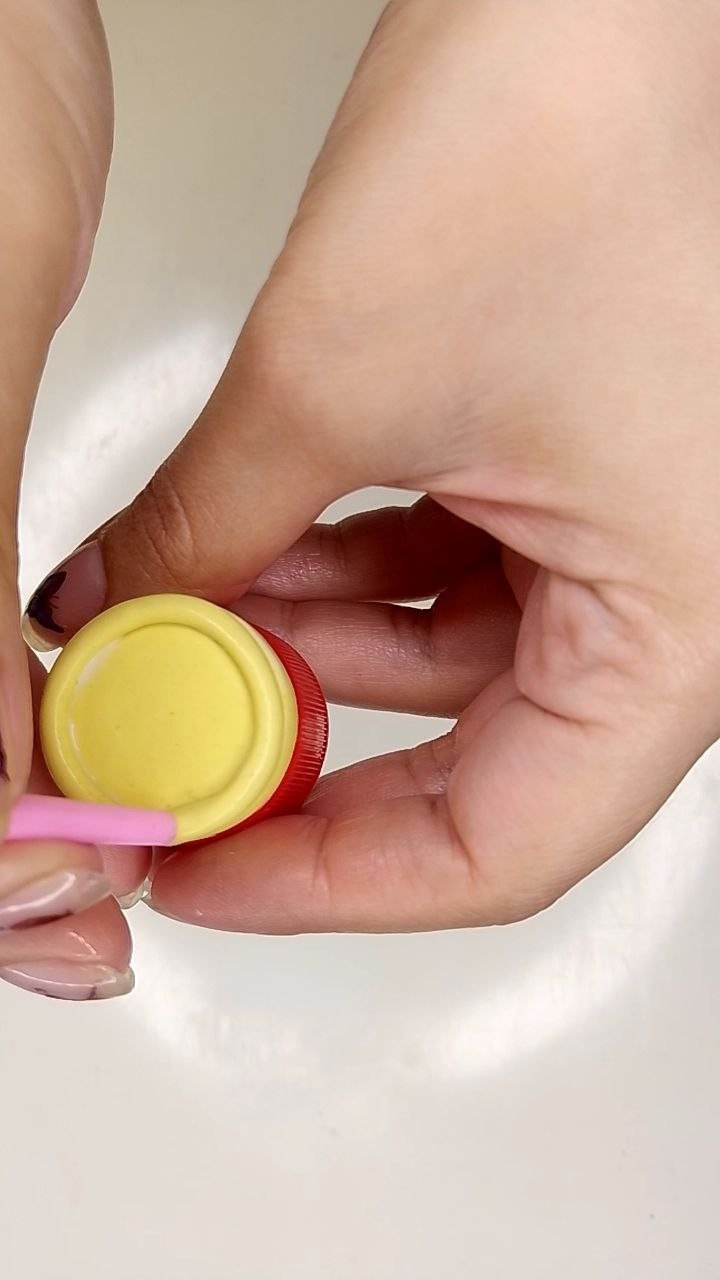
Marcas redondas / Round marks
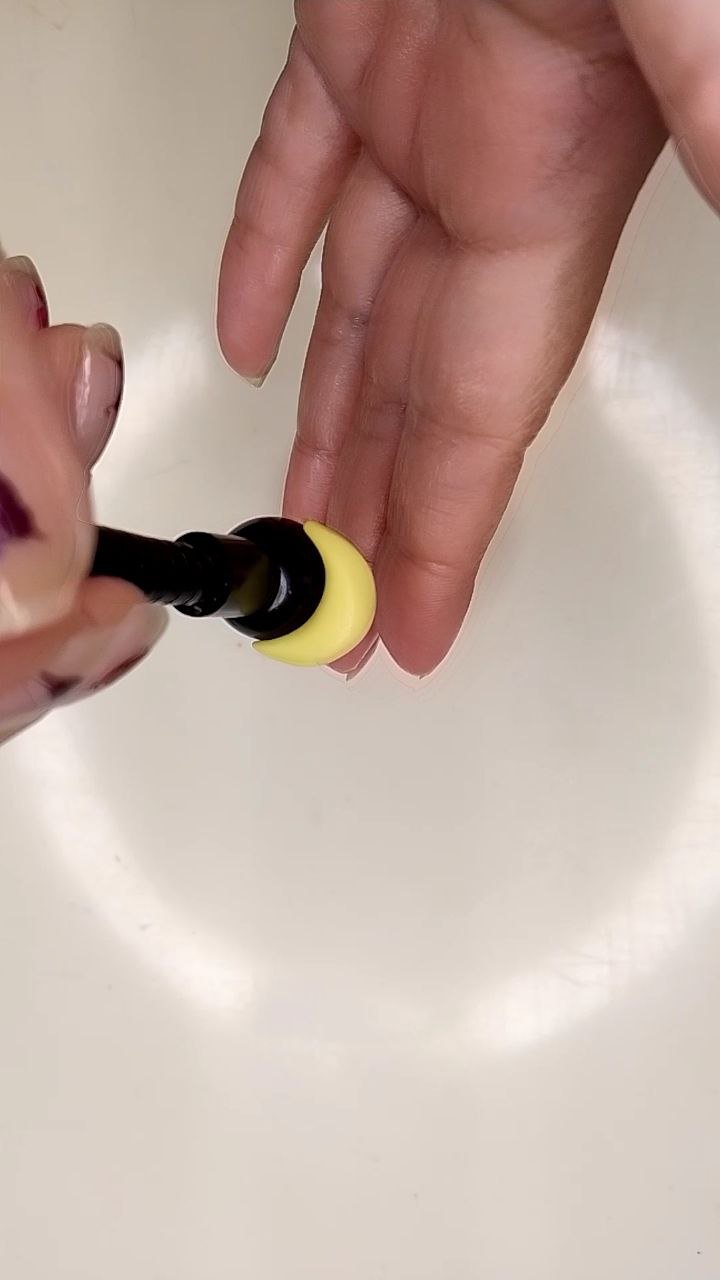
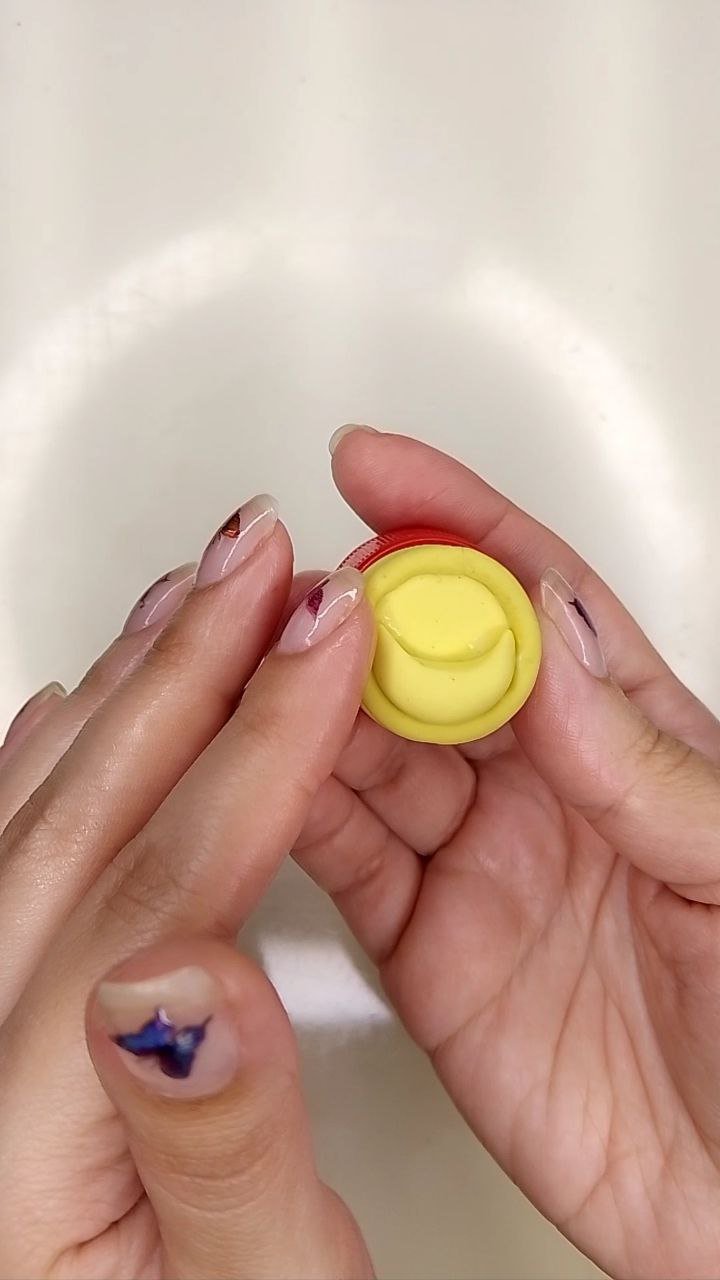
Es momento de agregar el cuarto de luna, para ello, tomamos una pequeña porción de porcelana fría amarilla y la moldeamos alargándola un poco pero dejando los extremos más finos y el centro más gordito y con una herramienta redonda que tenga más o menos el diámetro que necesitamos, terminamos de dar la forma de luna. Ya solo queda adherirla a la pieza principal.
It is time to add the quarter moon, for this, we take a small portion of yellow cold porcelain and mold it by lengthening it a little but leaving the ends thinner and the center fatter and with a round tool that has more or less the diameter we need, we finish giving the shape of the moon. Now all that remains is to attach it to the main piece.
 |  |
|---|
Para las gemas del contorno, haremos bolitas pequeñitas, puedes hacerlas directamente del color correspondiente, pero como son tan pequeñas, preferí hacerlas amarillas para pintarlas posteriormente.
For the outline gems, we will make tiny balls, you can make them directly in the corresponding color, but as they are so small, I preferred to make them yellow to paint them later.
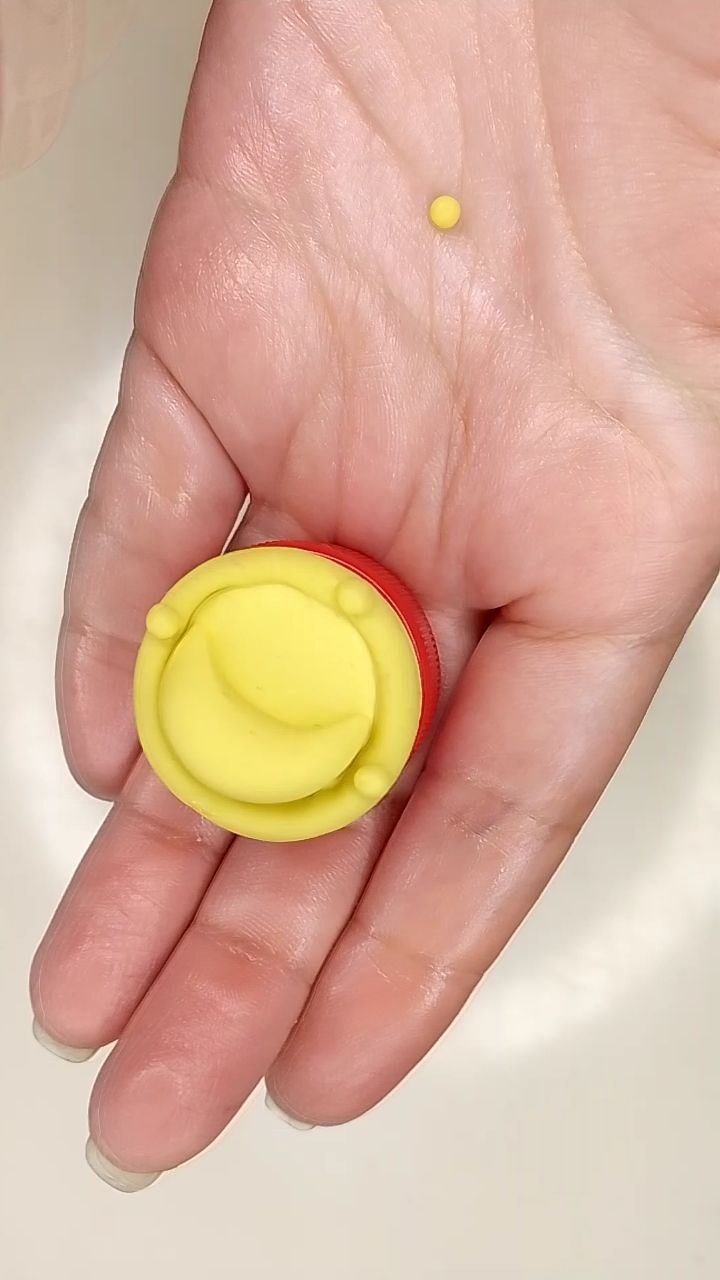
Gemas / Gems
Así mismo, llegó el turno de la gema principal en color rosado, la hacemos formando una bolita y la adherimos a la pieza principal presionado un poco sus bordes para que quede como una media esfera y no plana.
Likewise, it was the turn of the main gem in pink color, we make it forming a little ball and we adhere it to the main piece pressing a little its edges so that it looks like a half sphere and not flat.
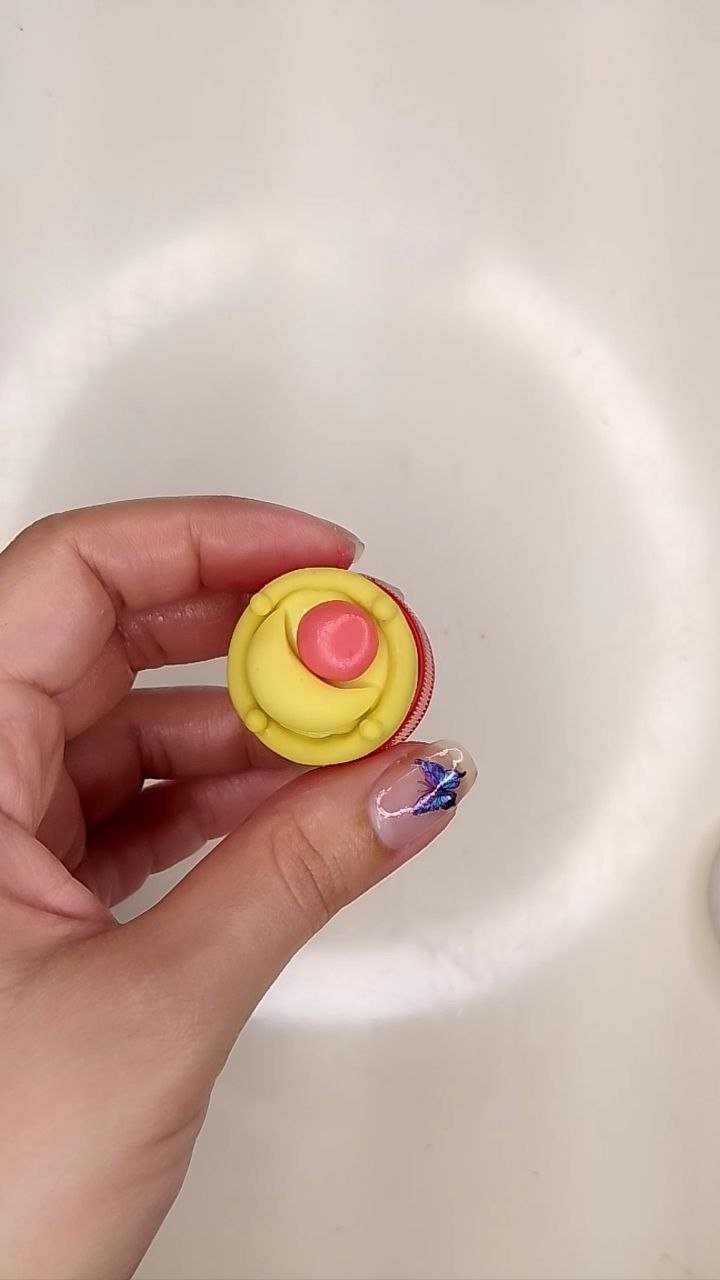
Gema rosada / Pink gem
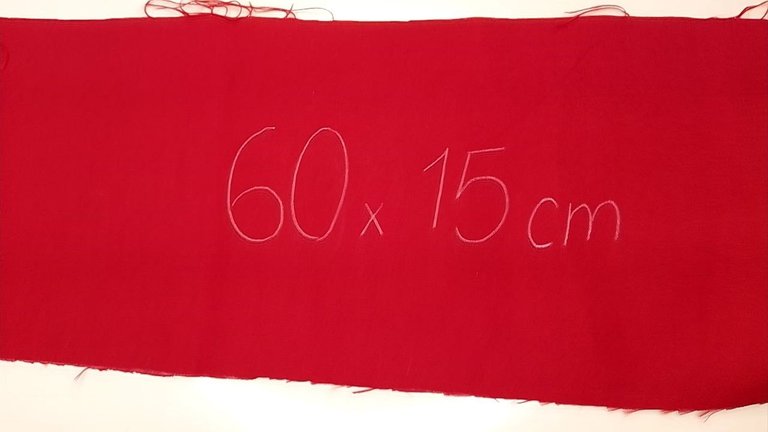
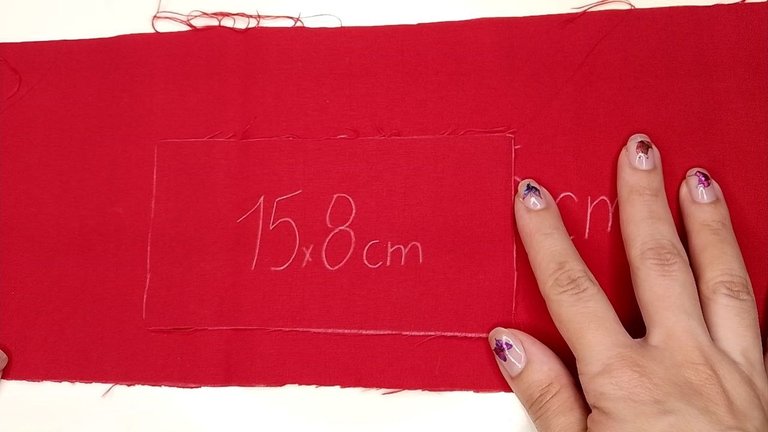
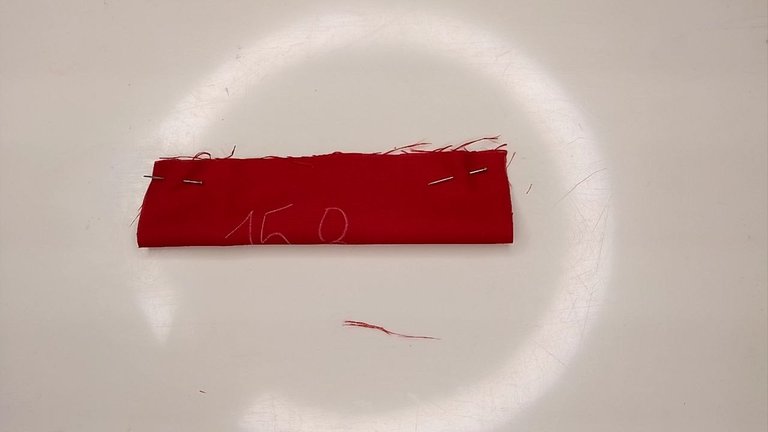
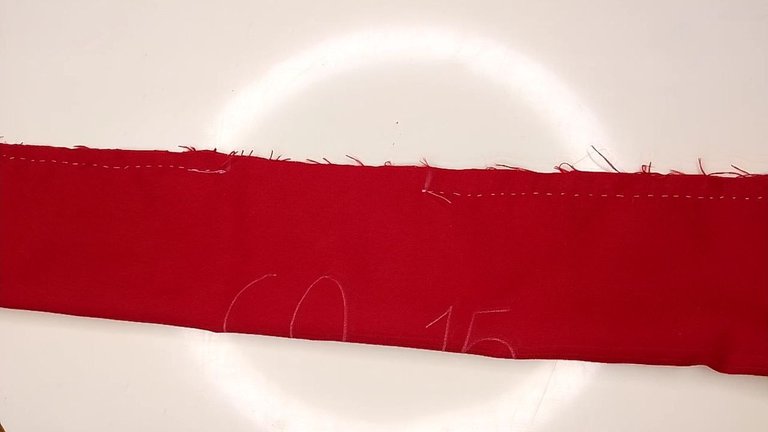
Ahora, hay que dejar que la pieza que hemos hecho se seque para poder dar los toques finales, por lo que empezaremos con el lazo. Necesitamos entonces dos piezas de tela roja con las medidas que se ven en las imágenes.
Now, we have to let the piece we have made dry to be able to give the final touches, so we will start with the bow. We then need two pieces of red fabric with the measurements shown in the images.
 |  |
|---|
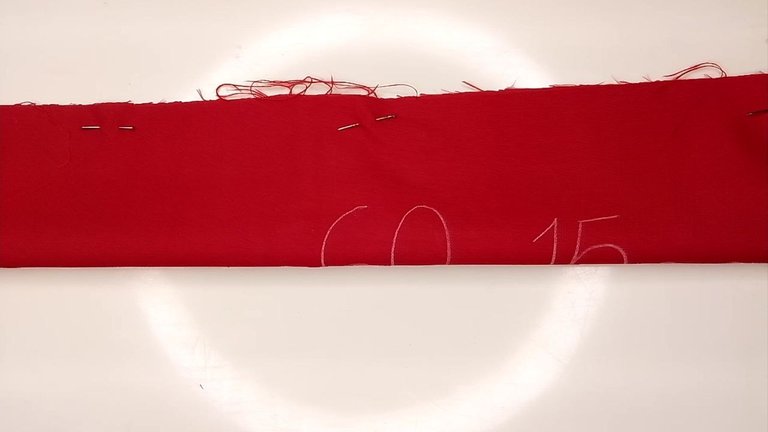
Doblaremos ambos rectángulos a la mitad de manera longitudinal y coseremos los bordes. Es importante recordar que se debe dejar un espacio en el centro del rectángulo más grande para poder dar la vuelta a la pieza y en el caso del rectángulo pequeño, no es necesario coser ninguno de sus extremos cortos, solo el lado largo.
Fold both rectangles in half lengthwise and sew the edges together. It is important to remember to leave a space in the center of the larger rectangle to be able to turn the piece over and in the case of the small rectangle, it is not necessary to sew any of its short ends, only the long side.
 |  |  |
|---|
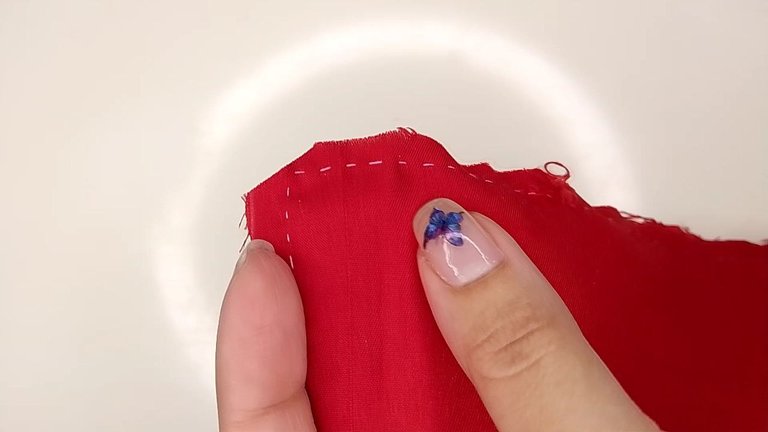
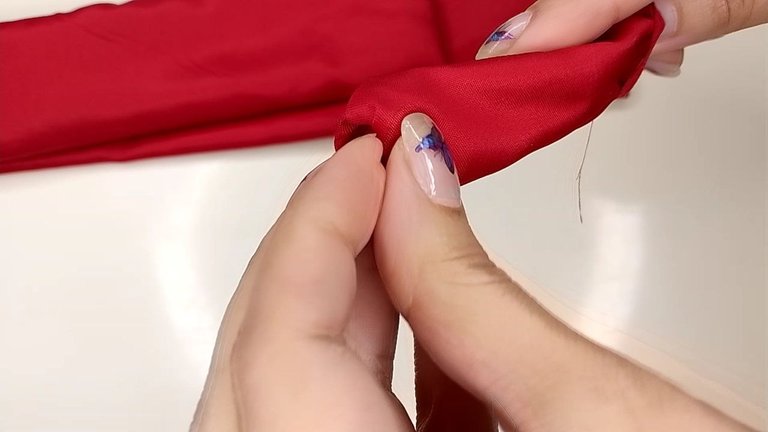
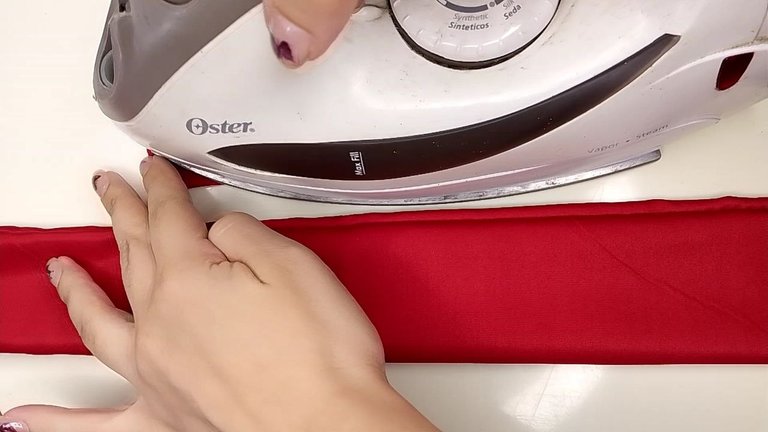
Para el rectángulo grande, recortamos las esquinas en diagonal para evitar que se amontone la tela al voltear y el resultado sea más prolijo. Damos la vuelta a ambas piezas (podemos ayudarnos con un palito de altura o algo similar si lo necesitamos) y planchamos ambas piezas.
For the large rectangle, we cut the corners diagonally to prevent the fabric from bunching up when turning and to make the result neater. We turn both pieces over (we can help ourselves with a height stick or something similar if we need it) and iron both pieces.
 |  |
|---|
 |  |
|---|
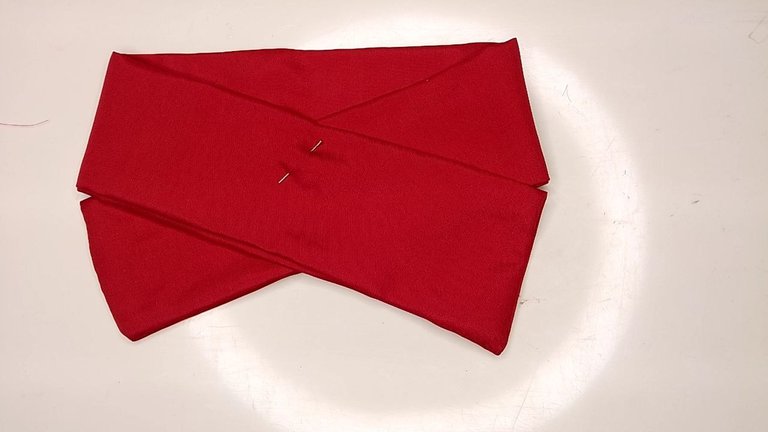
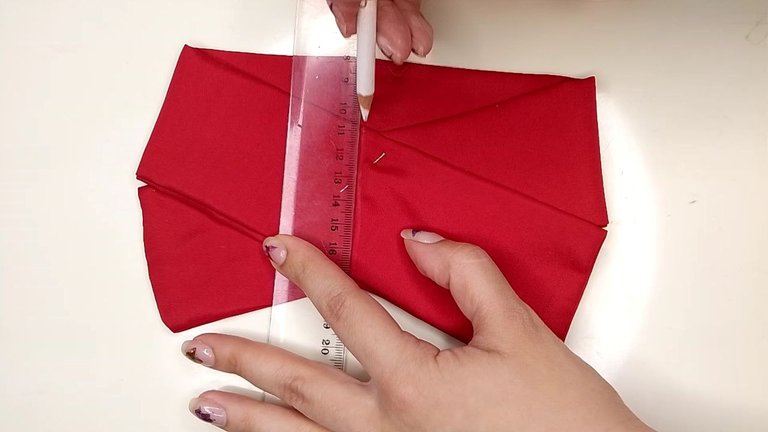
Es momento de posicionar el lazo, para ello pasaremos un extremo del rectángulo grande sobre el otro de forma simétrica y cruzada, tal y como se muestra en la imagen. Aseguramos el centro con un alfiler para que no se mueva. Puedes pasar una línea vertical por el centro para poder guiarte sobre dónde coser.
Now it is time to position the loop, to do this we will pass one end of the large rectangle over the other in a symmetrical and crossed way, as shown in the image. Secure the center with a pin so that it does not move. You can pass a vertical line through the center to guide you on where to sew.
 |  |
|---|
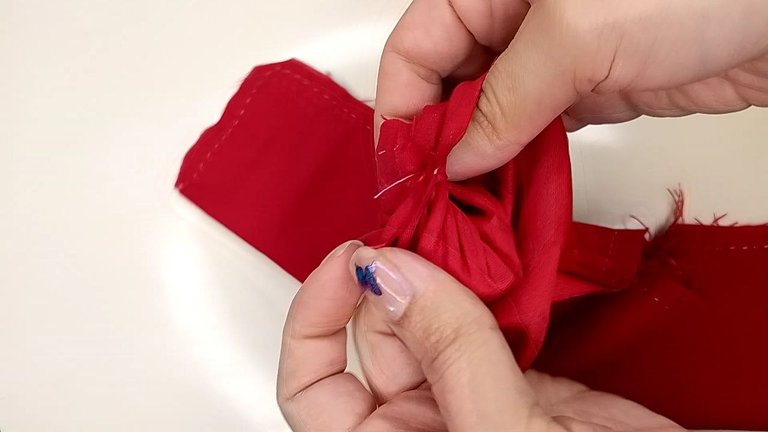
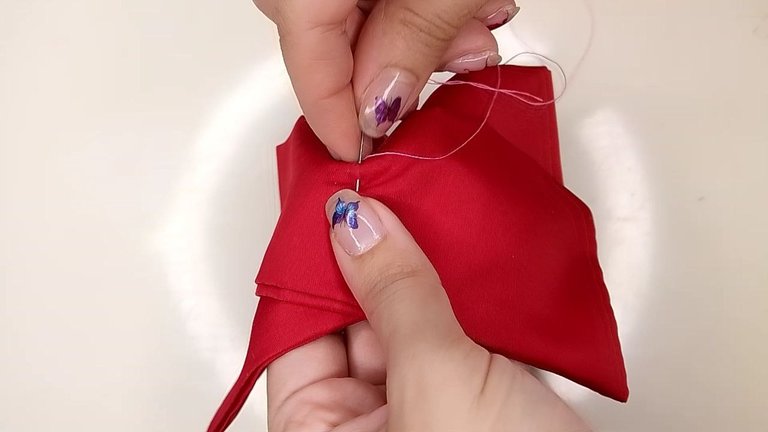
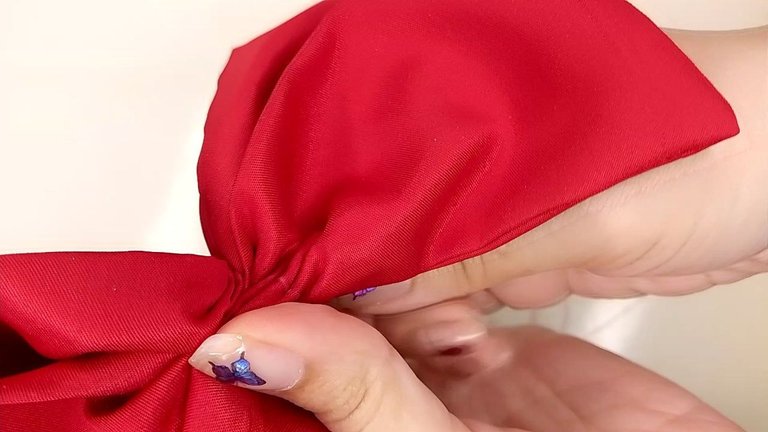
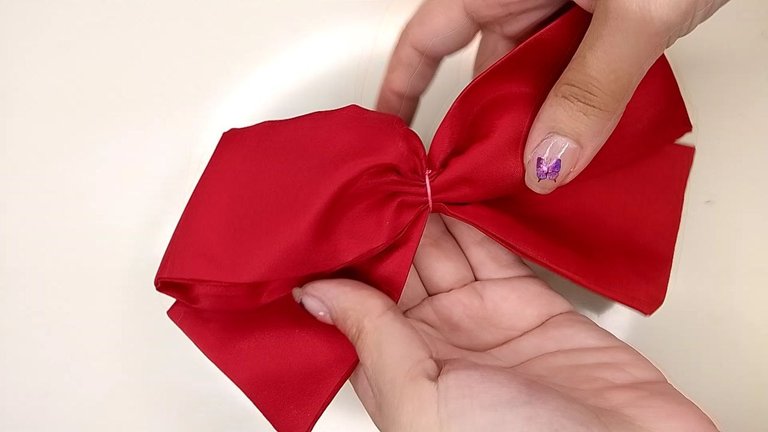
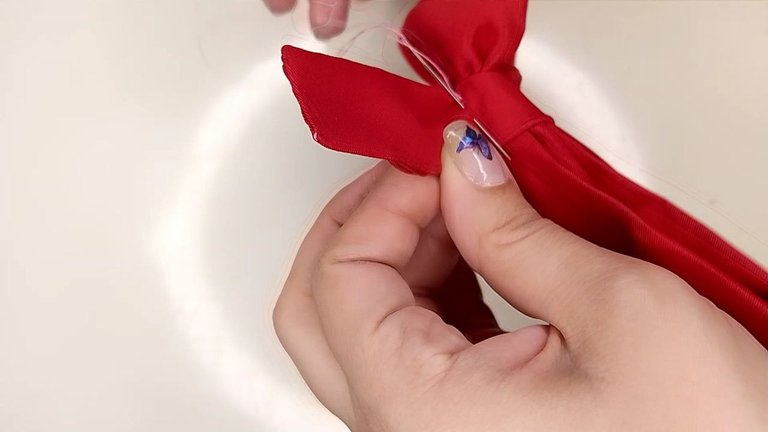
Cosemos con una puntada sencilla que nos permitirá ahora tirar del hilo para que se forme el fruncido del medio del lazo. Aseguramos dando varias vueltas con el mismo hilo y un nudo final.
We sew with a simple stitch that will now allow us to pull the thread to form the gathering in the middle of the loop. Secure with several turns of the same thread and a final knot.
 |  |  |
|---|
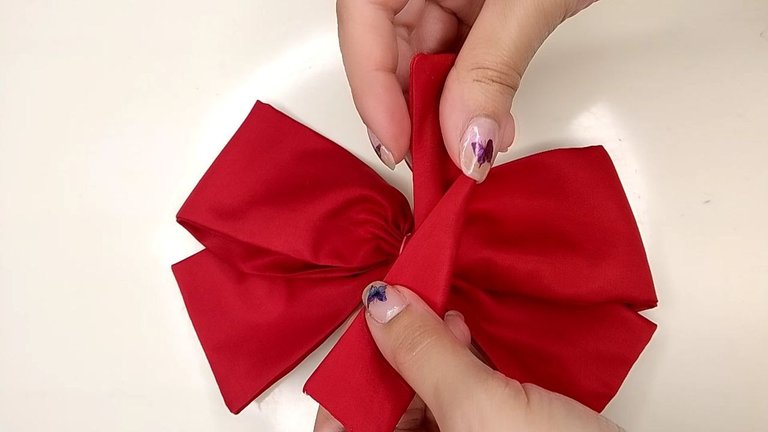
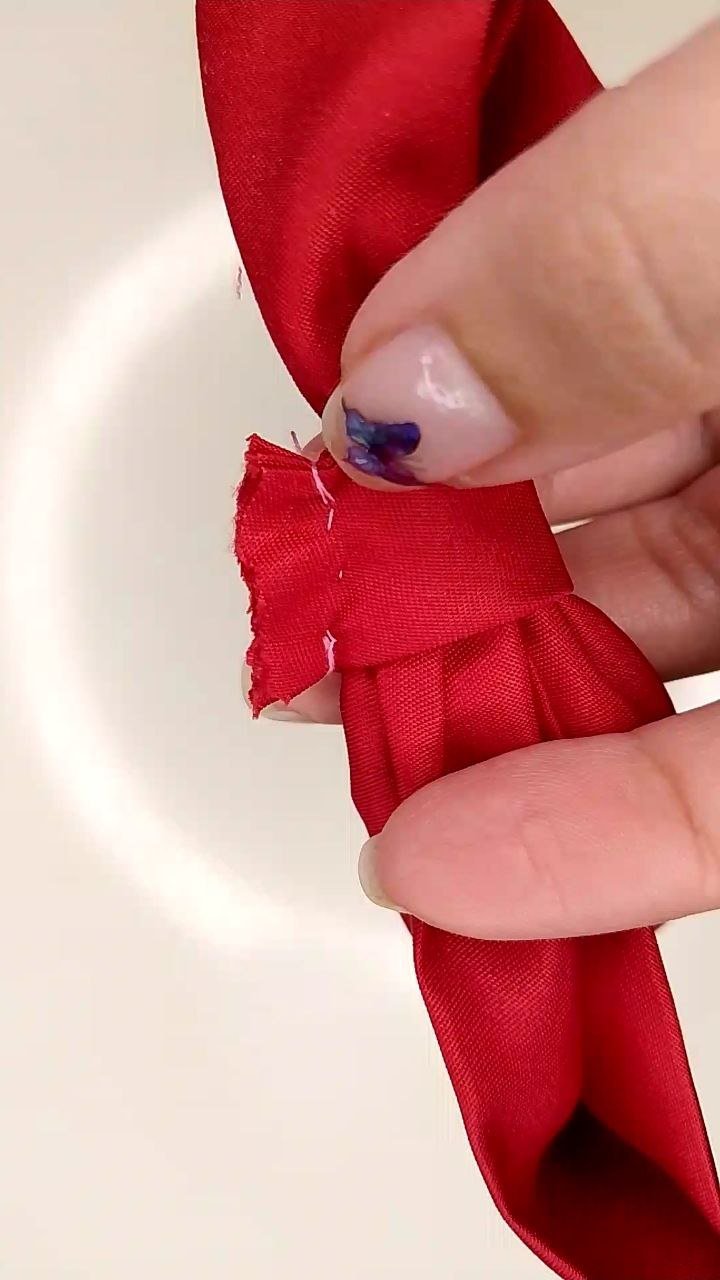
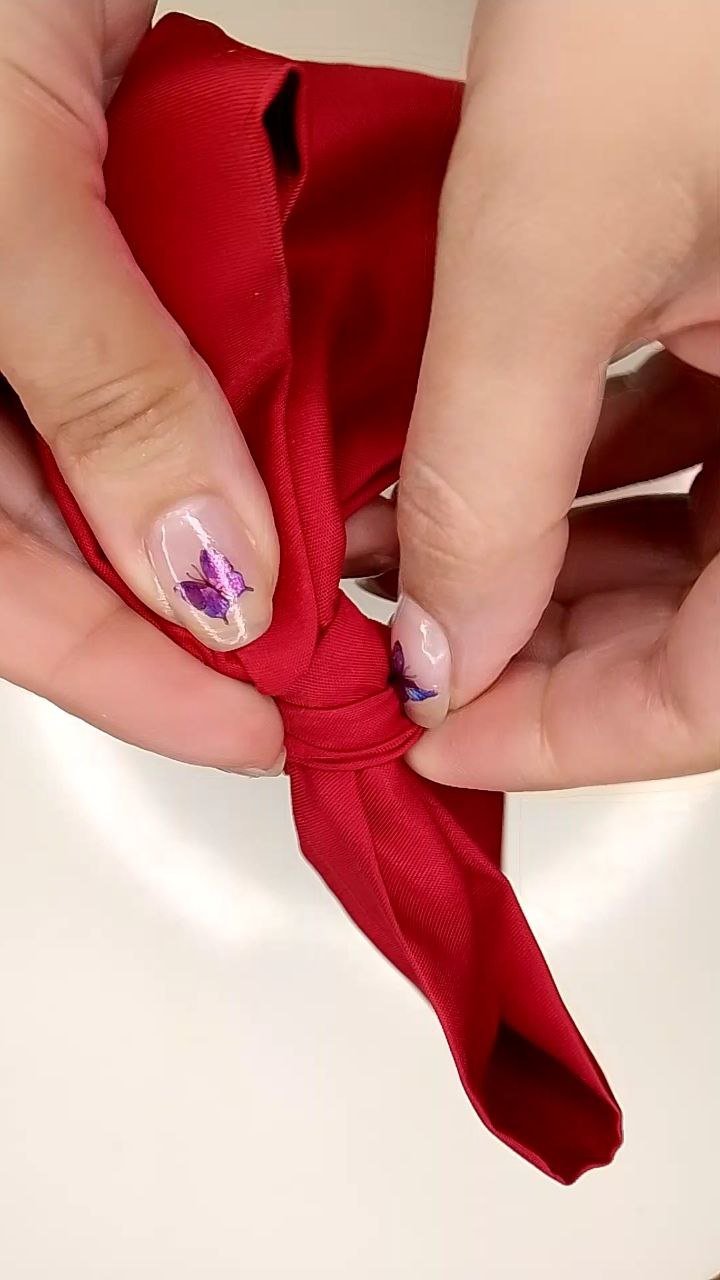
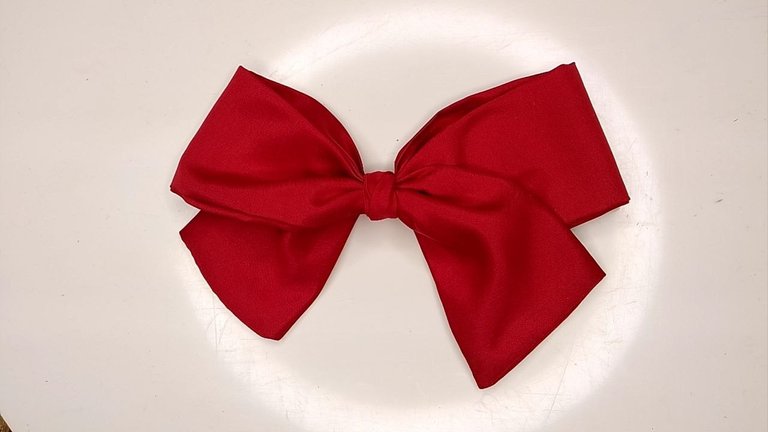
Ahora torceremos la pieza del rectángulo pequeño, lo posicionaremos sobre el centro del lazo y coseremos en la parte trasera del mismo, el sobrante de la tela lo recortamos y le damos la vuelta para que la costura quede por dentro y ya está listo nuestro hermosísimo lazo de marinero.
Now we twist the piece of the small rectangle, position it over the center of the bow and sew on the back of it, trim the excess fabric and turn it over so that the seam is on the inside and our beautiful sailor bow is ready.
 |  |
|---|
 |  |
|---|
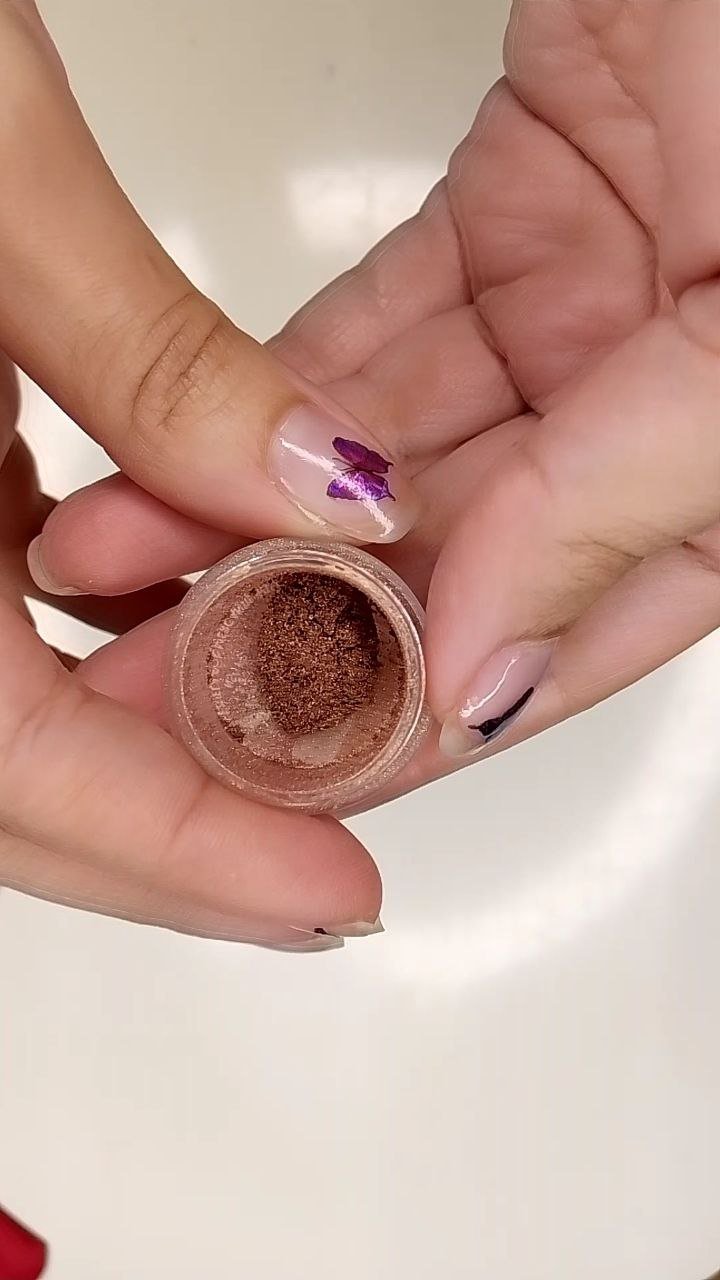
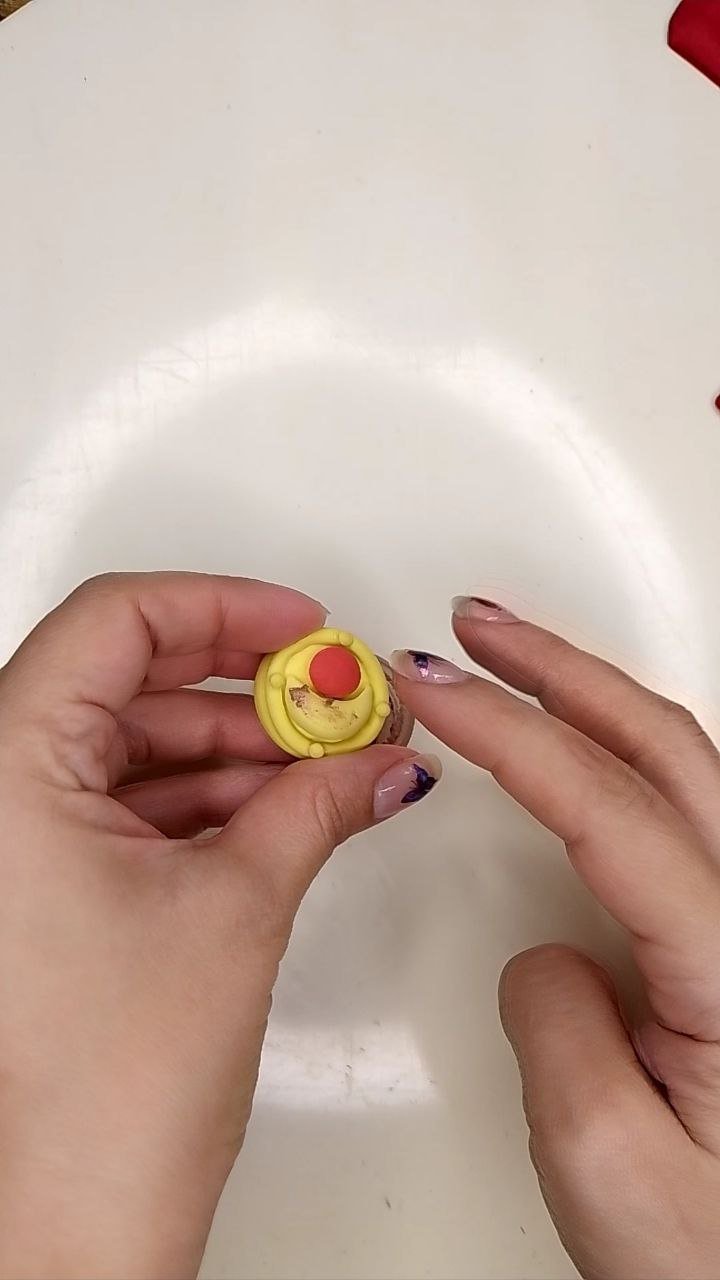
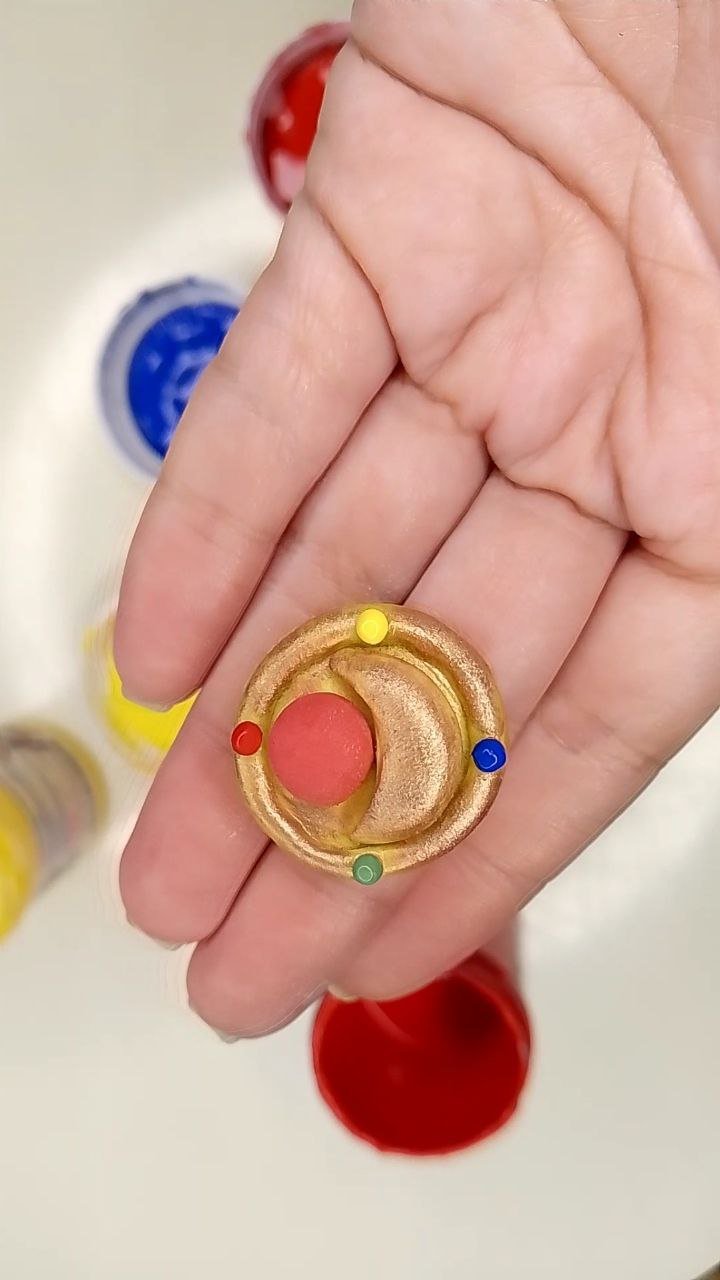
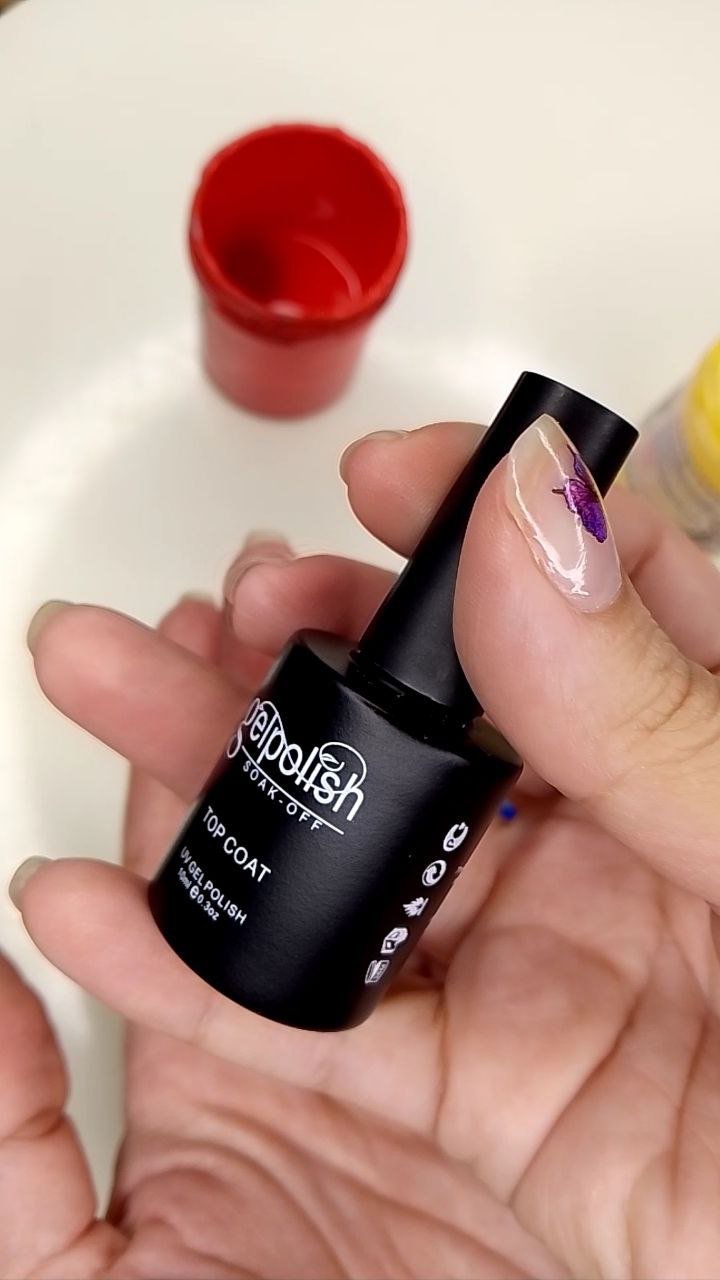
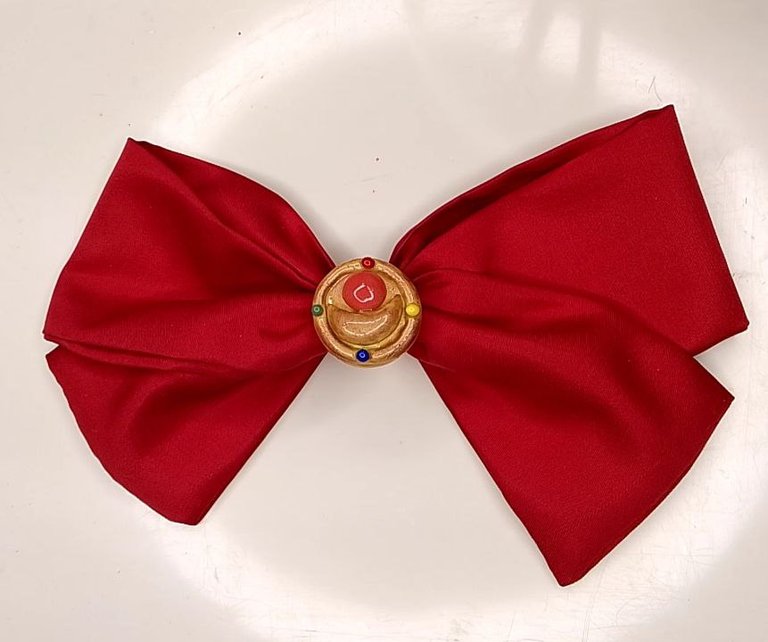
Entonces ya nuestra pieza está completamente seca (pasaron al menos 24 horas) y podemos empezar a darle los toques finales para embellecerla, así que tomamos sombra de ojos dorada y cubrimos toda la superficie amarilla para darle ese efecto metalizado y que se vea más elegante. También pintamos con pintura al frío cada gema de su color correspondiente, dejamos secar bien, cubrimos toda la pieza con Top Coat y lo curamos con lámpara (el tiempo de curado dependerá de la potencia de tu lámpara). Ya solo queda pegar el prendedor con silicón en el lazo.
Then our piece is completely dry (at least 24 hours have passed) and we can start to give it the final touches to embellish it, so we take gold eyeshadow and cover the entire yellow surface to give it that metallic effect and make it look more elegant. We also painted with cold paint each gem of its corresponding color, let it dry well, covered the whole piece with Top Coat and cured it with a lamp (the curing time will depend on the power of your lamp). Now all that's left is to glue the pin with silicone on the loop.
 |  |
|---|
 |  |
|---|
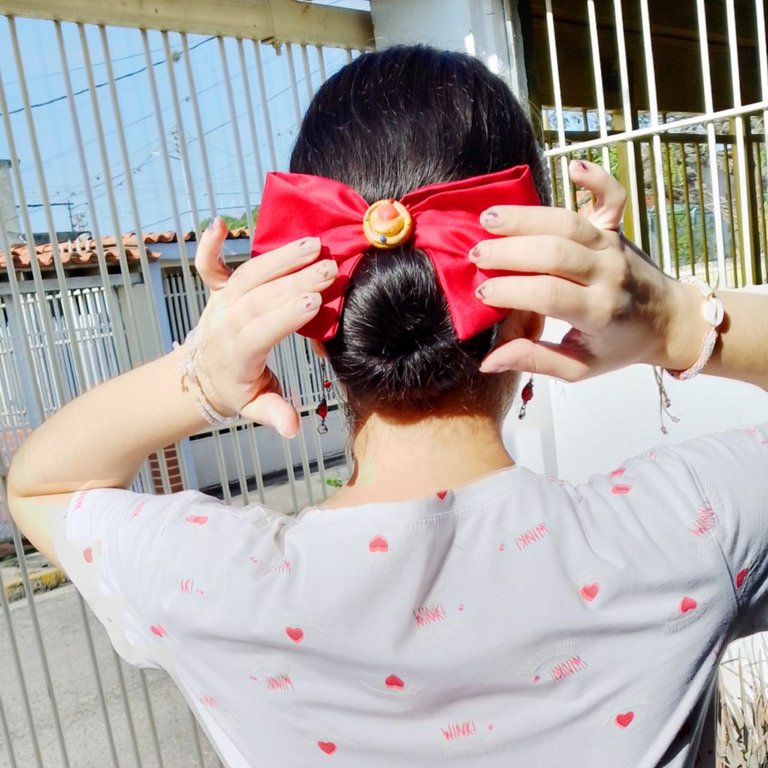
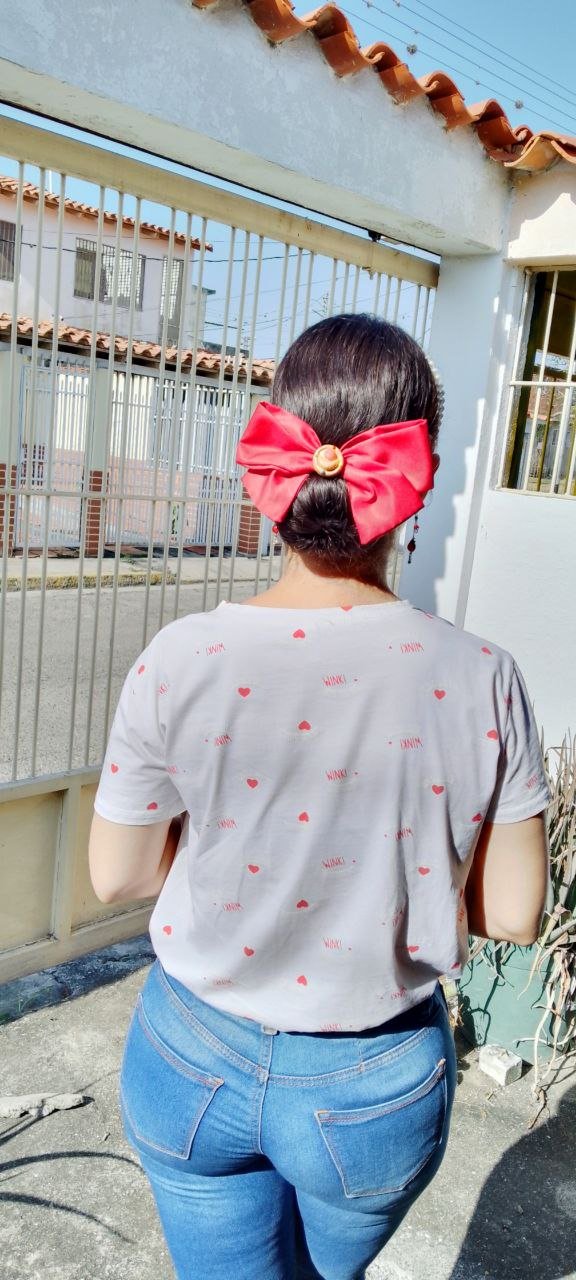
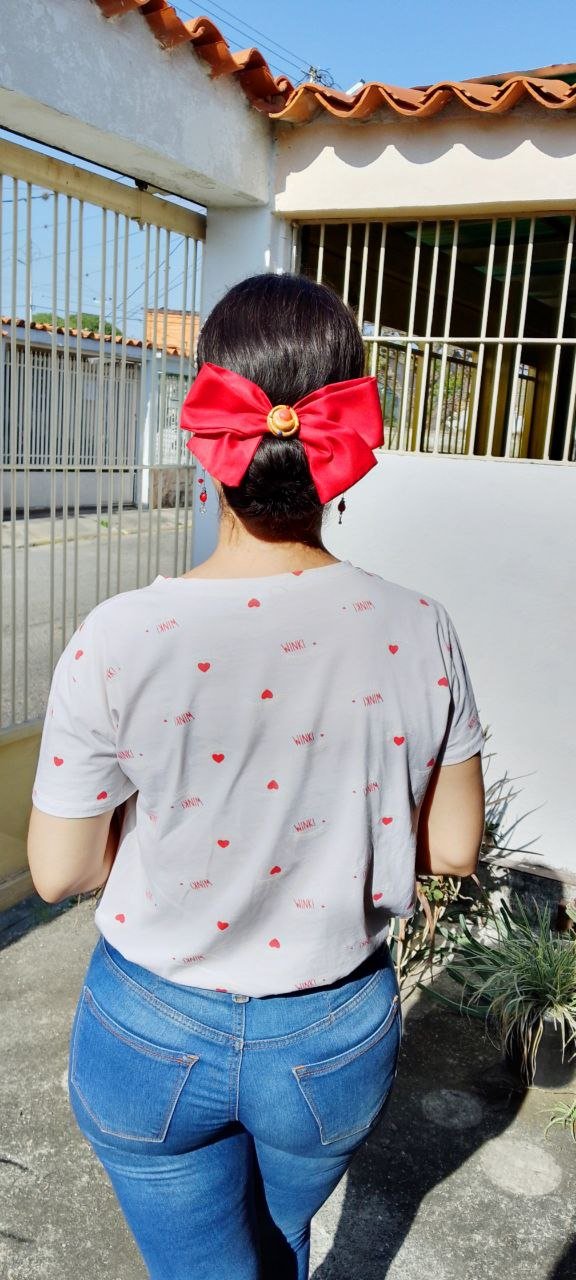
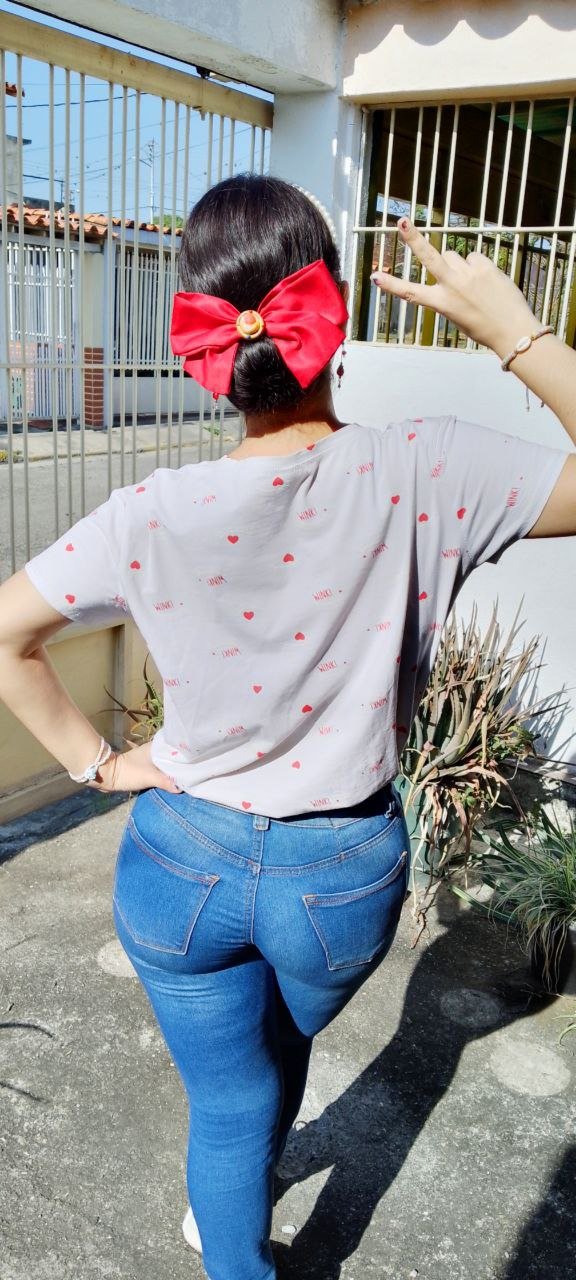
Y este es el resultado final con sesión de fotos incluido (risas):
And this is the final result with photo shoot included (laughs):
 |  |
|---|
 |  |
|---|
Comentarios finales:
Debo agradecer a la comunidad por haber elegido este tema para el concurso, realmente me he divertido tanto. Si mi yo de niña hubiese sabido que la yo adulta podría hacer todas estas cosas que siempre quisimos tal vez no me habría creído (risas) pero ambas (mi yo niña interna y yo), somos extremadamente felices en este momento.
Final comments:
I must thank the community for choosing this theme for the contest, I really had so much fun. If my child self had known that the adult self could do all these things we always wanted maybe I wouldn't have believed me (laughs) but both of us (my inner child self and I), are extremely happy right now.
¡Muchas gracias por leerme!
Thank you so much for reading me!
Own photographs, taken with my Tecno Spark 10C.
Translated to English with DeepL.
Fotografías propias, tomadas con mi Tecno Spark 10C.
Traducido al inglés con DeepL.

Te quedó espectacular Amor. Es un réplica exacta del prendedor original del animé! Que buenos recuerdos me trae y el lazo te luce increíble!
Felicitaciones Amor!!! ♥️
Muchísimas gracias mi amor😍 esta es definitivamente una de mis manualidades favoritas🥰❤️✨
Por el poder del prisma lunar( creo que era así). Yo también me esperaba estos muñes cuando niño. Incluso la peli de Sailor Moon que ponían en mi país me daba mucha intriga. El lazo que creaste prácticamente es igual al de la serie. Fenomenal.
Te felicito ☺️ el lazo quedó súper lindo.
Te deseo mucha suerte 🍀 en este reto. ¡Saludos!
Muchísimas gracias Lelys💖 me alegra que te gustara 🤗
Sending you an Ecency curation vote!

Thank you so much for your support 💖✨
It is my pleasure!
!INDEED
muy lindo, buen trabajo!
very nice, good job!
Muchas gracias💖
Congratulations @mavilan30! You have completed the following achievement on the Hive blockchain And have been rewarded with New badge(s)
Your next target is to reach 500 comments.
You can view your badges on your board and compare yourself to others in the Ranking
If you no longer want to receive notifications, reply to this comment with the word
STOPEsta buen bonito me gusta mucho
Muchas gracias💖
It is beautiful, stylish, and lovely. It looks pretty good. It shows your skills. Nice work! Thanks!
Thank you so much for your support 💖✨