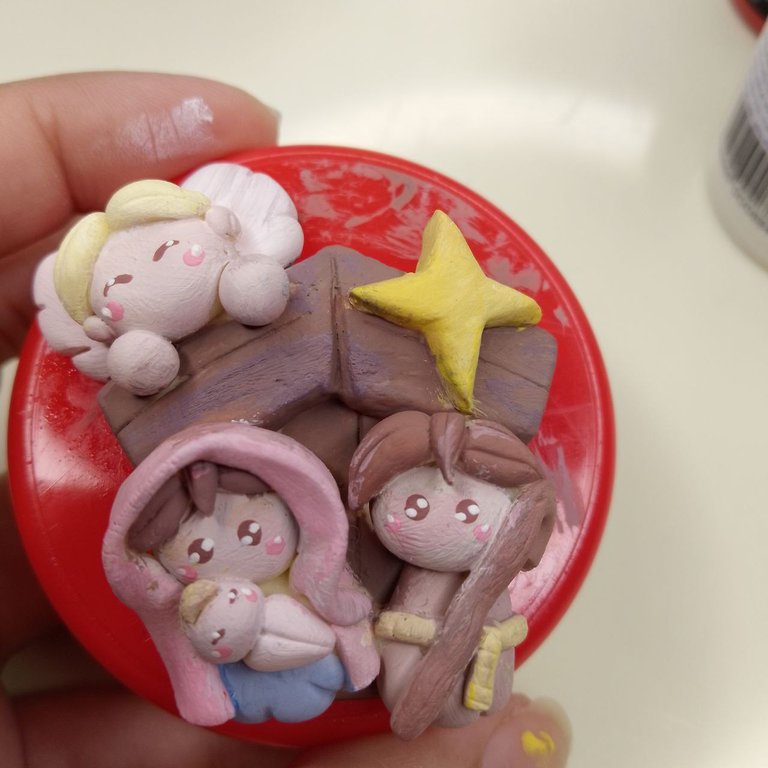
Hello dear community! As I mentioned before, Christmas is my favorite time of the year, that's why I loved the theme of this month's initiative and I couldn't finish my participation without creating a nativity scene, that's why today I'm sharing with you the step by step to make it in cold porcelain as my last post (I'll be leaving you the links to my other participations at the end of this post in case you want to take a look at them). I really think this is my prettiest creation of the season and maybe even of the year, so keep reading and be sure to check it out.
Versión Español
¡Hola querida comunidad! Como ya le he mencionado antes, la navidad es mi época favorita del año, es por eso que me ha encantado la temática de la iniciativa de este mes y no podía terminar mi participación sin la creación de un pesebre, es por ello que hoy les comparto el paso a paso para hacerlo en porcelana fría como mi última entrada (les estaré dejando los links a mis otras participaciones al final de este post por si quieren darles un vistazo). De verdad pienso que esta es mi creación más bonita de la temporada y tal vez hasta del año, así que sigue leyendo y no dejes de verlo.
Imagen creada por mí en Canva / Image created by me in Canva
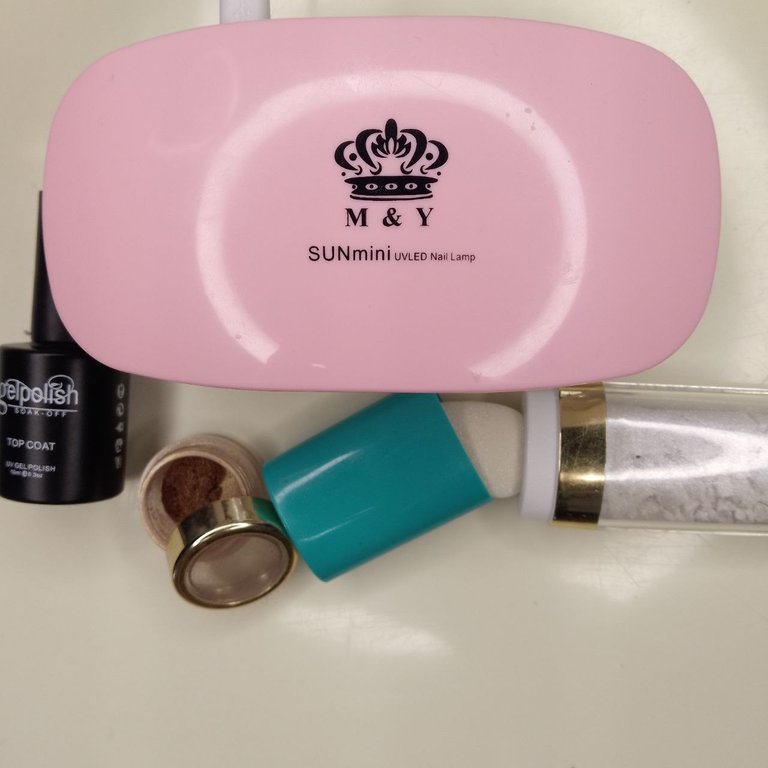
Materials:
- Cold porcelain
- Cold paints
- White glue
- Water
- Oil
- Brushes
- Tools for cold porcelain (can be substituted with needles, sticks, trowels, cutters, etc.)
- Top Coat (semi-permanent nail polish)
- UV/LED lamp
- Fairy dust / Glitter eyeshadow.
Procedure:
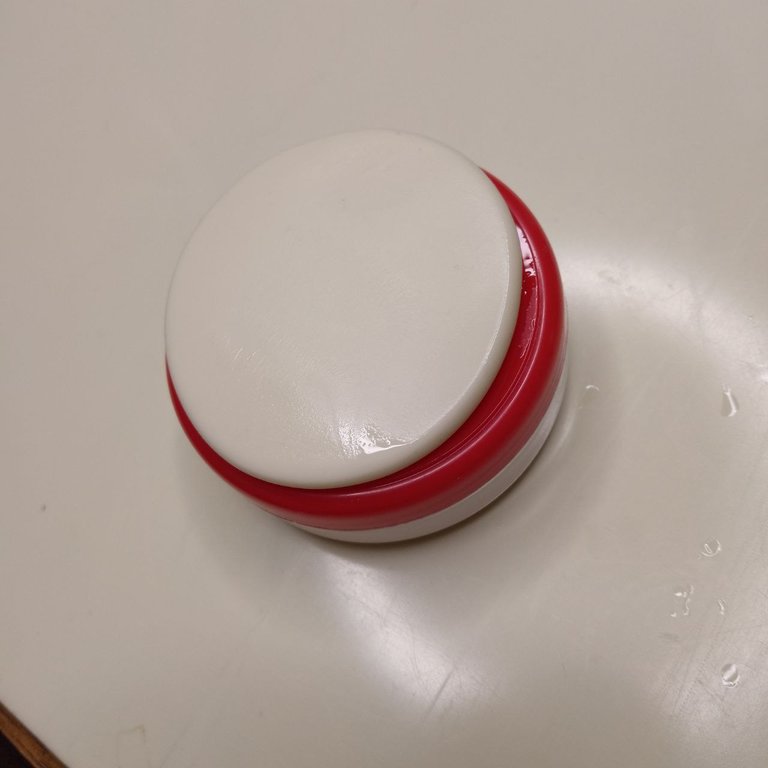
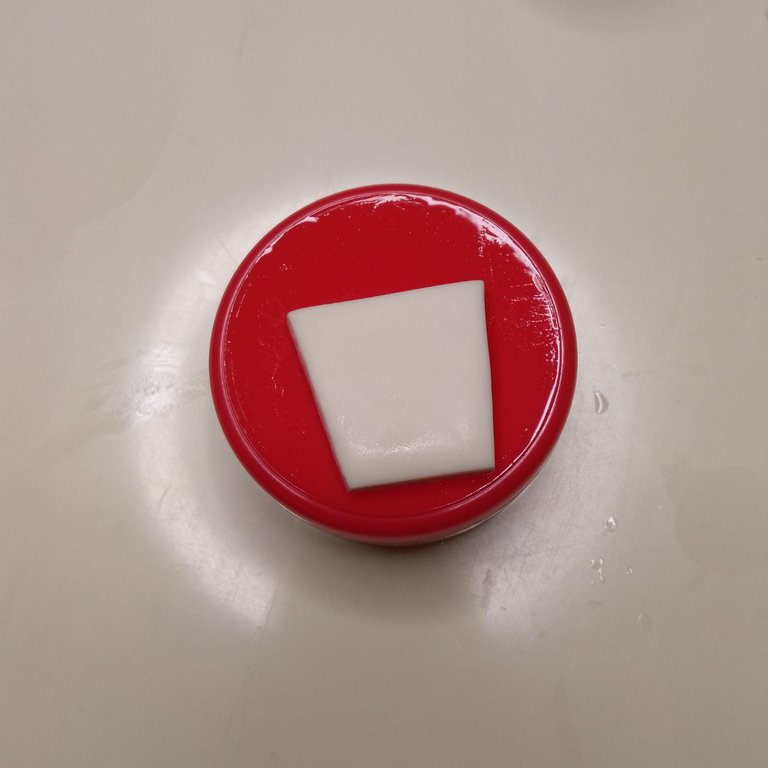
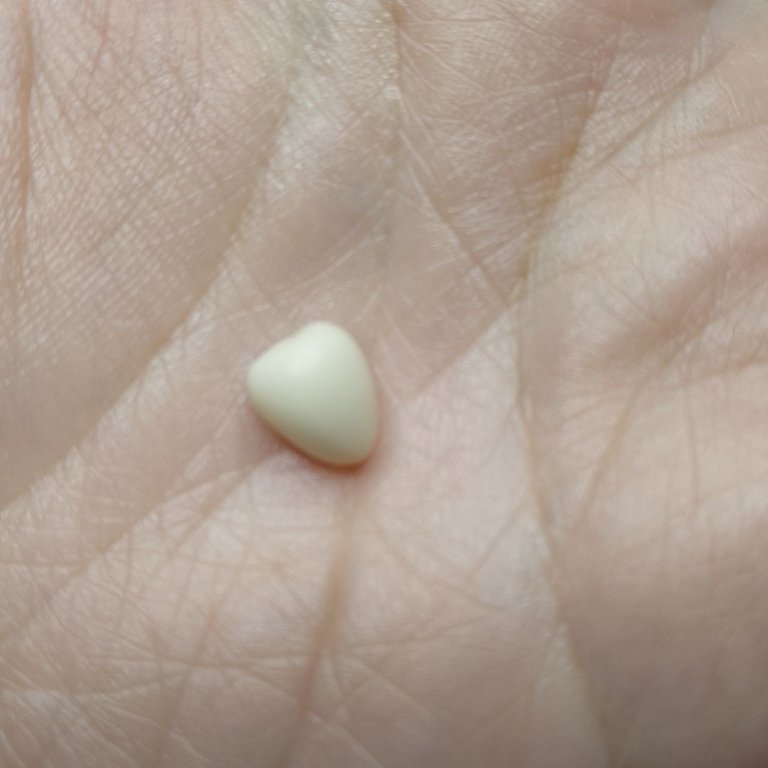
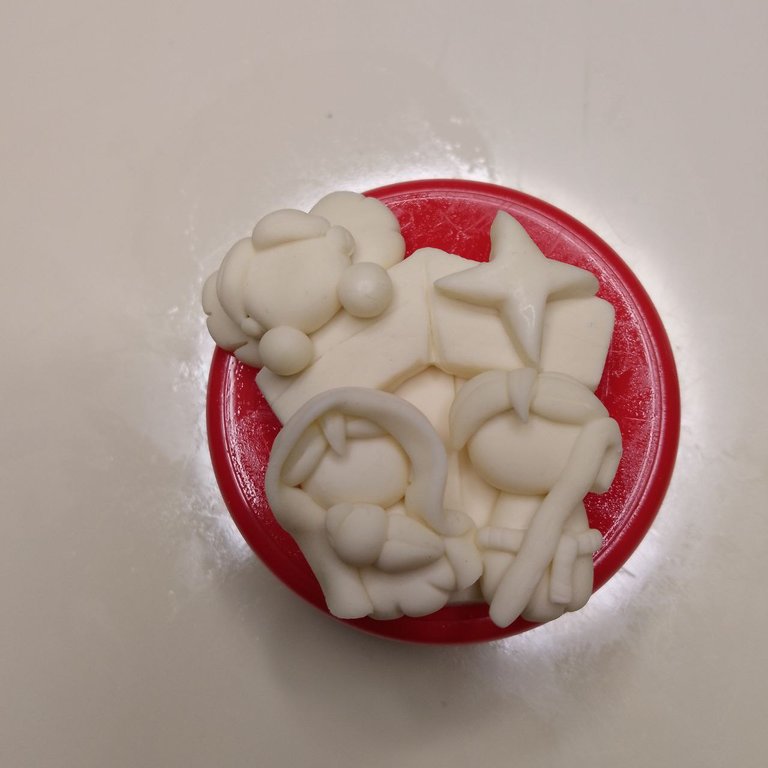
We start by flattening a portion of dough to make the base, I have used an empty container of my face moisturizer (laughs); the same, we will cut it with the help of the cutter in the shape of a trapezoid, in addition we will make some notches also with the cutter that will simulate the wooden boards of the walls of the crib. Finally, following the same procedure described above, we will cut a triangle shape and attach it on top, this will be the base to place the roof.
Versión Español
Materiales:
- Porcelana fría
- Pinturas al frío
- Pegamento blanco
- Agua
- Aceite
- Pinceles
- Herramientas para la porcelana fría (pueden sustituirse con agujas, palillos, paletas, cúter, etc.)
- Top Coat (de uñas semipermanente)
- Lámpara UV/LED
- Polvo de hadas / Sombra de ojos brillante
Procedimiento:
Iniciamos aplanando una porción de masa para hacer la base, yo he utilizado un envase vacío de mi crema hidratante del rostro (risas); la misma, la cortaremos con ayuda del cúter en forma de trapecio, además le haremos unas muescas también con el cúter que simularán las tablas de madera de las paredes del pesebre. Finalmente, siguiendo el mismo procedimiento descrito, cortaremos una forma de triángulo y se la anexaremos arriba, esa será la base para colocar el techo.
 |  |  |
|---|
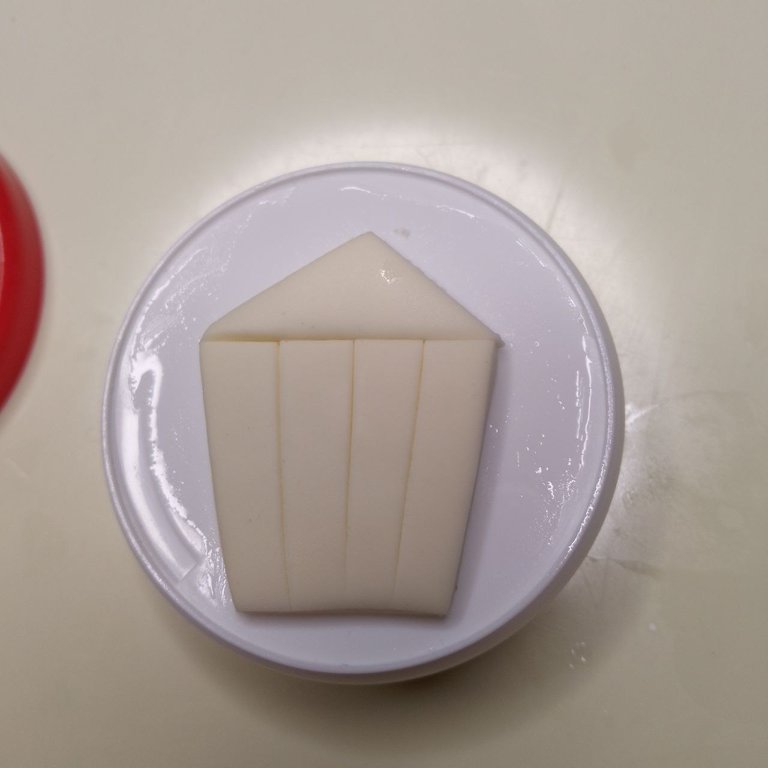
For the roof we will flatten a new portion and cut it as shown in the figure. Also, we will give it a little texture with a slightly stiff bristle brush previously moistened (only wet, not soaked in water). And then we will glue the roof in place, for this, if the dough still feels fresh, you only need to place the piece and it will adhere by itself, but if not, you can resort to slightly moisten the contact surface or add a thin layer of glue.
Versión Español
Para el techo aplanaremos una nueva porción y la cortaremos como se ve en la figura. Además, le daremos un poco de textura con un pincel de cerdas un poco duras previamente humedecido (solo húmedo, no empapado en agua). Y entonces pegaremos el techo en su lugar, para ello, si la masa se siente fresca aún, solo necesitarás colocar la pieza y ella se adherirá por sí sola, pero si no es así, puedes recurrir a humedecer un poco la superficie de contacto o agregar una capa delgada de pegamento.
 |  |
|---|
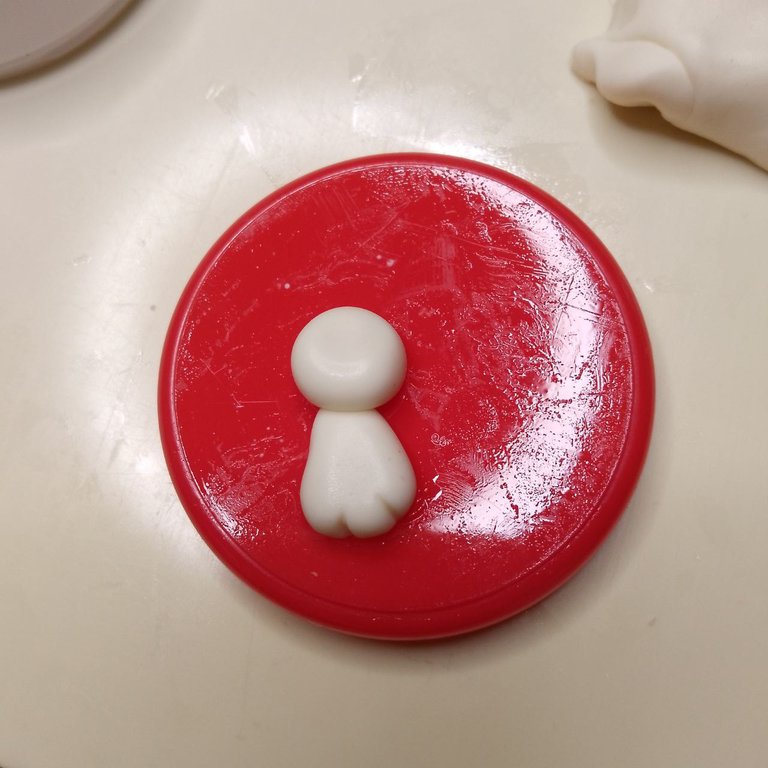
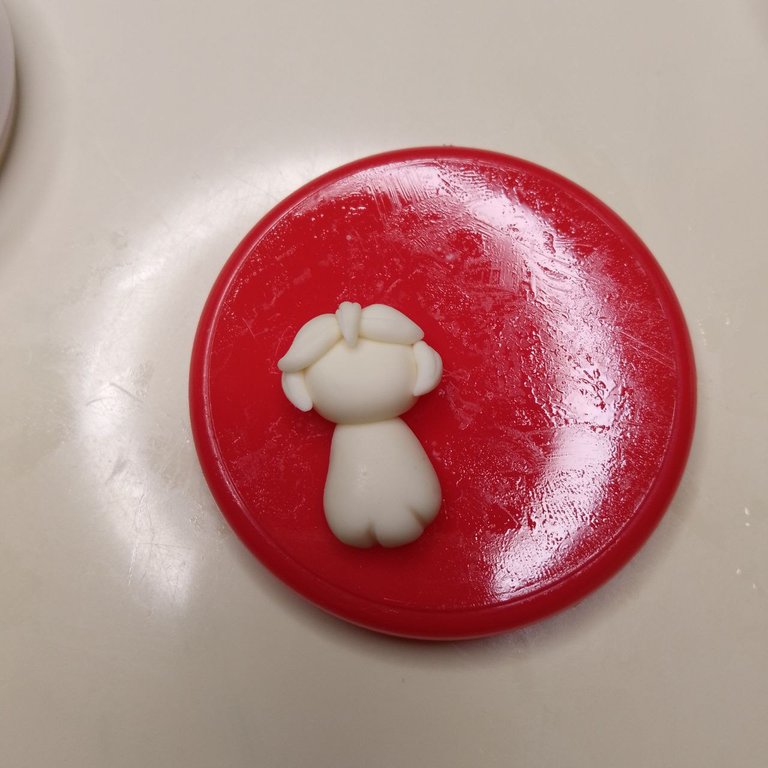
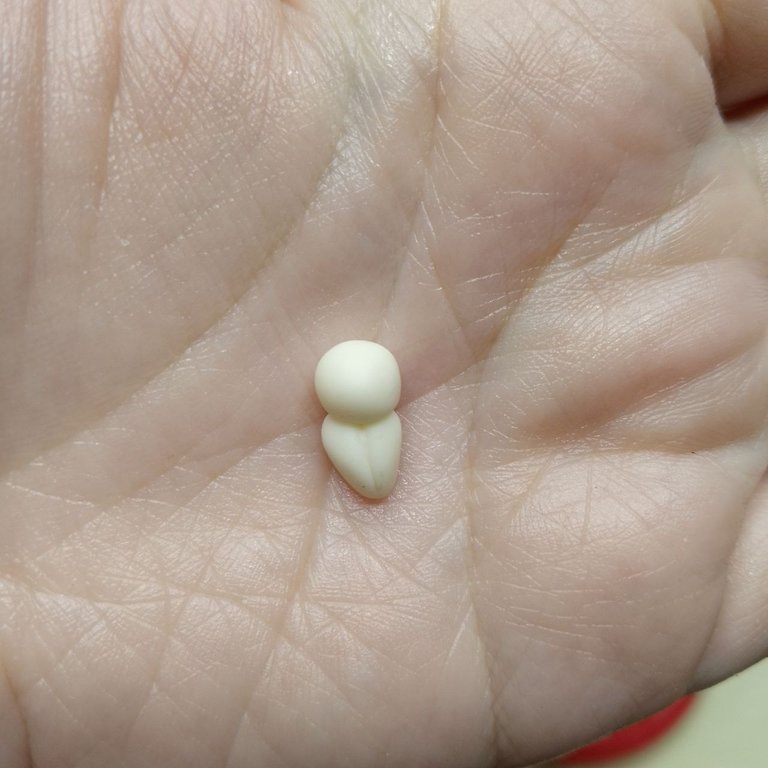
Now we will start with the figure of the virgin. For her body we will make a small drop and with the blunt side of the cutter, we will mark three notches in the lower part. Then we will make a big ball with respect to the proportions of the body, since our characters will be big-headed and tender (laughs) and we will flatten it a little in the part where the eyes will be, then we will stick it to the body.
Versión Español
Ahora iniciaremos con la figura de la virgen. Para su cuerpo haremos una pequeña gota y con el lado sin filo del cúter, marcaremos tres muescas en la parte baja. Luego haremos una bolita grande con respecto a las proporciones del cuerpo, puesto que nuestros personajes serán cabezones y tiernos (risas) y a ésta la aplanaremos un poco en la parte donde irán los ojos, posteriormente la adherimos al cuerpo.
 |  |  |
|---|
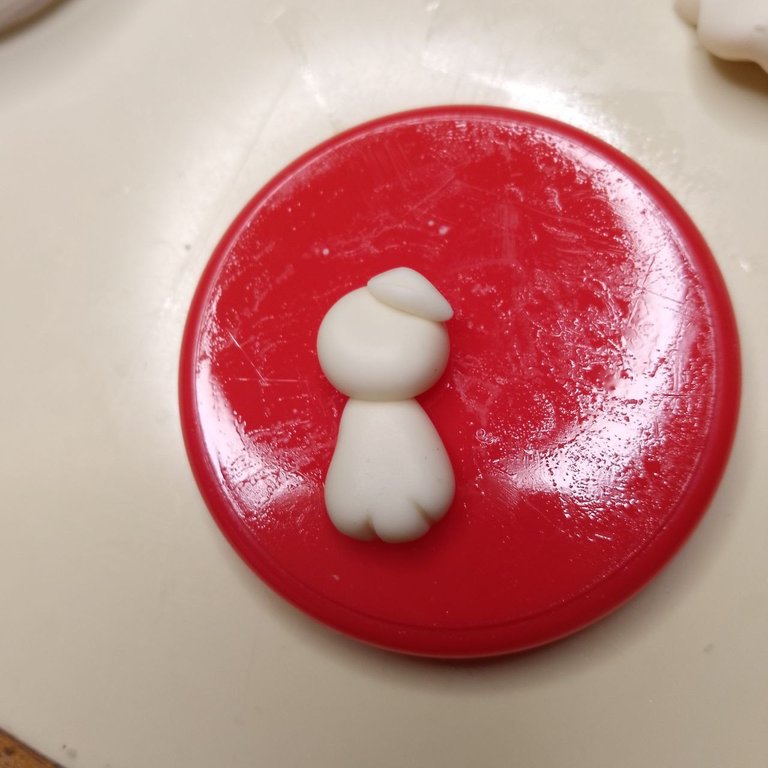
For the hair, we will take very small portions and we will give them a drop shape accentuating its pointed side, then we will make marks with the cutter to represent the locks of hair and we will position it in the place of our preference. We will make as many locks as necessary.
Versión Español
Para el cabello, tomaremos porciones muy pequeñas y les daremos forma de gota acentuando su lado puntiagudo, luego les haremos marcas con el cúter para representar los mechones de cabello y lo posicionaremos en el lugar de nuestra preferencia. Haremos tantos mechones como sean necesarios.
 |  |  |  |
|---|
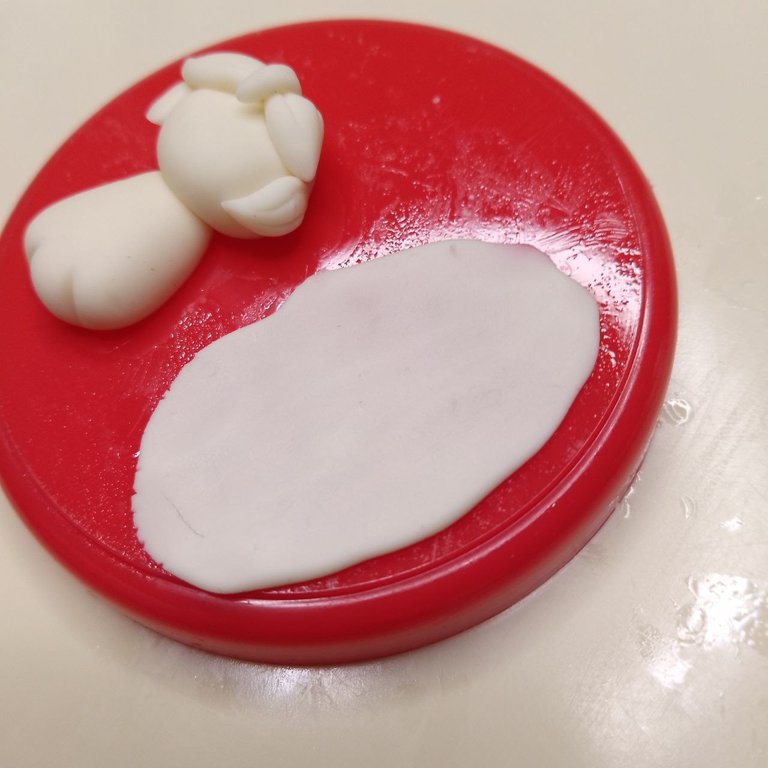
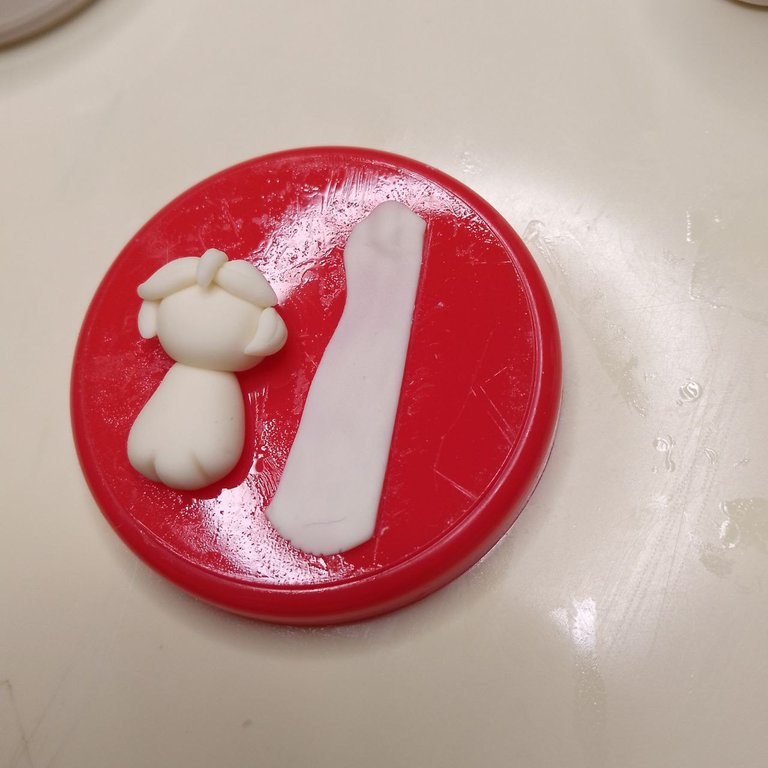
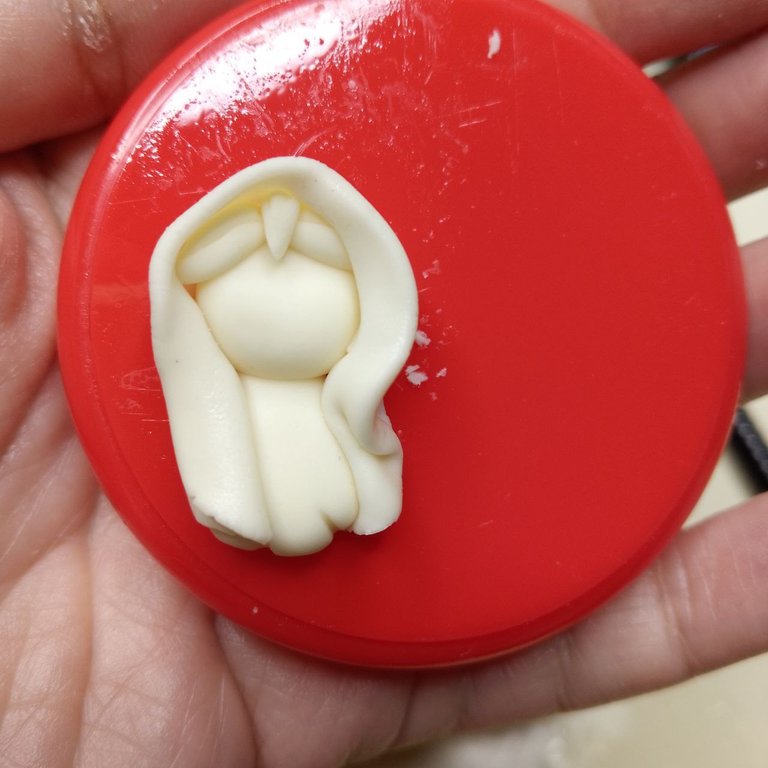
Now, we will flatten a small portion of dough, this should be exaggeratedly flat, however, I have not flattened it uniformly, since with this piece I will make the mantle of the virgin, so the differences in the surface will help me to give volume when I am arranging it. With the cutter we cut the excess and then we will take the piece and we will arrange it around the head, making folds simulating the fabric.
Versión Español
Ahora, aplanaremos una pequeña porción de masa, esta debe quedar exageradamente plana, sin embargo, yo no la he aplanado de manera uniforme, ya que con esta pieza haré el manto de la virgen, por lo que las diferencias en la superficie me ayudarán a dar volumen cuando lo esté acomodando. Con el cúter cortamos el sobrante y luego tomaremos la pieza y la iremos acomodando alrededor de la cabecita, haciendo pliegos simulando la tela.
 |  |  |
|---|
Later we will form another drop but this one will be very tiny and more rounded, because it corresponds to the little body of the baby Jesus. With the cutter we will make a small longitudinal mark in the center of the figure that will represent where the two parts of the fabric that wrap him are joined and once again we will make a little ball for his head. With the same technique used previously for the tufts, we will make a single tuft for the child and this will be centered at the beginning. Then we will attach the child to the virgin as if she were carrying him in her arms.
Versión Español
Posteriormente formaremos otra gota pero esta será muy pequeñita y más redondeada, pues corresponde al cuerpecito del niño Jesús. Con el cúter haremos una marquita longitudinal al centro de la figura que representará donde se unen las dos partes de la tela que lo envuelven y una vez más haremos una bolita para su cabeza. Con la misma técnica usada anteriormente para los mechones, realizaremos un único mechón para el niño y este irá centrado en su inicio. Luego adheriremos el niño a la virgen como si lo cargara en sus brazos.
 |  |  |
|---|
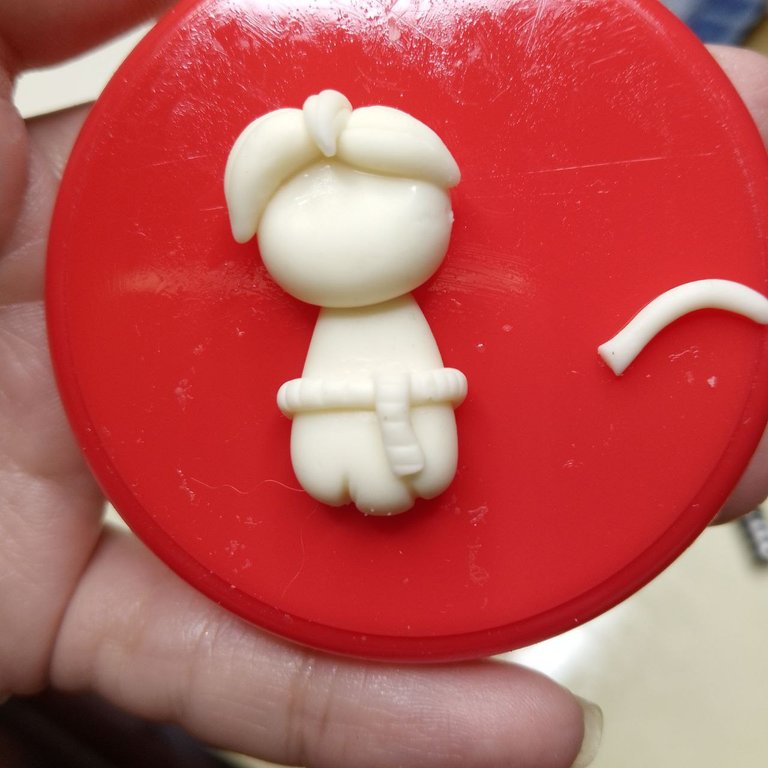
For José, we will form the body and the head in the same way we did for the virgin, but we will add a belt to her dress, for this we will form a very thin cylinder and place it around her waist and with another small piece of the same diameter we will add the part of the belt that hangs after the knot. In addition, to give it texture, we will make small transversal marks along the entire length of the belt.
Versión Español
Para José, formaremos el cuerpo y la cabeza de la misma forma que hicimos para la virgen, pero le agregaremos un cinto a su vestimenta, para ello formaremos un cilindro muy fino y lo posicionaremos alrededor de su cintura y con otro trocito del mismo diámetro agregaremos la parte del cinto que cuelga luego del nudo. Además, para darle textura, haremos marquitas transversales a lo largo de todo el cinto.
 |  |  |
|---|
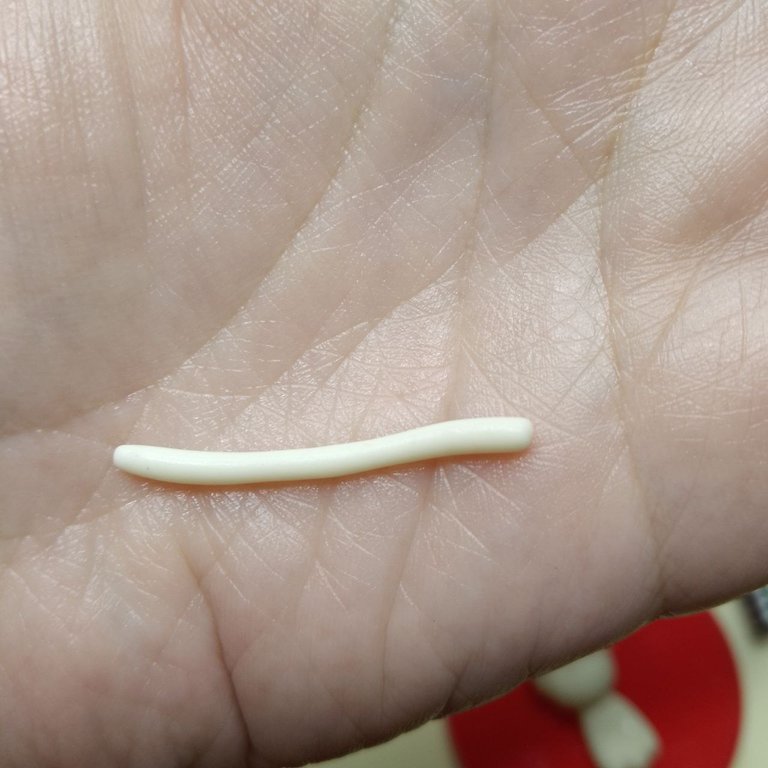
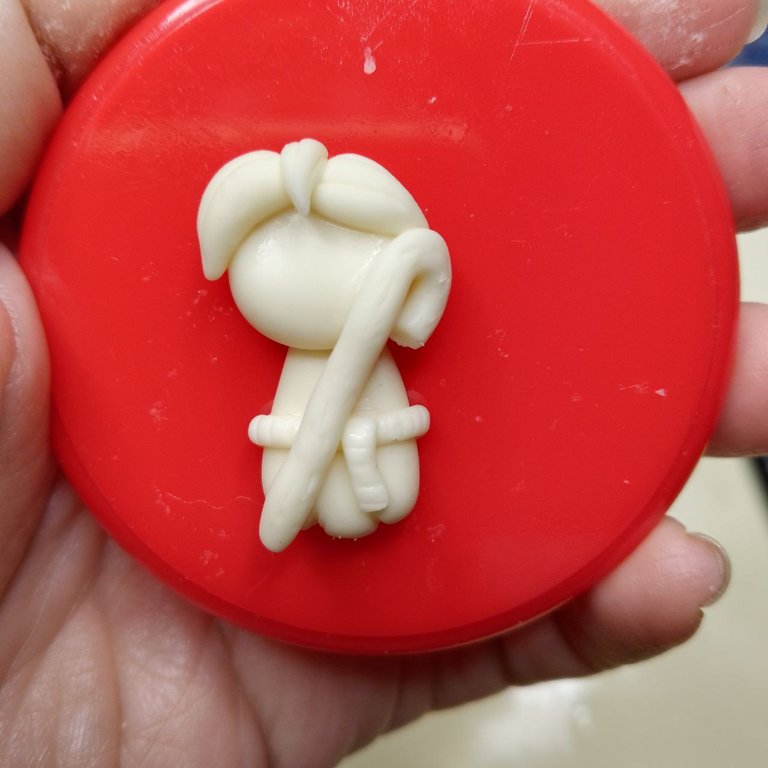
With the same process as for the belt but covering a larger diameter, we will form Joseph's staff. I made small longitudinal marks of different lengths along its entire length to give it the texture of wood. Finally, we attached it to the main piece next to Mary and Jesus.
Versión Español
Con el mismo proceso que para el cinto pero abarcando un diámetro mayor, formaremos el cayado de José. Hice pequeñas marcas longitudinales de distintos largos en toda su extensión para darle la textura de la madera. Finalmente, lo adherimos en la pieza principal junto a María y Jesús.
 |  |
|---|
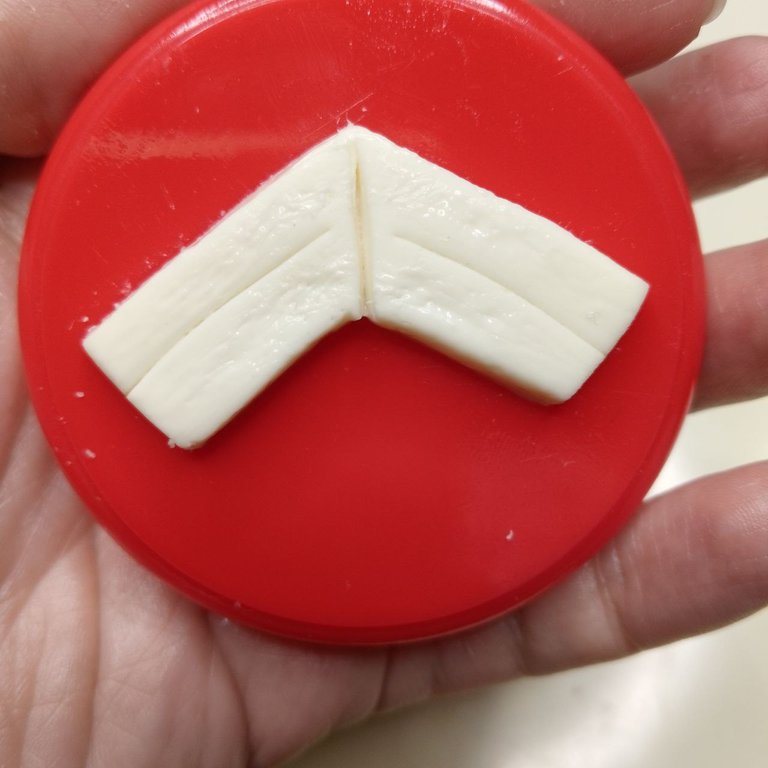
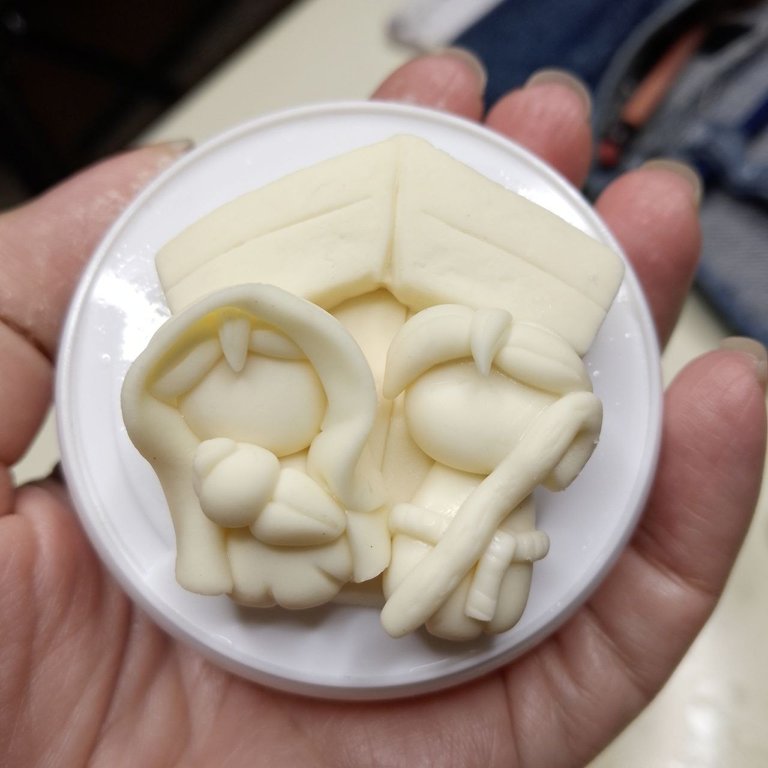
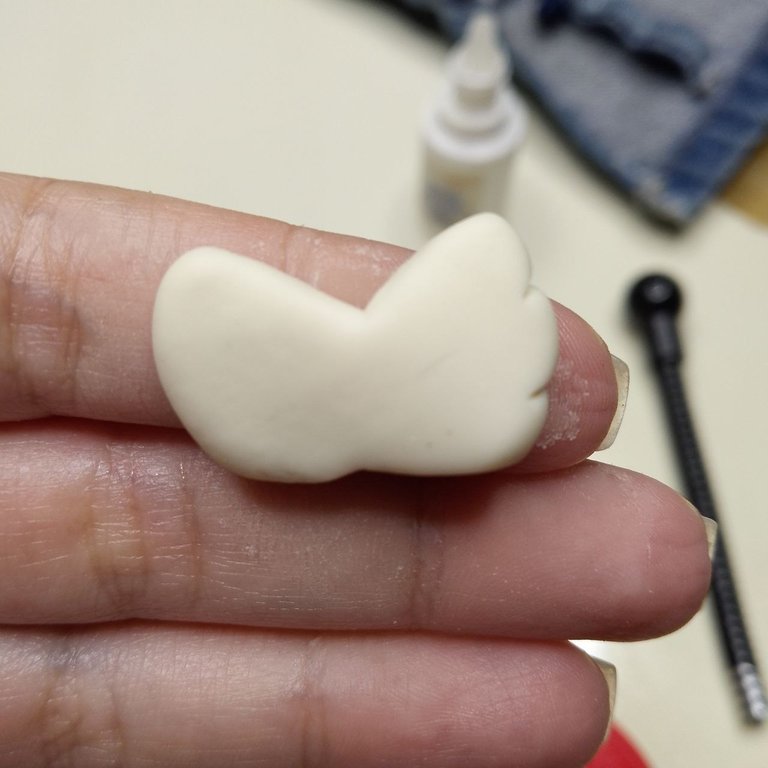
We will flatten again a portion of dough and cut a triangle at the top, as we will form the angel's wings. In the lower part we will also cut the excess in a slightly triangular shape but less pronounced than the one above. In addition, we will make notches with the cutter on the sides of the wings to represent the plumage.
Versión Español
Aplanaremos nuevamente una porción de masa y cortaremos un triángulo en la parte superior, pues formaremos las alas del ángel. En la parte inferior también cortaremos el excedente en forma un poco triangular pero menos pronunciada que el de arriba. Además, haremos muescas con el cúter a los lados de las alas para representar el plumaje.
 |  |
|---|
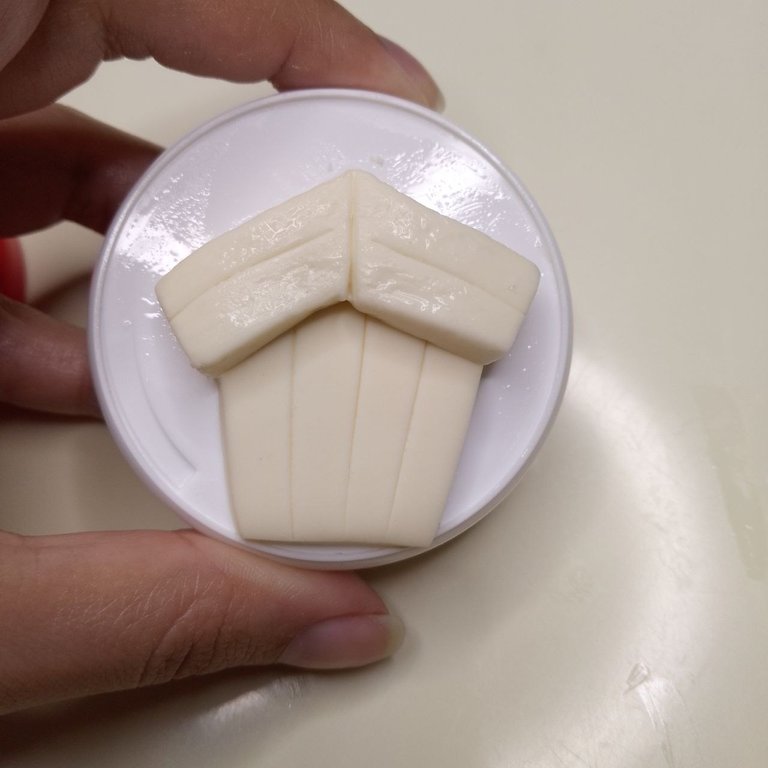
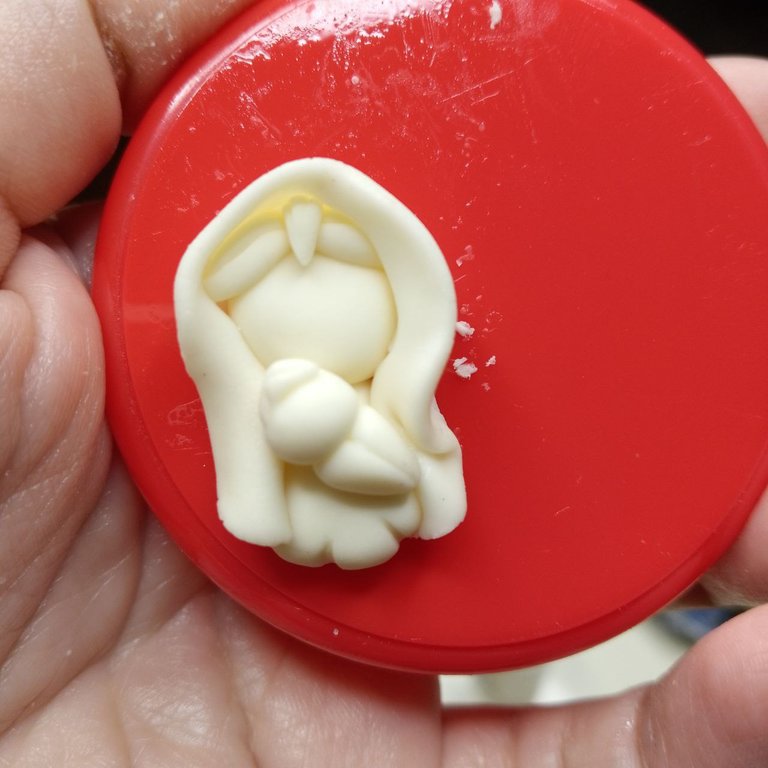
With the same procedure that has been described so far, we will form the head and hair of the angel and glue it on the wings previously glued to the main piece. In the case of the angel I also added some little ears that are nothing more than two miniature balls of dough that I pressed to the sides of his little head and I made a little mark with a needle so that they would not look so simple. I also added two little balls that represent his little hands, since this little angel is leaning out of the ceiling as if he were a curious child (laughs).
Versión Español
Con el mismo procedimiento que ha sido descrito hasta ahora formaremos la cabecita y cabello del ángel y lo pegaremos sobre las alas previamente pegadas a la pieza principal. En el caso del ángel también agregué unas pequeñas orejitas que no son más que dos bolitas miniatura de masa que presioné a los lados de su cabecita y les hice una marquita con una aguja para que no se vieran tan sencillas. También agregué dos bolitas que representan sus manitos, pues este angelito está asomado desde el techo como si de un niño curioso se tratara (risas).
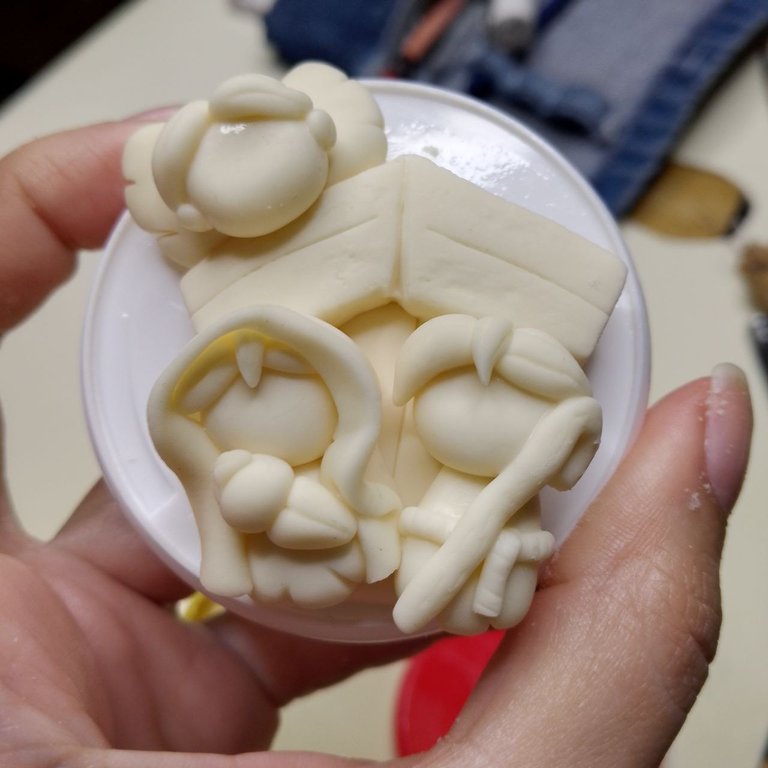
Ángel en el techo / Angel on the roof
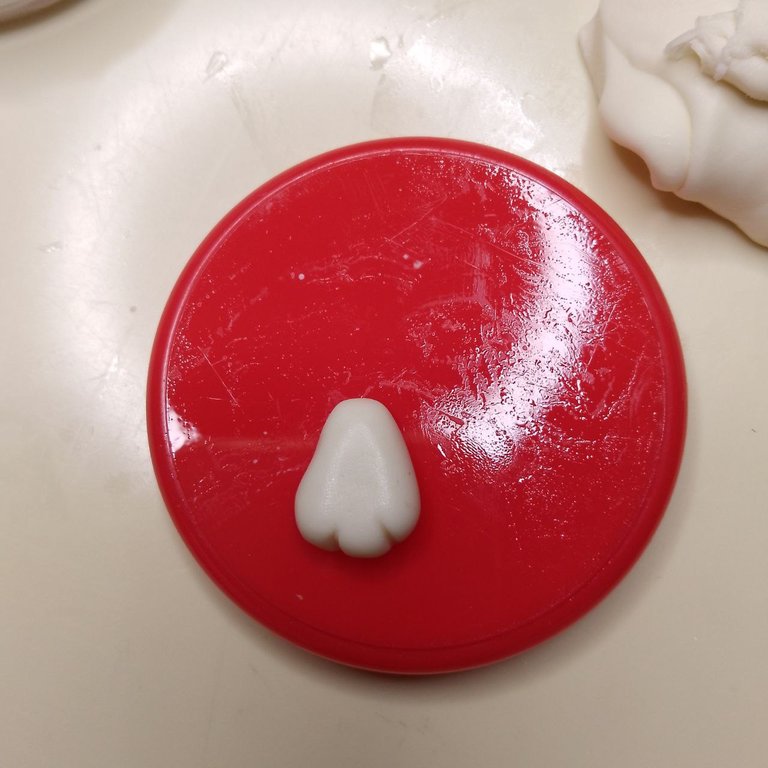
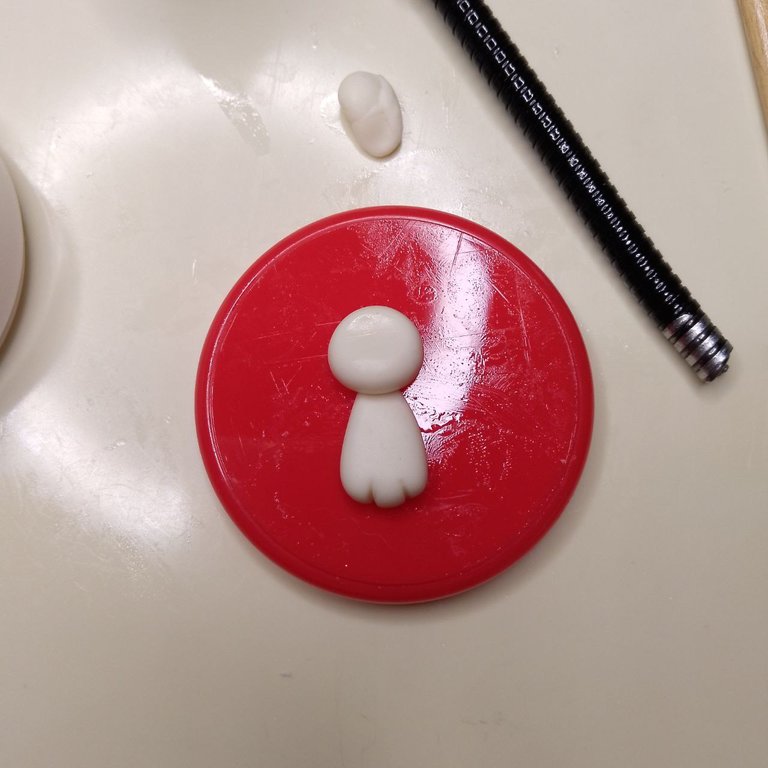
Then I realized that my angel was falling down, as the piece was very heavy and needed support, so I added a small ball of dough on the back to support it.
Versión Español
Luego me di cuenta de que mi ángel se caía, pues la pieza era muy pesada y necesitaba un soporte, por lo que agregué una bolita de masa en la parte de atrás que le sirvió para sostenerse.
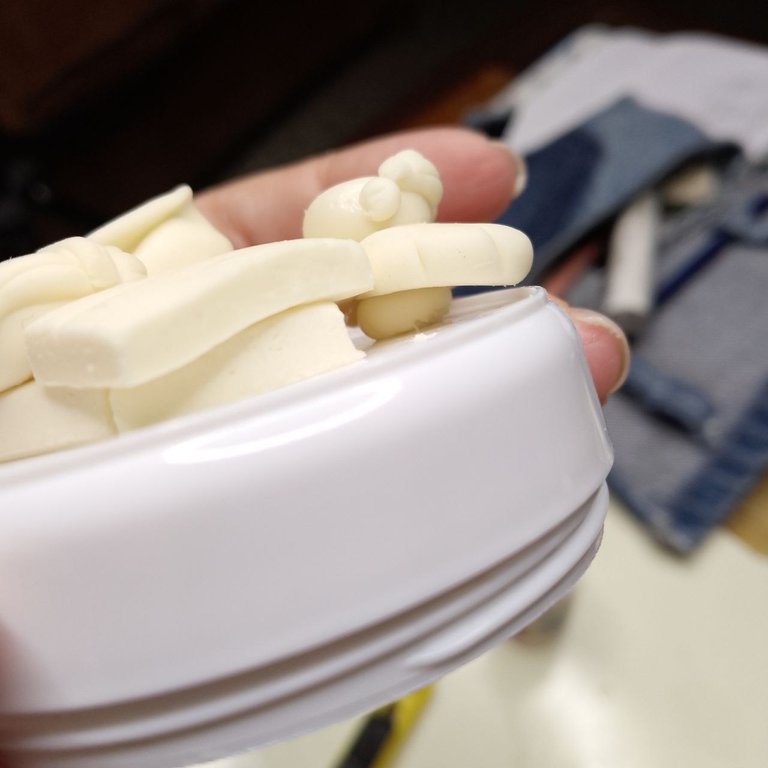
Agregando soporte / Adding support
For the star I flattened some dough and cut out the four-pointed star shape with the cutter, then adhered it to the main piece on the empty side of the roof.
Versión Español
Para la estrella aplané algo de masa y con el cúter recorté la forma de estrella de cuatro puntas, luego la adherí a la pieza principal en el lado vacío del techo.
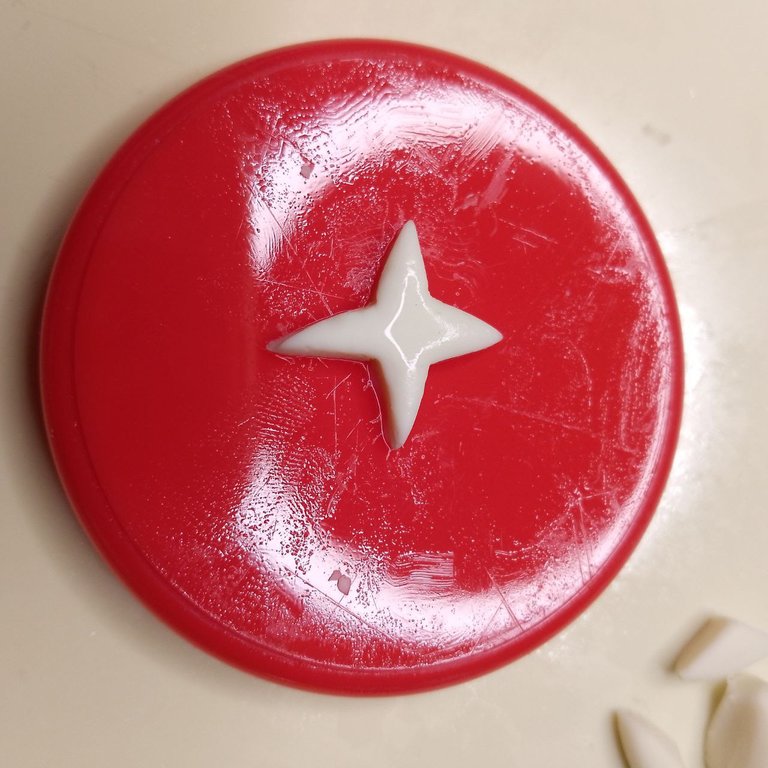 |  |
|---|
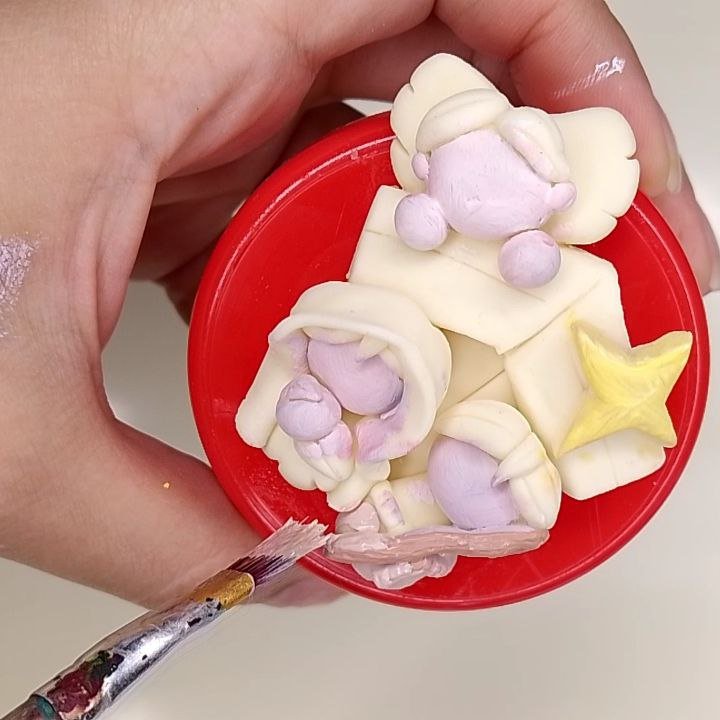
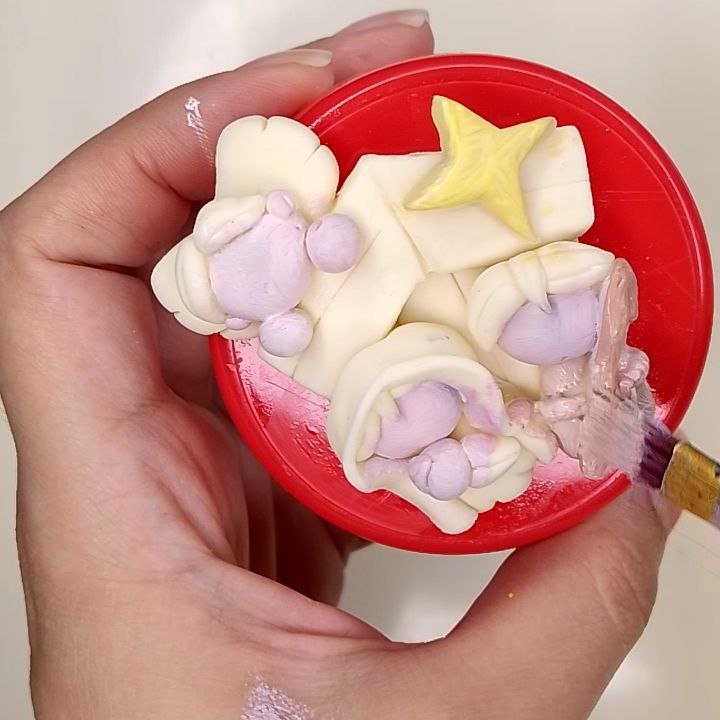
Then came my favorite moment, coloring the piece. For this task, I used my cold paints, only white and primary colors. The idea here was for the colors to look mixed together, I didn't want anything defined so I know in the first images the faces look like they are blue, but trust the process (laughs).
Versión Español
Llegó mi momento favorito, el de darle color a la pieza. Para esta tarea, utilicé mis pinturas al frío, solo blanco y colores primarios. La idea aquí era que los colores se vieran mezclados entre ellos, no quería nada definido así que ya sé que en las primeras imágenes las caras se ven como si fuesen de color azul, pero confía en el proceso (risas).
 |  |  |  |
|---|
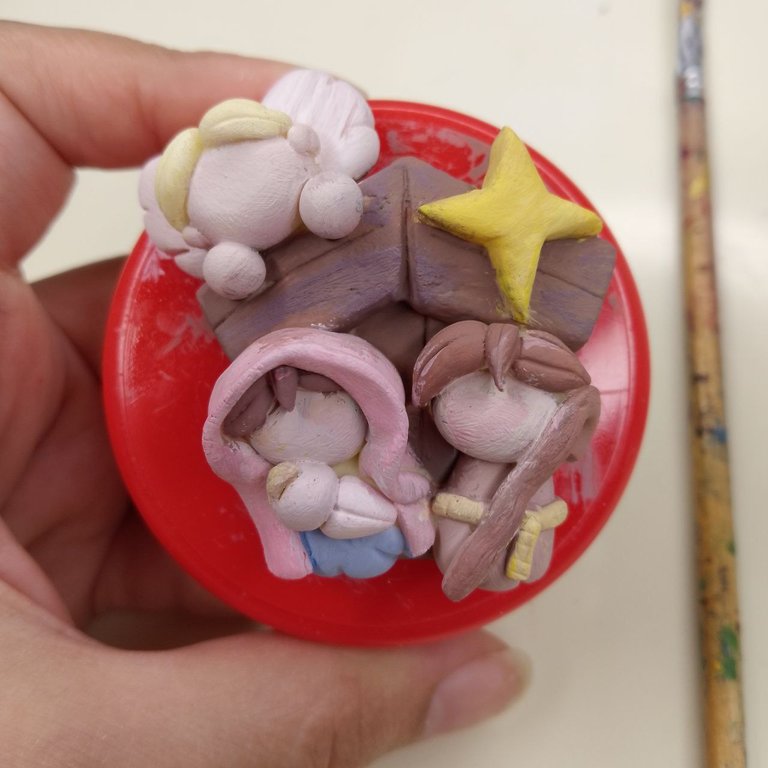
Finally, I added details, like her eyes or the blush on her cheeks and when everything was dry, I proceeded to add glitter because I love it (laughs) and Christmas seems like the perfect time to glitter, so I added gold eyeshadow to the star and the angel's hair and white fairy dust to the rest of the piece.
Versión Español
Por último, agregué detalles, como sus ojos o el rubor en sus mejillas y cuando ya secó todo, procedí a agregar brillo porque me encanta (risas) y pues navidad parece la época perfecta para brillar, así que a la estrella y al cabello del ángel les añadí sombra de ojos dorada y al resto de toda la pieza le añadí polvo de hadas blanco.
 |  |
|---|
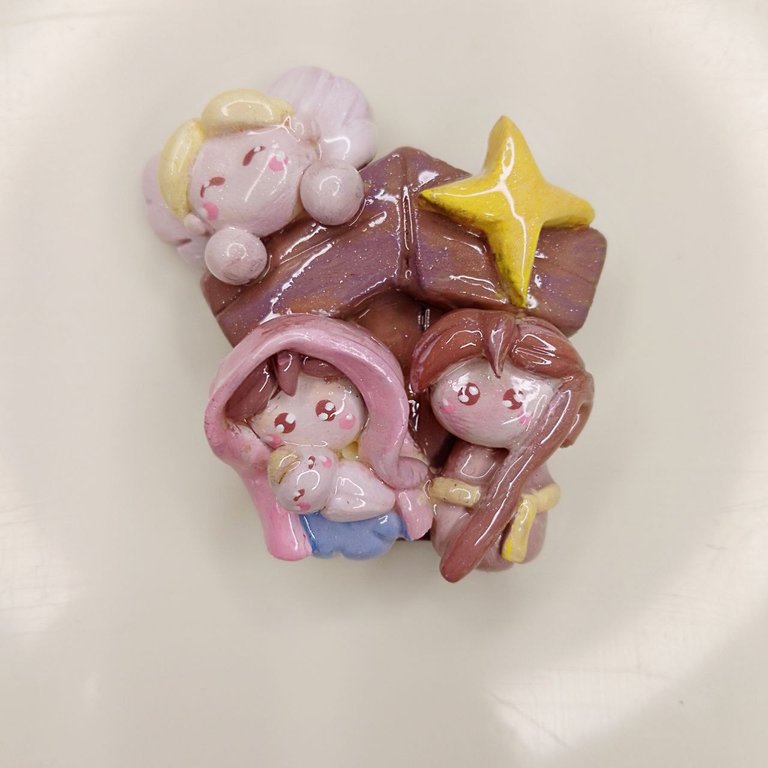
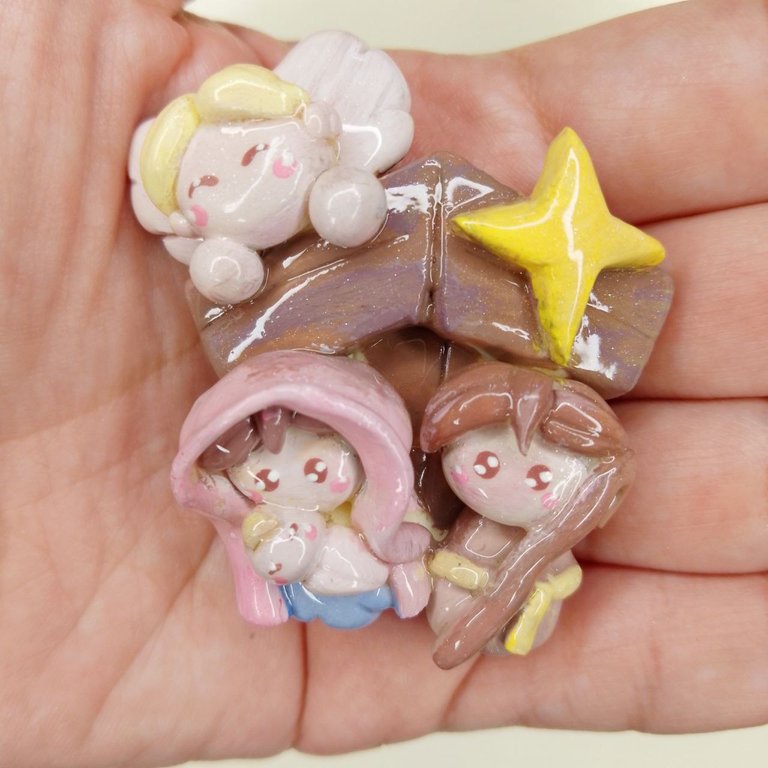
Finally, I applied a coat of Top Coat and lamp cured and this was the result:
Versión Español
Finalmente, apliqué una capa de Top Coat y curé en lámpara y este fue el resultado:
 |  |  |
|---|
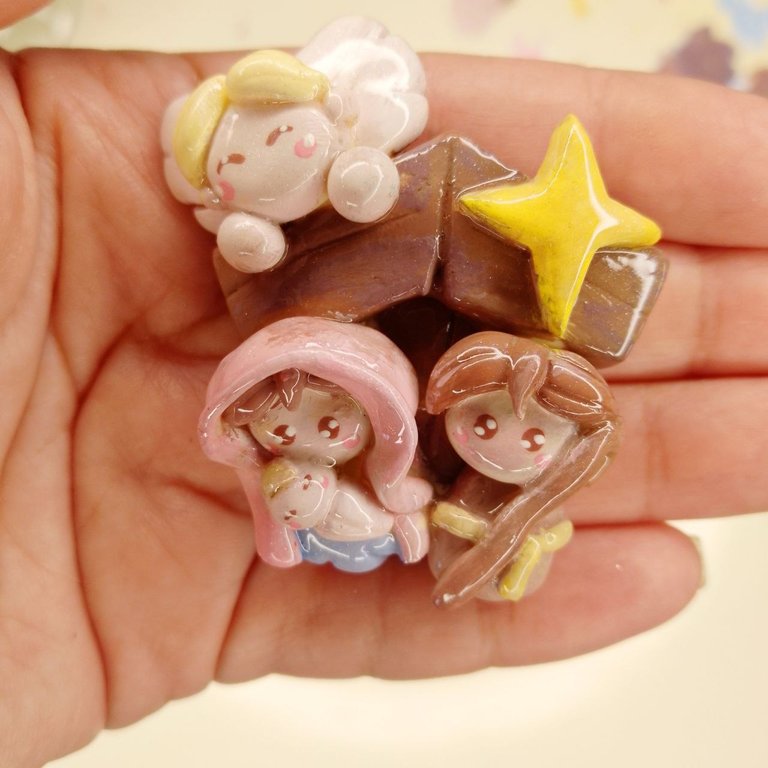
Final comments:
Did you see that the little faces were not blue in the end (laughs), the truth is that I was confident in my process but sometimes the brush was against me, but it was fun, because I got just what I wanted, that mix of colors where nothing is perfect or within its line but that is precisely its beauty.
I think the color I had the hardest time forming was brown, I don't know why but it was hard work.
Do not forget that you must let the piece dry well before painting it and likewise, you must let the paint dry well before using the top coat.
As my lamp is not very powerful, I cure up to four minutes per side just to make sure everything is perfect, however, you can leave it unvarnished that way and it still looks very nice, because you can see the brush strokes and gives a very interesting effect that goes very well with the nativity scene idea.
This ornament is quite versatile, because although it can be an ornament on a table, you can also glue a cord on the back and turn it into a backdrop.
I colored the initial cold porcelain beige so that the final result would have a slightly brown undertone.
The oil was used for the surfaces where I worked with the figures, to prevent them from sticking too much.
Versión Español
Comentarios finales:
¿Vieron que las caritas no quedaron azules al final? (risas), la verdad confiaba en mi proceso pero a veces el pincel se ponía en mi contra, pero fue muy divertido, porque conseguí justo lo que quería, esa mezcla de colores en donde nada queda perfecto ni dentro de su línea pero esa es precisamente su belleza.
Creo que el color que más me costaba formar era el marrón, no sé por qué pero me daba trabajo.
No olviden que deben dejar secar bien la pieza antes de pintarla y así mismo, deben dejar secar bien la pintura antes de usar el top coat.
Como mi lámpara no es muy potente, llego a curar hasta cuatro minutos por lado solo para asegurarme de que todo quede perfecto, sin embargo, puedes dejarlo sin barnizar de esa forma e igualmente queda muy bonito, porque se ven los trazos del pincel y da un efecto muy interesante que va muy bien con la idea de pesebre.
Este adorno es bastante versátil, porque si bien puede ser un adorno sobre una mesa, también puedes pegarle un cordoncito en la parte trasera y convertirlo en una bambalina.
La porcelana fría inicial la coloreé de beige para que tuviera un subtono un poco marrón el resultado final.
El aceite lo utilicé para las superficies donde trabajé con las figuras, para así evitar que se adhirieran demasiado.
Mis participaciones anteriores / My previous participations:
Snowman plush toy (eng/esp)
Christmas decorative mobile (eng/esp)
¡Muchas gracias por leerme!
Thank you so much for reading me!
Own photographs, taken with my Tecno Spark 10C.
Translated to English with DeepL.
Versión Español
Fotografías propias, tomadas con mi Tecno Spark 10C.
Traducido al inglés con DeepL.

Este nacimiento te quedó hermoso me encantó cómo hiciste cada pieza, toda una cuchitura.
Gracias por compartirnos tu paso a paso y excelente proceso creativo.
!discovery 40
Muchísimas gracias por todo tu apoyo💖 de verdad me esforcé mucho en esta artesanía y me encantó el resultado🥰 me alegra que también te gustara a ti 🤗
This is a beautiful nativity scene, your work is beautiful. Excellent participation in the contest. Thank you for sharing your creative process with the community.Best of luck and Merry Christmas
Thank you so much💖 I'm so glad you liked it and I enjoyed the process very much for hacerlo☺️ merry christmas🎄🤗
Thank you so much for your support 💖
This post was shared and voted inside the discord by the curators team of discovery-it
Join our Community and follow our Curation Trail
Discovery-it is also a Witness, vote for us here
Delegate to us for passive income. Check our 80% fee-back Program
Demasiado hermoso.
Eso es algo que, con gusto, tendría en mi escritorio como adorno!!!
Muchas gracias🤗 tendré que hacer uno para tu escritorio entonces🤭❤️
Congratulations @mavilan30! You have completed the following achievement on the Hive blockchain And have been rewarded with New badge(s)
Your next target is to reach 400 replies.
You can view your badges on your board and compare yourself to others in the Ranking
If you no longer want to receive notifications, reply to this comment with the word
STOPCheck out our last posts: