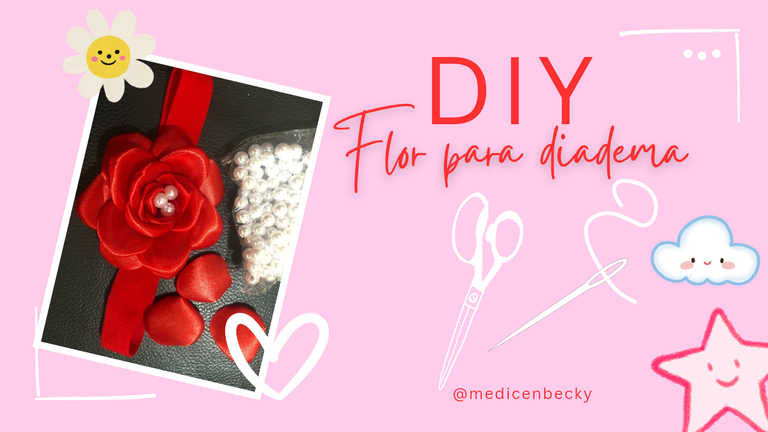

Hola hola gente bonita de Hive, tenía un tiempo perdida por esta red, porque mi celular se había dañado. Ya hoy nos reactivamos y que mejor forma de empezar que mostrándoles el proceso de realización de esta flor super linda, ideal para una diadema de niña.
Hello hello beautiful people of Hive, I had been lost on this network for a while, because my cell phone had been damaged. Today we are back on track and what better way to start than by showing you the process of making this super cute flower, ideal for a girl's headband.
Necesitamos: || Need:
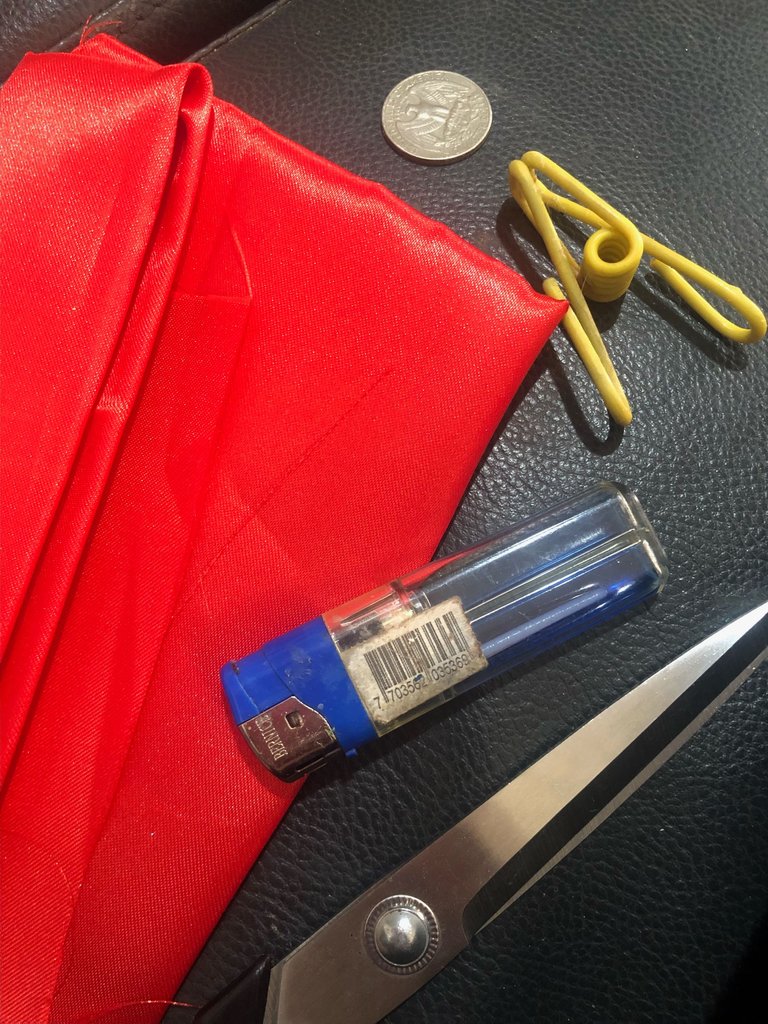
✓ Tela o cinta de razo del color que más te guste.
✓ Tijeras para tela
✓ Silicón en barra
✓ Encendedor
✓ Una moneda de cualquier denominación y un gancho de ropa.
✓ Satin fabric or ribbon in the color you like best.
✓ Fabric scissors
✓ Glue stick
✓ Lighter
✓ A coin of any denomination and a clothes hanger.
Procedimiento: || Procedure:
Paso 1:
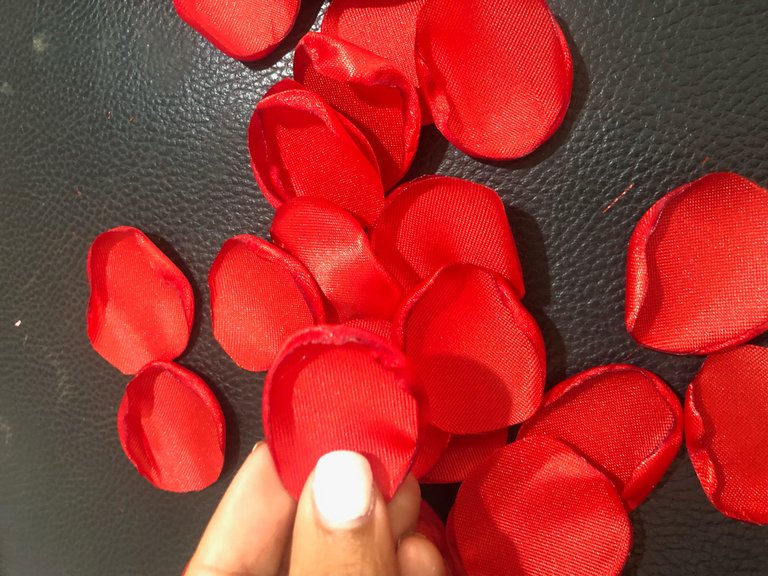
Cortar círculos un poco más grandes que la moneda que seleccionaste.
Cut circles a little larger than the coin you selected.
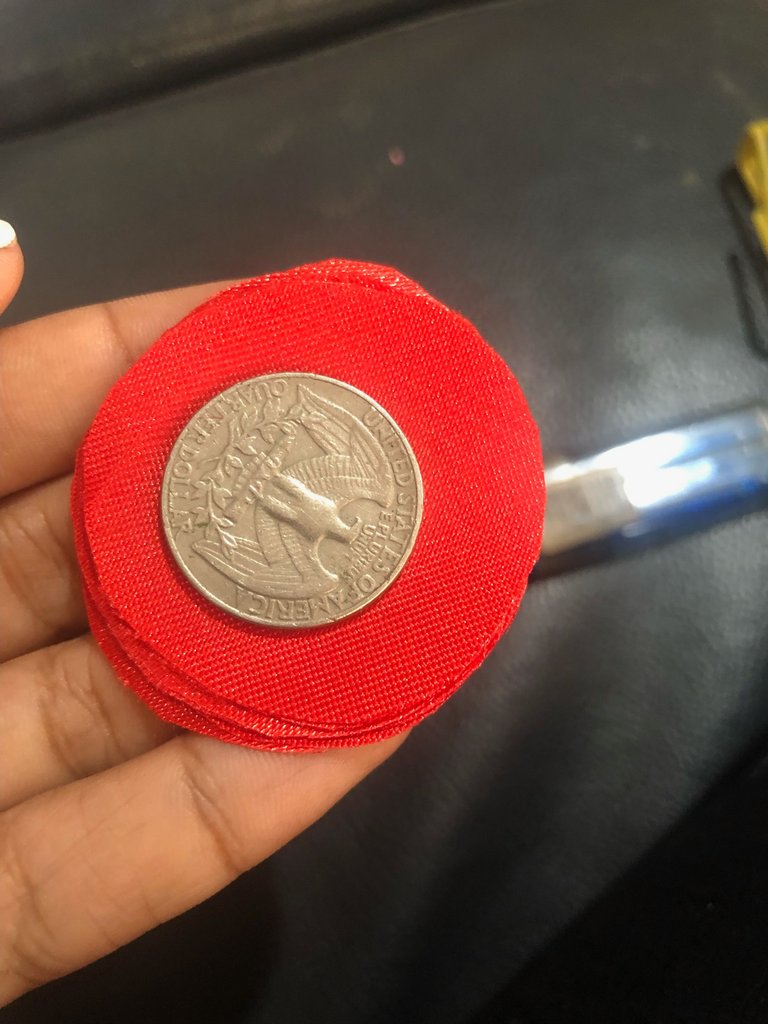
Paso 2:
Para que el proceso sea más fácil vamos a hacer una pinza con la moneda y el gancho. Para esto solo hay que pegar la moneda a un extremo del gancho yo utilicé pega loca, pueden usar algún pegamento resistente a cualquier superficie, dejar secar y listo.
To make the process easier, we are going to make a clamp with the coin and the hook. For this you just have to glue the coin to one end of the hook. I used glue stick, you can use any glue that is resistant to any surface.
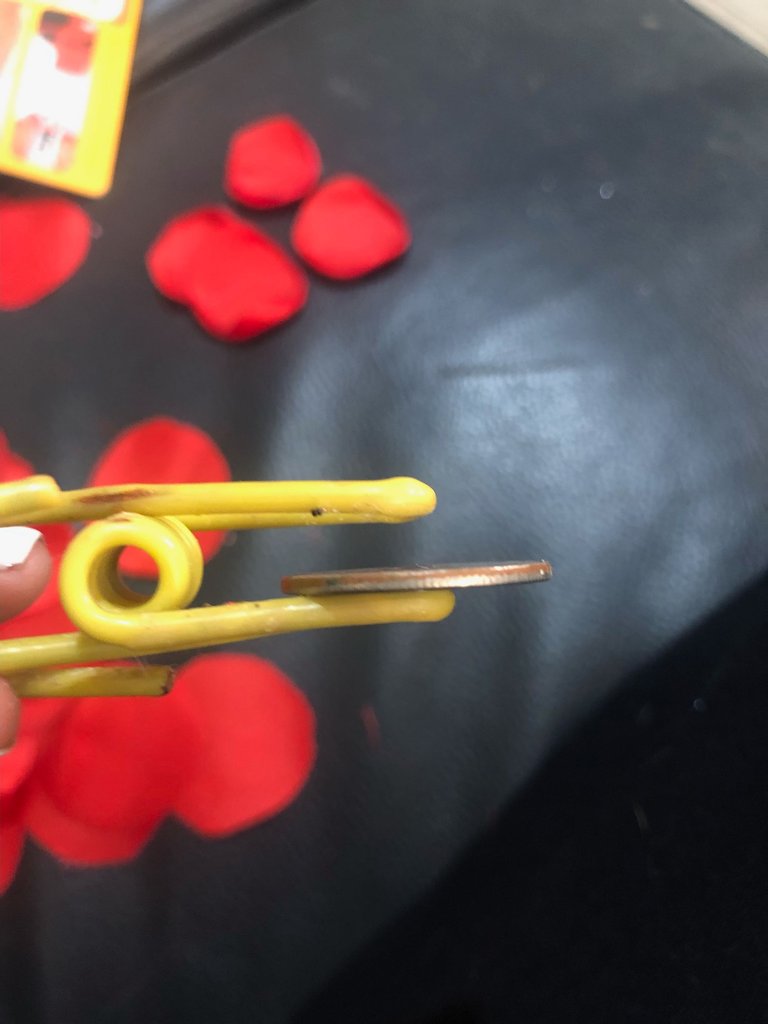
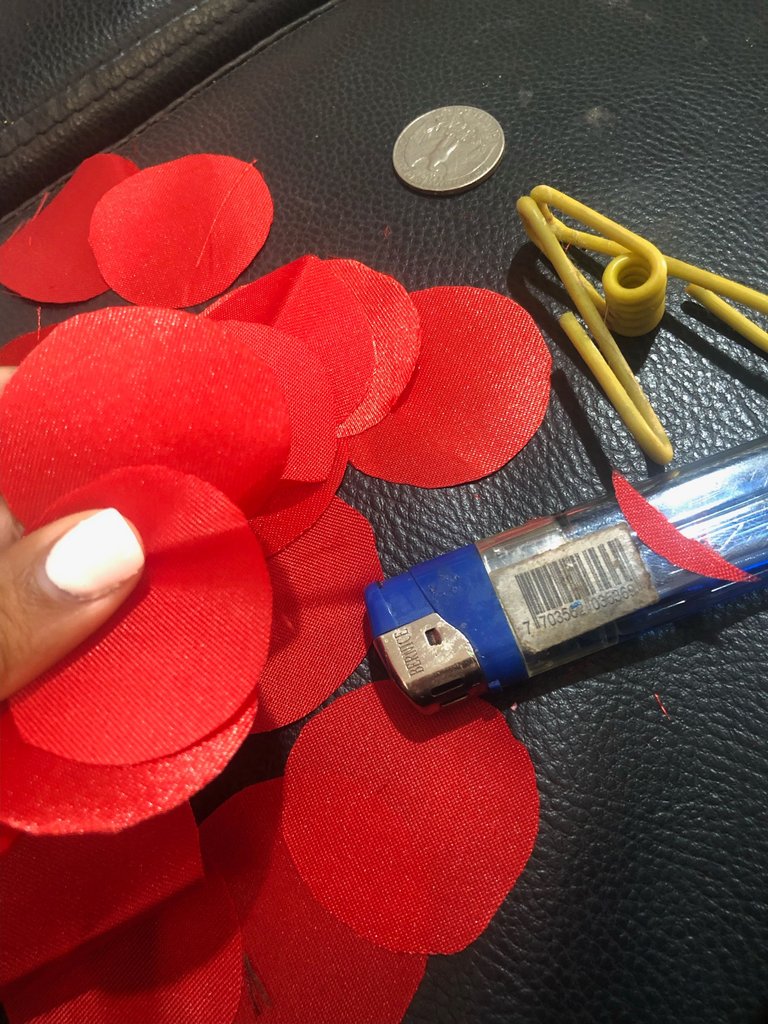
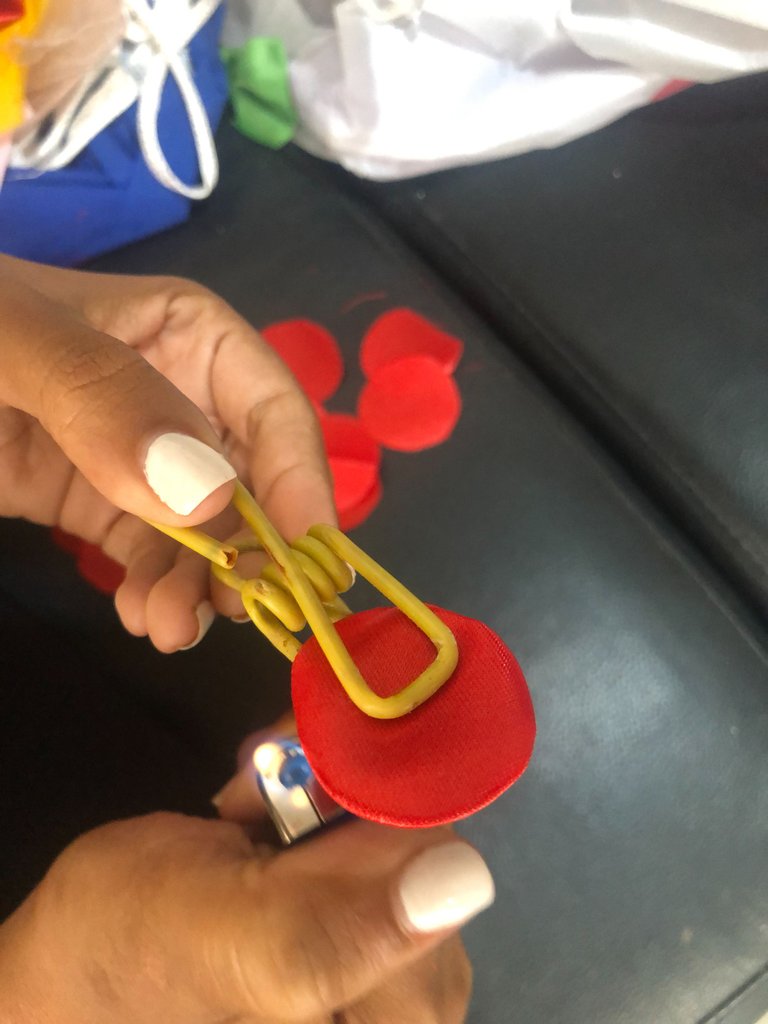
Paso 3:
Ahora se ubica un círculo dentro del gancho y con ayuda del encendedor se queman los bordes y repetir con todos los pétalos.
Now place a circle inside the hook and with the help of the lighter burn the edges and repeat with all the petals.
Paso 4:
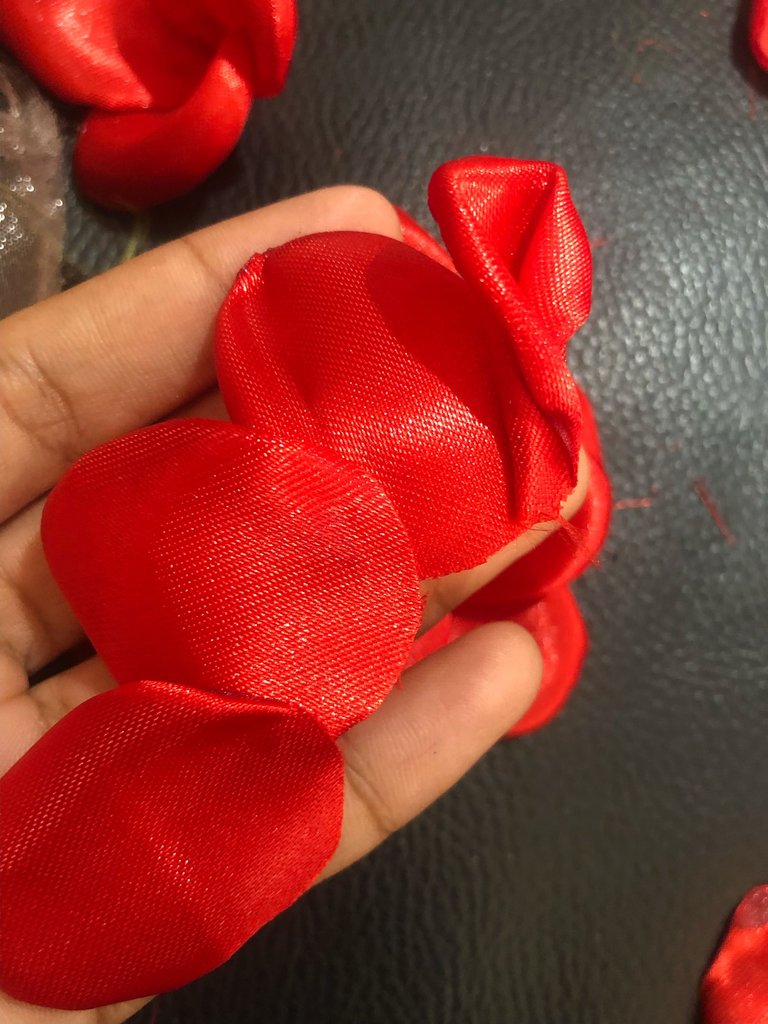
Ahora se unen los pétalos y se forman flores. Yo realicé una de 7, una de 5, y una de 3.
Now the petals are joined together and flowers are formed. I made one with 7, one with 5, and one with 3.
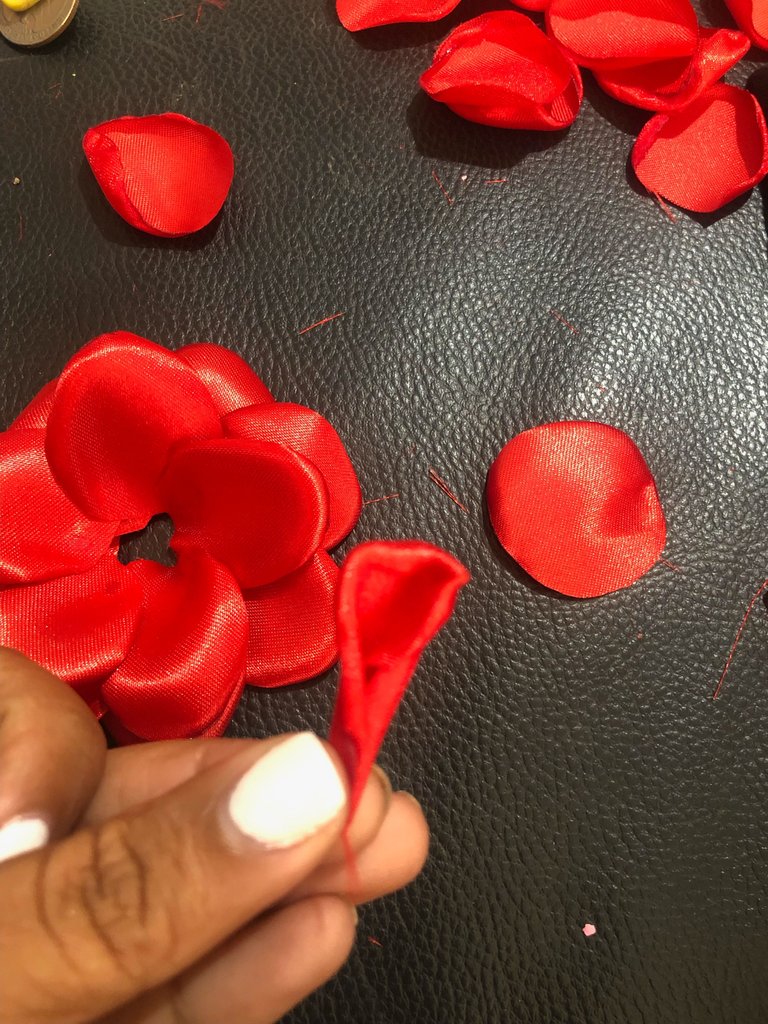
Paso 5:
Para el centro se doble un pétalo de esta forma y se une a tres pétalos más, luego se enrollar en si mismo y queda algo asi
For the center, fold a petal in this way and join it to three more petals, then roll it up on itself and it looks something like this
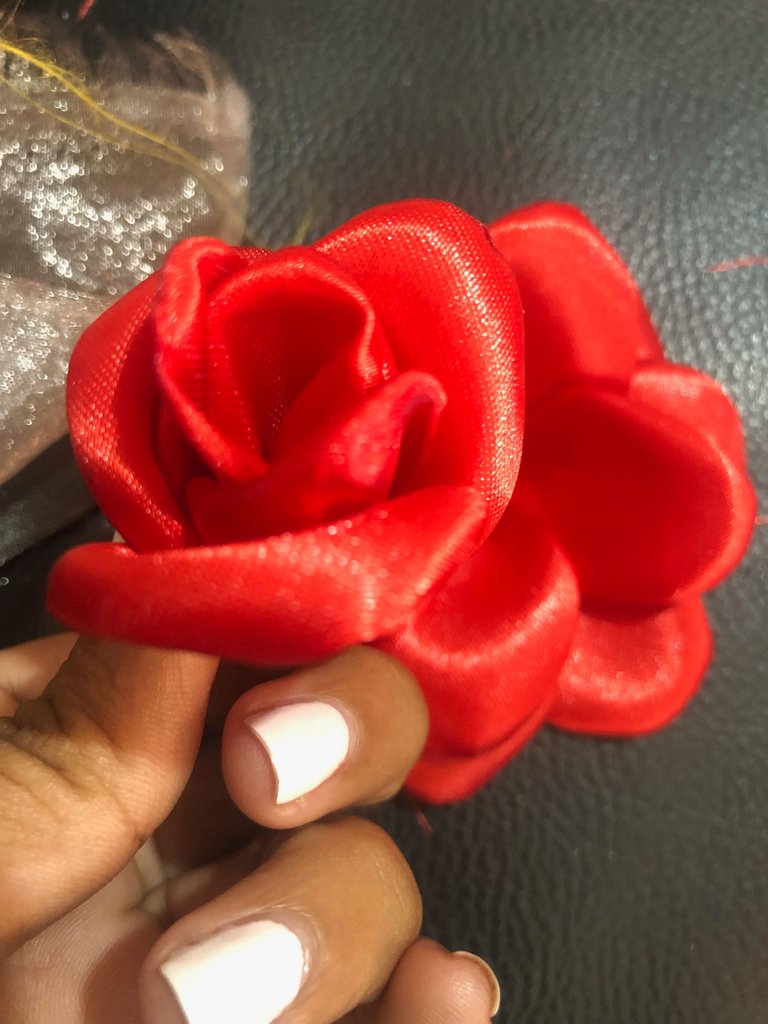
Paso 6:
Ya teniendo todos los pasos listos, es hora de armar la flor, y queda de esta forma.
Now that you have all the steps ready, it is time to put the flower together, and it looks like this.
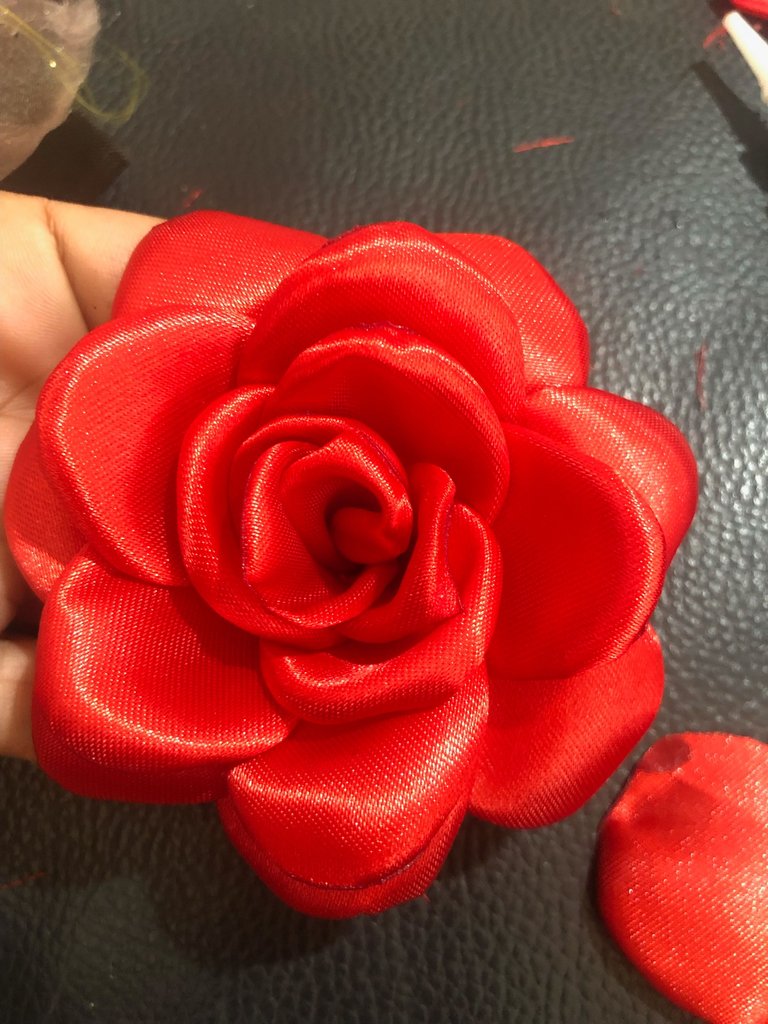
Ya teniendo nuestra flor lista, yo le agregué perlas en el centro, lo cual es totalmente opcional, la podemos utilizar para múltiples cosas, de hecho se puedo combinar con otras flores y hacer una diadema grande y hermosa. Pero como este es para una bebé pequeña la dejé solita. Luego le coloqué una elástica y así quedó está preciosura.
Now that we have our flower ready, I added pearls in the center, which is totally optional, we can use it for multiple things, In fact, you can combine it with other flowers to make a big, beautiful headband. But since this one is for a little baby, I left it alone. Then I put an elastic on it and this is how it turned out.

Así culminamos el post de hoy, hacer estás flores me trae muchos recuerdos porque hacer diademas fue uno de mis ingresos por un largo tiempo. Gracias por acompañarme en este tutorial, nos vemos pronto con más 🌷🌹🌼
This is how we end today's post, making these flowers brings back many memories because making headbands was one of my incomes for a long time. Thanks for joining me in this tutorial, See you soon with more 🌷🌹🌼

This is so beautiful and I love it so much
Just a perfect colour and a detailed explanation.
Thank you for sharing this with us.
It is so beautiful and lovely. Love its design and color. You did a great job! Thank you for sharing this. Keep it up!
que bello y elegante se ve!
how beautiful and elegant it looks!
Thanks 🥺❤️
This looks so nice and lovely.
Well done
!diy
You can query your personal balance by
@stevenson7 just sent you a DIY token as a little appreciation for your post dear @medicenbecky! Feel free to multiply it by sending someone else !DIY in a comment :) You can do that x times a day depending on your balance so:!DIYSTATSEsta diadema ha quedado hermosa! El color y diseño de la flor con la tela de raso en combinación con las perlas le da un aspecto muy elegante✨