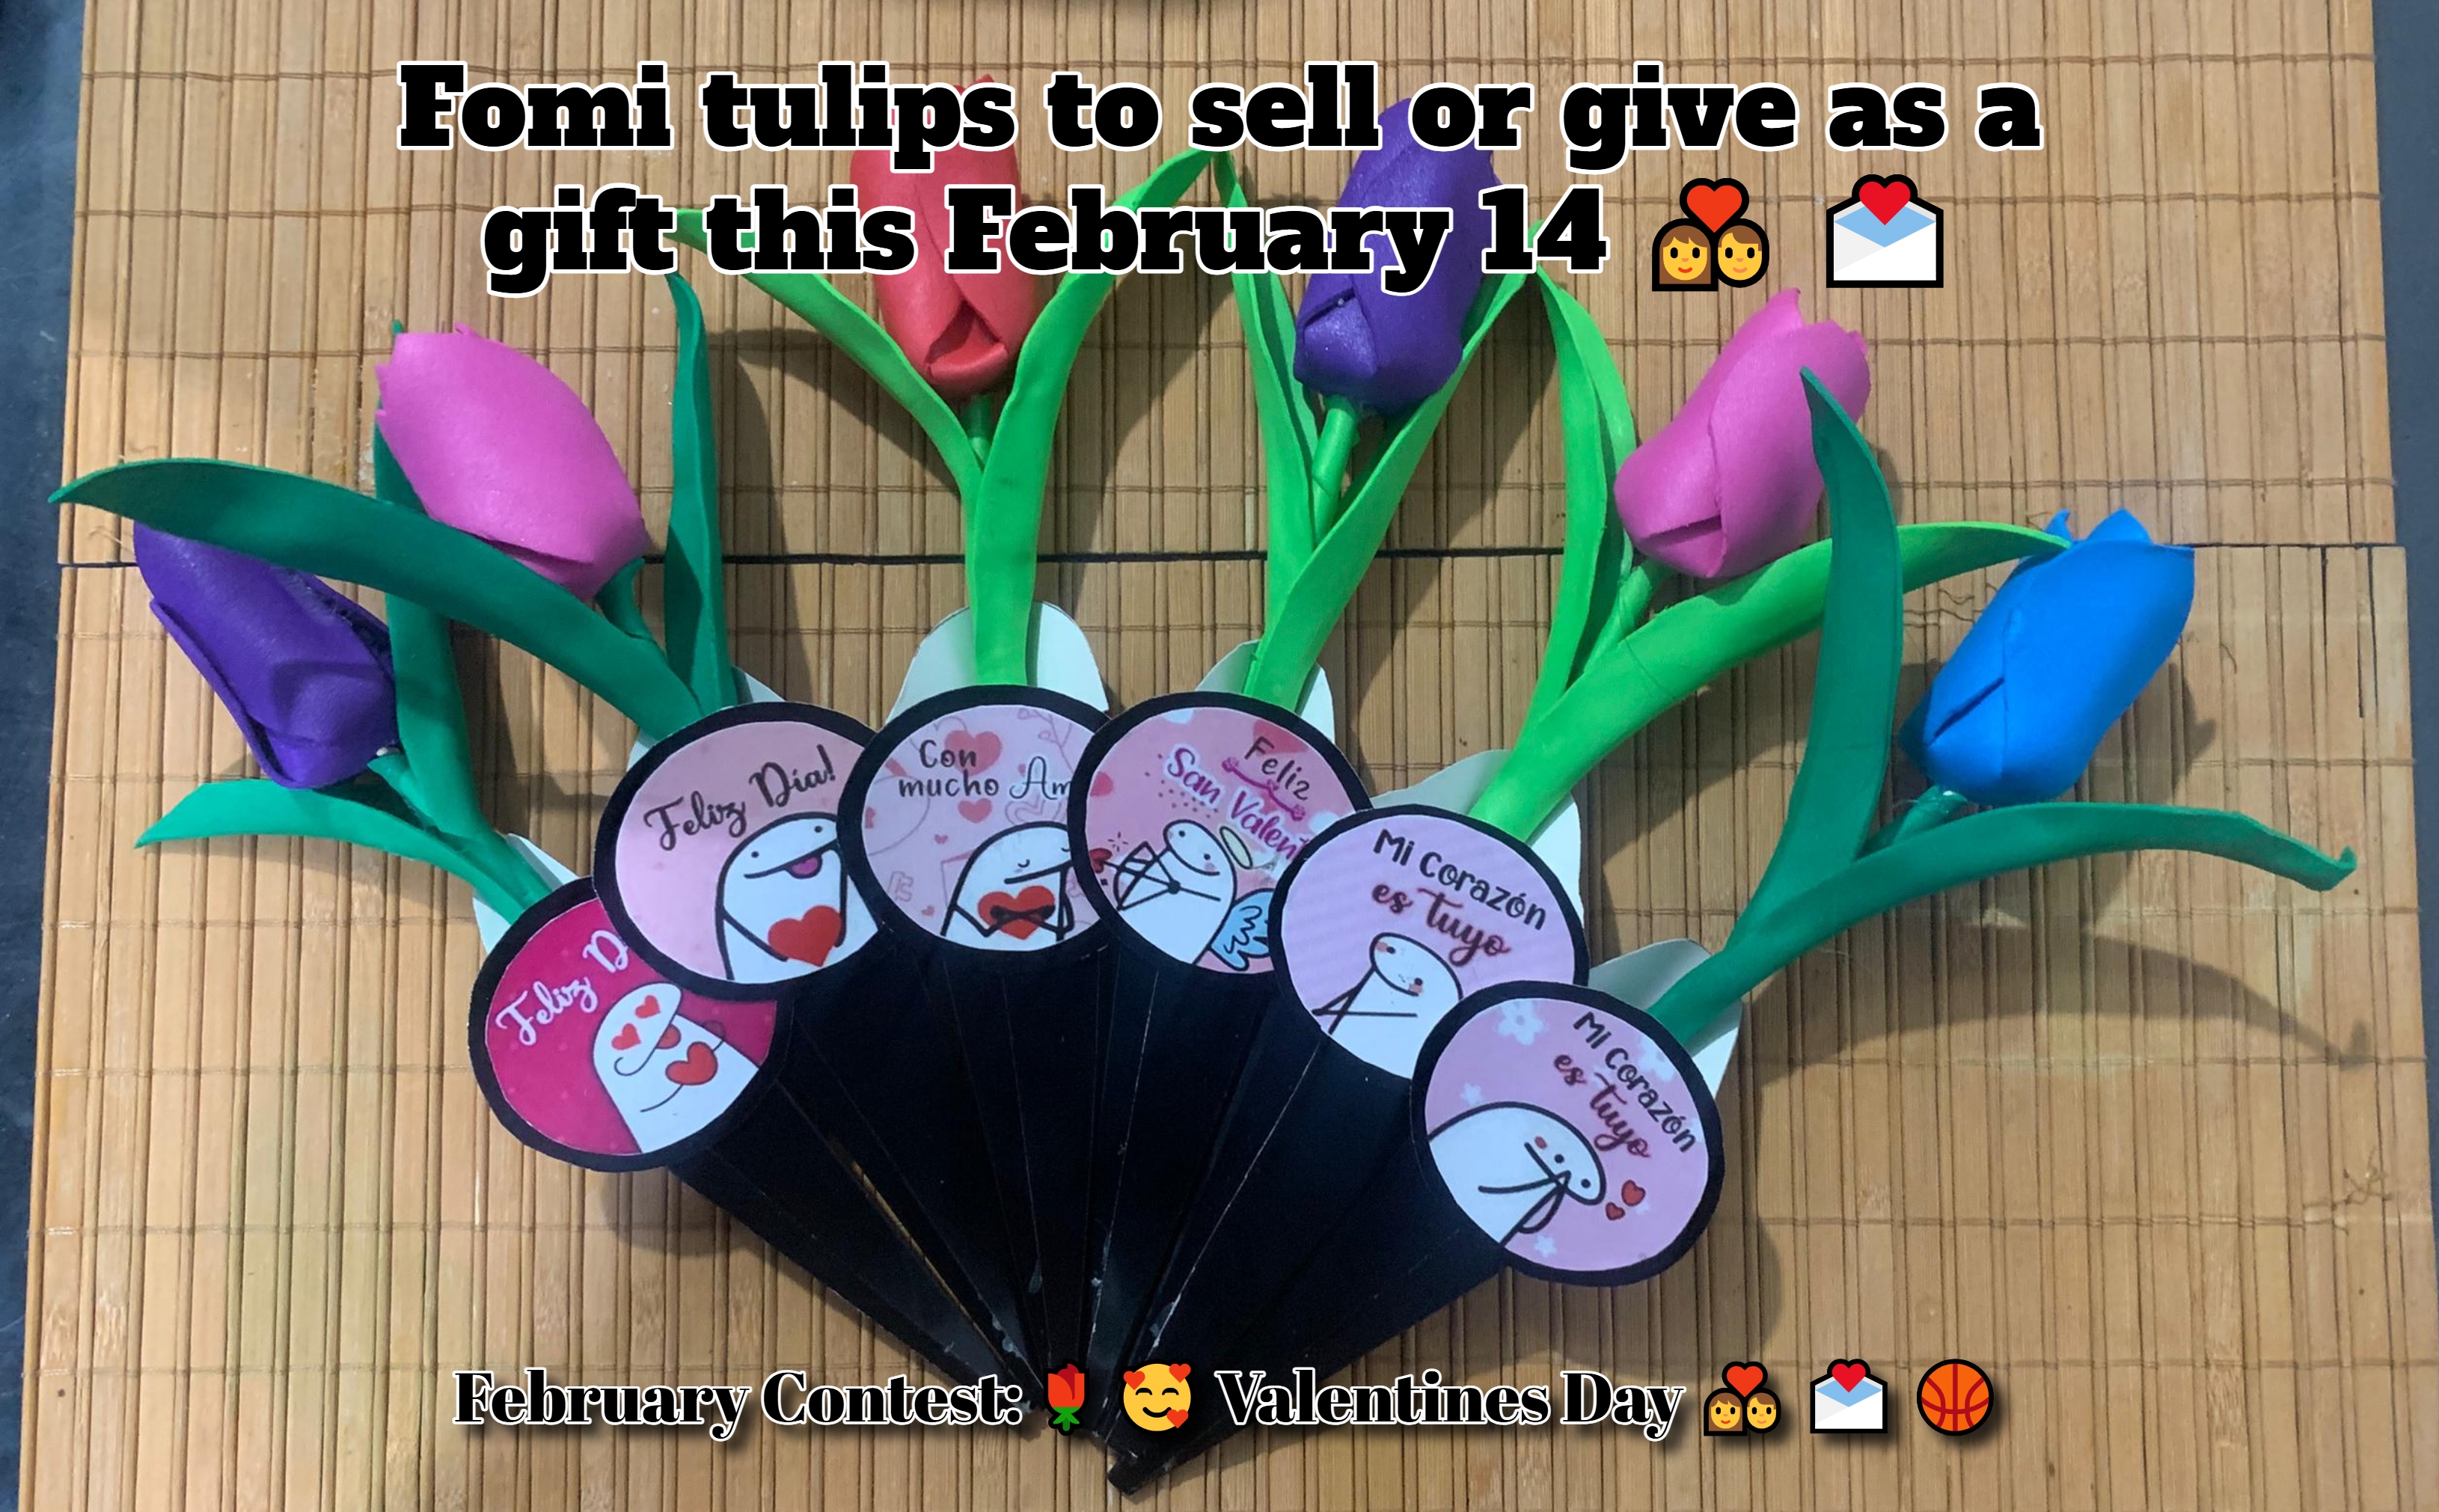
Hello dear friends of the DIYhub community, it's a pleasure to greet you again through this medium and share with you a little bit of what I do in my day-to-day life. This time, participating in the February Contest: 🌹 🥰 Valentines Day 💑 💌
It's nice to dedicate time to celebrate Valentine's Day in one way or another, and there are people like me who don't have a partner but have a strong desire to create small crafts for these beautiful and special occasions. So, I got down to work and also took the opportunity to start offering and selling the little things I make. Today, I bring you the step-by-step process of how I made these small foam tulips to give away or sell this February 14th.
To begin with, I made 6 of these details, and the materials needed are:
- 3 colored foams for the petals (one for every two tulips)
- 2 green foams for the stem and leaves (2 for every 3 tulips)
- 6 tall toothpicks for the stems (one for each tuliapn)
- Two hot glue sticks and a glue gun for them
- A sheet of double-sided cardboard
- A sheet of stickers related to the date
Other tools to use:
- A clothes iron to mold the foam
- A cutter or scissors
- A ruler, pen, pencil and a sheet of paper to make molds
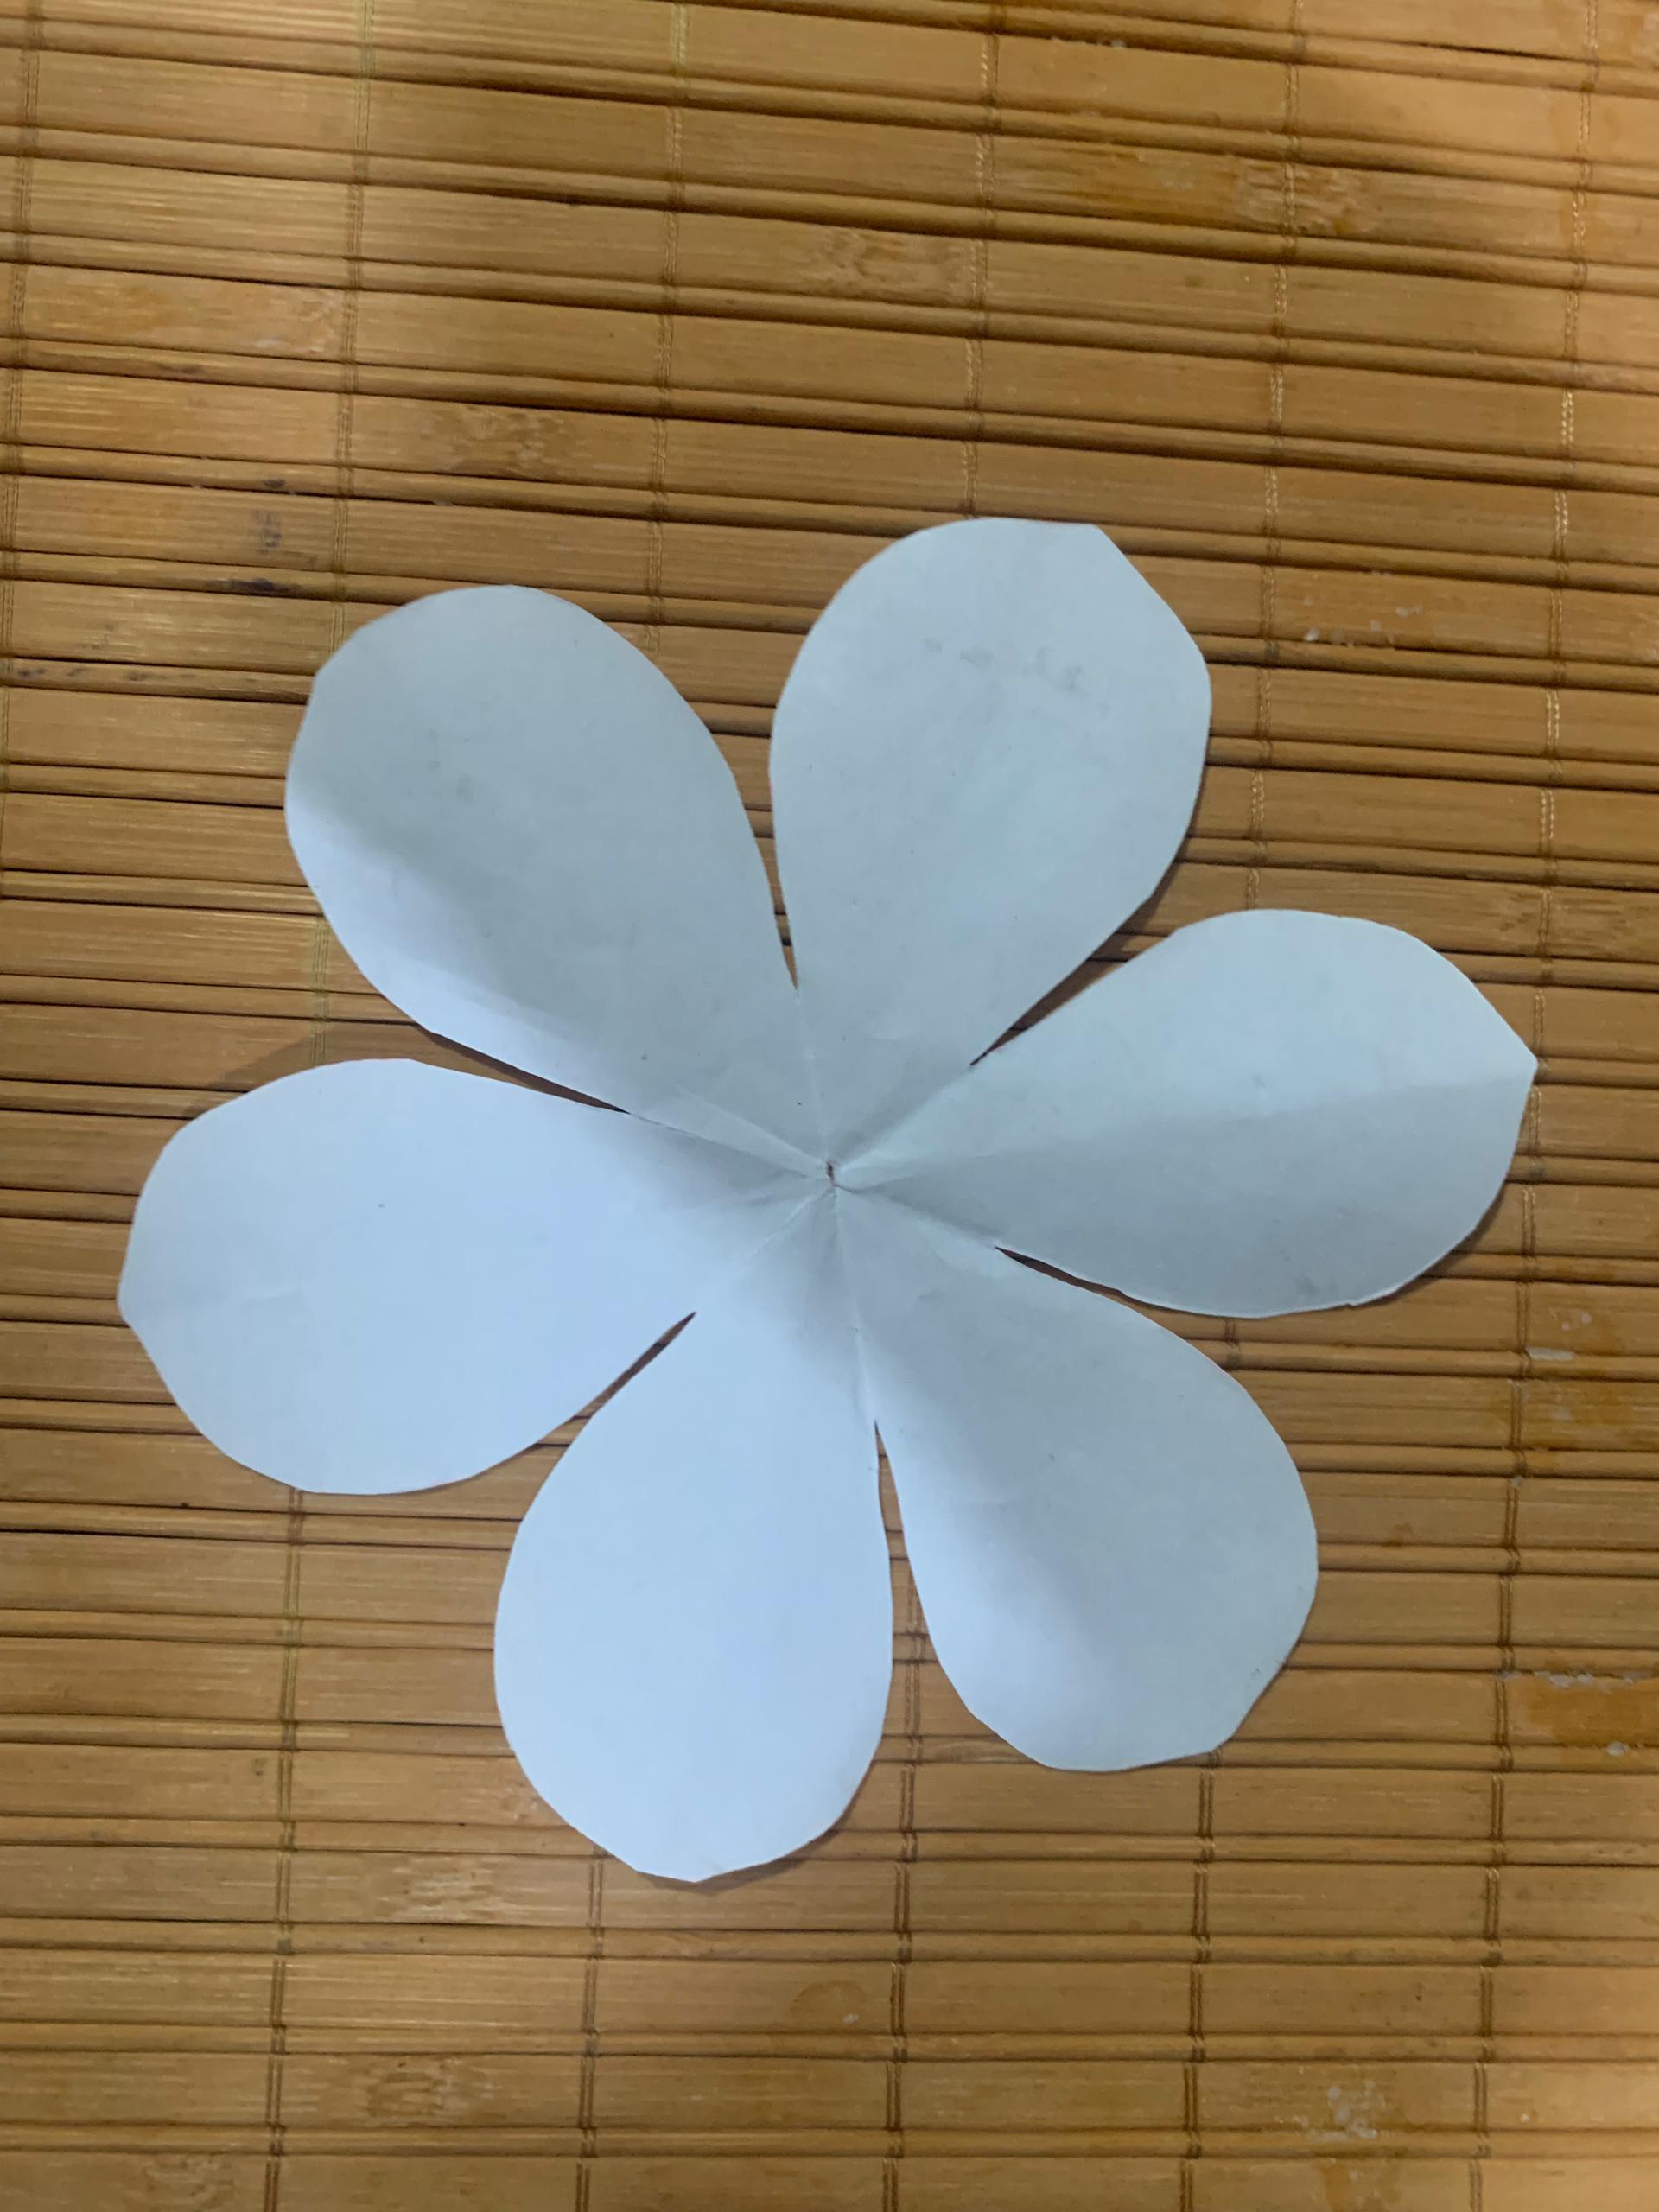
For the flower petals:
 | .jpeg) | .jpeg) |
|---|
I started by creating a mold using a piece of paper, pencil, and scissors. I made this mold from a circle folded in half and then into three equal parts, from which I cut out the shape of a water drop. When I unfolded the paper, the shape of a flower with 6 petals emerged.
I repeated the figure of this mold 6 times on colored foam, tracing it with a pencil and cutting it with a cutter and scissors in small spaces. I was able to make two of these figures on each foam sheet.
For the leaves and stem:
.jpeg) |
|---|
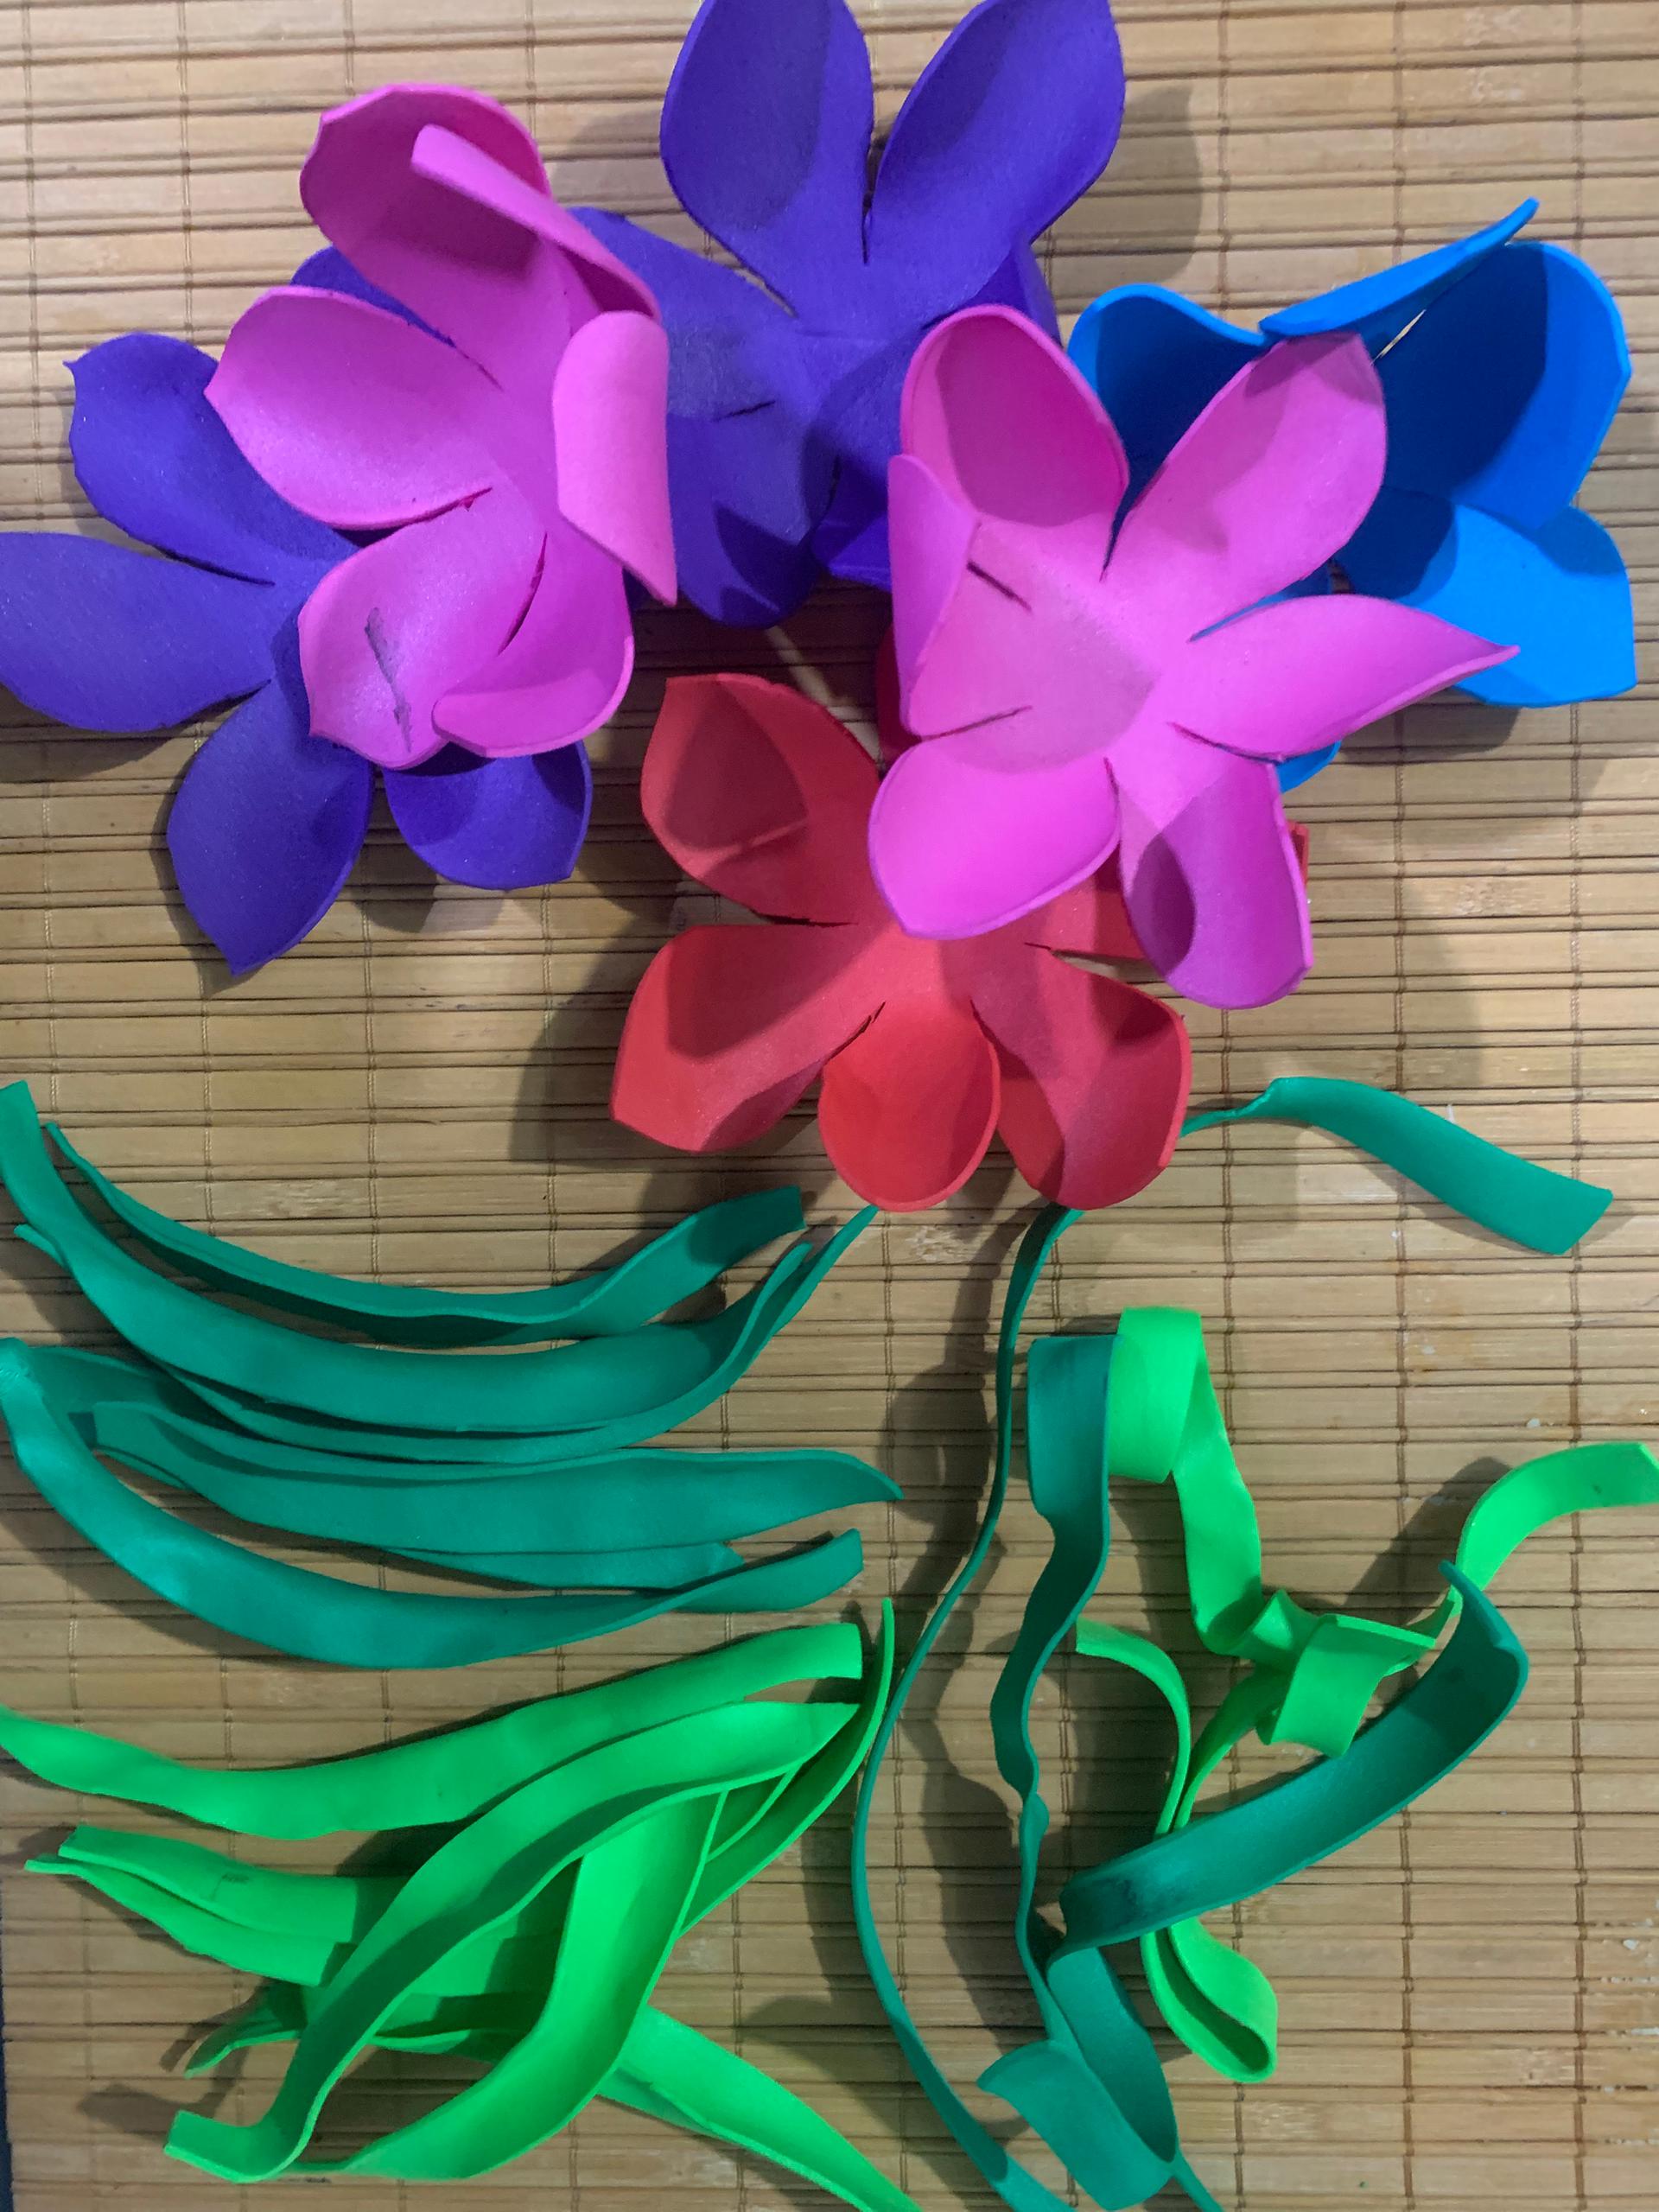
For the leaves, just like for the petals, I made a small mold that was simply an elongated rectangle folded in half and cut into a D shape, and one with the same shape but smaller. Using these molds as a guide, I traced 6 figures of each on the green foam, thus leaving a pair of leaves for each flower. I alternated by making 3 pairs of leaves with light green foam and 3 with darker green foam.
For the stem, I simply made a long strip of 1.5cm wide for each flower.
For the box:
.jpeg) |
|---|
Just like in the previous steps, I also made a template for this and traced it onto double-sided cardboard 6 times to obtain a figure for each flower. Following the folds of the template, I assembled each of these boxes and glued them with hot glue. I also added a small detail by sticking stickers that I had custom-made at a print shop onto a piece of the same cardboard, which I then cut out and glued to the front of each box.
To assemble:
 | .jpeg) | .jpeg) | .jpeg) |
|---|
And lastly, but I think most importantly, all that was left was to assemble each of my flowers. It was quite an easy and fun process, as I first had to heat up each of the foam pieces I had previously made with the help of a clothes iron to shape them.
I pierced the center of the petal part with a tall toothpick which I secured with a small dot of hot glue. I glued together 3 of the petals, leaving one in between each and then placing the remaining ones on top.
I covered the tall toothpick with the green foam strip I had made for the stem, and on top of this, I placed the respective pair of leaves for each flower, consisting of a small leaf and a larger one.
Once all the flowers were ready and assembled, I simply glued them onto the boxes, and they turned out like this:
.jpeg)
All photos are my property taken with my Iphone XR, the cover were edited with the befunky website
Discord Felicitaciones, su publicación ha sido votada por @ dsc-r2cornell. Puedes usar el tag #R2cornell. También, nos puedes encontrar en
Wow, it's so beautiful and lovely craft dear, it's
Congratulations @merlysmont! You have completed the following achievement on the Hive blockchain And have been rewarded with New badge(s)
Your next target is to reach 60 posts.
You can view your badges on your board and compare yourself to others in the Ranking
If you no longer want to receive notifications, reply to this comment with the word
STOPCheck out our last posts:
Wow, wow , this is mind-blowing and simply amazing. I like how you have made the petals and everything else. It must have been alot of work but the end result is incredible.