

🎄✨🎄🦌🎄✨🦌🎄🦌✨🎄🦌✨🎄✨🦌
Hola querida comunidad de DiyHub ! Cómo están ? Listo para la noche buena ? Bueno en mi país Venezuela celebramos es el 24 de diciembre que hacemos la cena navideña y el 25 no las pasamos abriendo los regalos, en casita con la familia ,comiendo recalentados y por ejemplo en mi familia viendo películas todo el día.Pero aprovechando que aún está activo la actividad que nos trae es linda comunidad en conjunto con ecency , el #DIYCHRISTMAS les comparto mi entrada navideña 🎄 para esta ocasión, sumando un proyecto decorativo para completar la decoración navideña de mi casita y haciendo una decoración navideña que quería intentar hacer desde hace algún tiempo , una silueta de Reno , porque aparte del típico Rudolf ,reno icónico navideño, también como lectora los renos son importantes en algunos libros de literatura juvenil como el patronus de Harry Potter ,o el emblema de la Familia de Aelin Ashriver en trono de cristal o incluso el ciervo de Morozova en sombra y hueso , por lo que tener una decoración así me causa mucha ilusión ✨🤭.
Materiales
🦌 Cartón Reciclado
🦌 Foami escarchado negro
🦌 Pistola de silicon y barras
🦌 Recortes de foami blanco y dorado
🦌 Fieltro verde
🦌 Cordón blanco para macramé
🦌 Pintura dorada y pincel
✨🎄Manos a la obra 🎄✨
English Version
🎄✨🎄🦌🎄✨🦌🎄🦌✨🎄🦌✨🎄✨🦌
Hello dear DiyHub community! How are you? Ready for Christmas Eve? Well in my country Venezuela we celebrate on December 24th when we make Christmas dinner and on the 25th we spend not opening presents, at home with the family, eating leftovers and for example with my family watching movies all day. But taking advantage of the fact that the activity that brings us this beautiful community together with ecency, #DIYCHRISTMAS is still active, I share with you my Christmas entry 🎄 for this occasion, adding a decorative project to complete the Christmas decoration of my little house and making a Christmas decoration that I wanted to try to do for some time, a Reindeer silhouette, because apart from the typical Rudolf, iconic Christmas reindeer, also as a reader reindeer are important in some young adult literature books such as Harry Potter's patronus, or Aelin Ashriver's Family emblem in Throne of Glass or even Morozova's deer in Shadow and Bone, so having a decoration like this makes me very excited ✨🤭.
Materials
🦌 Recycled cardboard
🦌 Black frosted foam
🦌 Glue gun and glue sticks
🦌 White and gold foam scraps
🦌 Green felt
🦌 White cord for macramé
🦌 Gold paint and paintbrush
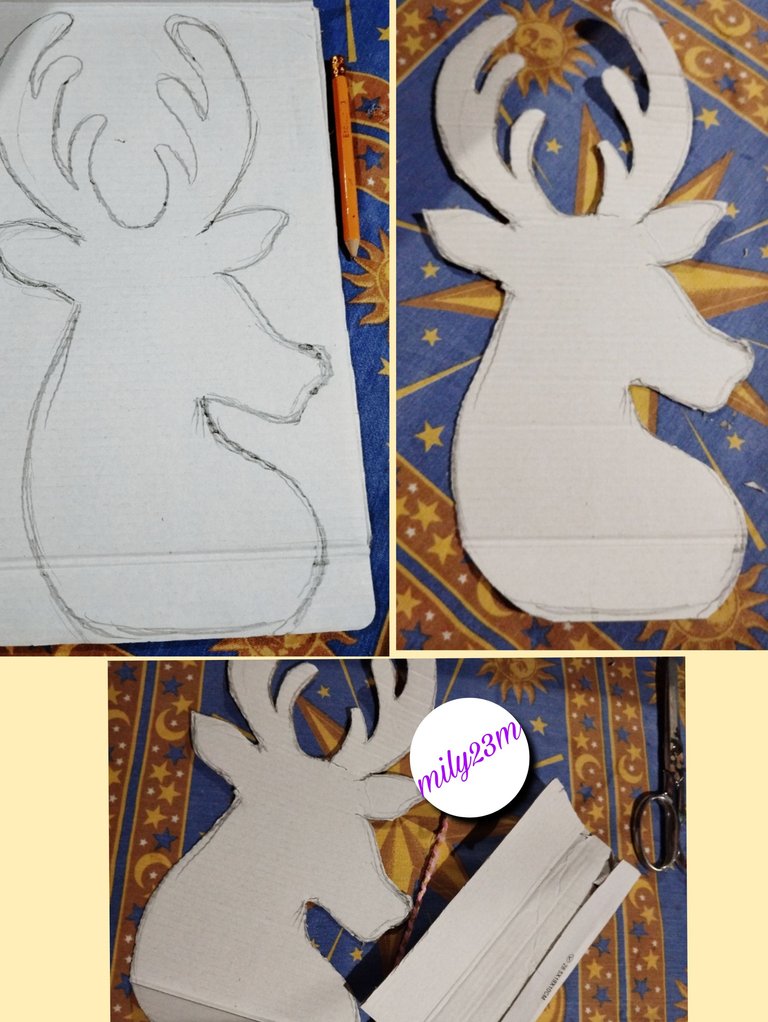
#1 Primeramente para hacer la silueta del Renito , usé el fondo de la tapa de zapatos , incluyendo la parte inferior que haría el doblez de la tapa ,está parte ayudará a hacer la base de la silueta, luego hice una silueta de perfil del reno con un lápiz , una vez hice el diseño con tijera recorté todo esté contorno, nótese que queda la parte de la base con el pliegue para doblar en una especie de lengüeta. Y con uno de los laterales de la caja lo corté para usarlo como otro soporte y la parte trasera de la base.
English Version
#1 First, to make the silhouette of the reindeer, I used the bottom of the shoe cover, including the bottom part that would make the fold of the cover, this part will help to make the base of the silhouette, then I made a profile silhouette of the reindeer with a pencil, once I made the design with scissors I cut out this entire outline, notice that the part of the base with the fold remains to fold into a kind of tab. And with one of the sides of the box I cut it to use as another support and the back part of the base.
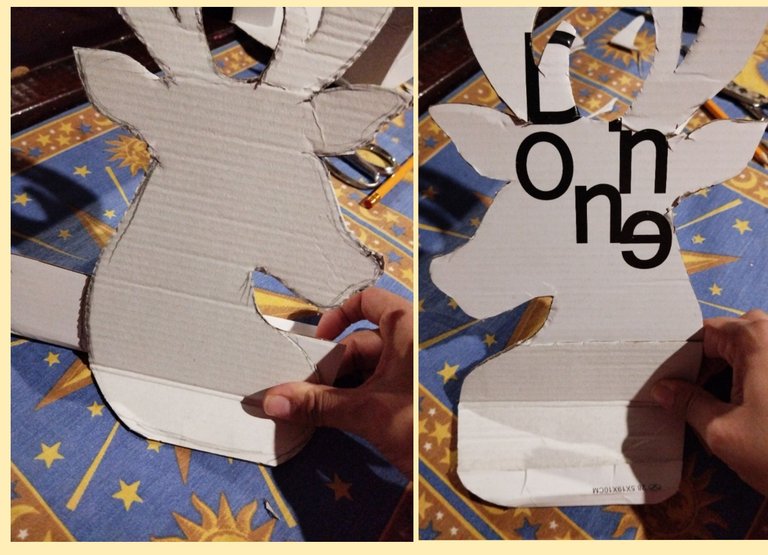
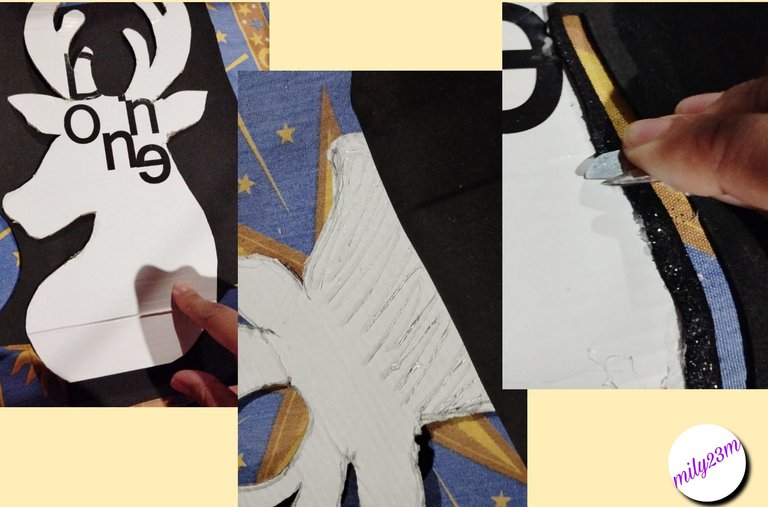
#2 Midiendo la parte de la caja que corté en el paso 1,y midiendola con la silueta de mi reno la ubiqué de forma que está siguiera la silueta y marqué su contorno , para luego cortarlo, la idea de esto es que quedara está base trasera con el doblez que trae la cajita y dejando el borde doble hacia abajo , para que tenga mucho más capacidad de mantener el equilibrio con esta base , esto no lo pegaré aún, sí no hasta que tenga la silueta forrada de foami. Con el silicón caliente empecé a cubrir la figura completamente , y posiciones el Foami con el lado sin escarcha enfrentado con la parte en donde apliqué el silicón, lo hice rápido para que no se secara y apliqué presión para que quedara bien prolijo la superficie, una vez bien adherido el Foami, apliqué silicón caliente a todo el borde de la parte trasera y mientras estaba muy caliente estire estos extremos de foami hacia atrás de manera de ir cubriendo los bordes también con el mismo foami, esto hará que quede muchísimo mejor acabado, aquí no voy a mentir se me hizo en el algunos lugares tedioso porque sí lo estiraba mucho se me rompía o no se pegaba bien atrás y la idea era dejar un bordesito bien prolijo, me ayude frotando los bordes con la tijera para que estos quedarán bien pegados.
English Version
**#2 Measuring the part of the box that I cut in step 1, and measuring it with the silhouette of my reindeer, I placed it so that it followed the silhouette and marked its outline, and then cut it. The idea of this is that this back base would remain with the fold that the box has and leaving the double edge facing down, so that it has much more capacity to maintain balance with this base. I will not glue this yet, but not until I have the silhouette covered with foam. With the hot silicone I began to cover the figure completely, and position the Foami with the frost-free side facing the part where I applied the silicone, I did it quickly so it would not dry and I applied pressure so that the surface would be very neat, once the Foami was well adhered, I applied hot silicone to the entire edge of the back part and while it was very hot I stretched these ends of the foami backwards in order to cover the edges as well with the same foami, this will make it look much better finished, here I am not going to lie it was tedious for me in some places because if I stretched it too much it would break or it would not stick well back and the idea was to leave a very neat edge, I helped myself by rubbing the edges with the scissors so that they would stay well glued. **
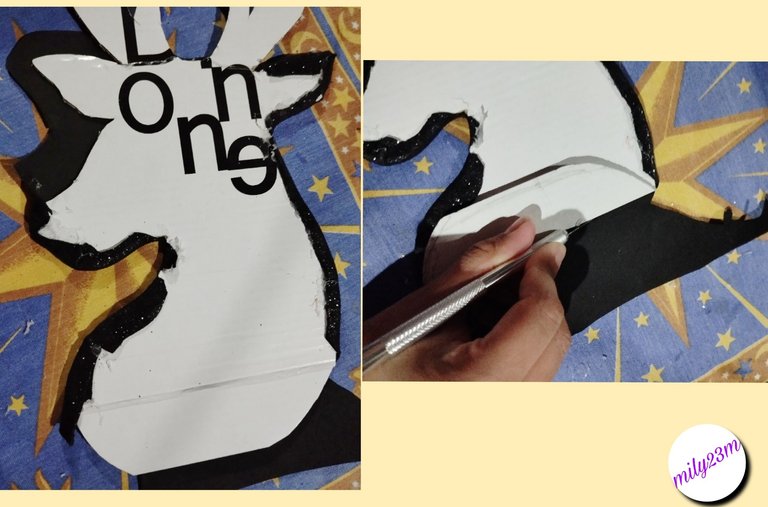
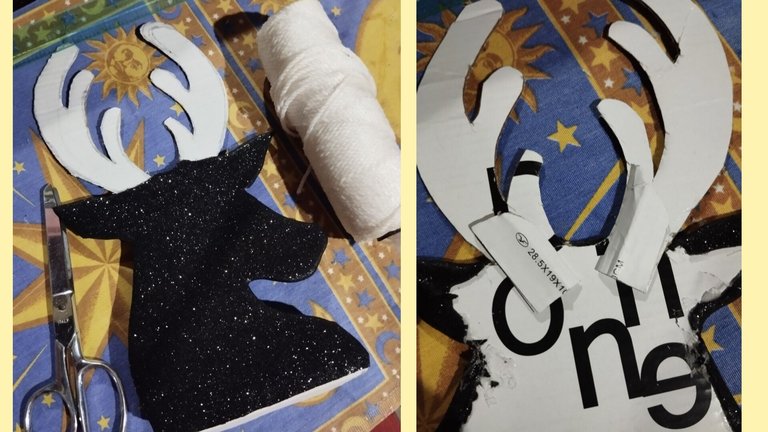
#3 Para la parte de las Astas del Reno lo deje sin foami ,esto debido a que lo rellenaremos con otro material, y para la parte inferior en donde está el doblez, lo corté con un cúter dejando la parte con foami hasta donde se dobla y lo demás sin el foami (para que el grosor del foami no haga que no se doble). Con el borde superior extremo que me quedó de la cajita corte dos trocitos de este filo doble que es más grueso, y lo pegué en la parte de atrás de las Astas para darle mucho más soporte.
English Version
#3 For the part of the Reindeer Antlers I left it without foam, this is because we will fill it with another material, and for the bottom part where the fold is, I cut it with a cutter leaving the part with foam up to where it bends and the rest without the foam (so that the thickness of the foam does not prevent it from bending). With the extreme upper edge that I had left from the little box, I cut two pieces of this double edge that is thicker, and I glued it to the back of the Antlers to give it much more support.
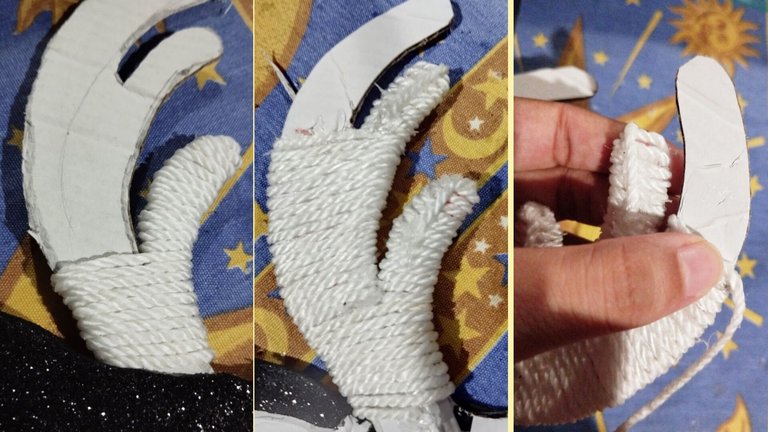
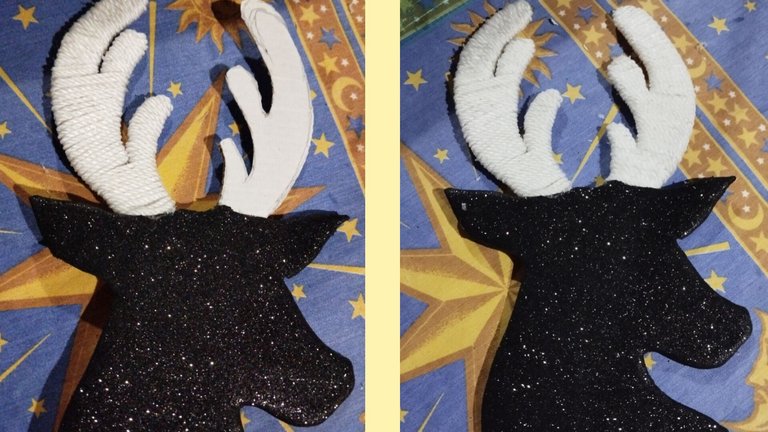
#4 Este hilo/cordón que usé la verdad no sé que tipo es ,creo que es una de los que usan para macramé y es de un grosor mediano,me lo regalaron hace unos años pero yo para ese tiempo necesitaba un grosor mucho más finito y no lo he usado mucho, pero para esto venía perfecto, pegué el extremo con silicón y empecé a enrrollar el hilo alrrededor de todas las Astas ,rodeando de columna en columna , siempre poniendo la pega de silicón por la parte trasera para evitar que se dañe el aspecto delantero , la idea es no dejar espacios e ir apretando a medida que vamos enrrollando, y una vez que llegó a las ramificaciones de la Astas voy completando por la columna, y una vez que llegó a la punta le pongo suficiente silicón para sellar está punta ,sigo con el cordón tirándolo por la parte de atrás que baje unos centímetros y lo cortó, pegué estos centímetros extras hasta el extremo, al punto final le pongo una gota de silicón para evitar que se despegue.Continue pegando más hilo y enrollando alrrededor para hacer la siguiente columna, hasta llegar a la siguente punta y repito lo mismo , selló bien la punta con suficiente silicón y no cortó al llegar a la parte súper sinó que tiró hacia atras unos centímetros de hilo y lo pegué con silicón, para seguir con la última columna haciendo el mismo proceso . Al terminar un lado empecé con el otro haciendo el mismo procedimiento ,enrrollando desde abajo y ascendiendo cubriendo las columnas , hasta terminarla todas.Si notan en la foto este efecto hace que las Astas tengan un aspecto bonito y más grueso.
English Version
**#4 This thread/cord that I used, I don't really know what kind it is, I think it's one of those used for macramé and it's of a medium thickness, it was given to me a few years ago but at that time I needed a much thinner thickness and I haven't used it much, but for this it came perfect, I glued the end with silicone and began to roll the thread around all the Antlers, going around column by column, always putting the silicone glue on the back to avoid damaging the front appearance, the idea is to not leave spaces and to tighten as we roll, and once it reaches the branches of the Antlers I complete it along the column, and once it reaches the tip I put enough silicone to seal this tip, I continue with the cord pulling it from the back so that it goes down a few centimeters and I cut it, I glued these extra centimeters to the end, at the end I put a drop of silicone to prevent it from take off. Continue gluing more thread and winding around to make the next column, until reaching the next tip and repeat the same, seal the tip well with enough silicone and do not cut when reaching the super part but pull back a few centimeters of thread and glue it with silicone, to continue with the last column doing the same process. When finishing one side I started with the other doing the same procedure, rolling from below and ascending covering the columns, until finishing them all. If you notice in the photo this effect makes the Antlers have a nice and thicker appearance. **
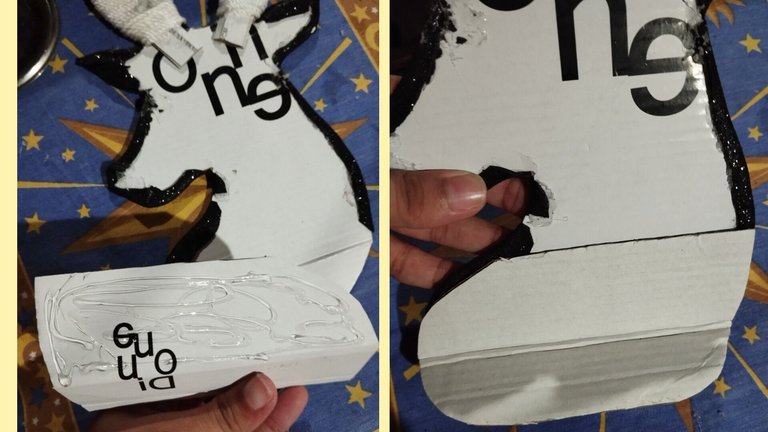
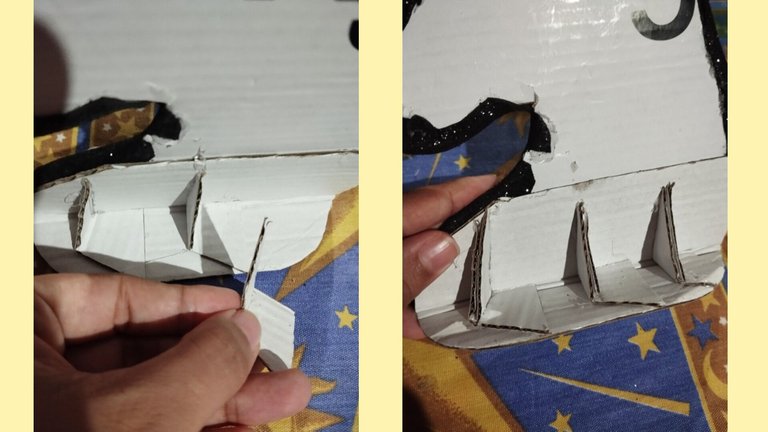
#5 Ahora sí ,una vez que esté lista la silueta y su aspecto delantero , con silicón caliente pegué la parte trasera de la base extra que hice, siguiendo la misma forma que ya había recortado y haciendo que coincida con el doblez de la base de la parte delantera. Luego usando uno de los borde de la caja corté tres pequeños triángulos de cartón que se doblan , como una especie de L , como se ve en la foto, y lo pegué para que estás piezas ayuden a brindar apoyo y soporte. ( Imagínense un estante flotante boca abajo ).
English Version
#5 Now, once the silhouette and its front appearance are ready, with hot silicone I glued the back of the extra base that I made, following the same shape that I had already cut out and making it match the fold of the base of the front part. Then using one of the edges of the box I cut three small cardboard triangles that fold, like a kind of L, as seen in the photo, and I glued them so that these pieces help provide support and support. (Imagine a floating shelf upside down).
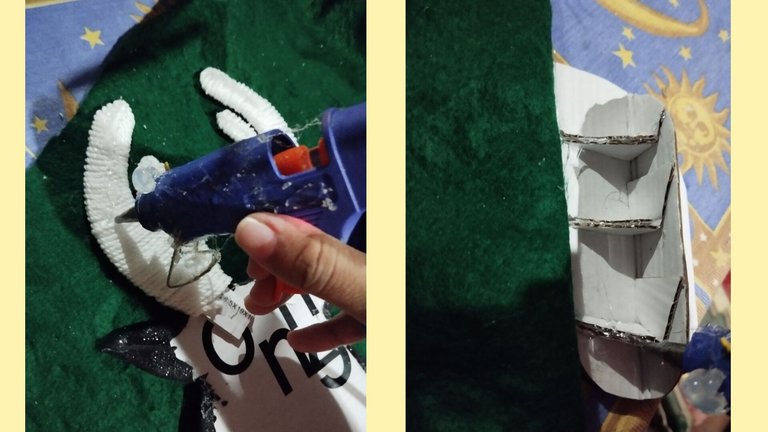
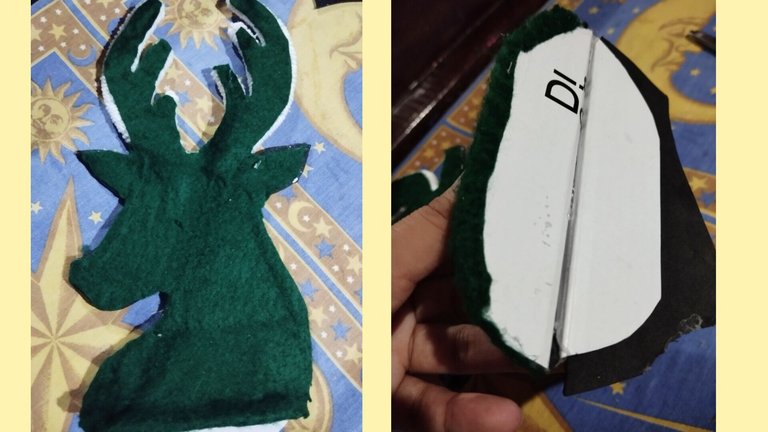
#6 Con el fieltro verde que tenía medí, más o menos la silueta del reno para poder tapar toda la parte trasera, agregué silicón caliente suficiente en toda la superficie y pegue la pieza de fieltro a la parte trasera de la silueta del reno, incluyendo la parte inferior de la base , está quedará tapada completamente con el fieltro, una vez que pegué todo,recorte todo el contorno para darle un borde limpio.Como ven en la última foto está la base vista desde arriba mostrando la base trasera y la delantera ,aquí se me pasó tomarle fotos a la base delantera pero está seria la parte doblada que hice al principio y que deje libre sin Foami ,esto lo hice para que al doblar pudiera doblar bien y no se pisará el foami si lo cubria completamente, así que pegué con silicón caliente para que quedara el doblez fijó y pegue la otra pieza de foami negro escarchado pars completar ese "pisito de la base".
English Version
#6 With the green felt that I had, I measured more or less the silhouette of the reindeer to be able to cover the entire back part, I added enough hot silicone to the entire surface and glued the piece of felt to the back part of the reindeer silhouette, including the bottom of the base, it will be completely covered with the felt, once I glued everything, I cut out the entire outline to give it a clean edge. As you can see in the last photo, the base is seen from above showing the back and front base, here I forgot to take photos of the front base but it would be the folded part that I did at the beginning and that I left free without Foami, I did this so that when folding I could fold well and the foam would not be stepped on if I covered it completely, so I glued with hot silicone so that the fold would be fixed and glued the other piece of frosted black foam to complete that "floor of the base".
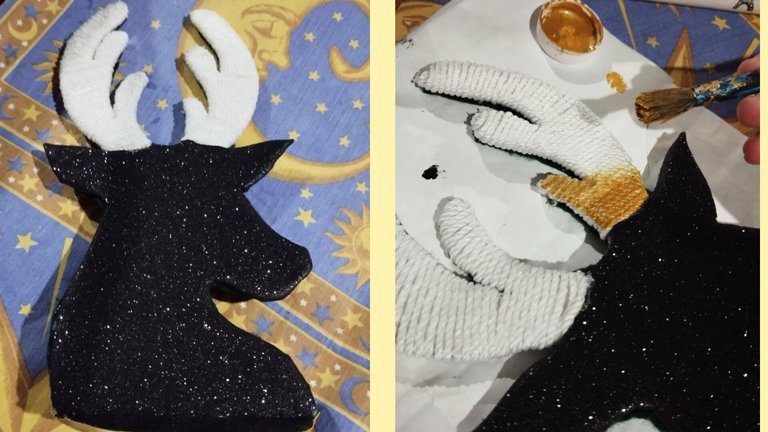
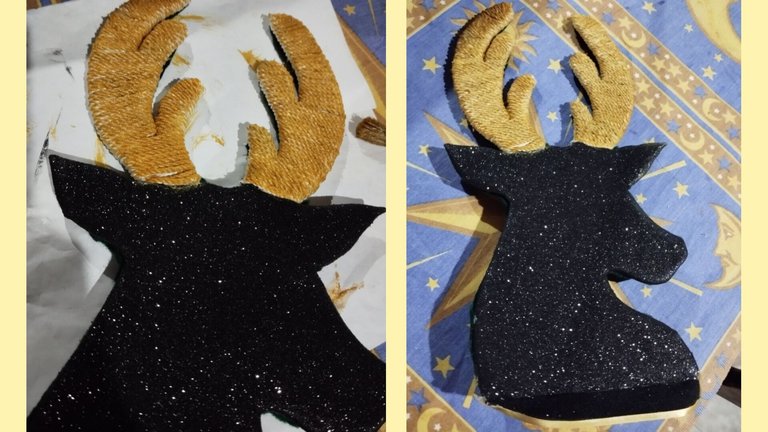
#7 Con los cuernitos o Astas listas , decidí darle otro toque con pintura dorada , entonces con un pincel y pintura empecé a cubrir toda la parte delantera de las Astas, le dí dos manos para lograr un buen acabado y se viera mucho mejor el color dorado.
English Version
#7 With the horns or antlers ready, I decided to give it another touch with gold paint, then with a brush and paint I began to cover the entire front part of the antlers, I gave it two coats to achieve a good finish and make the golden color look much better.
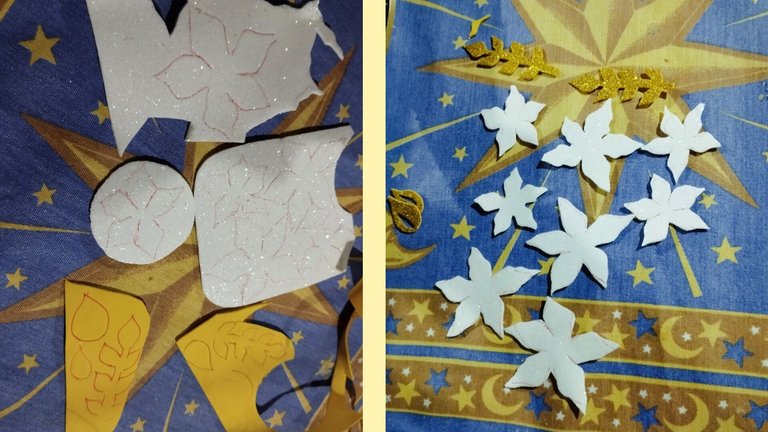
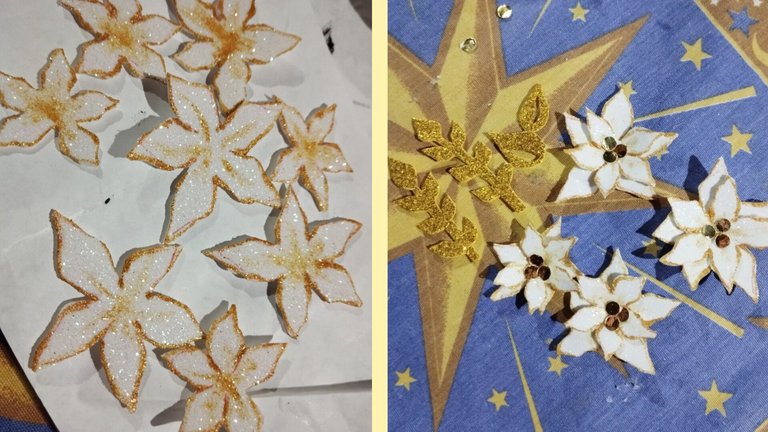
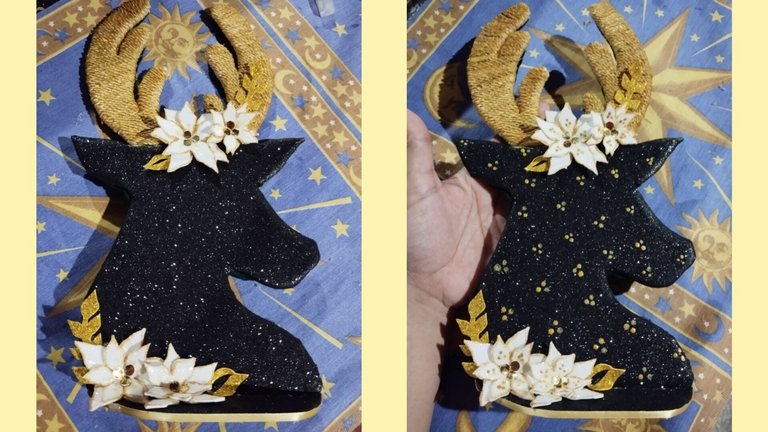
#8 Usando recortes de foami , hice 4 pares de flores navideñas de distintos tamaños en foami blanco, también hice hojitas en dorado y recorté algunos círculos dorados con cartulina espejo y usando un sacabocados, una vez que las recortes con pintura dorada les hice bordes a todas las florecitas y agregué algo de color al centro para darles un toque mucho más bonito, y una vez que se secó ,junte dos flores una más grande y otra más pequeña, y en el centro le puse unos centros dorados de cartulina espejo. Ya con la silueta lista, en la cabeza del reno para tapar la unión de las Astas,poniendo dos flores una más grande y otra pequeña con una hojita dorada de cada lado , y en la parte inferior de forma diagonal, en la base hice el mismo arreglito poniendo las dos florecitas y las hojitas doradas. Por último para terminar el diseño les hice unos puntitos con pintura dorada en toda la superficie del reno.
English Version
#8 Using foam scraps, I made 4 pairs of Christmas flowers of different sizes in white foam, I also made gold leaves and cut out some gold circles with mirror cardstock and using a hole punch, once I cut them out with gold paint I made borders to all the flowers and added some color to the center to give them a much prettier touch, and once it dried, I put two flowers together, one bigger and one smaller, and in the center I put some gold centers of mirror cardstock. With the silhouette ready, on the head of the reindeer to cover the junction of the antlers, putting two flowers, one bigger and one smaller, with a gold leaf on each side, and in the lower part diagonally, at the base I made the same arrangement putting the two little flowers and the gold leaves. Finally, to finish the design, I made some dots with gold paint all over the surface of the reindeer.
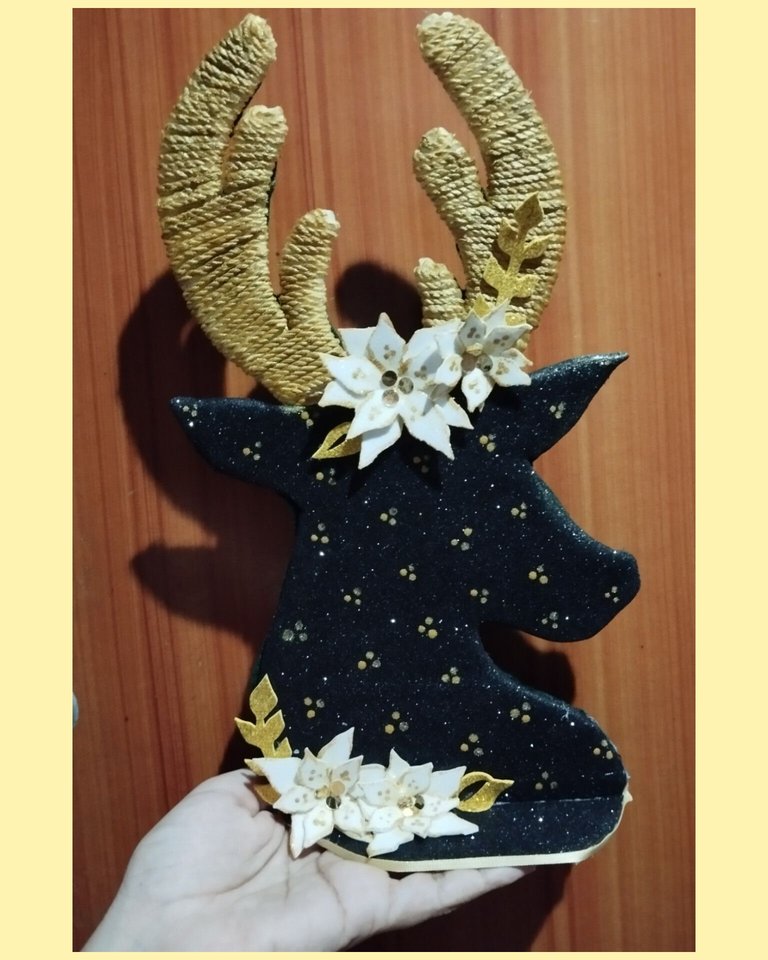
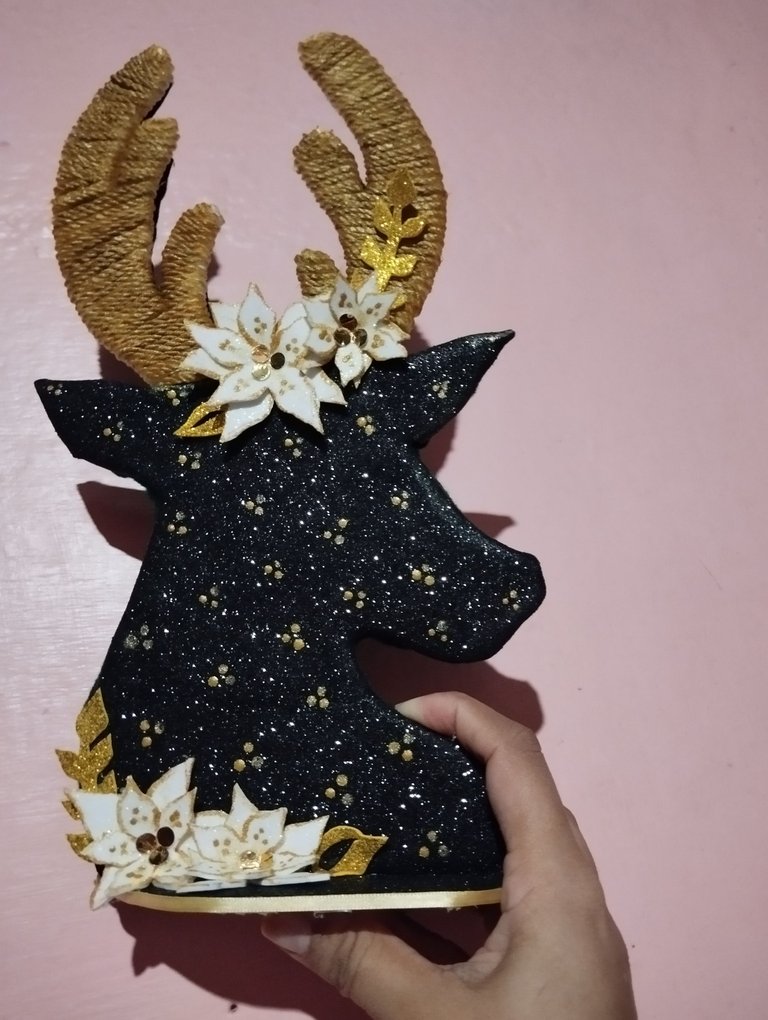
✨🦌 Y listo ! 🎄✨ Aquí está el resultado 😁 Me encantó como quedó ,todo precioso y elegante y mira que empezó como una tapa de una caja de zapatos 😹 ! Es una buena idea 💡 para realizar sí aún quieren decorar antes del 24 🎄, Que les pareció está idea ? Lo intentarían?.
✨😁Muchas gracias por leerme✨
Fotos tomadas por mi en mi equipo redmi note 12 editadas en pics art y gifs creados en app creador de gifs texto traducido en Google traductor.
English Version
✨🦌 And that's it! 🎄✨ Here's the result 😁 I loved how it turned out, everything was beautiful and elegant and look how it started as a shoe box lid 😹! It's a good idea 💡 to do if you still want to decorate before the 24th 🎄, What did you think of this idea? Would you try it?.
✨😁Thank you very much for reading me✨
Photos taken by me on my redmi note 12 device edited in pics art and gifs created in the gif creator app, text translated in Google translator.
Que trabajo tan hermoso, me encanto ese renito decorativo, la verdad es digno para decorar cualquier espacio en casa en estas navidades.
!DIY
Spectacular this decorative reindeer wowww, what a delicacy of work. Thank you for leaving us your work and idea and creative process so beautiful.
You can query your personal balance by
!DIYSTATSEsta muy bonito a mi mamá seguro le gusta ella quería uno pero estaban caros te quedó bellísimo
!discovery 45
This post was shared and voted inside the discord by the curators team of discovery-it
Join our Community and follow our Curation Trail
Discovery-it is also a Witness, vote for us here
Delegate to us for passive income. Check our 80% fee-back Program