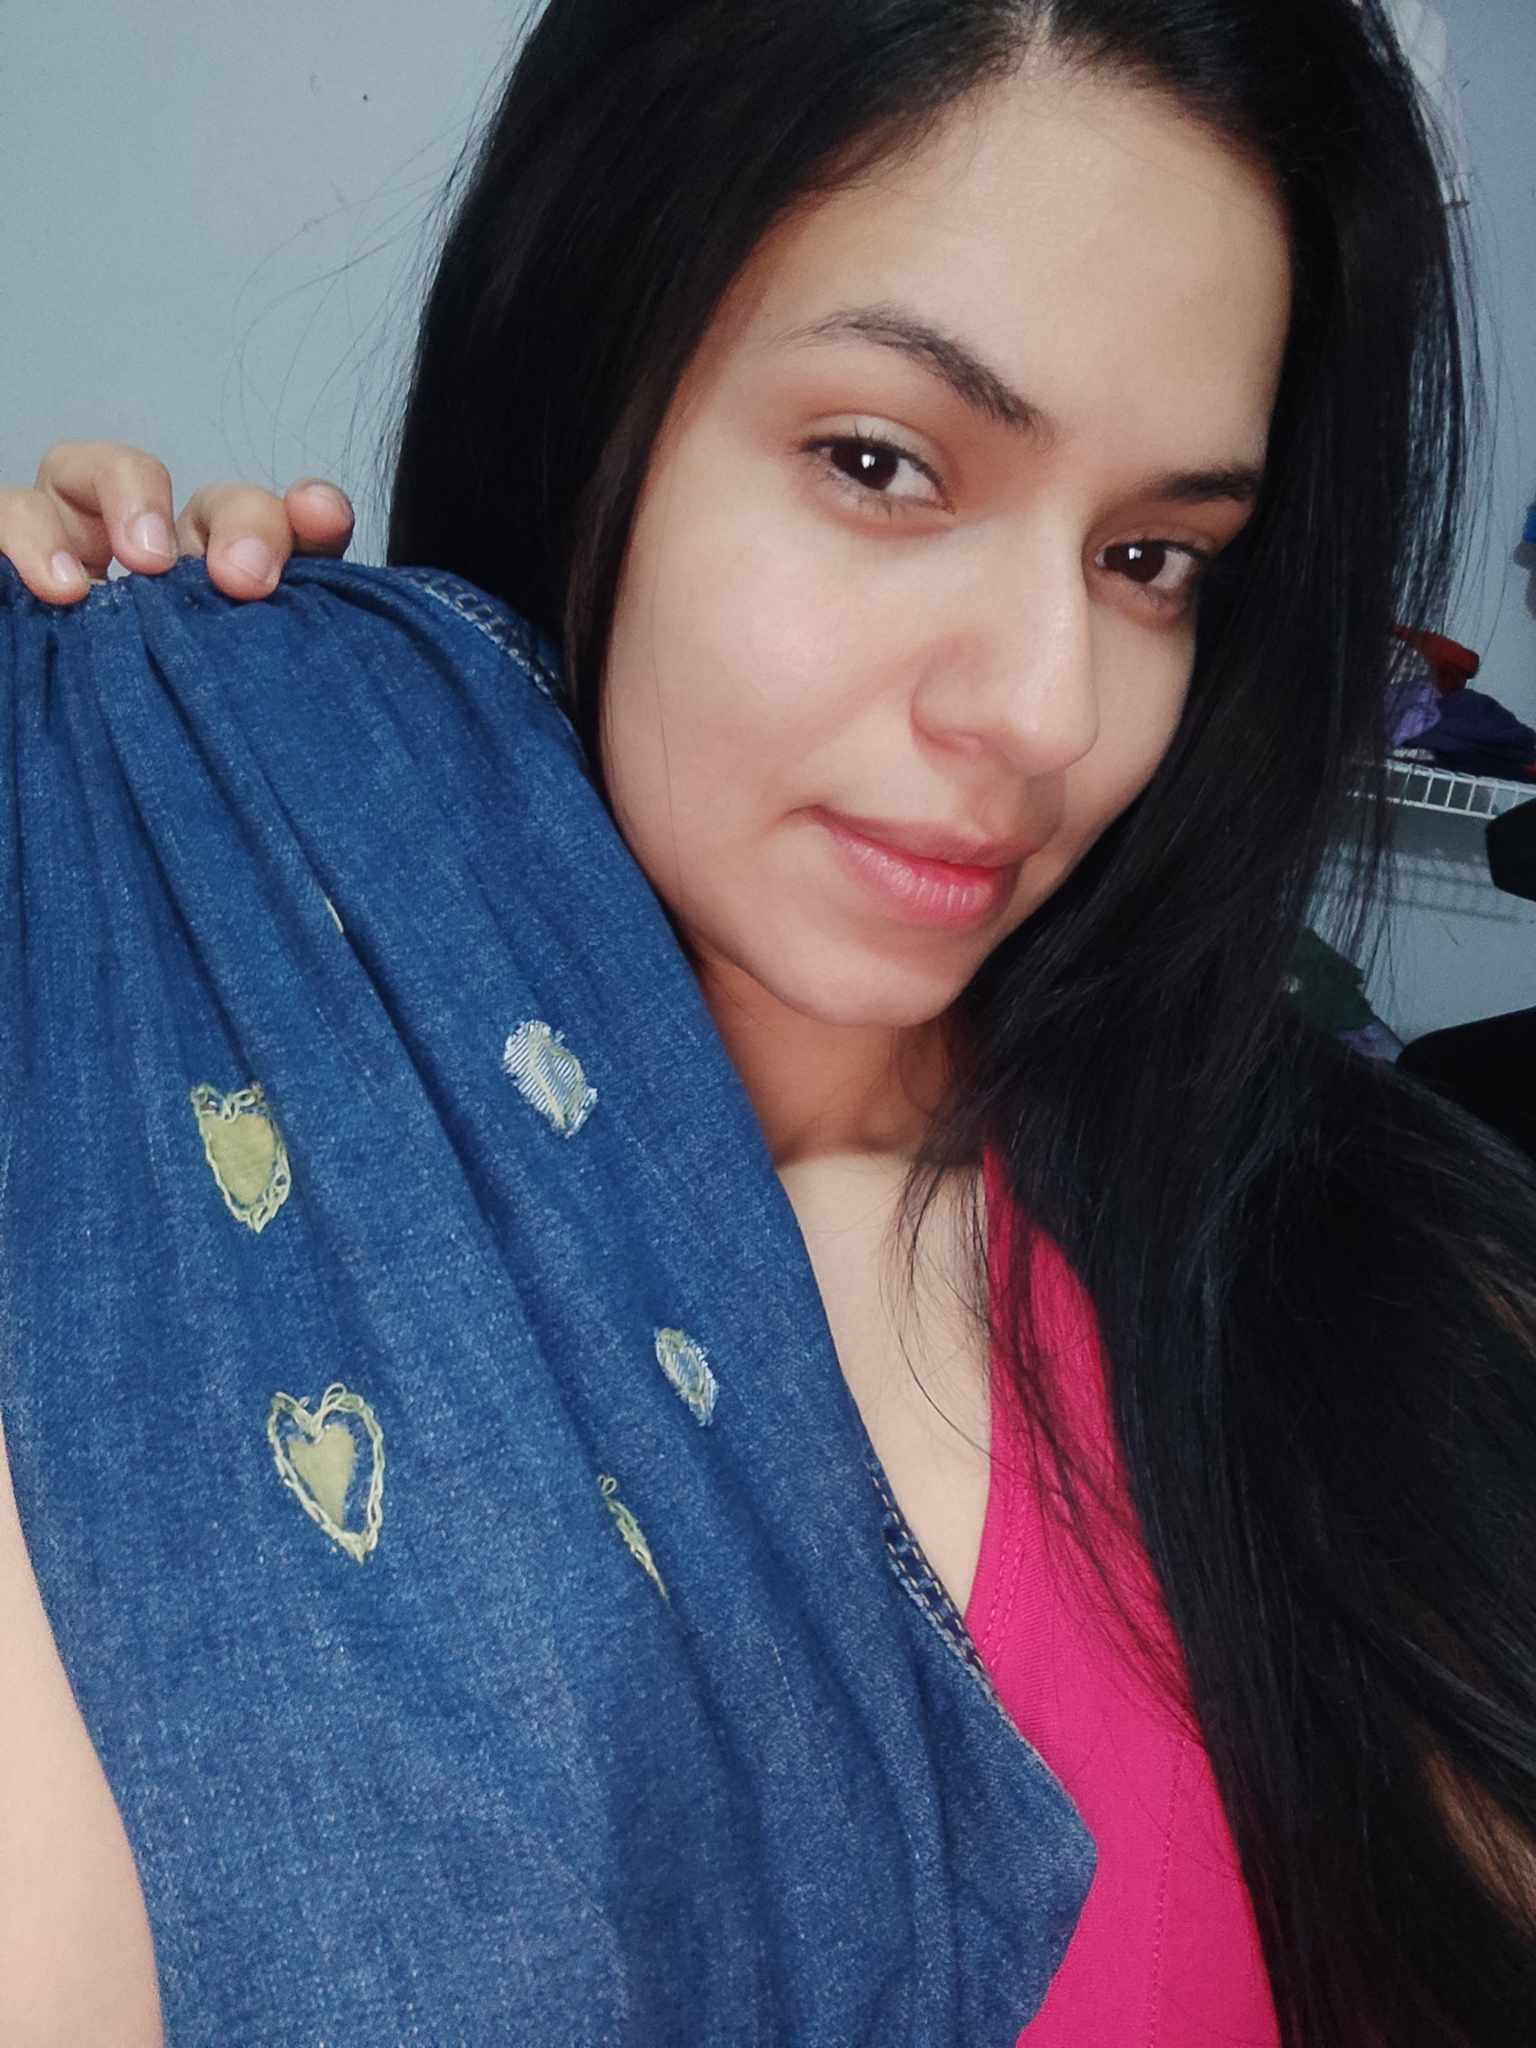
Hola amigos de la comunidad de DIYHub, espero se encuentren muy bien.
Hello friends of the DIYHub community, I hope you are well.
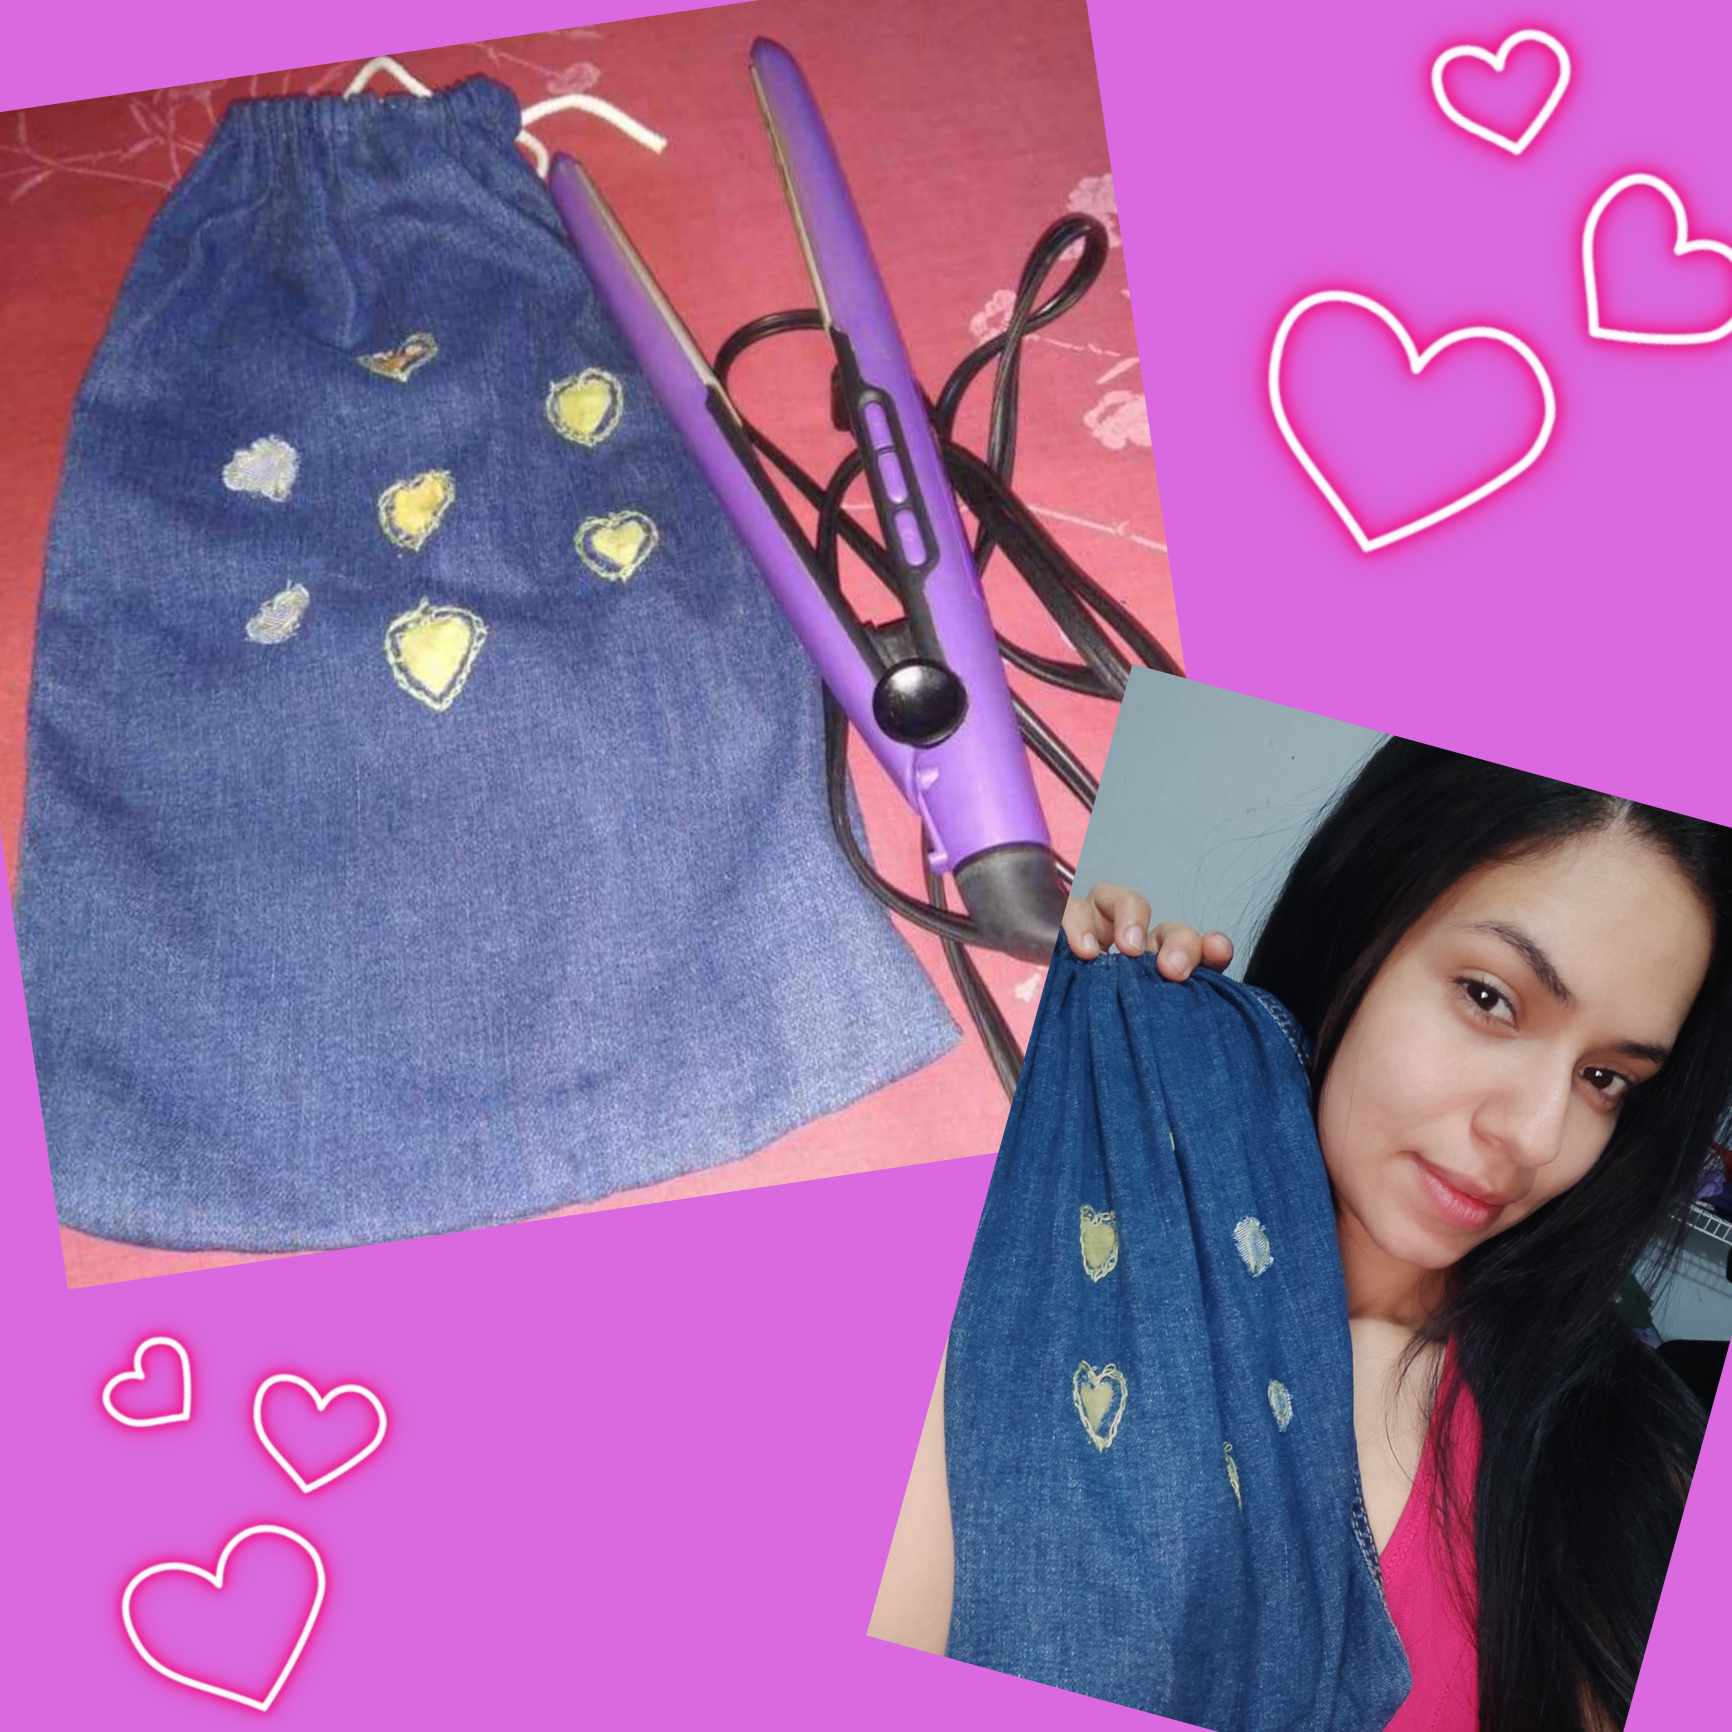
Hoy les quiero compartir esta manualidad que realice el día de hoy y que en verdad resultó muy fácil de hacer, además de lo practico y muy útil que nos resulta a la hora de guardar y llevar, en este caso la plancha del cabello.
Today I want to share with you this craft that I did today and that was actually very easy to do, in addition to how practical and very useful it is when it comes to storing and carrying, in this case the hair straightener.
Aunque molesta un poco porque ya le había hecho una y resulta que mi hermana se la lleva y la regresa sin su funda...por lo que tuve que hacer una de manera express porque iba de viaje y no quería meterla así sin funda en la maleta.
Although it is a little annoying because I had already made one for her and it turns out that my sister takes it and returns it without its cover...so I had to make one expressly because I was traveling and I didn't want to put it like that without a cover in the suitcase.
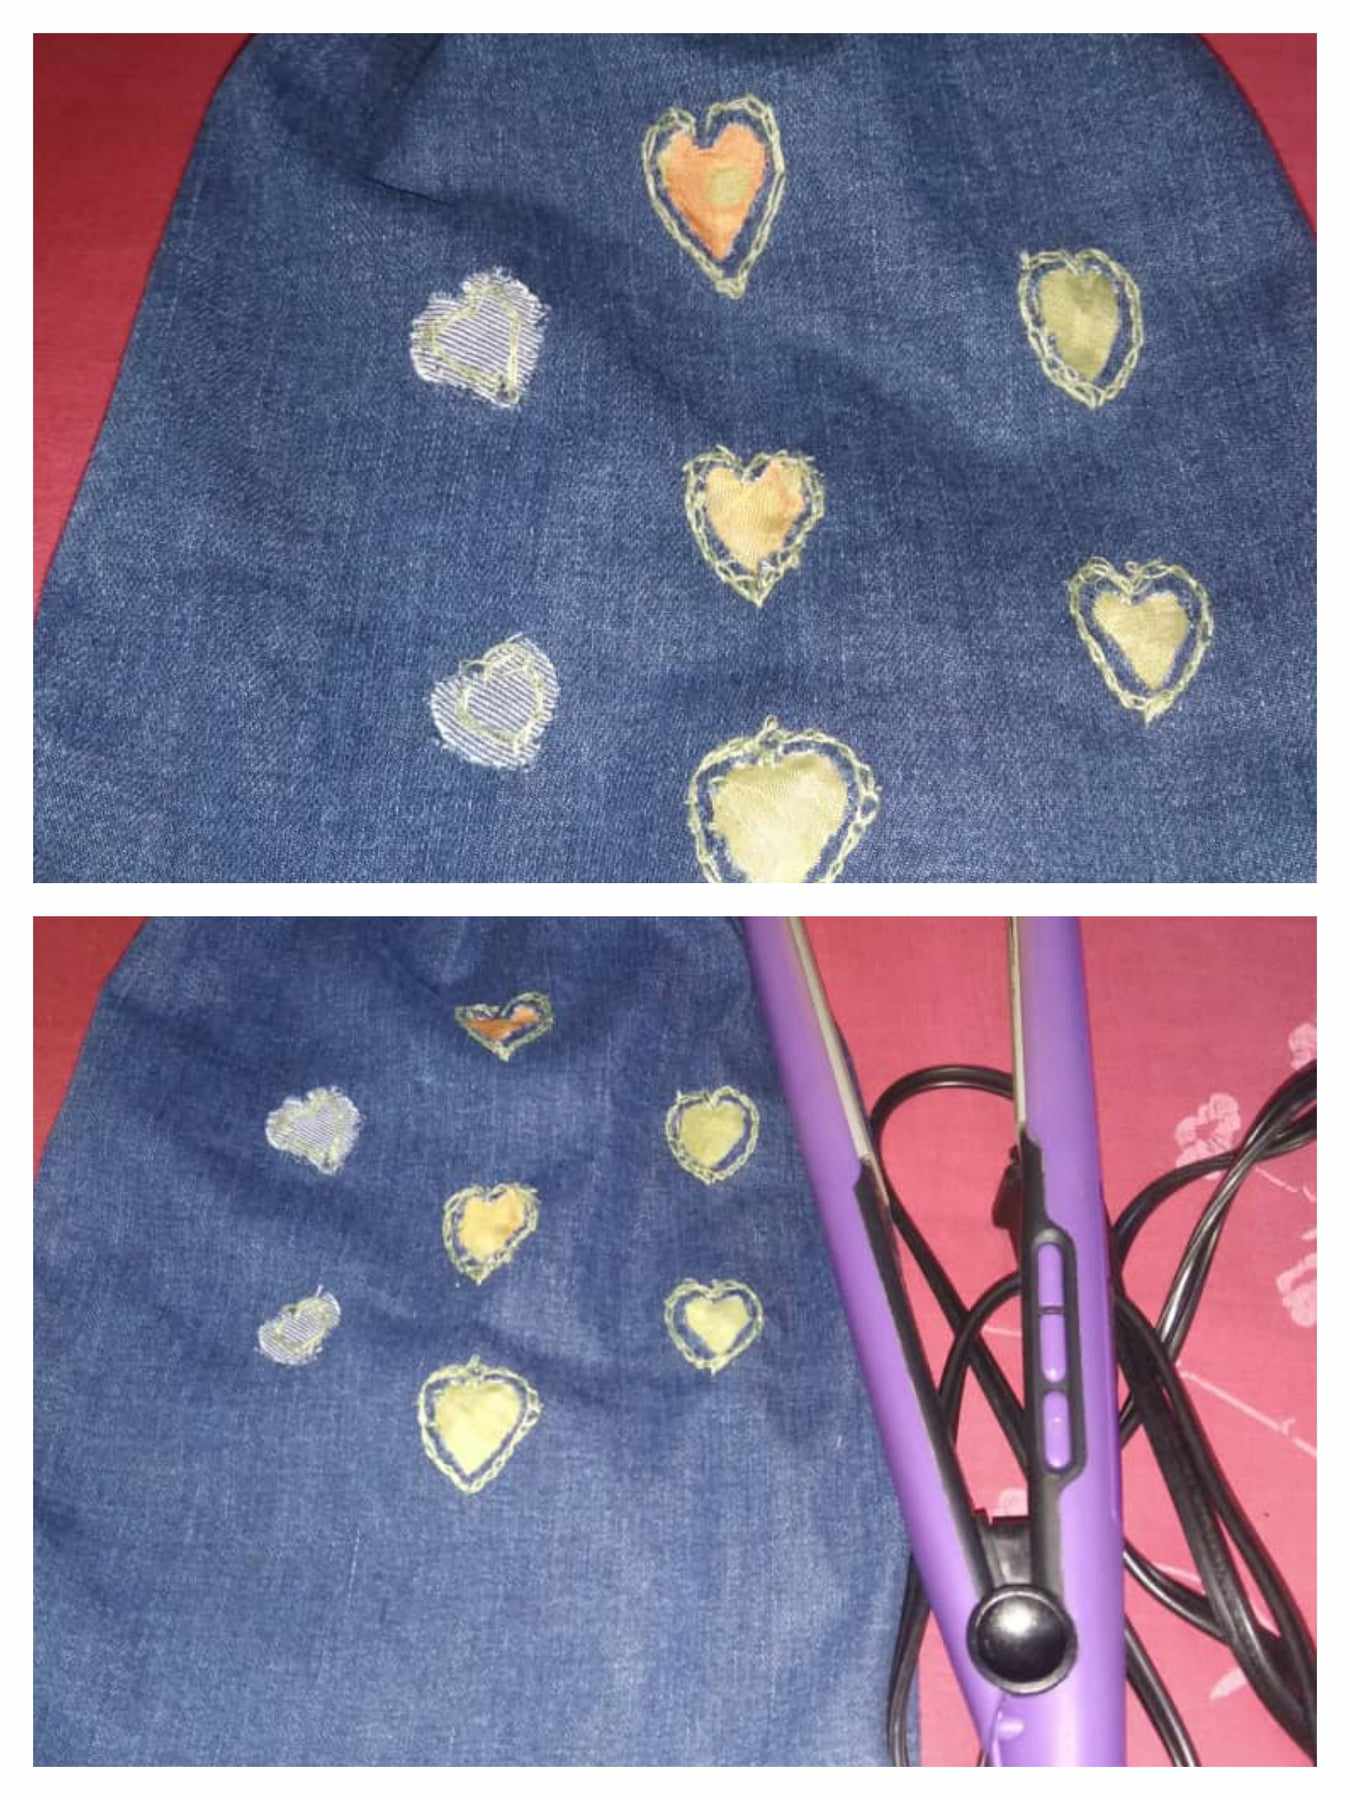
Así que me puse en modo rápido para hacer mis manualidades y aunque no me quedo muy prolija, le hice unos pequeños detallitos para que se viera tan simple.
Ya que soy de las me gusta colocarle muchas cositas y colores a mis trabajos, pero en este caso tenía que ser rápido porque lo primero era resguardar la plancha.
So I went into quick mode to make my crafts and although I'm not very neat, I made some small details to make it look so simple.
Since I am one of those, I like to add a lot of things and colors to my work, but in this case I had to be quick because the first thing was to protect the iron.
Y como tenía unas piernas de un jeans que había cortado y las tenía guardada ( esas son buenísimas para reciclar, salen proyectos muy útiles) por lo que fueron la opción correcta para hacer mi funda express. Ya después con calma seguro le haré otra más bonita y con detalles coloridos.
And since I had some legs from a pair of jeans that I had cut up and had saved (those are great for recycling, they make very useful projects) so they were the right option to make my express case. Later, I will surely calmly make another one that is prettier and with colorful details.
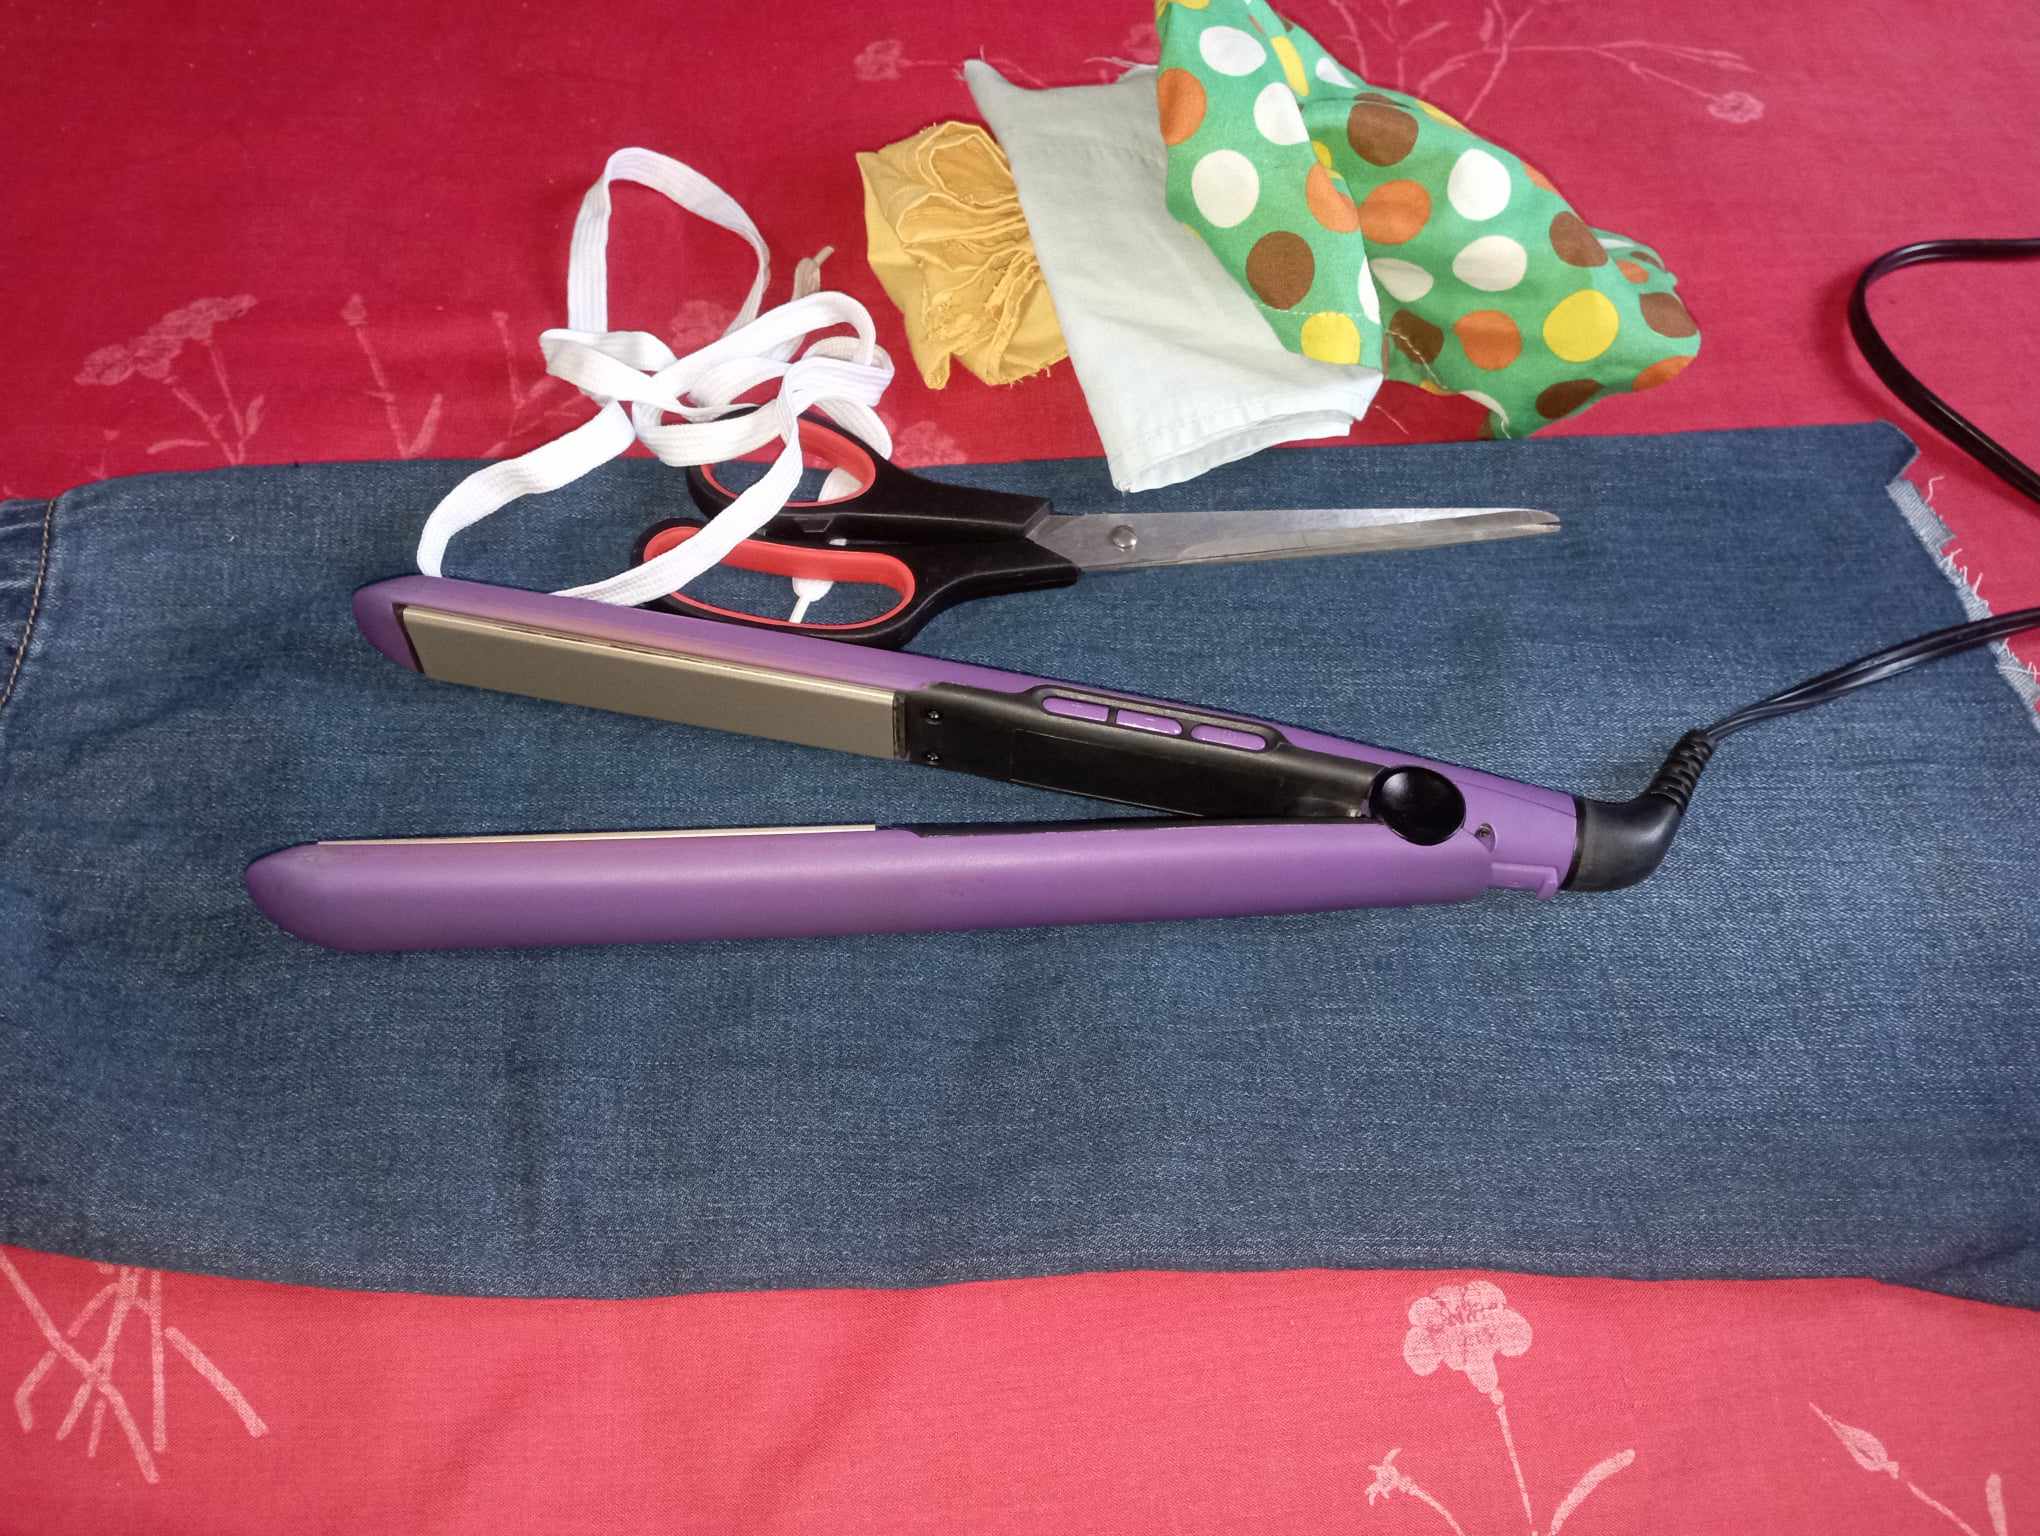
Para está utilicé los siguientes materias:
- Retazo de tela de jeans reciclado ♻️.
- Pedacitos de tela verde 💚
- Cordón blanco.
- Hilo y aguja.
- Tijera, regla y marcador.
For this I used the following materials:
- Scrap of recycled jeans fabric ♻️.
- Little pieces of green fabric 💚
- White cord.
- Thread and needle.
- Scissors, ruler and marker.
Elaboración
Preparation
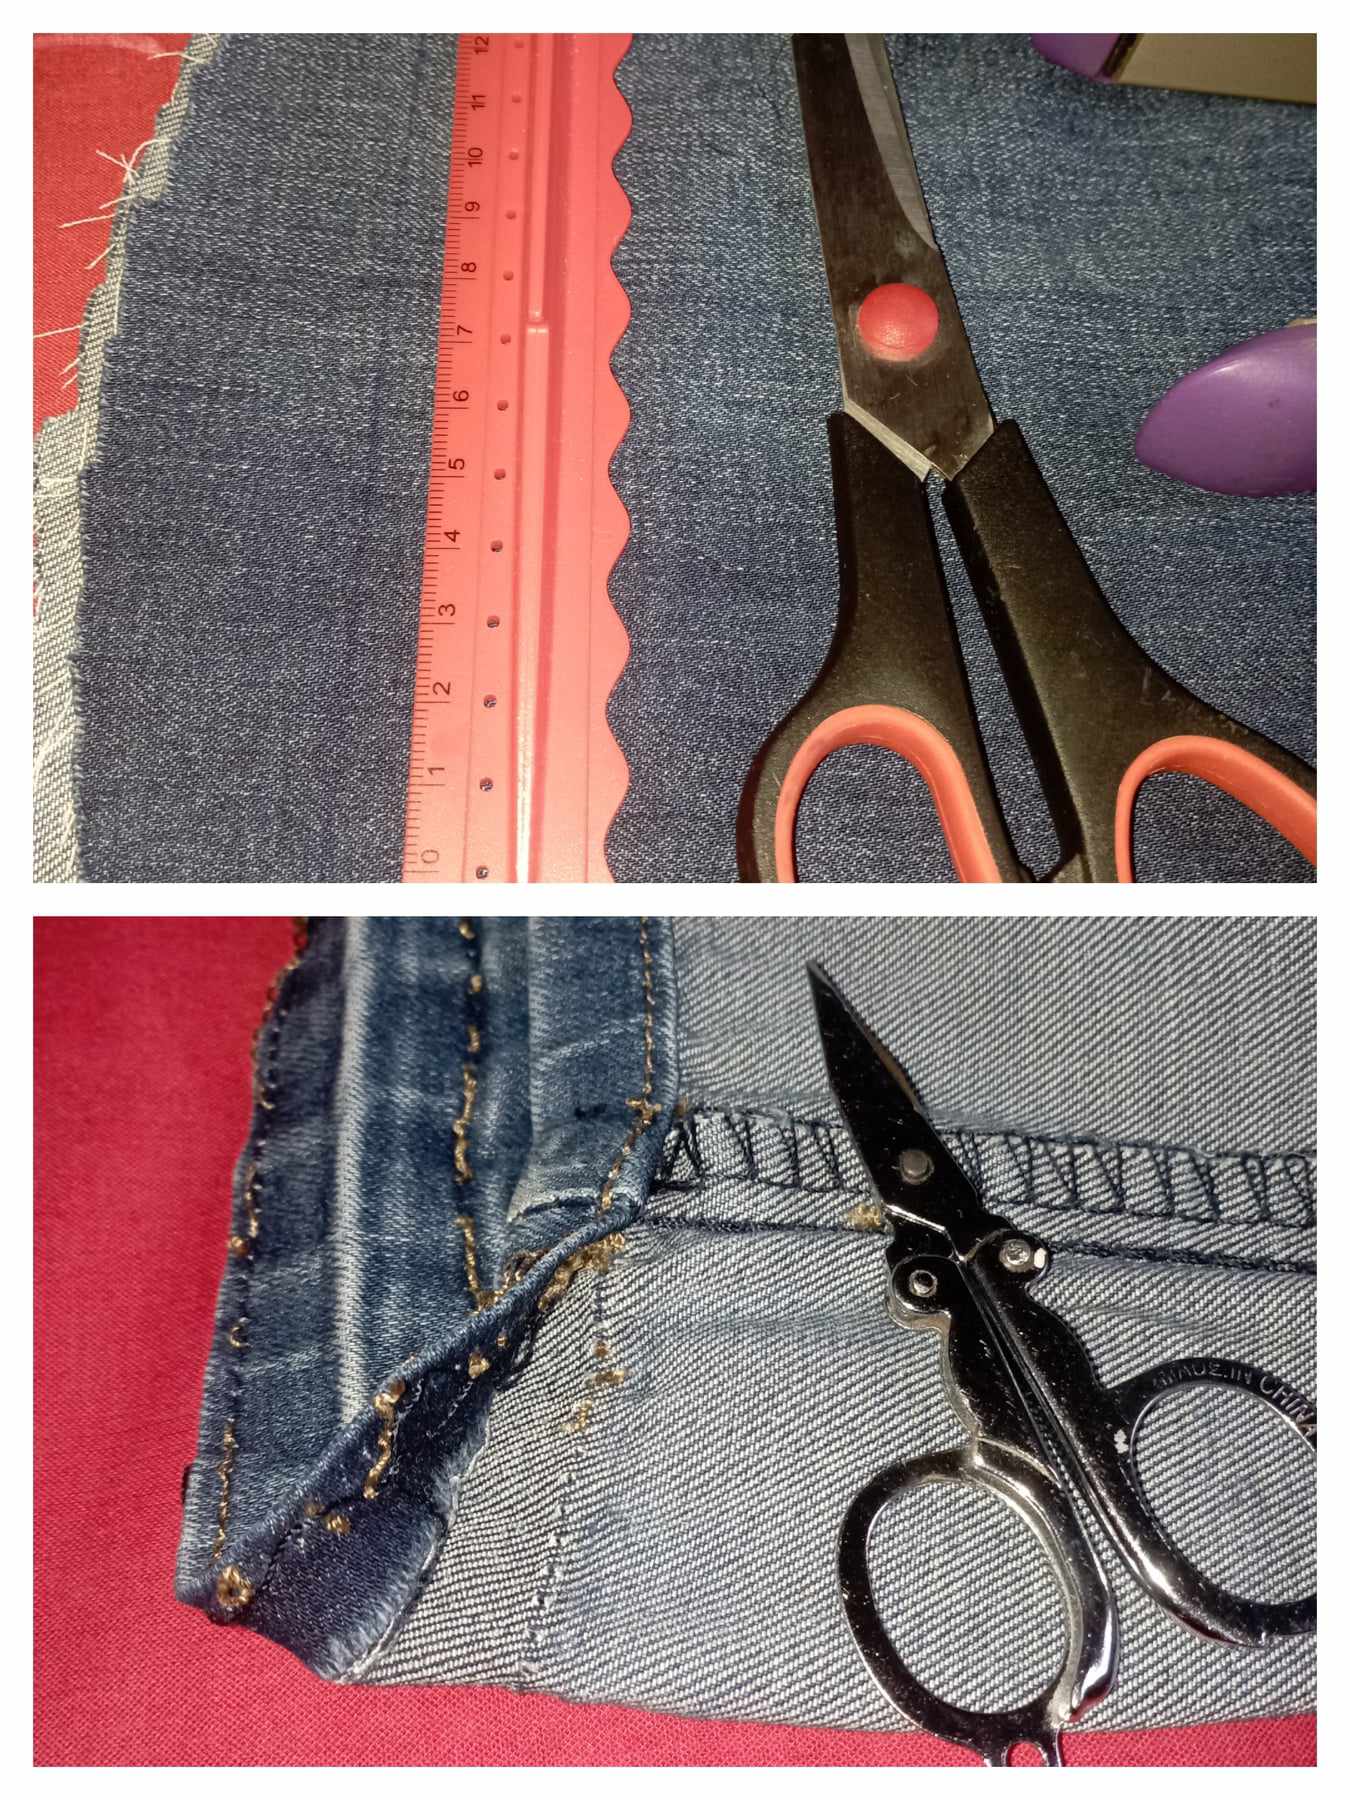
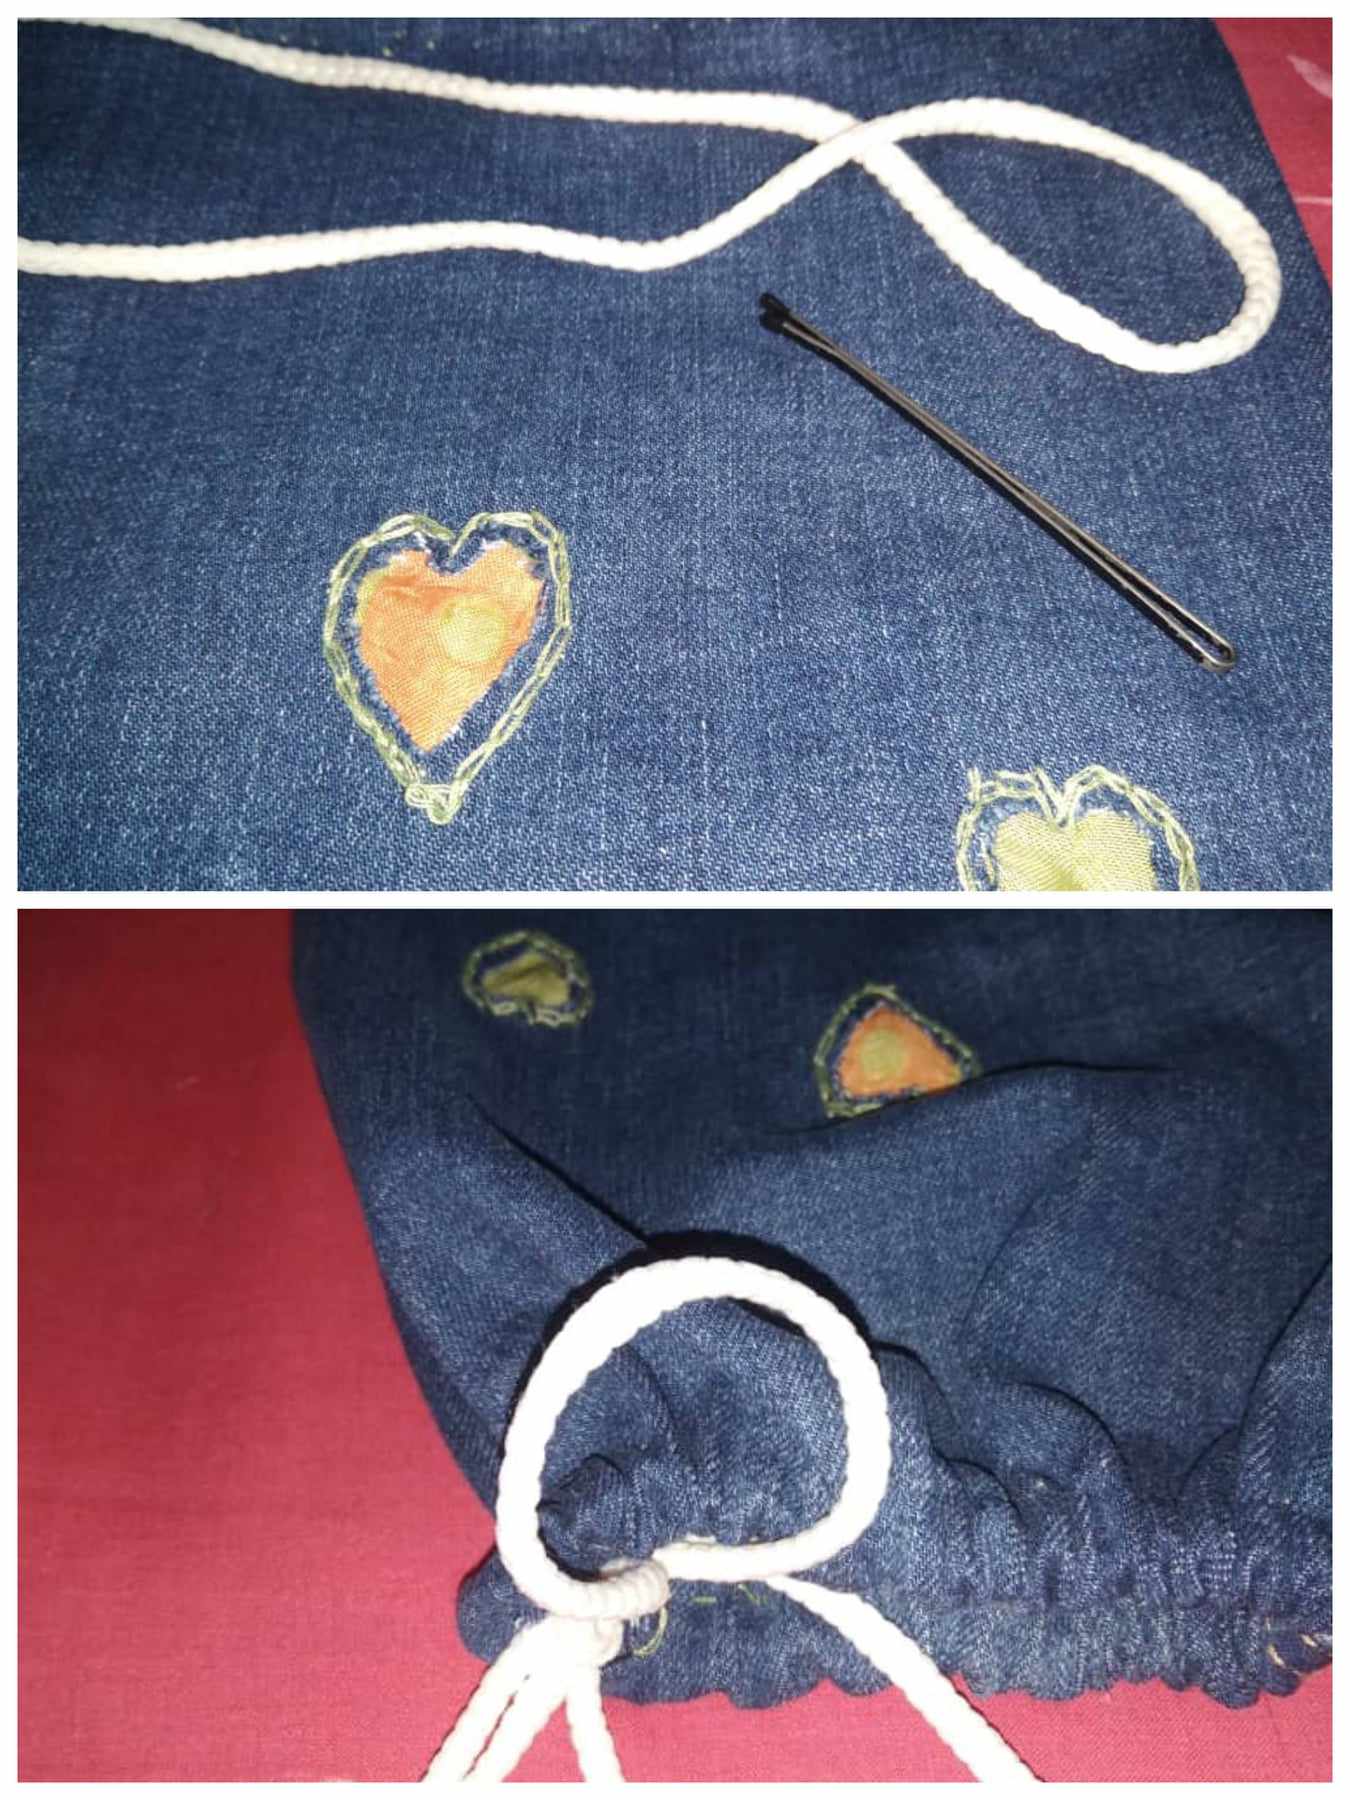
- 01 paso.
Teniendo ya la medida, descosi y corte los sobrantes de la tela.
Luego doble a lo largo la tela y marque para corta y sacar los corazones.
Después coloque por dentro la tela verde para bordar los corazones por el lado derecho.
- 01 step.
Having already measured, unstitch and cut the excess fabric.
Then fold the fabric lengthwise and mark to cut and remove the hearts.
Then place the green fabric inside to embroider the hearts on the right side.

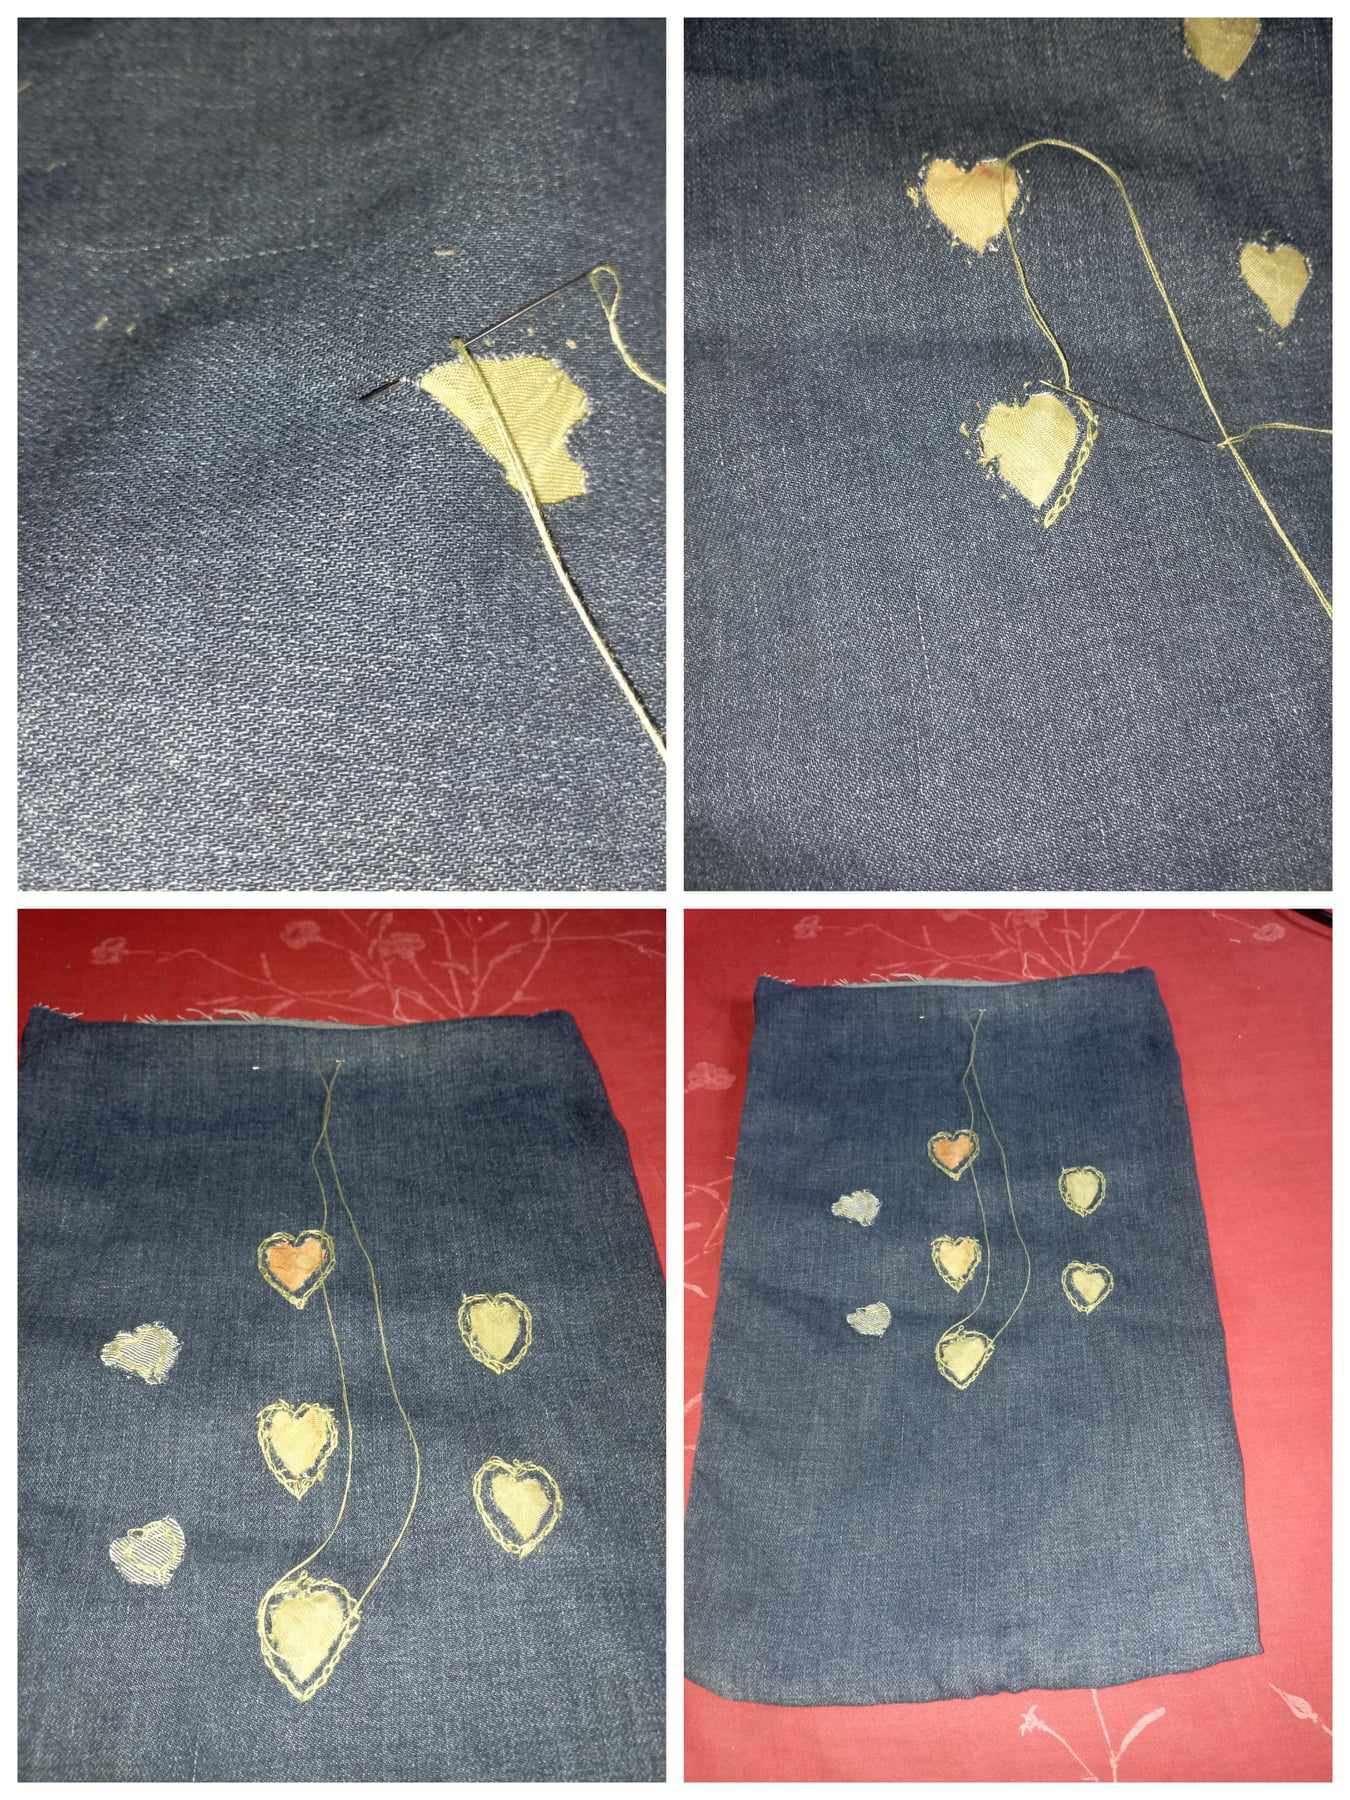
- 02 paso.
Cosí un pequeño dobles por todo el borde , para luego con la ayuda de un gancho introducir el cordón que sería el cierre de la funda.
- 02 step.
I sewed a small double stitch along the entire edge, and then with the help of a hook insert the cord that would be the closure of the cover.
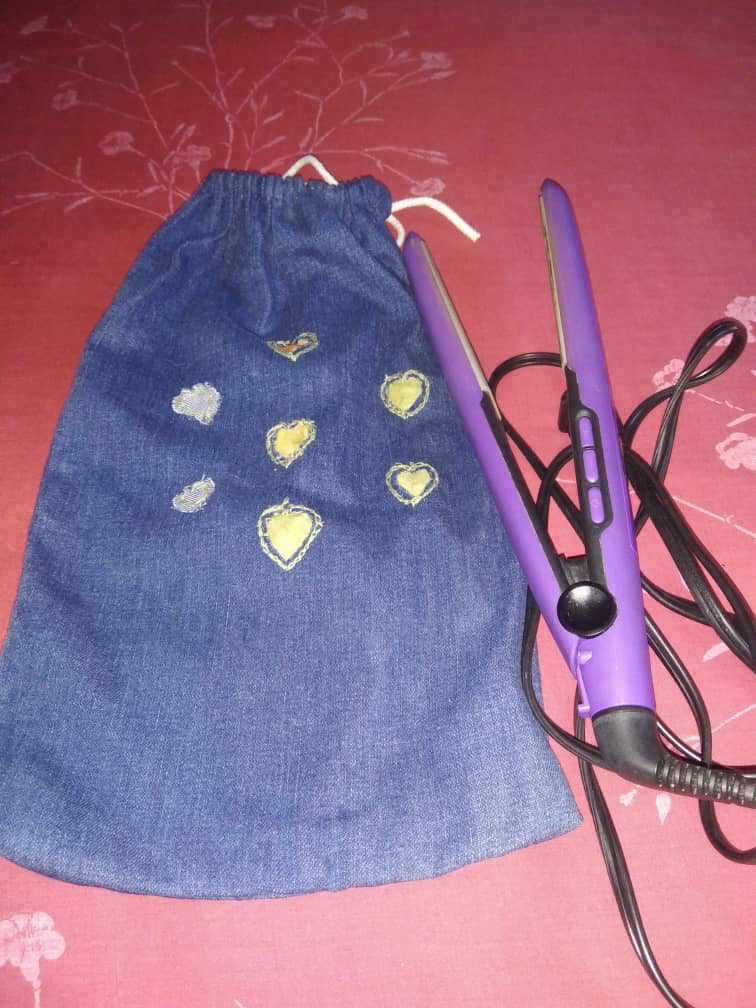
Y así de esa manera fácil y en muy poco tiempo le hice está funda a mi plancha, con materiales que tenía en casa y resultando muy útil.
And so in that easy way and in a very short time I made this cover for my iron, with materials I had at home and it turned out to be very useful.
Hasta una nueva oportunidad......Dios los bendiga...!!!
Until a new opportunity......God bless you...!!!
I'm thinking of making a backpack like this one, they are comfortable to take anywhere
.
Oh that was easy and short
I like the denim that you used, strong to hold a straightener
I like heart designs you made as well.
Well done