My Dear Hiveians,
Today is Sunday, February 09/2025 I am @rjraju001 from Bangladesh
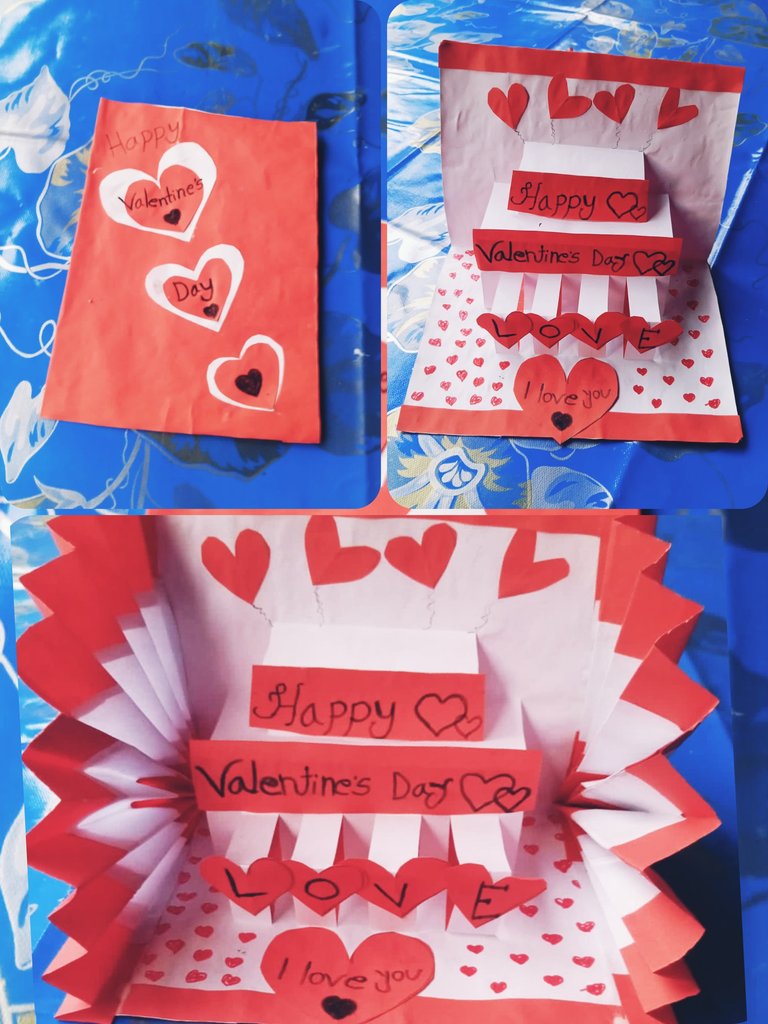
I am a new member of the @DIYHub community. I'm going to make a post today on the DIYHub community with my hard work. Welcome everyone to my blog. Hope you all are well. Today's creative community has brought us the art of love's endless joy with few exchanges. Today I'm joining the @DIYHub community to give you a Valentine's Day full of love. Today you will enjoy this wonderful creative art with great feeling. Today I will show you how to make valentines day card. I made this valentines day card for dear people with my hard work and present it today to @DIYHub community. I hope you will like it. Let's take a look at how I make Valentine's Day cards for my loved ones.

Necessary materials for making Walmate |
|---|
| Serial number | Name of the material |
|---|---|
| 1 | A4 Paper |
| 2 | Scale |
| 3 | Pencil / pen |
| 4 | Gum |
| 5 | Kaichi |
Steps to make a Valentine's Day card. |
|---|
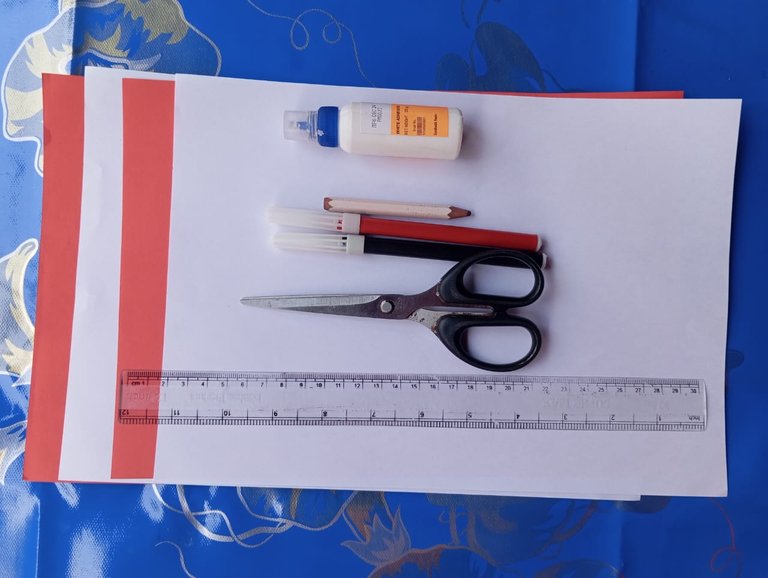
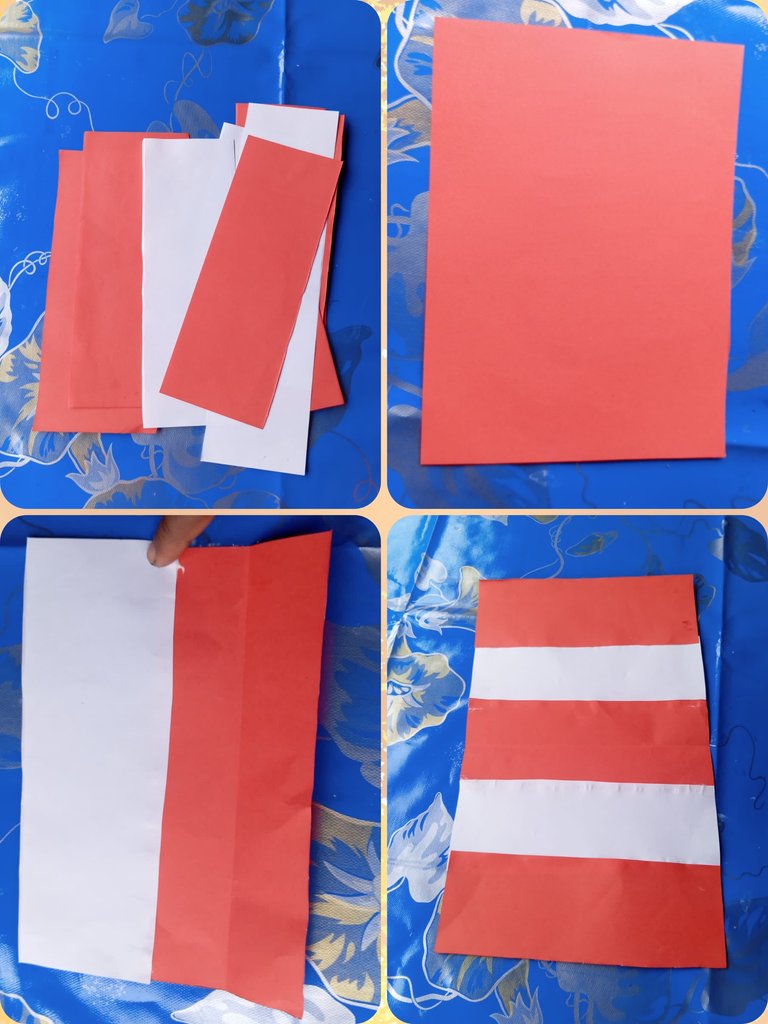
- First I took all the materials to make the Valentine's Day card.
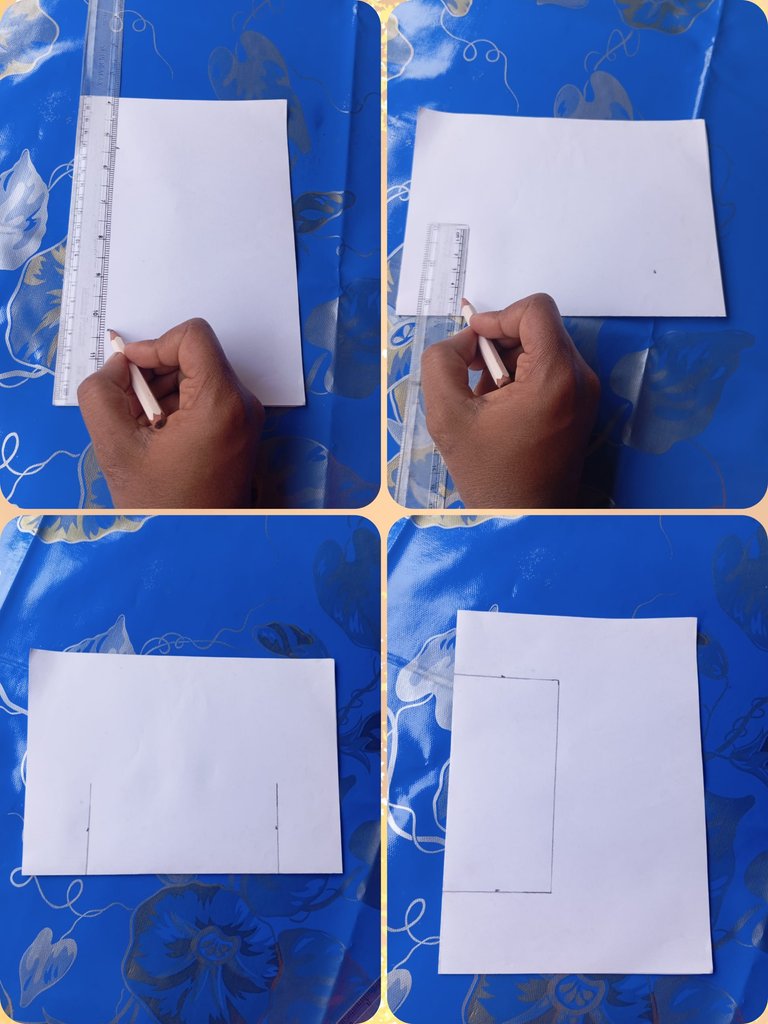
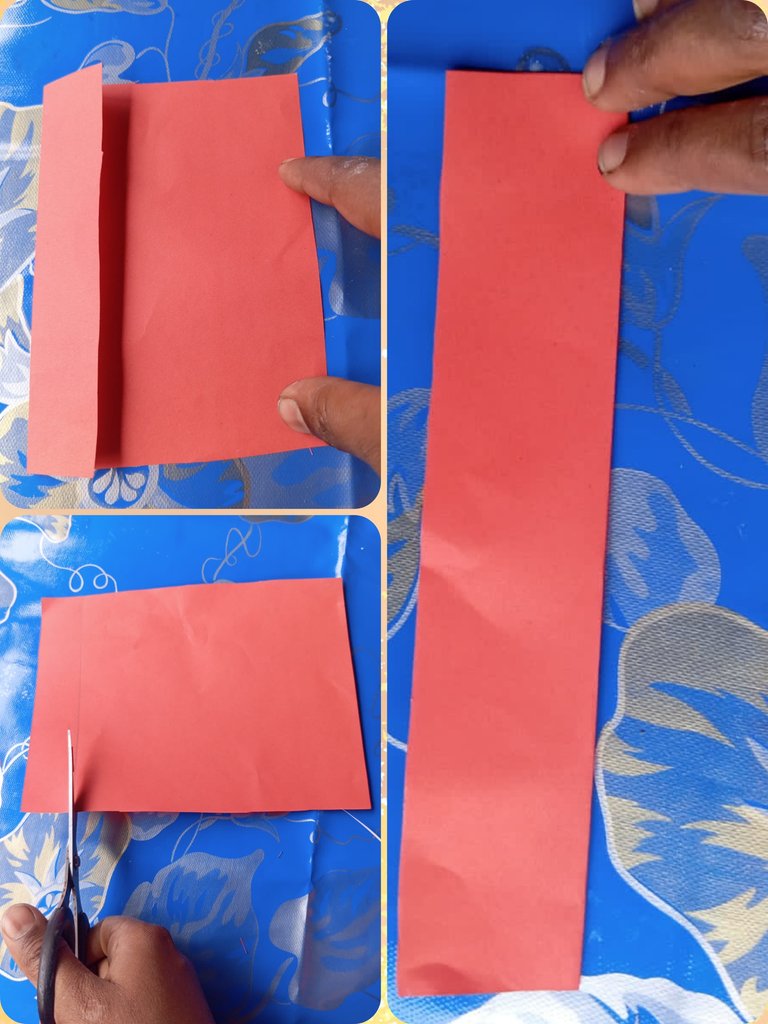
- Now I drew the marks according to the rules with a scale and pencil on an A4 white paper.
- Now cut the stained white paper with scissors to make Valentine's Day card. Then I will step by step insert the thorn part into the inside of the white fried paper. You will notice my steps well.

- As you can see, after inserting the cut part to the inside of the white paper, I started drawing the marks according to the rules with the scale and pencil. Then start cutting with scissors.
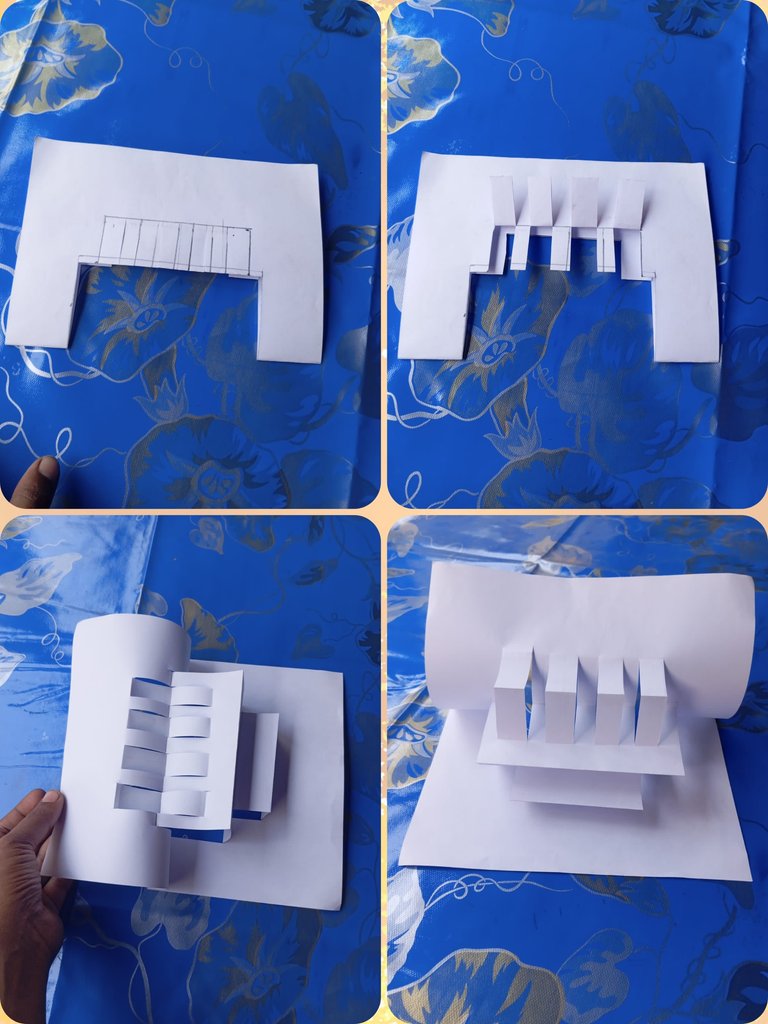
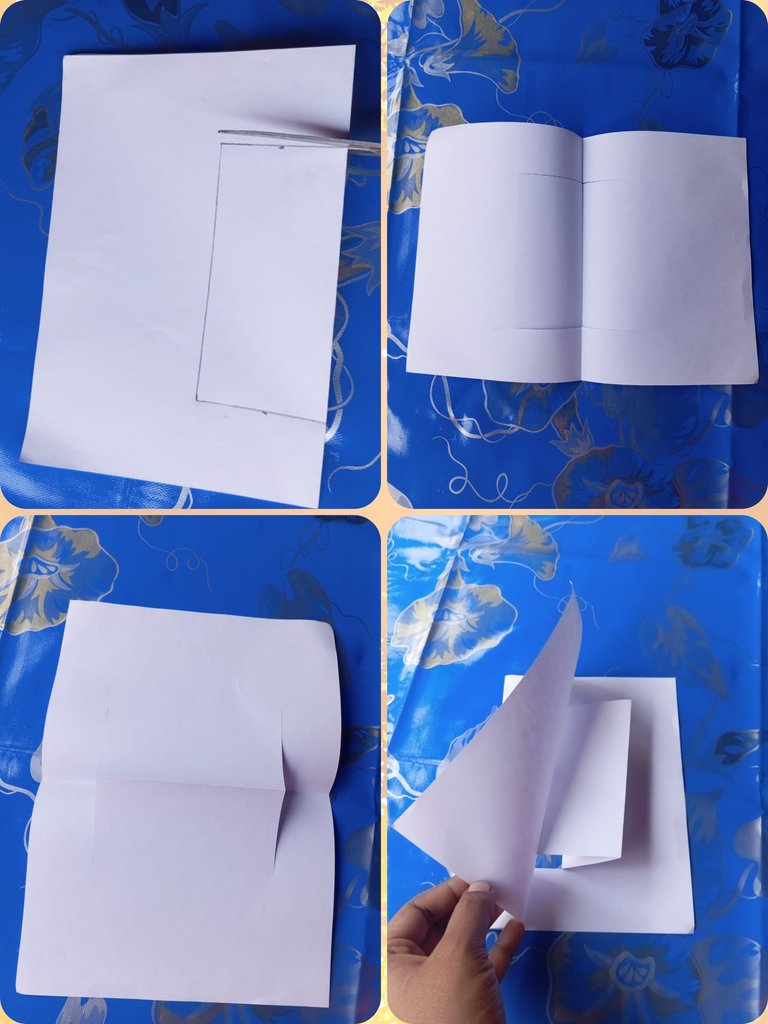
- 5th step is very important here you can notice well I have cut the marks step by step with scissors. And took out one more fry after another. You will notice my steps well how I am doing things. Now that I have lifted one side of the white paper my valentines day card is starting to take shape.
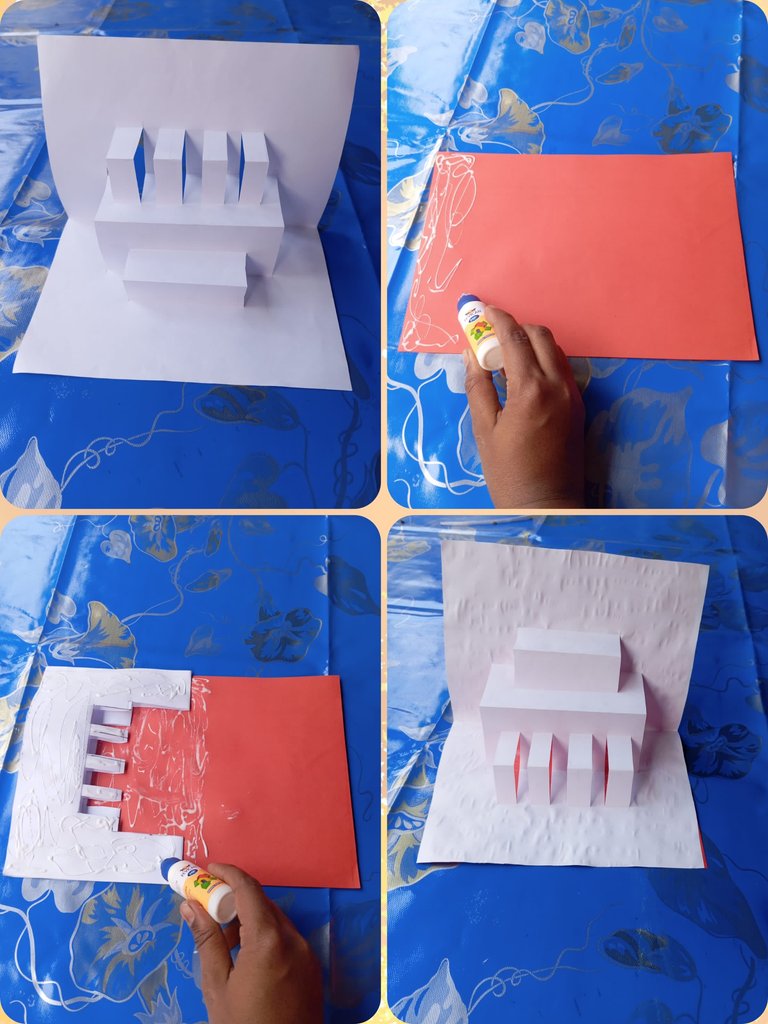
- In step six, I put the white paper I used to make the Valentine's Day card in one place. Then start putting gum on a colored paper on the side. Then add a piece of white paper on top of the colored paper. You can see that the white paper is attached to the colored paper by the gum.
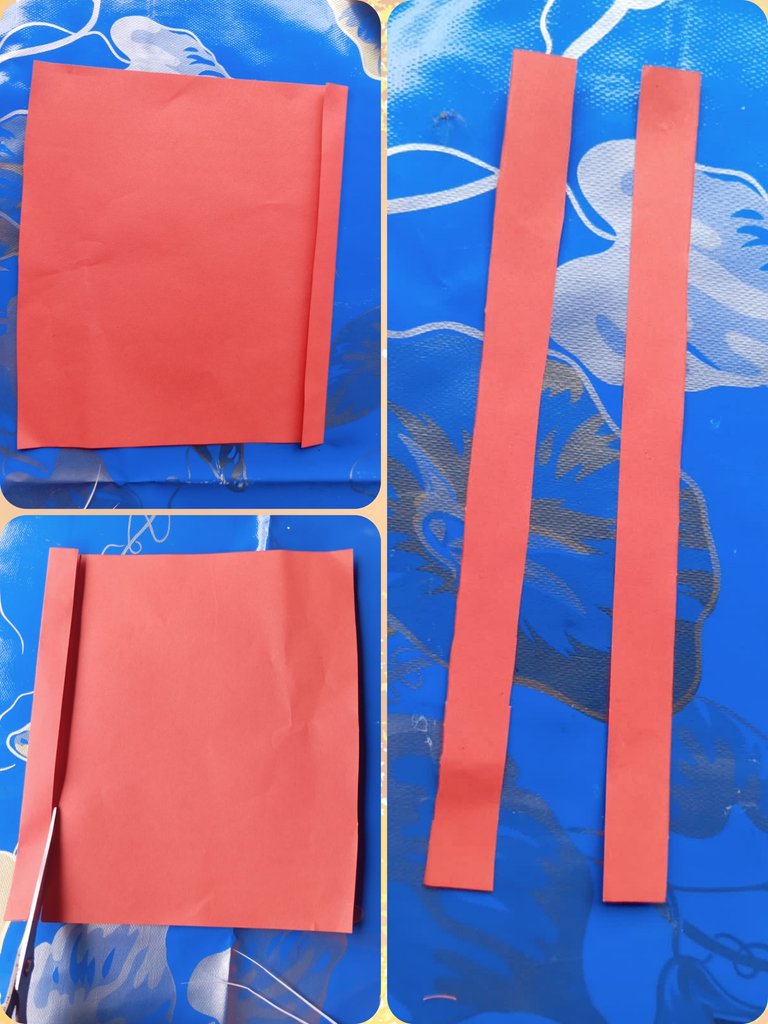
- Now I will cut the colored paper into a thin length according to the rules. Then I will cut it with scissors. I'm cut.
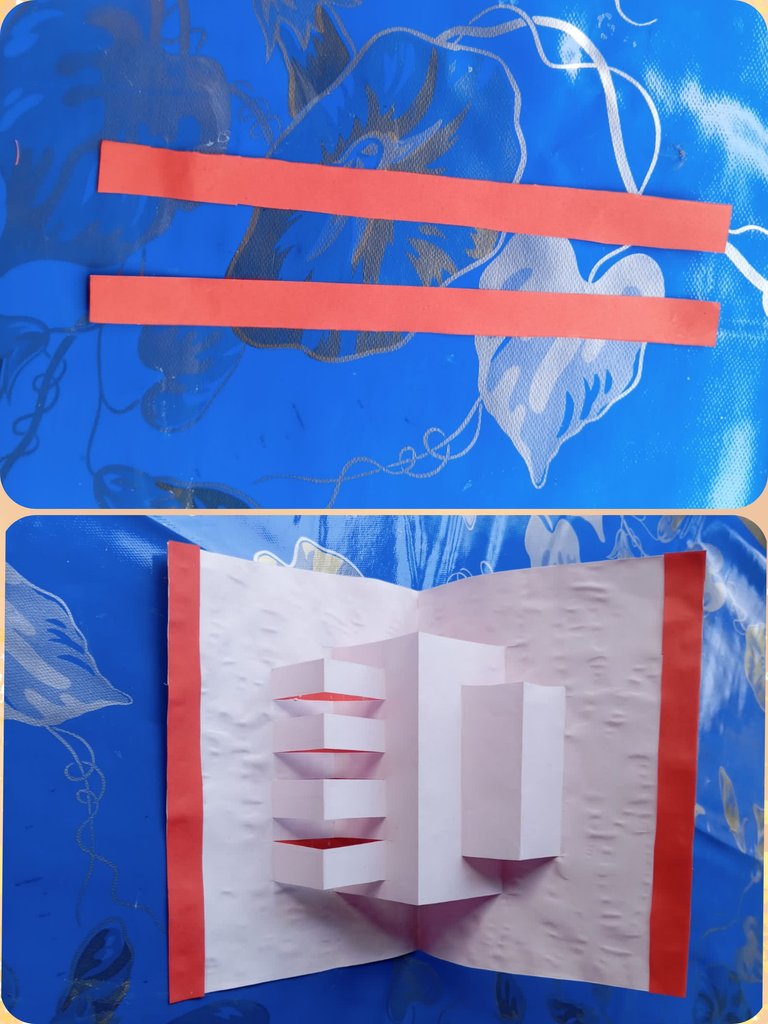
- On both sides of the valentines day card being made, I will add this thin long colored paper to the head part with gum.
- Now to enhance the beauty of the Valentine's Day card, again I will fold the colored paper according to the rules and cut it with scissors.
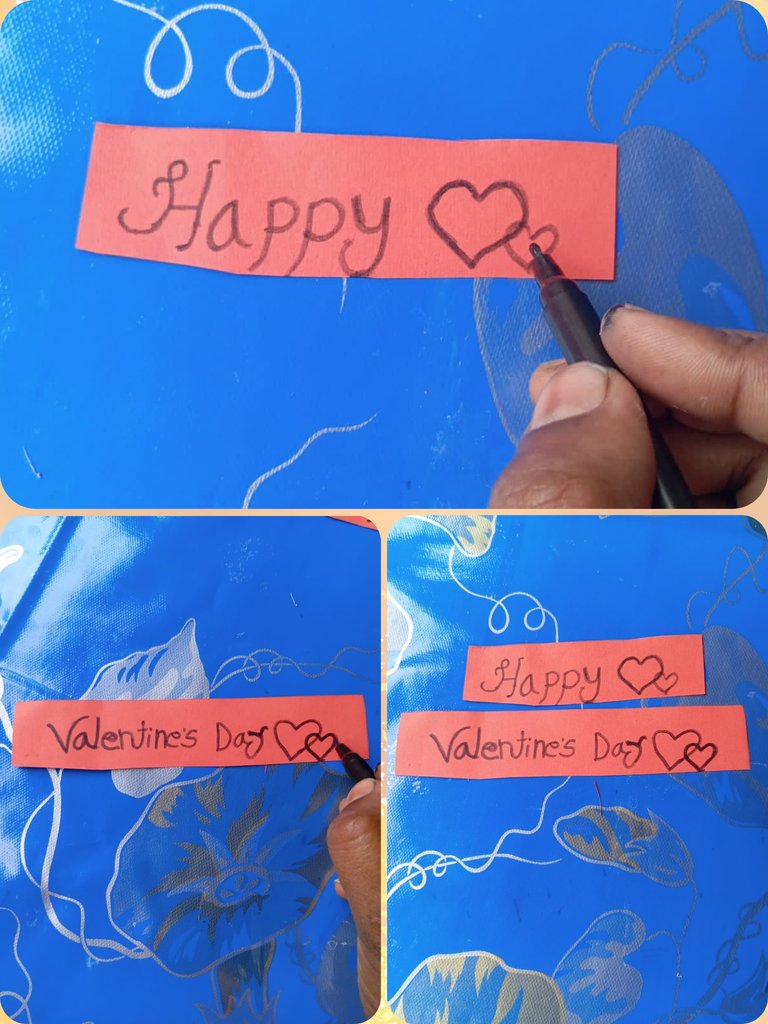
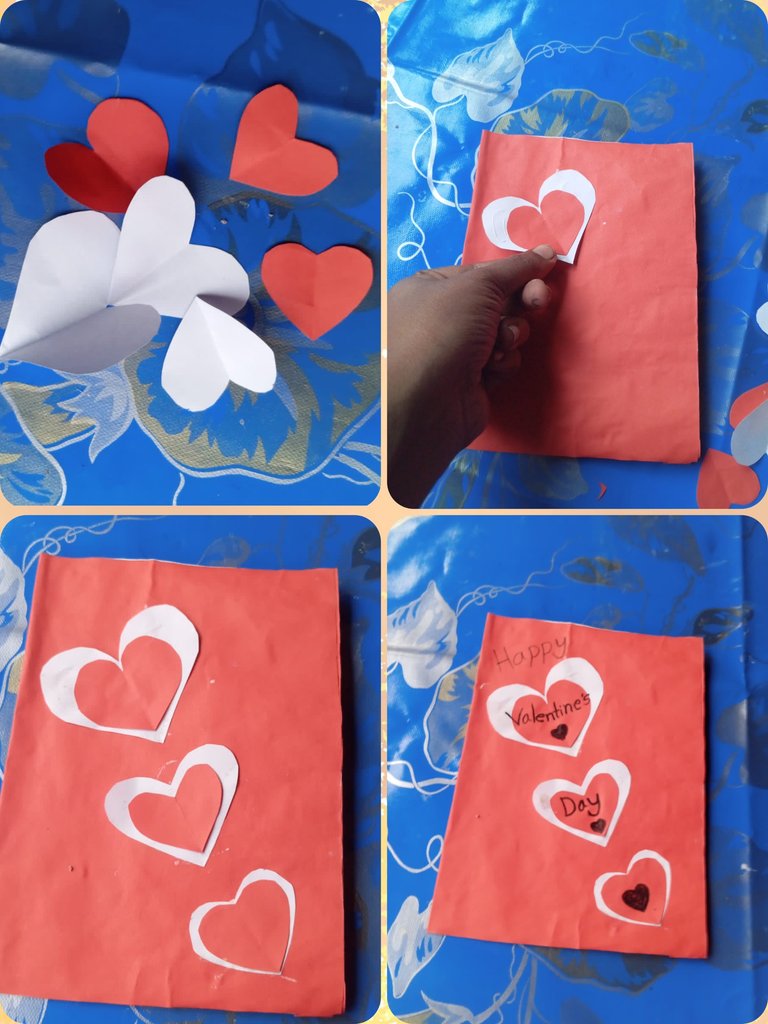
- The Valentine's Day card I would make. To enhance the beauty of the card, I cut two colored papers according to the rules. Now I will write happy valentines day beautifully on the colored paper by hand with black marker pen. You see I have written happy valentines day with my hard work with black marker pen.
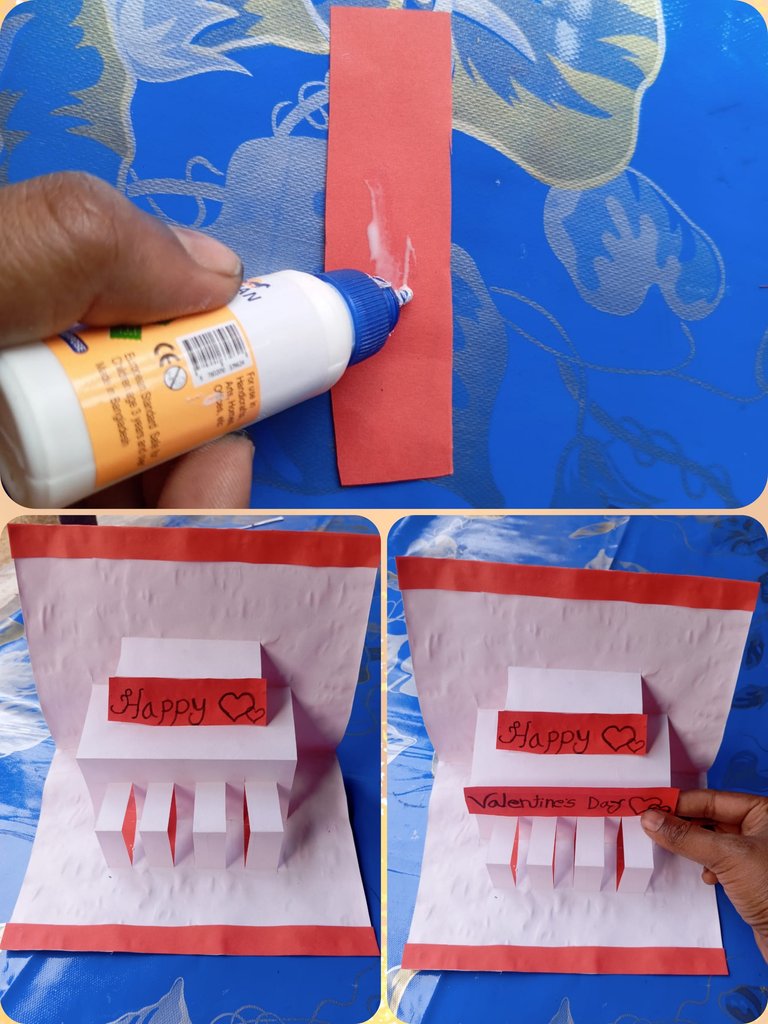
- Now, to get the rough shape of the Valentine's Day card, I will put gum on the reverse side of the colored paper with Valentine's Day written on it. Then, I will put the gummed colored paper on the front of the Valentine's Day card step by step. The Valentine's Day card is starting to take shape.
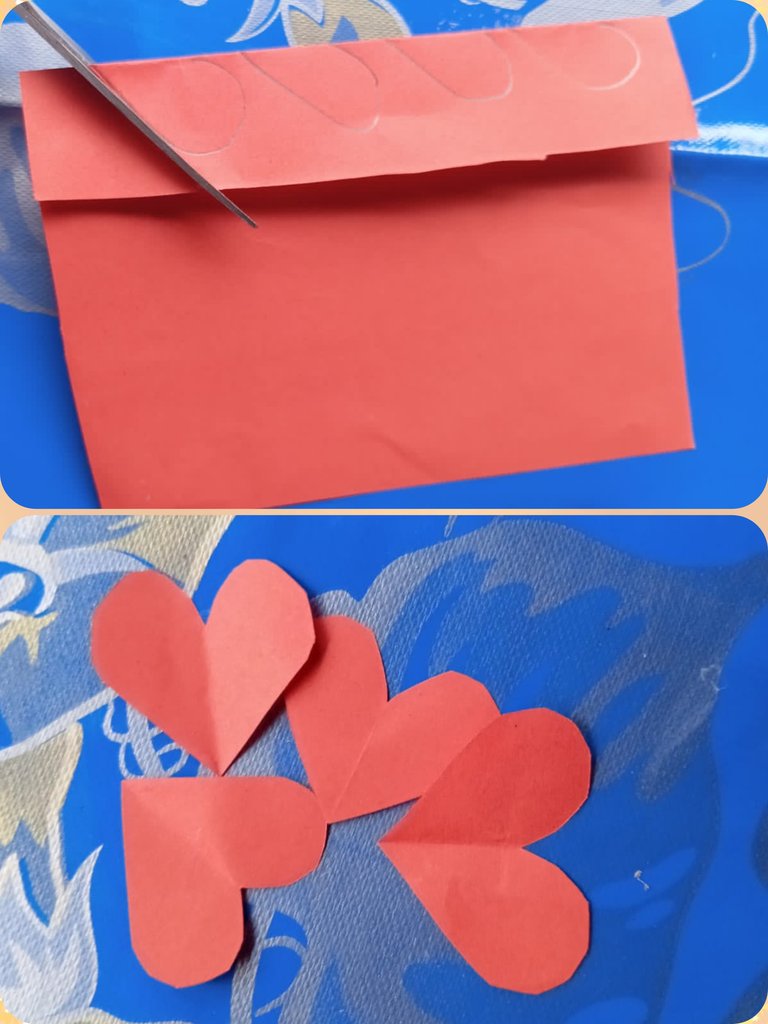
- Little by little I will continue to beautify the Valentine's Day card. Here you can see I have made love flowers in pencil on colored paper. Now I will cut that part with scissors. As you can see I have made four love flowers.
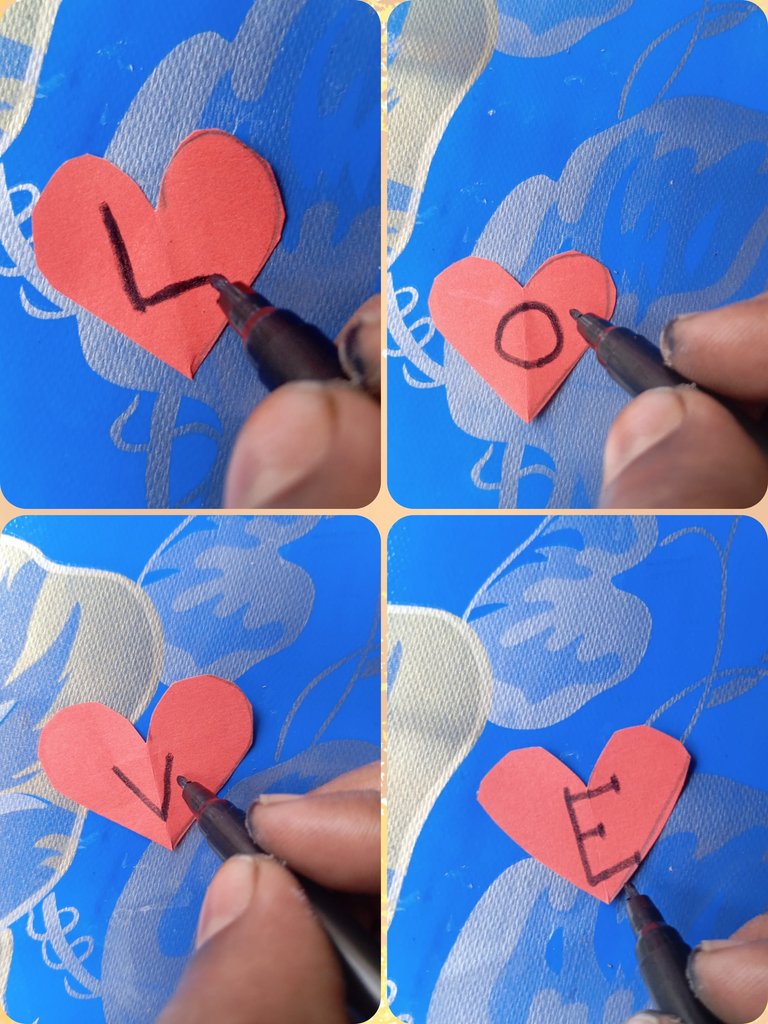
- You will notice that I have written Love beautifully here with black marker pen on the paper made of love flower.

- This time I added the colored paper love flowers to the Valentine's Day card with gum step by step.
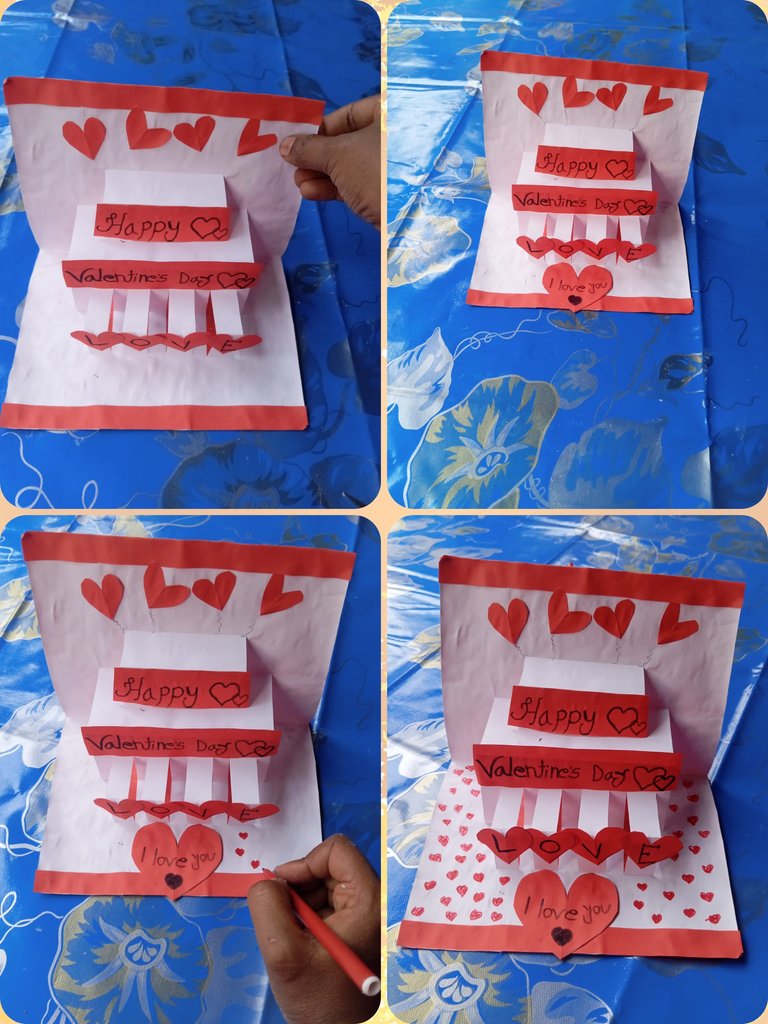
- Step 15 is very important. As you can see I added some love full gum to add beauty to the Valentine's Day card. Again by hand I made many small love flowers with red marker pen. The beauty of valentine day cards is slowly increasing.

- I have again folded colored paper and white paper according to the rules. Then cut with scissors.
- Now I will glue the cut colored paper and white paper step by step.
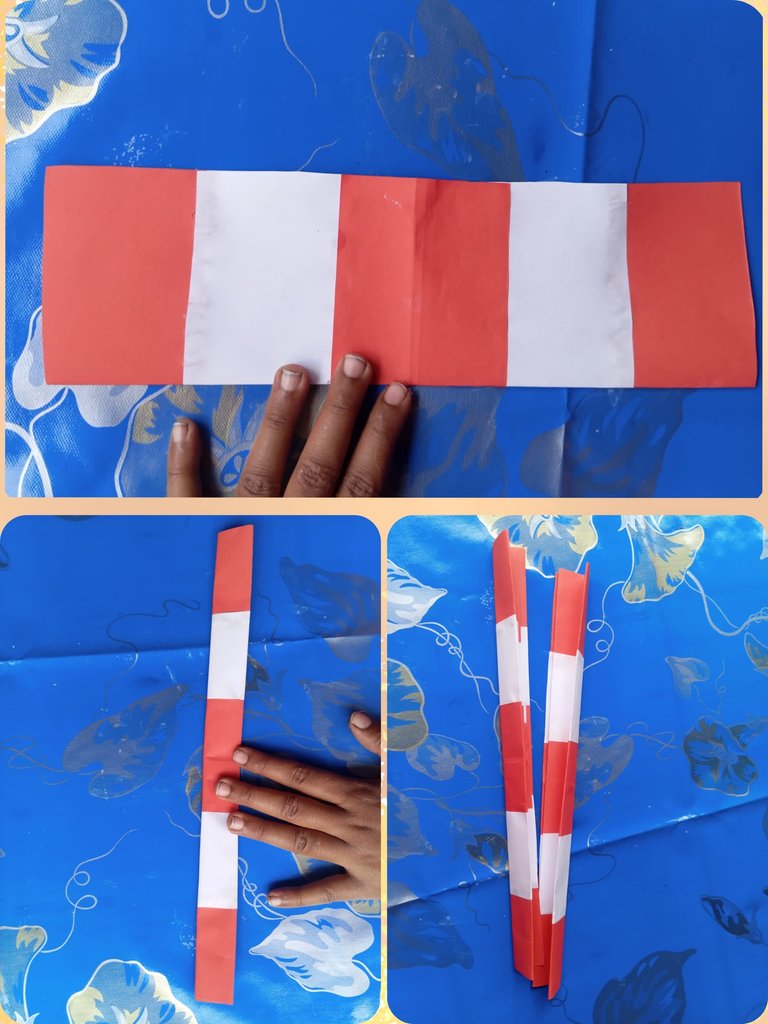
- Now I will fold the length and width. Then I started to fold the papers step by step according to the rules by hand into thin lengths.

- Now after matching the folded colored paper, small folds will be seen. Then the small folded colored paper should be folded step by step. Then the colored paper will look like a flower. Now glue one part of the folded colored paper and join it to another part. Then it will look like a beautiful flower.
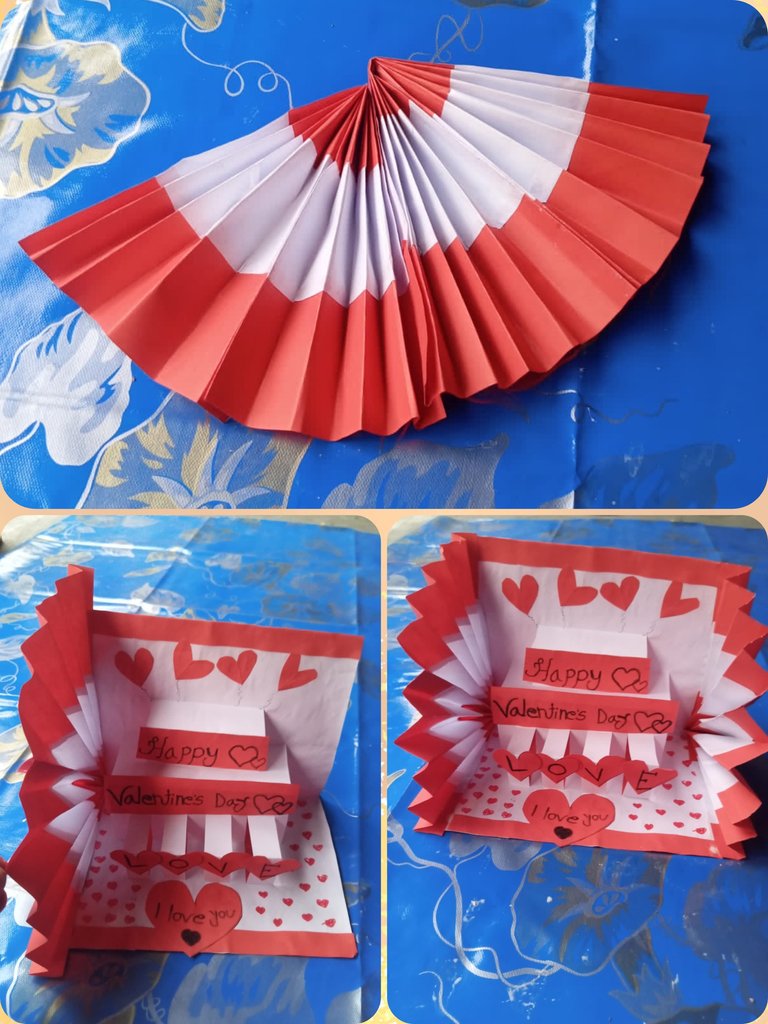
- The Valentine's Day card is almost finished. As you can see here I have made two flowers. Now I put one full gum on both sides of the card. will add by As you can see my card is almost finished. I tried to make this happy valentine day card very beautiful with my hard work.
- To double the beauty of the happy valentines day card I made love flowers with some colored paper and white paper. I first added white love flower gum to the top of the Happy Valentine's Day card. Added a colorful Loveful Gum on top of that. In this way I designed a beautiful love flower on the top of the Happy Valentine's Day card step by step and wrote Happy Valentine's Day on it. I think you will love this Happy Valentine's Day card with my hard work. I have made this very nice step by step Happy Valentine's Day Card to show you. Hope if you follow my steps, you will be able to make many beautiful Happy Valentine's Day cards for your loved ones. Made a Happy Valentine's Day card for my loved ones with my hard work @DIYHub community. Be sure to comment and let me know how you like it. You all will be fine. Wishing you all the best, I am ending here today. Allah Hafez.
Thanks for reading my post.

Follow Our Social Media
I am Md. Roknuzzaman Raju. I am a Muslim. I live in Gangni Police Station, Meherpur District, Khulna Division, Bangladesh. I feel proud as a Bangladeshi citizen. I love my native Bangladesh very much.I love to do photography and I love to hang out with my friends.I love to serve the poor and needy people. You all pray for me.May I reach my destination inshallah.
🌹This is a wonderful work! Your efforts are really shown. The layering of the coloured paper and the idea of ‘love flowers’ is very creative. The way you explain the steps one by one makes it easy to follow even for beginners. Especially the sincerity of the handmade details and the careful cuts are remarkable. Your loved ones will be very happy to see this card! 🥰 I am also glad that you participated in DIYHub, our family will be even more colourful with talented members like you. I look forward to your new projects!us!
Good luck to you and thanks for reading my post.
This is lovely and It's beautiful as well, I love it and above all it's simple but unique. Well done and good job
Thank you so much..
amazing work, looks very beautiful.
Thank you..
You're welcome.
Your DIY Valentine’s card looks really great and unique. Well done and thanks for participating in the monthly contest.
Thank you so much for your support.
Sending Love and Ecency Curation Vote!
 To earn 100% daily curation rewards in Hive + 10% of your delegation each day in Ecency Points and if you write well, you might even get curated!
Thank you so much.
Congratulations @rjraju001! You have completed the following achievement on the Hive blockchain And have been rewarded with New badge(s)
Your next target is to reach 2000 upvotes.
You can view your badges on your board and compare yourself to others in the Ranking
If you no longer want to receive notifications, reply to this comment with the word
STOP