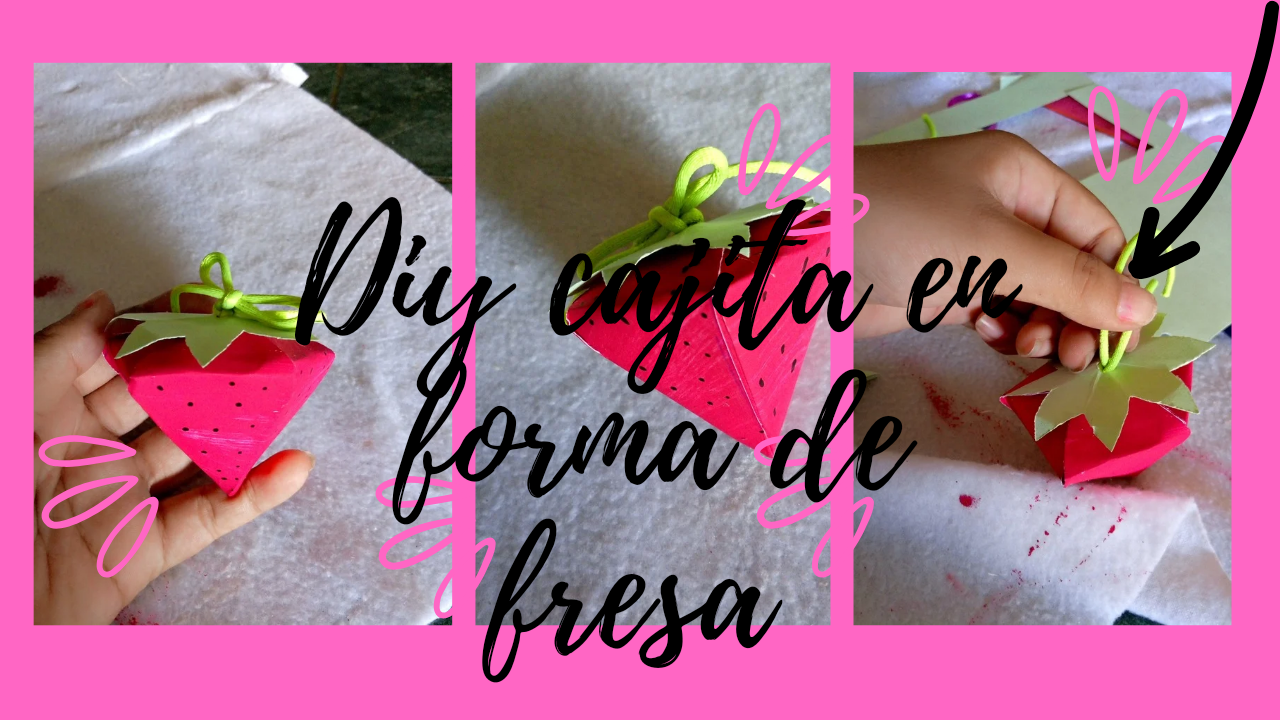
Hello everyone in the DIYHub community, I hope you are enjoying this beautiful Sunday. This time, I am working on a little box shaped like a strawberry. This little box is ideal for giving as a gift, as its peculiar shape makes it very special and pretty. Also, it is made from recycled materials. As I always say, let's give a new life and utility to what many consider trash! I hope you like this idea, and the best thing is that making it is not that complicated. For a while now, I have been creating gift boxes because they are practical and aesthetically pleasing. Whenever the opportunity to give something as a gift arises, I always have a little bag or box on hand, which saves me the need to buy one. Now that I think about it, it might be a good idea to start a small business making gift bags and boxes. I will definitely consider it!
I saw this little box in a video and was inspired to try my hand at making it. In the video, they used some pretty stationery, but I already had another type of material in mind that I wanted to use. So, let's get to work! I love the idea of reusing what I have at home and giving it a new purpose. What would this little box be used for? Being small, I thought of using it for jewelry or some tiny object. I think it's best suited for gifting a ring or earrings, as its unique and charming shape adds a special touch to any gift. Imagine someone's surprise when they receive a piece of jewelry presented in such a creative and original way. Plus, this little box is not only functional, but it's also a great way to show care and dedication when gifting something. By making it myself, I'm giving it a sentimental value that a simple gift bag couldn't offer. Personalizing gifts always adds a special touch that makes the gift-giving experience even more memorable.
(Materiales:)||(Materials:)
- Papel blanco
- Papel verde
- Pintura fucsia
- Rabo de ratón
- Tijeras
- Silicón
- Abre hoyos
- Pintura fucsia
- Marcador negro
- White paper
- Green paper
- Fuchsia paint
- Mouse tail
- Scissors
- Silicone
- Hole punch
- Fuchsia paint
- Black marker
(Procedimiento:)||(Procedure:)
Paso nro 1
Paso nro 1
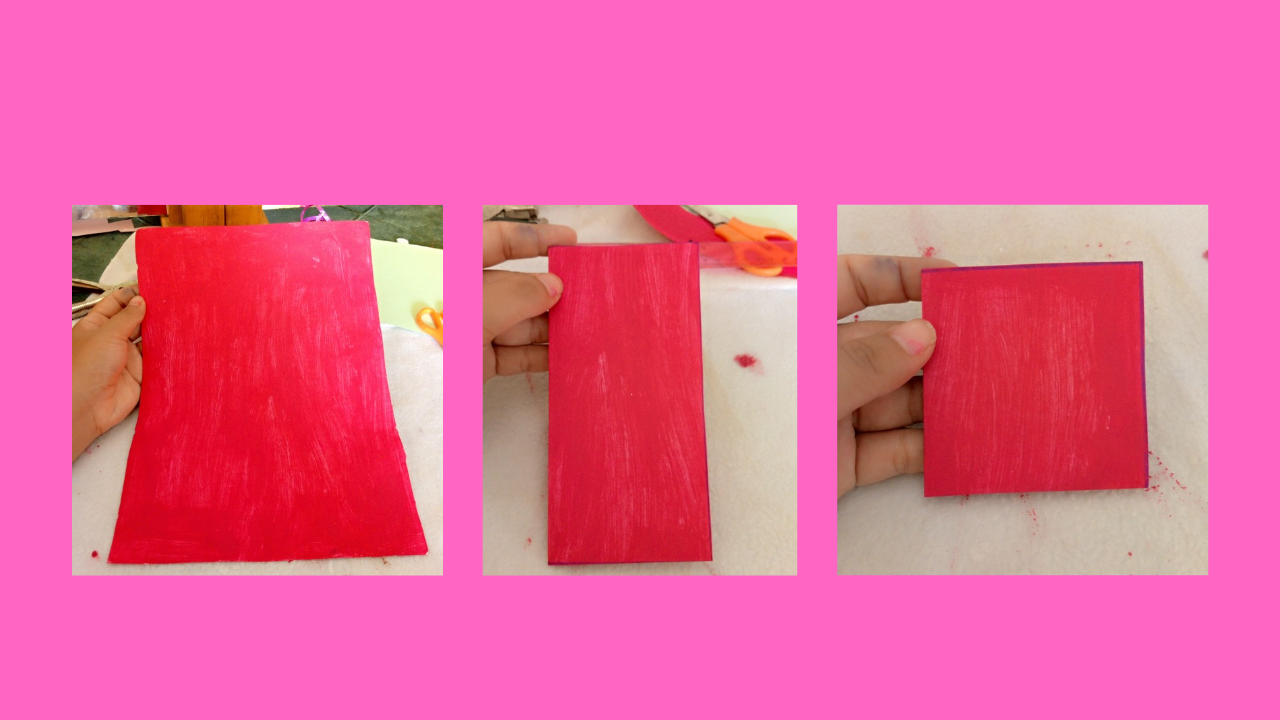
The first step I took was to paint the white sheet fuchsia. Since I didn’t have any fuchsia paper, I decided this would be a creative and fun alternative. After applying the paint, I let it dry completely to make sure the color was even and vibrant. Once the sheet was dry, I measured the size needed for the little box: 15 cm wide and 15 cm long. Using a ruler, I marked the measurements and proceeded to carefully cut out the sheet. Next, I folded the sheet in half, allowing me to create a reference line. Then, I took that half and folded it again, forming a perfect square. This process is essential, as it ensures that the dimensions are correct for the design.

Paso nro 2
Paso nro 2
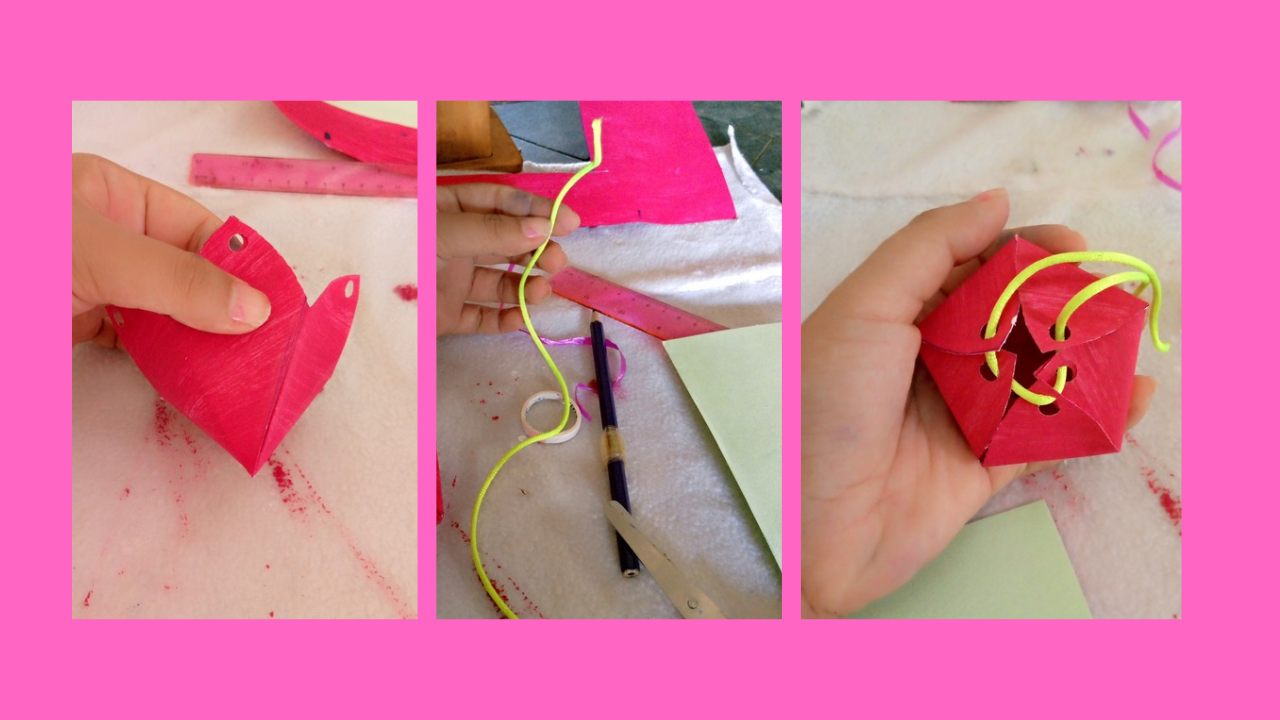
In the second step, I was left with the square shape. From there, I took the sheet and folded it again, but this time forming a triangle. This new fold is crucial for the design of the little box, as it sets the base for the following steps. With the triangular shape ready, I drew an outline that resembles a leaf. Once I was satisfied with the drawing, I proceeded to carefully cut out the shape. After cutting, I unfolded the sheet and, to my surprise, it turned out like a beautiful flower!

Paso nro 3
Paso nro 3
Paso nro 4
Paso nro 4
In the fourth step, after gluing the flower parts together, the strawberry shape is now visible. I used a piece of mouse tail, but you can also use ribbon or string. I threaded this material through the holes I had previously made. This step is crucial, as it allows me to attach the top of the box, ensuring that it is closed properly and that the strawberry shape remains intact.
Paso nro 5
Paso nro 5
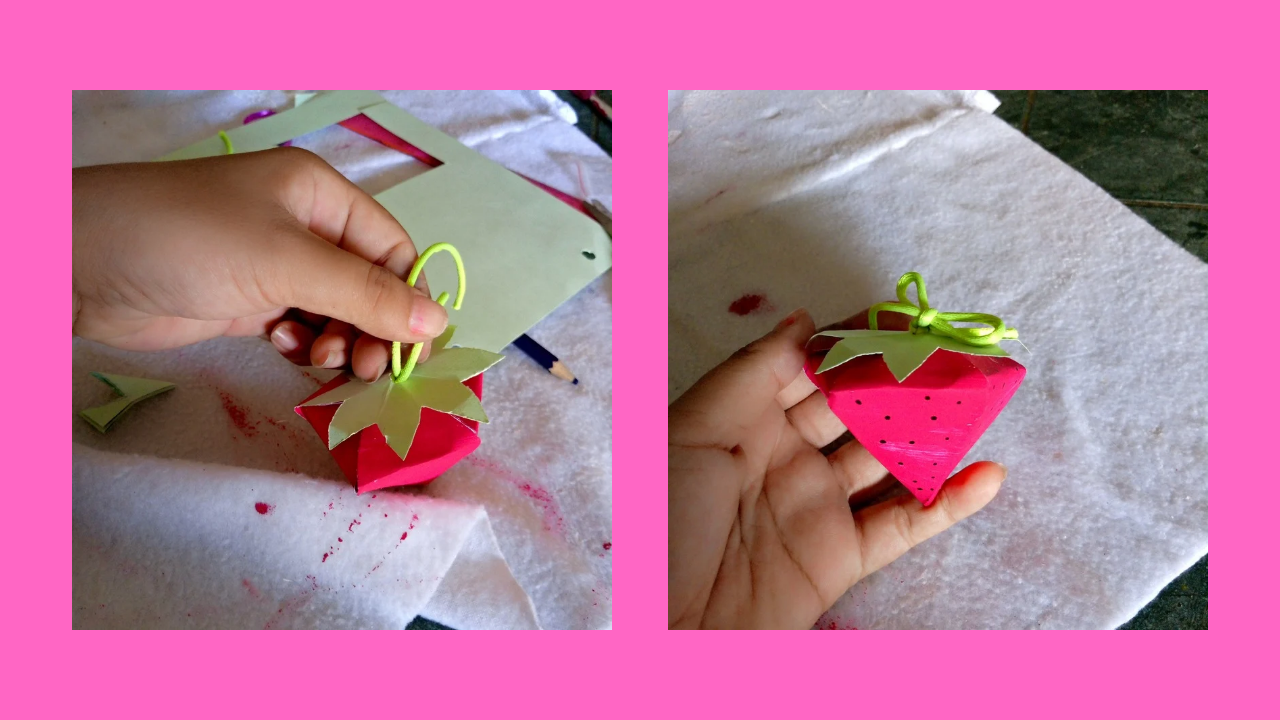
In the fifth step, I took some green paper and decided to do the same thing I did with the fuchsia paper. I started by measuring the necessary dimensions, which are 7 cm long and 7 cm wide. Once I had the measurements, I carefully cut out the paper, making sure it was accurate. Then, I performed the same folding and design process I used before. I drew the shape I wanted it to have, making sure it fit the style of the little box. After cutting out the shape, I made a hole in the middle part. This hole is important, since I will be putting the mouse tail I used previously through it. This part of green paper will represent the leaves of the strawberry, adding a natural and realistic touch to the little box. Finally, my plan is to put the mouse tail through the hole to finish the decoration, making a bow.
(Resultado final:)||(Bottom line:)
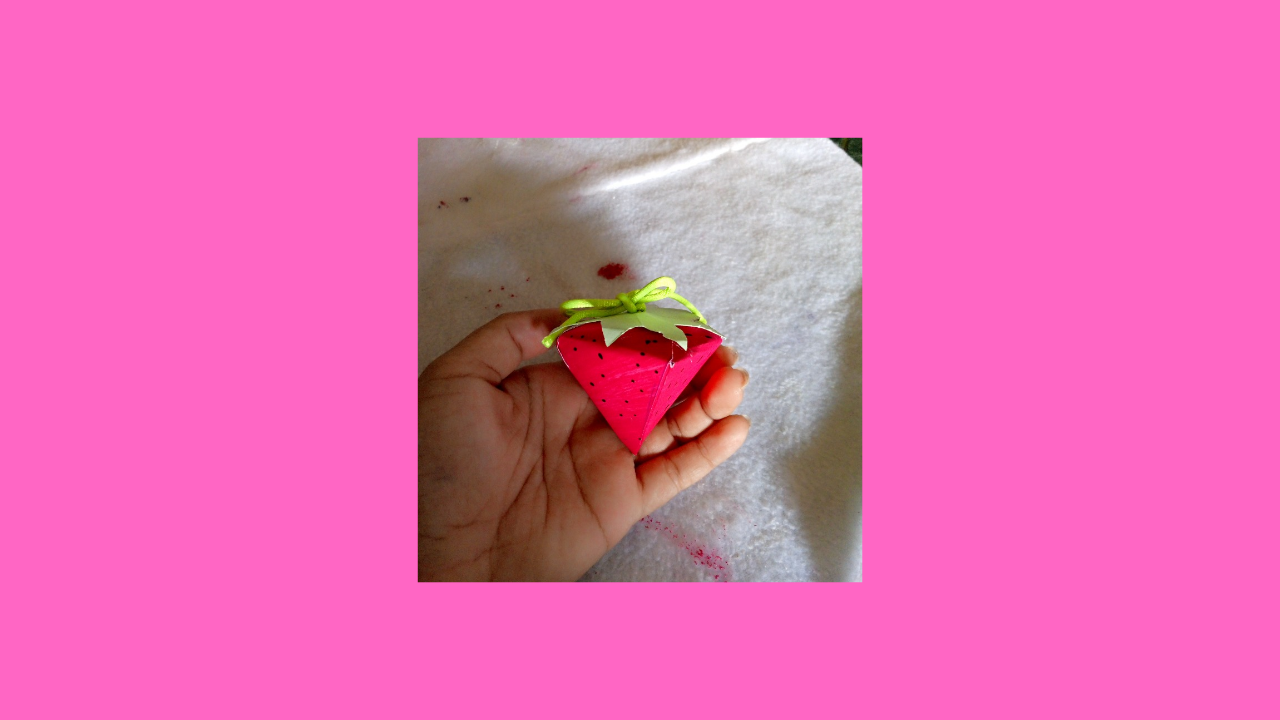
Once I finished putting all the parts together, the final result was a lovely little strawberry-shaped box. The combination of the vibrant fuchsia paper and the green leaves gives it a fresh and attractive look. The bow I made with the mouse tail adds a delicate and fun touch, thus completing the design. As a final touch, I used a black marker to draw the strawberry seeds.
Las fotos de este blog son de mi propiedad|Las imágenes son editadas en canva|Fotografías tomadas en mi celular infinix Smart 7|El contenido está traducido en el traductor de Firefox.
Making a strawberry is a really unique craft. Thank you so much for presenting this wonderful art to all of us with great feeling through the use of paper.
Hi, I'm glad you liked it, thanks
Aaaww que linda cajita,la fresa me encanta, es ideal para dar obsequios pequeños, excelente idea, gracias por compartir.
Saludos!
Hola gracias que bueno que te guste
Turning things into treasures is golden and your little box is a testament to that. Amazing job friend and thanks for sharing.
Hello, being here and making useful crafts and being able to show you how they are really made, that if it is gold, how something simple changes, it is wonderful, thank you.
muy lindo y creativo!
very nice and creative!
Hola gracias que bueno que te gustó
Congratulations friend, it is beautiful and perfect for keeping small surprises inside and giving it to friends or family.
Hola que bueno que allá gustado la cajita y si es muy ideal para esas pequeñas sorpresas