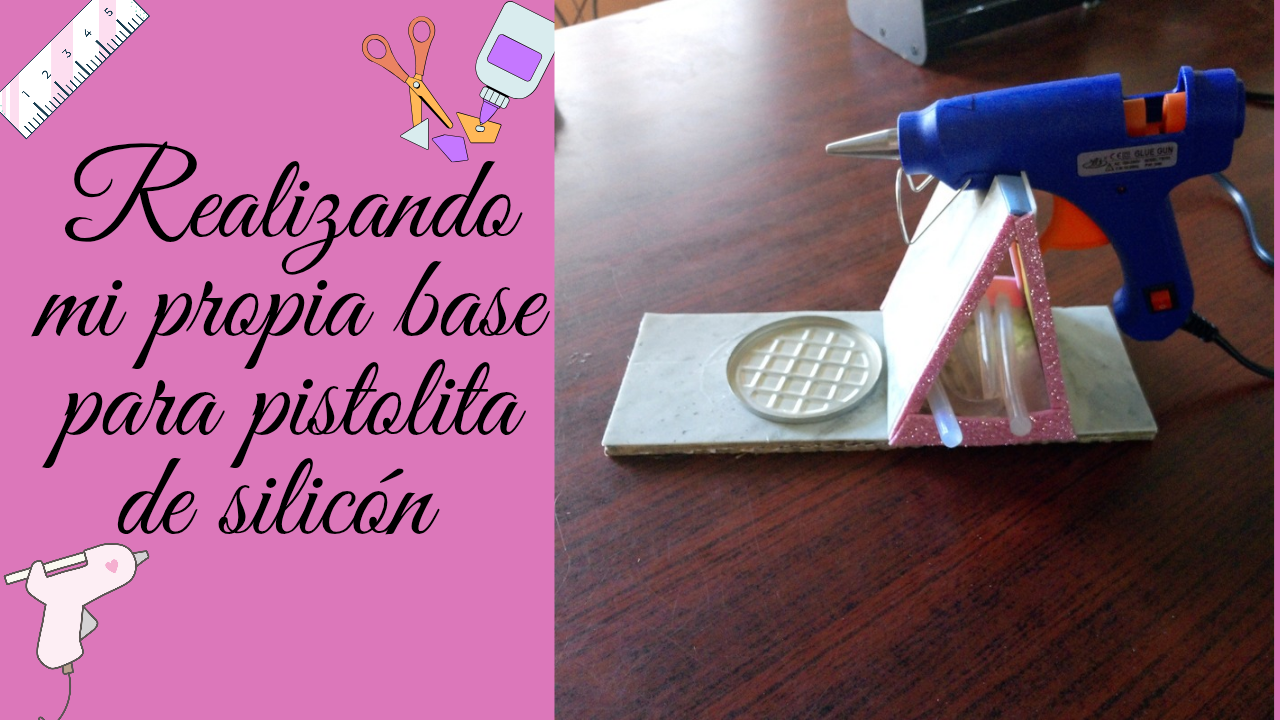
Hello, to all of you diyhub friends, a big greeting, I find myself on this day at the beginning of the week with all the motivation to share with you the creation of a base or support for my silicone pistol, it is a practical idea for those of us who make many crafts, in order to have a better accommodation for our tools and as you know the silicone gun is a tool that is electric and transmits heat and so to avoid any accident this base will be an appropriate solution, I invite you to join me in this fun crafting.
It is worth mentioning that I did not have a silicone gun and so previously I used a candle to melt the silicone bar and that option was not the best either since sometimes silicone fell on me that was too hot, but now I have this very useful tool. needed, so it was there that I also thought of making the base, also in order to avoid an accident, the materials I used were not things out of the ordinary since the base of everything was basically cardboard and that material is easy to obtain, but if you have wood Believe me, it will surely look better, so now I am going to show the materials I used and the step by step.
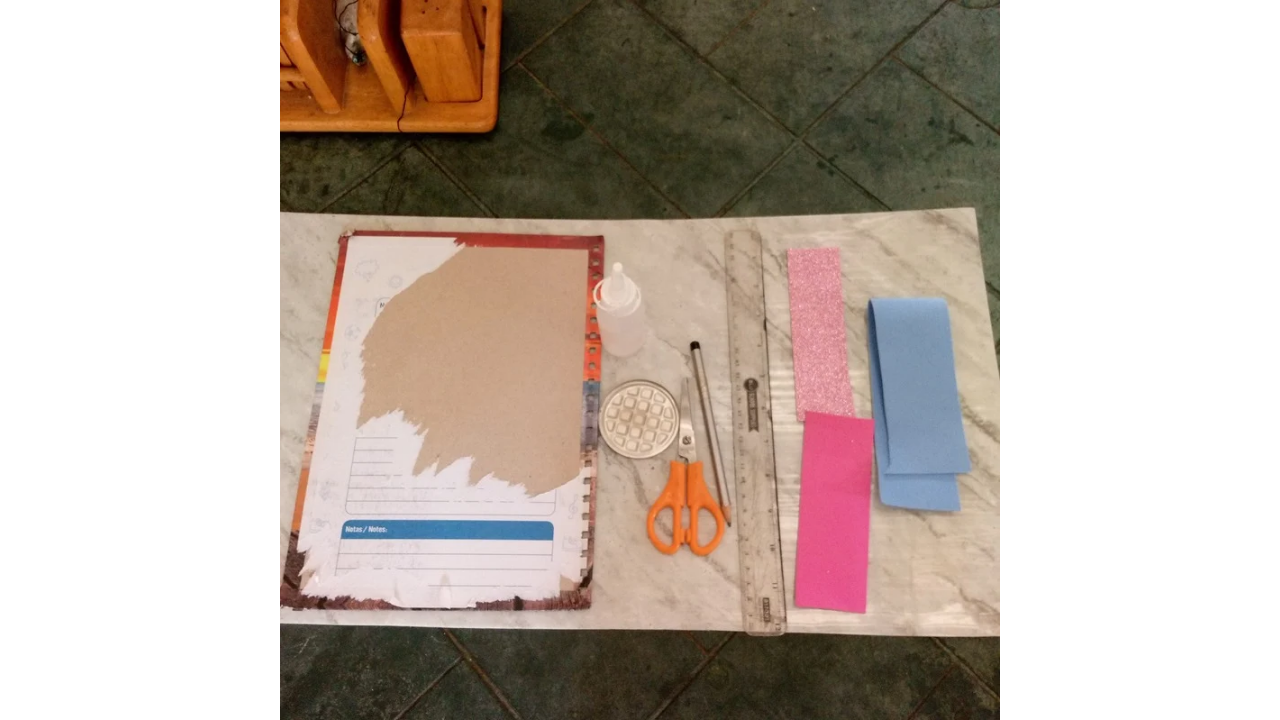
(Materiales:)||(Materials:)
- Carton
- Una tapa de metal
- Silicón líquido
- Papel tapiz
- Foami (azul,rosado)
- Tijeras
- Regla y lápiz
- Cardboard
- A metal cap
- Liquid silicone
- Wallpaper
- Foami (blue, pink)
- Scissors
- Ruler and pencil
(Procedimiento:)||(Procedure:)
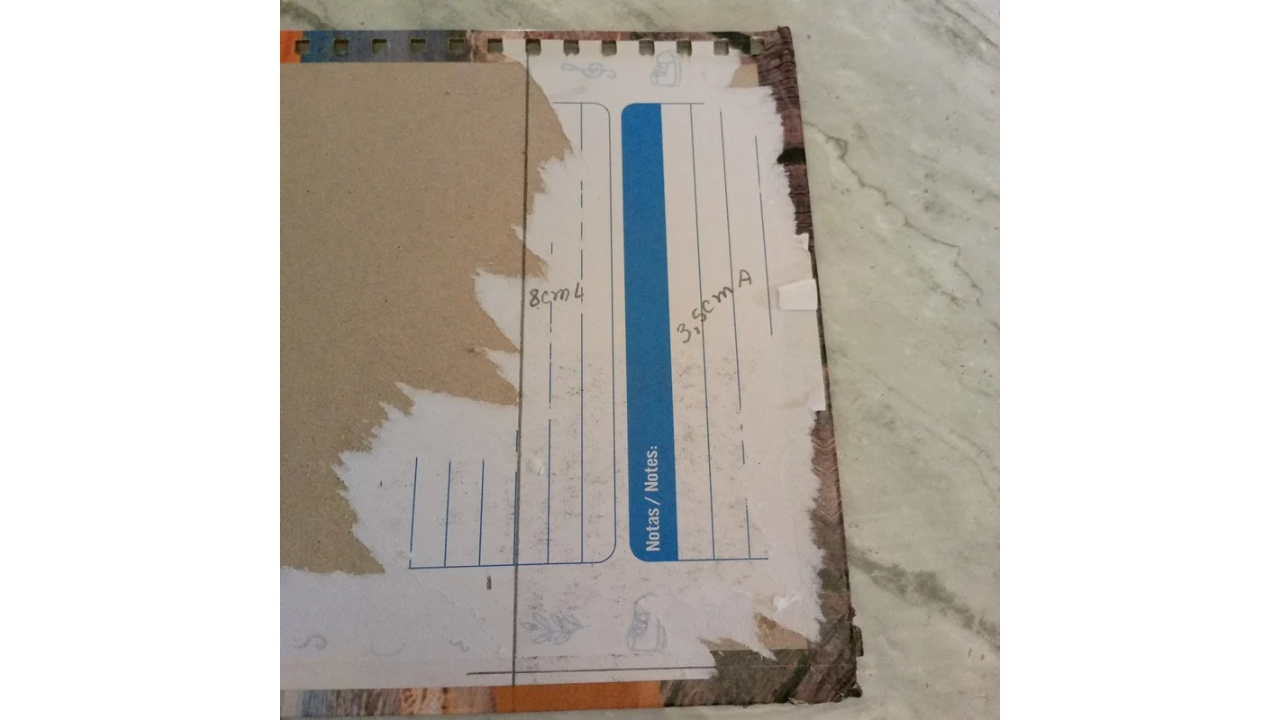
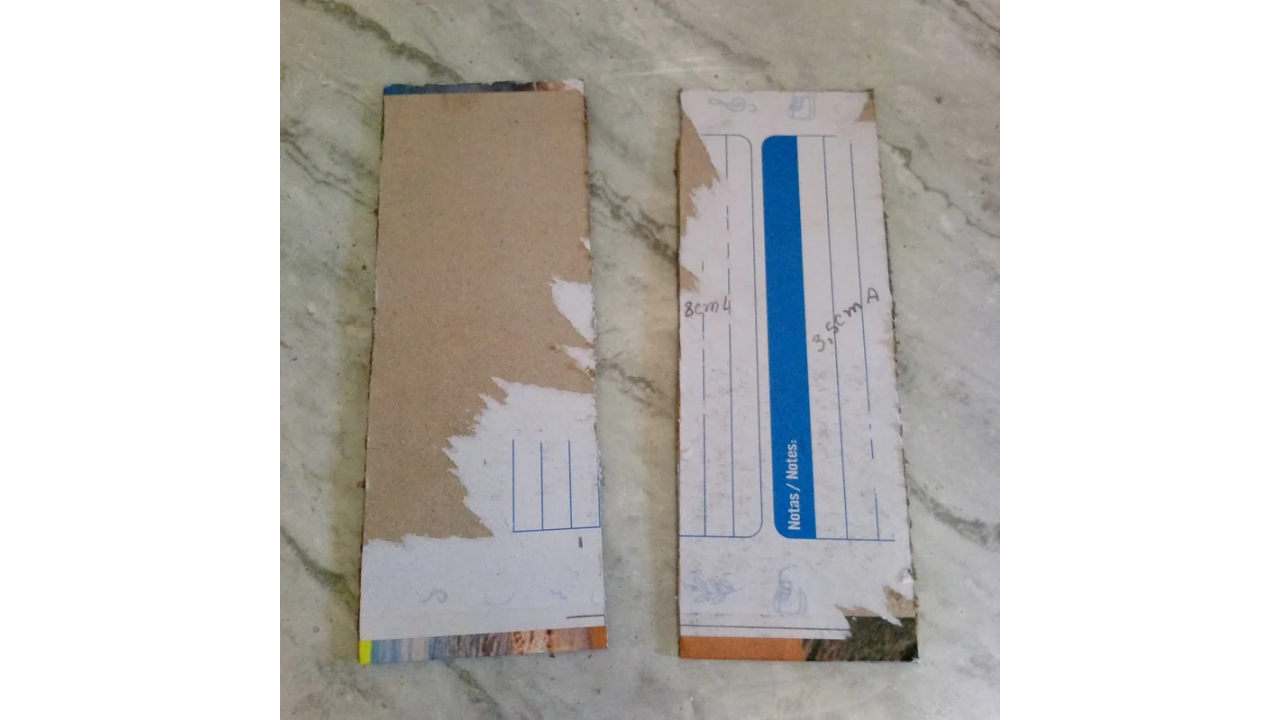
Paso nro 1
Paso nro 1
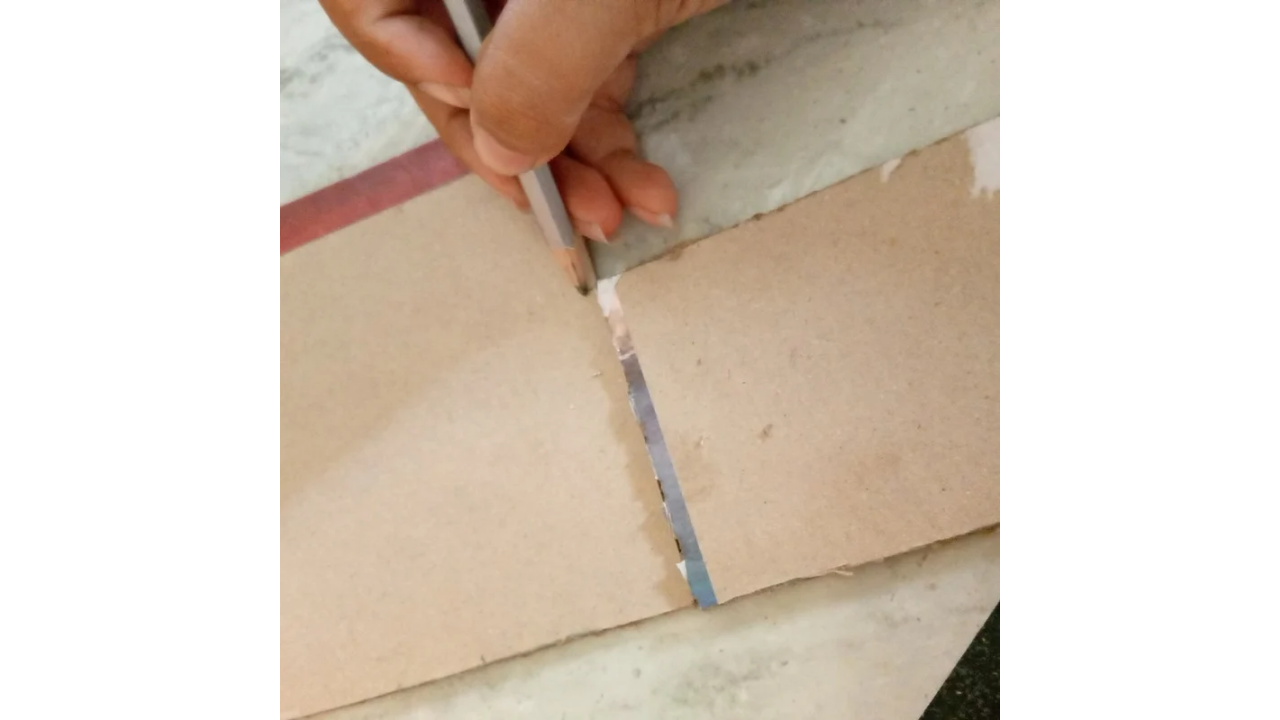
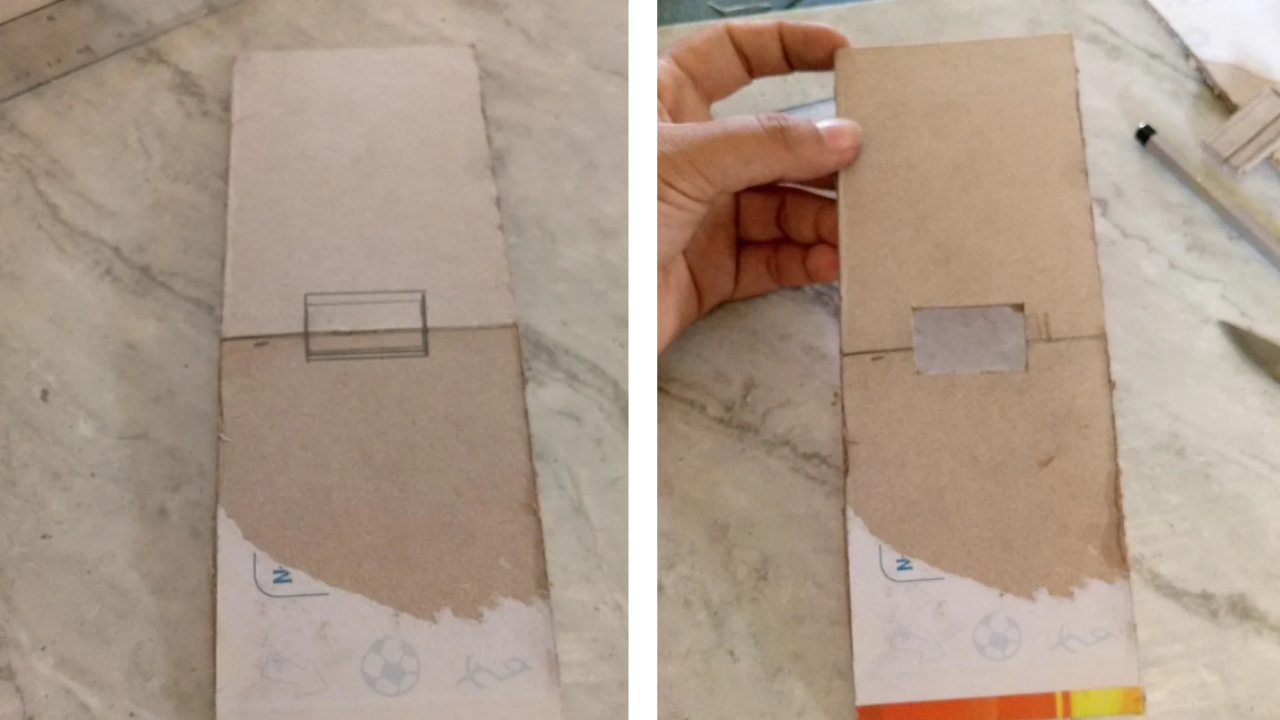
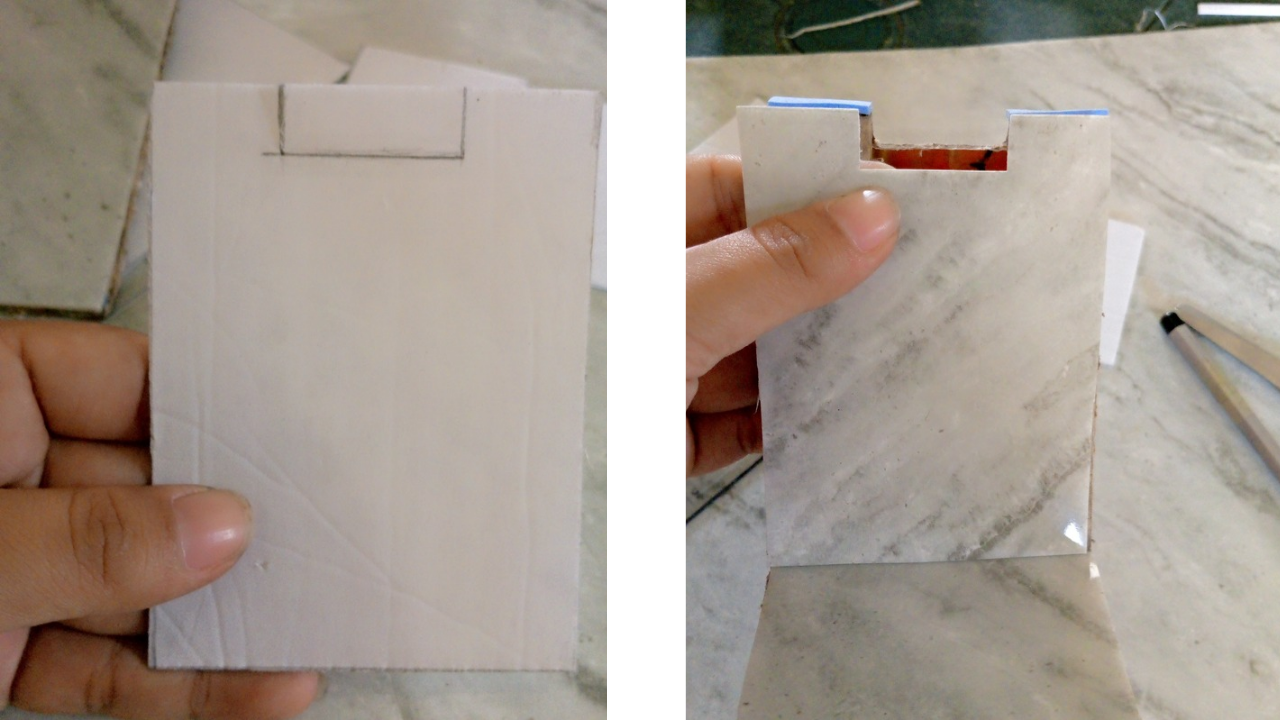
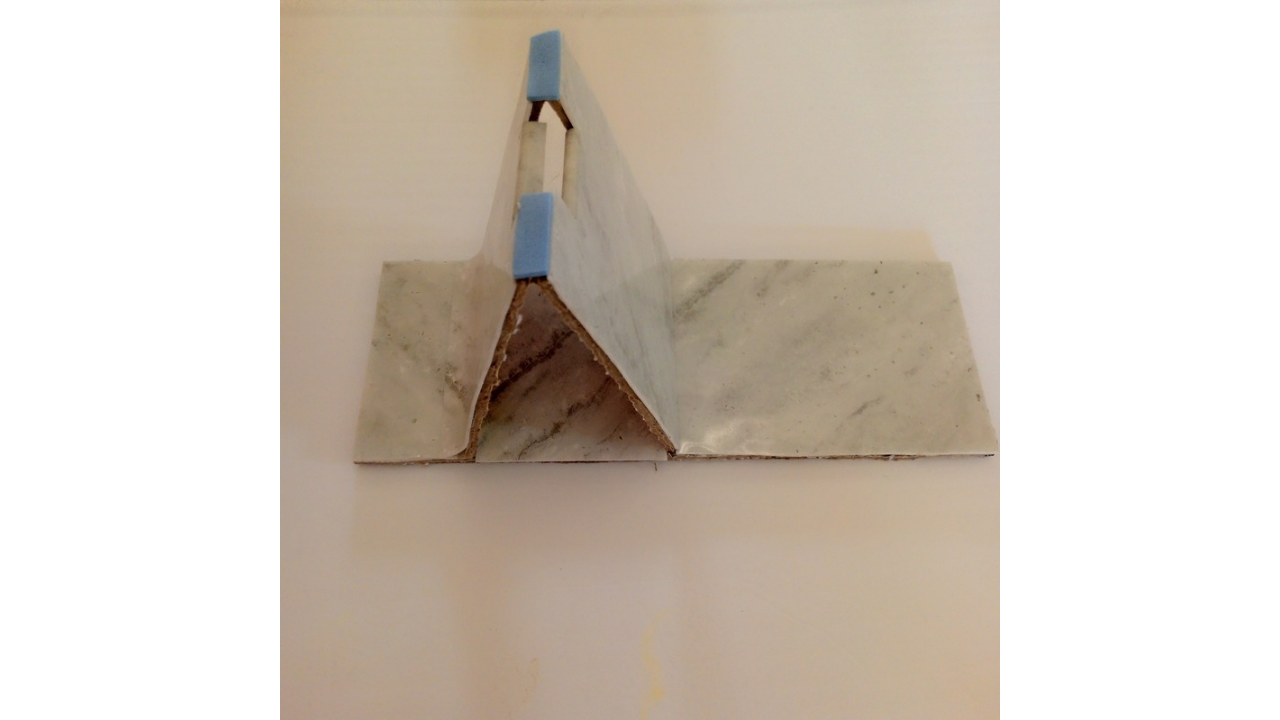
First start by marking the measurements of the main base, with the ruler I took the measurements of 3 cm wide and 8 cm long, I made two pieces, cut them and glued them with silicone, I left them aside so that they joined together well until It will dry the silicone. Now I am going to make the part that supports the silicone gun, without the same measurements as the main base but only with the difference that this part will be folded in half forming a triangle, and I also made the slot where the gun will fit. I drew a square in the middle of that part and cut it out.
Paso nro 2
Paso nro 2
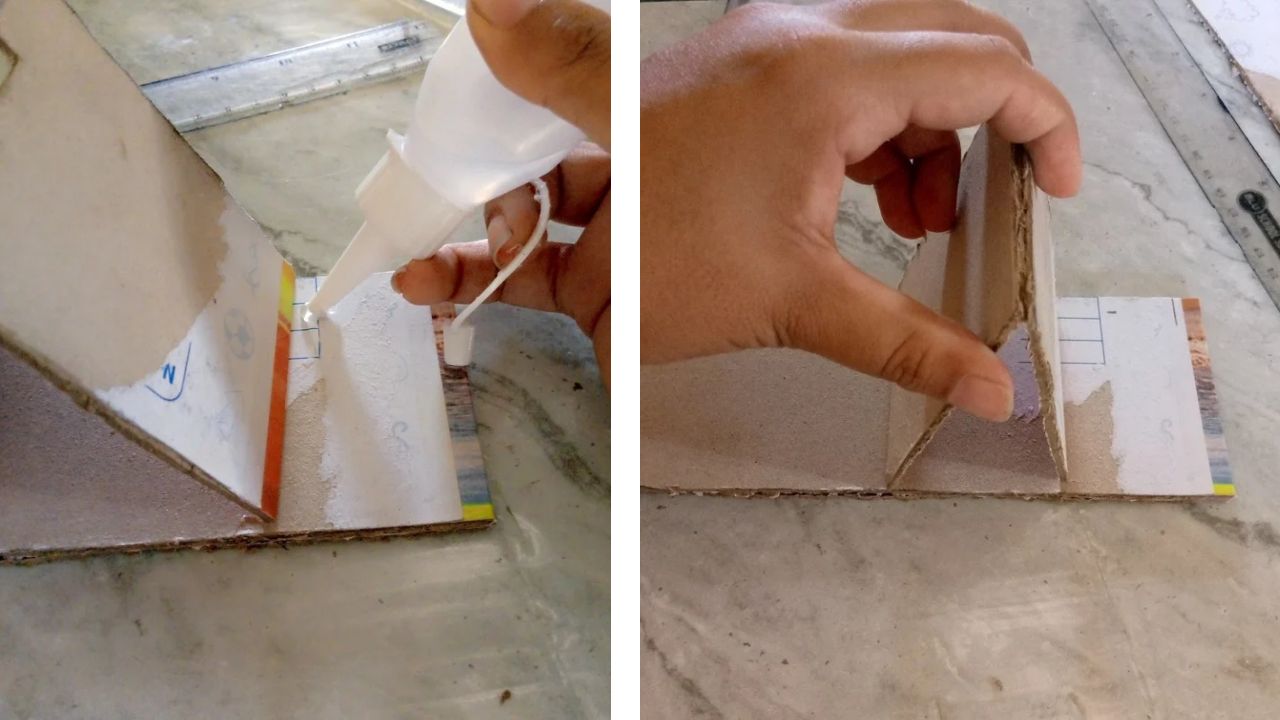
Here in this step I am placing the support by gluing it with liquid silicone, let it dry well and now continue with the decoration, I am going to use a wallpaper that is similar to porcelain and I found it interesting to use that material and also because it is already included with glue so what I will do is guide myself with the base to cut the pieces that are glued.
Paso nro 3
Paso nro 3
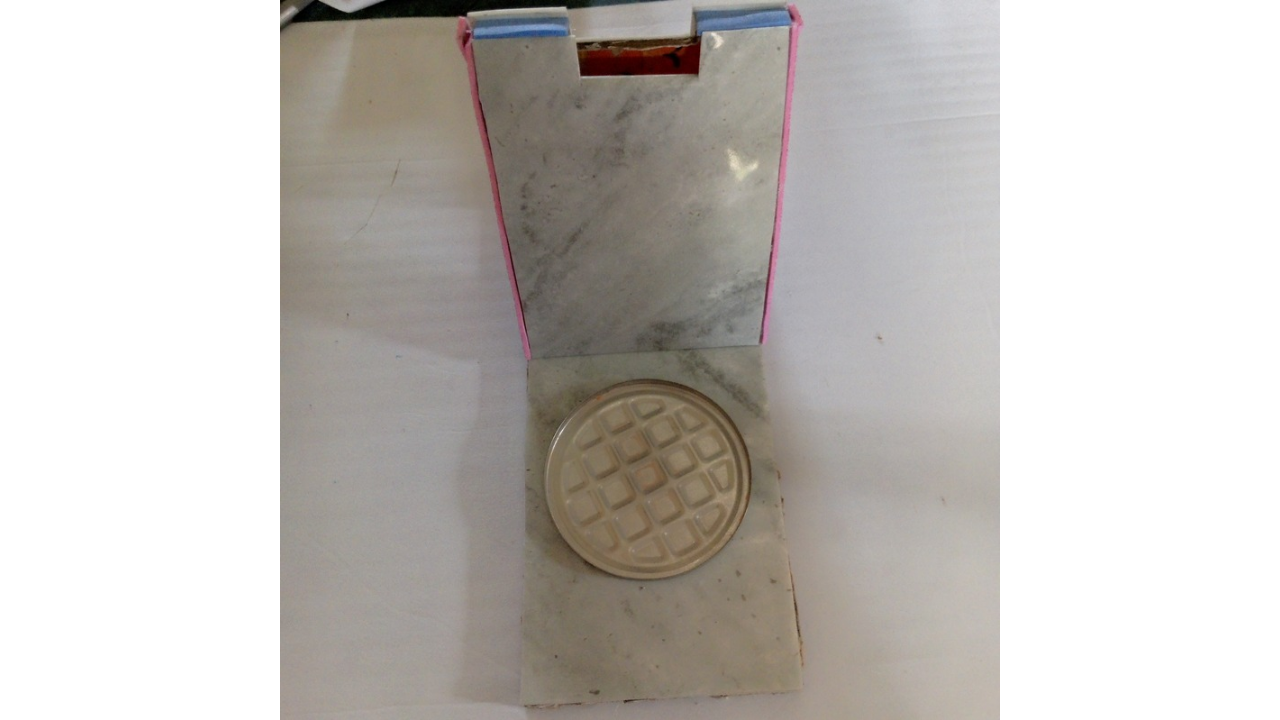
I placed a little foam in the corner part of the support, and then I proceeded to place the wallpaper very carefully since I want everything to be even, the times I do things in which I expect everything to be the same it doesn't turn out well. , so this time I don't want the same thing to happen. This is how it looks and at first glance it looks good.

Paso nro 4
Paso nro 4
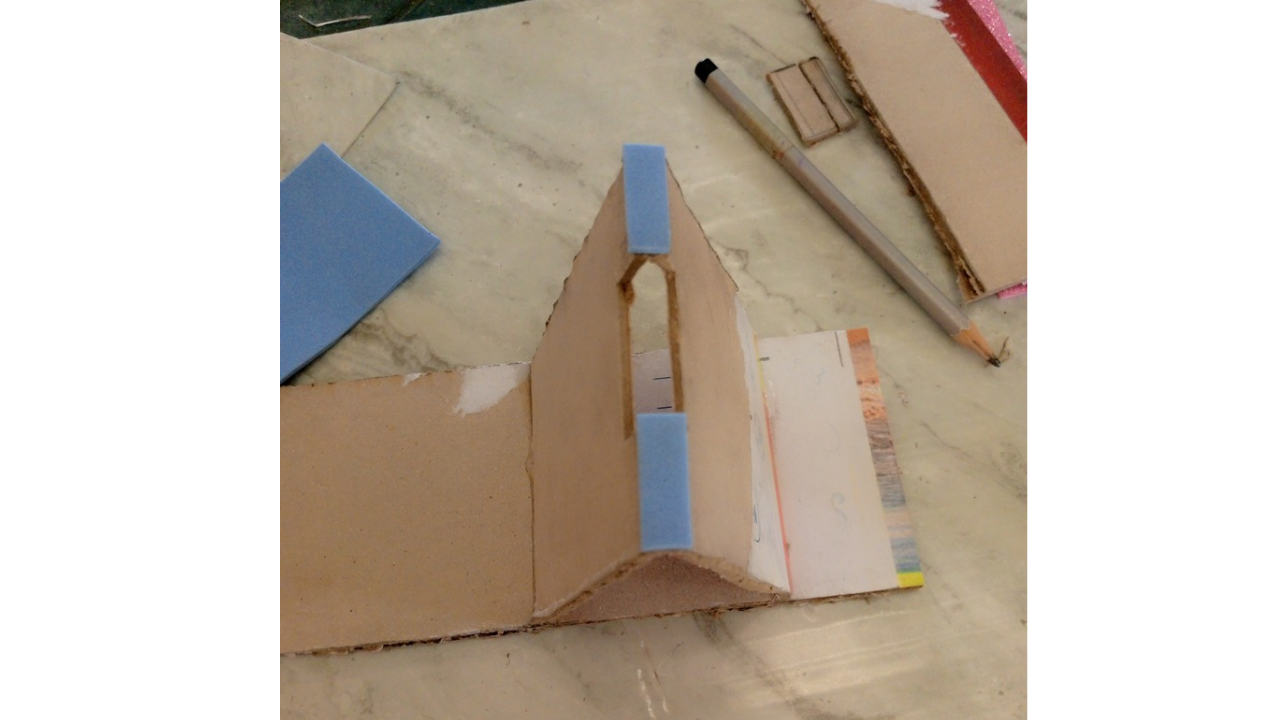
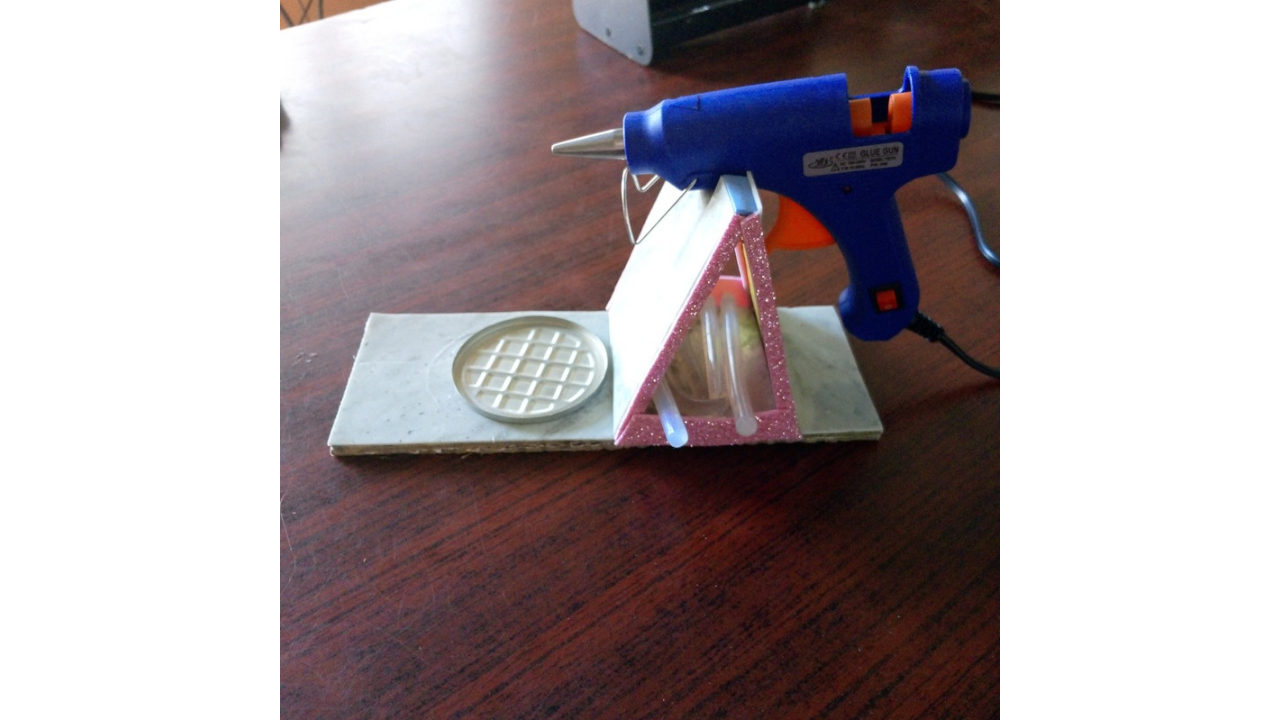
Finally, I placed pink foam on the sides, I want that part to be where the silicone bars can be placed, where I can store them, I also placed the metal lid, the lid will serve so that when the silicone is hot it does not fall on the base damaging it, so that's why I put the lid on it so that the excess falls out.
(Resultado final:)||(Bottom line:)
And this is how my base for my pistol turned out, the truth is that it met more expectations than I imagined, I hope you like this idea and I hope to continue with my craft materials since this is one of the things I needed but I need more. I say goodbye and on another occasion I hope to show you more beautiful crafts.
Las fotos de este blog son de mi propiedad|Las imágenes son editadas en canva|Fotografías tomadas en mi celular infinix Smart 7|El contenido está traducido en el traductor de Firefox.
¡Enhorabuena!
✅ Has hecho un buen trabajo, por lo cual tu publicación ha sido valorada y ha recibido el apoyo de parte de CHESS BROTHERS ♔ 💪
♟ Te invitamos a usar nuestra etiqueta #chessbrothers y a que aprendas más sobre nosotros.
♟♟ También puedes contactarnos en nuestro servidor de Discord y promocionar allí tus publicaciones.
♟♟♟ Considera unirte a nuestro trail de curación para que trabajemos en equipo y recibas recompensas automáticamente.
♞♟ Echa un vistazo a nuestra cuenta @chessbrotherspro para que te informes sobre el proceso de curación llevado a diario por nuestro equipo.
🥇 Si quieres obtener ganancias con tu delegacion de HP y apoyar a nuestro proyecto, te invitamos a unirte al plan Master Investor. Aquí puedes aprender cómo hacerlo.
Cordialmente
El equipo de CHESS BROTHERS
The base for the silicon gun looks really sturdy and durable. A good creation to keep it safe. Well done
Hello, thank you, yes the truth is that it is resistant, you just have to use a very strong cardboard to do it. thank you so much
Congratulations @stefany0720! You have completed the following achievement on the Hive blockchain And have been rewarded with New badge(s)
Your next target is to reach 200 upvotes.
You can view your badges on your board and compare yourself to others in the Ranking
If you no longer want to receive notifications, reply to this comment with the word
STOPCheck out our last posts:
Todas las que usamos la pistola de silicón apreciamos mucho tener esa base, la hemos hecho en algún momento nosotras mismas. Esta base que hiciste te quedó genial, te felicito