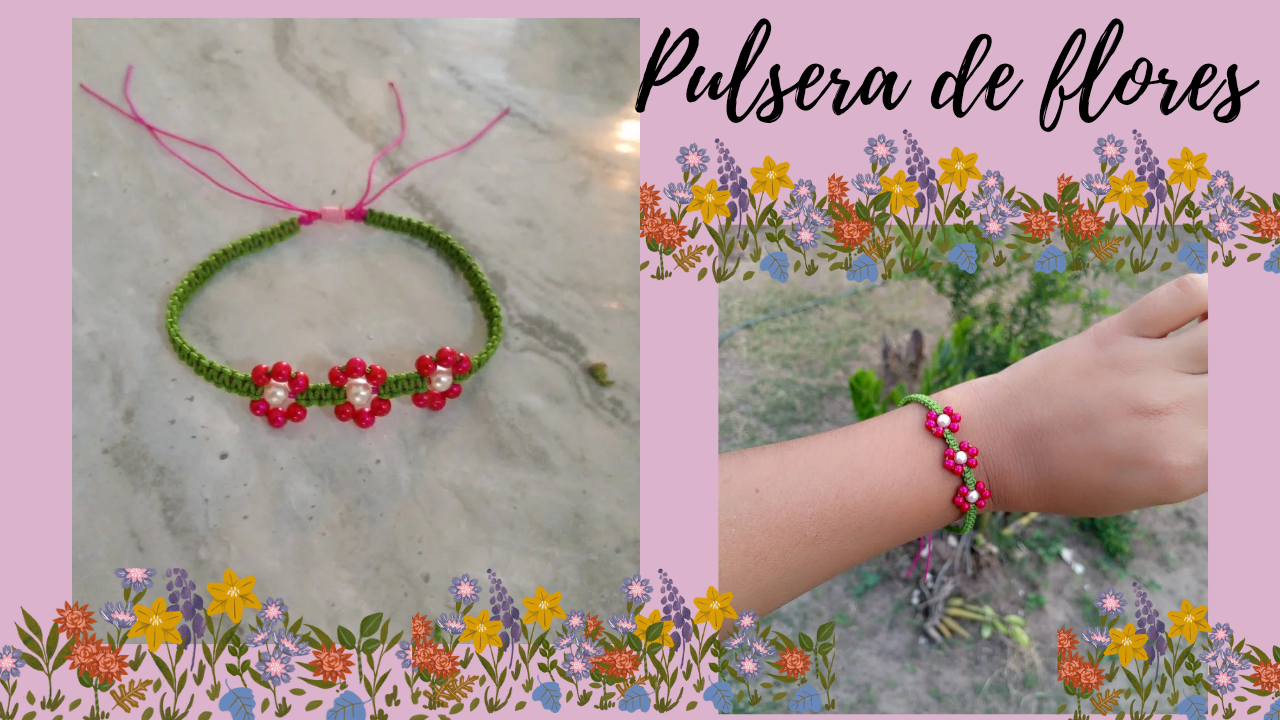
Hello hello to all the friends of diyhub, this Monday afternoon I am starting a new Blog in which I will be making a new bracelet model, but it is a model that has flowers made of little stones, something that has been in fashion for some time now, and since I wanted one I started making it, and that is why I am going to be sharing the process with you, I hope you like it and together we will learn how to make woven bracelets.
I tell you that just at the moment I was making the bracelet I was watching craft videos and a video appeared that said that making a craft, like a woven bracelet, since it is something handmade becomes a craft, but when you do it with imagination and with your heart, that craft changes into making art, an art that I really find so, so beautiful to make.
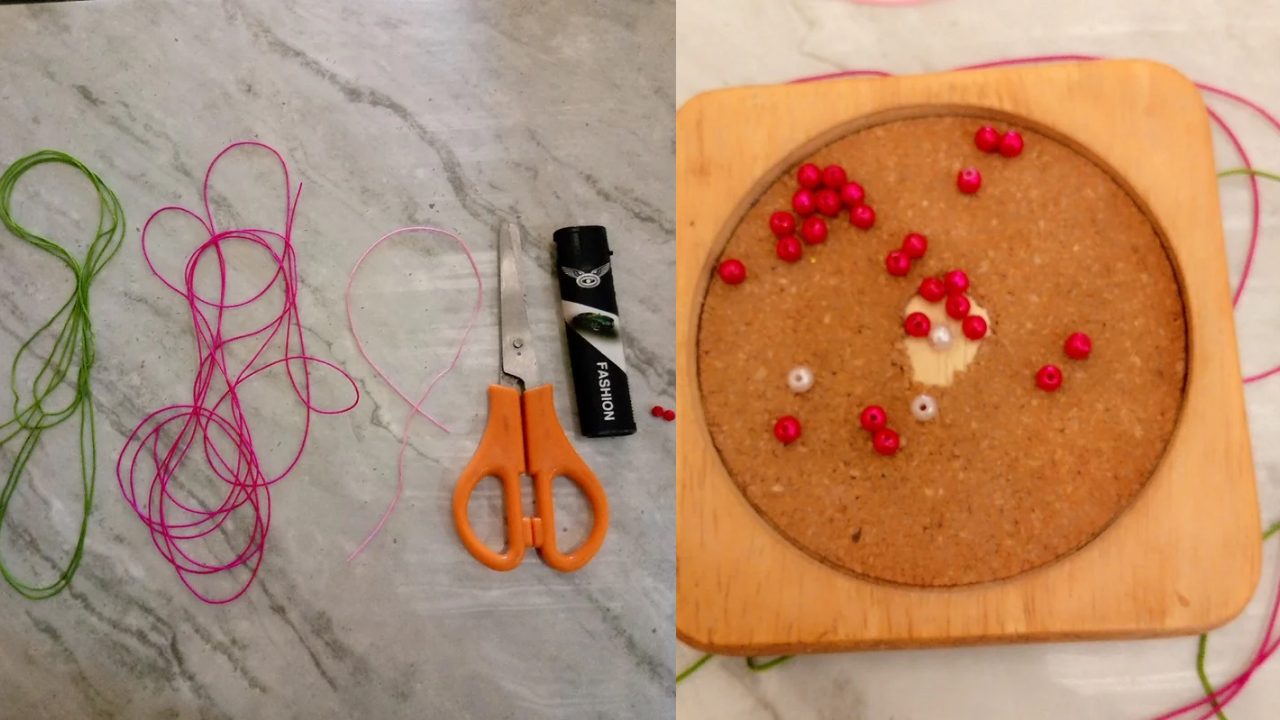
(Materiales:)||(Materials:)
- Hilo chino de color fucsia,verde y rosado
- Tijeras
- Piedras de color fucsia y blancas
- Encendedor
- Fuchsia, green and pink Chinese thread
- Scissors
- Fuchsia and white stones
- Lighter
(Procedimiento:)||(Procedure:)
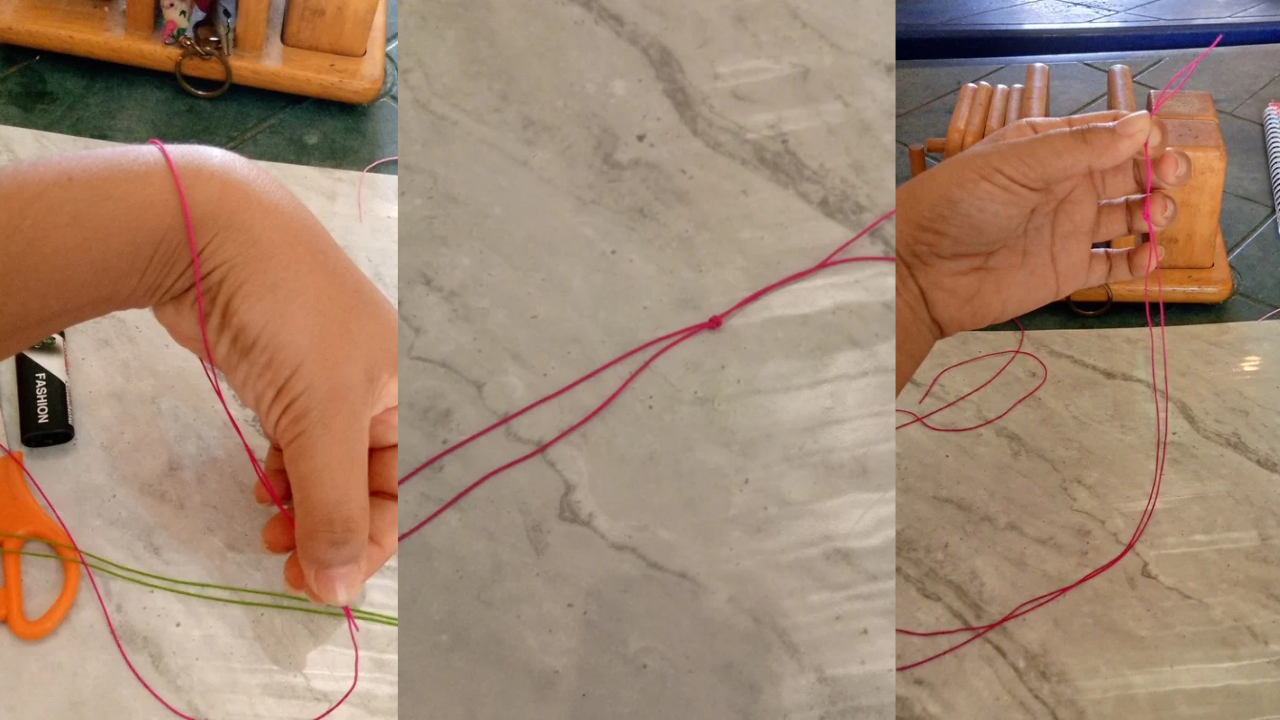
Paso nro 1
Paso nro 1
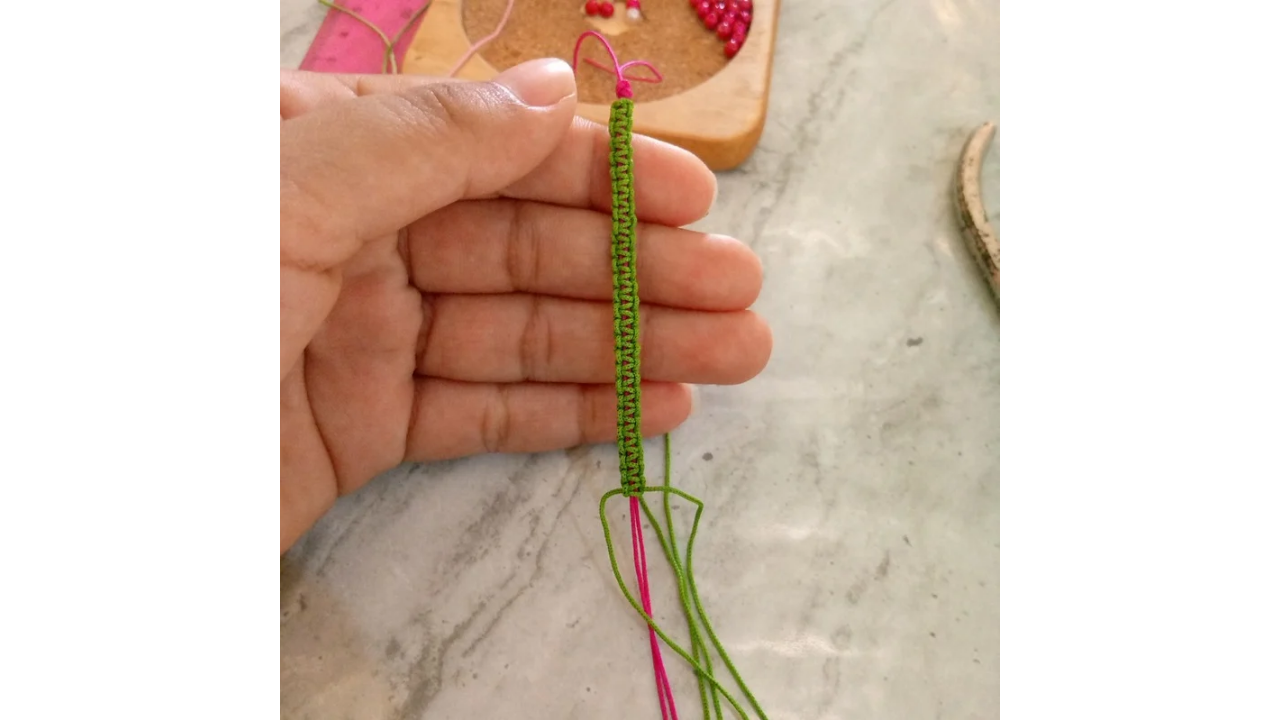
First I started by measuring the thread, I used 2 meters of fuchsia, 1 meter of green and 27 cm of light pink, I cut the fuchsia thread to the length of my hand since that will be the base of the bracelet, I tied a knot to mark exactly where I am going to start weaving, the green thread will be the fabric.
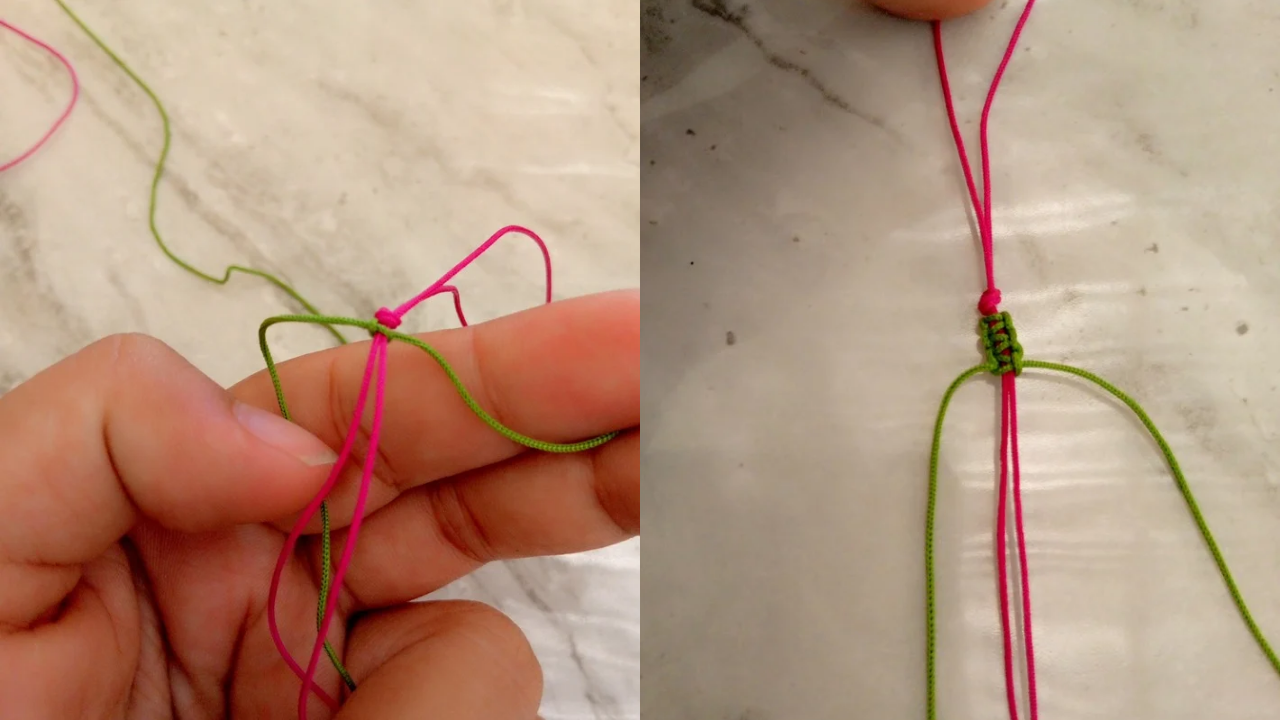
Paso nro 2
Paso nro 2
Here I have a knitted part, as you can see, I did a minimum of 27 rows, the truth is I don't do it with exact measurements, but more or less what the thread will reach.
Paso nro 3
Paso nro 3
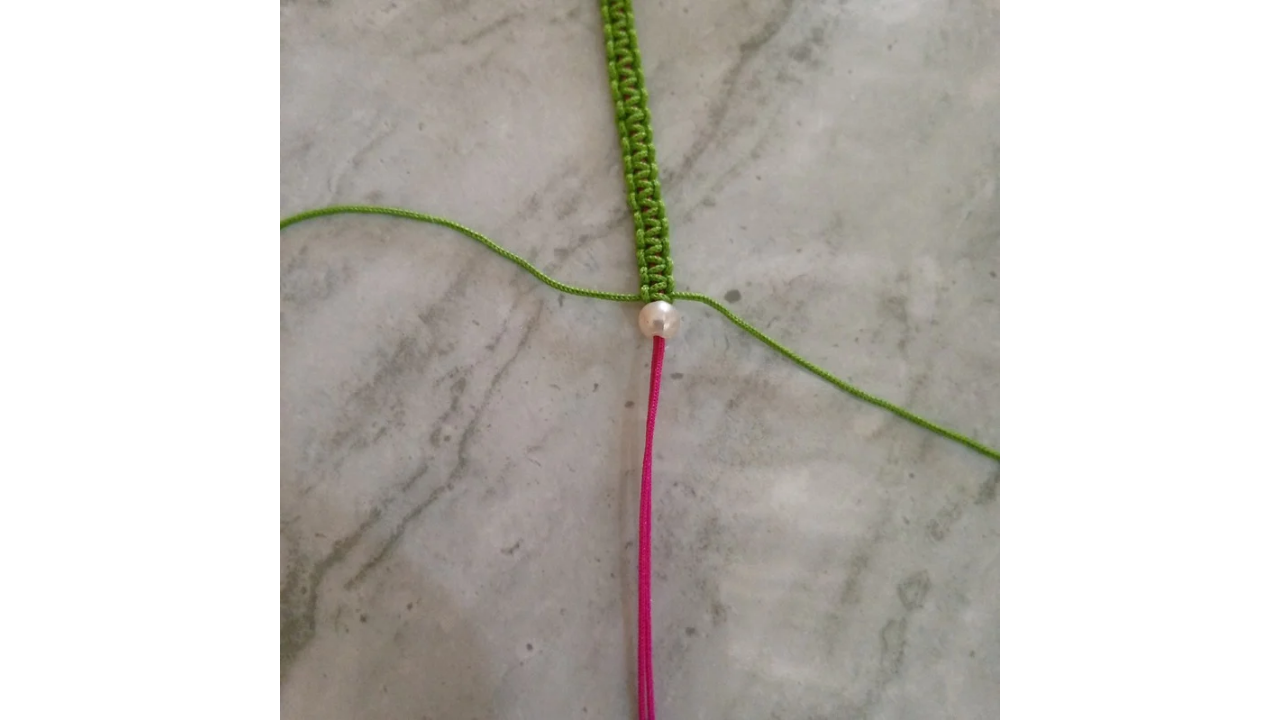
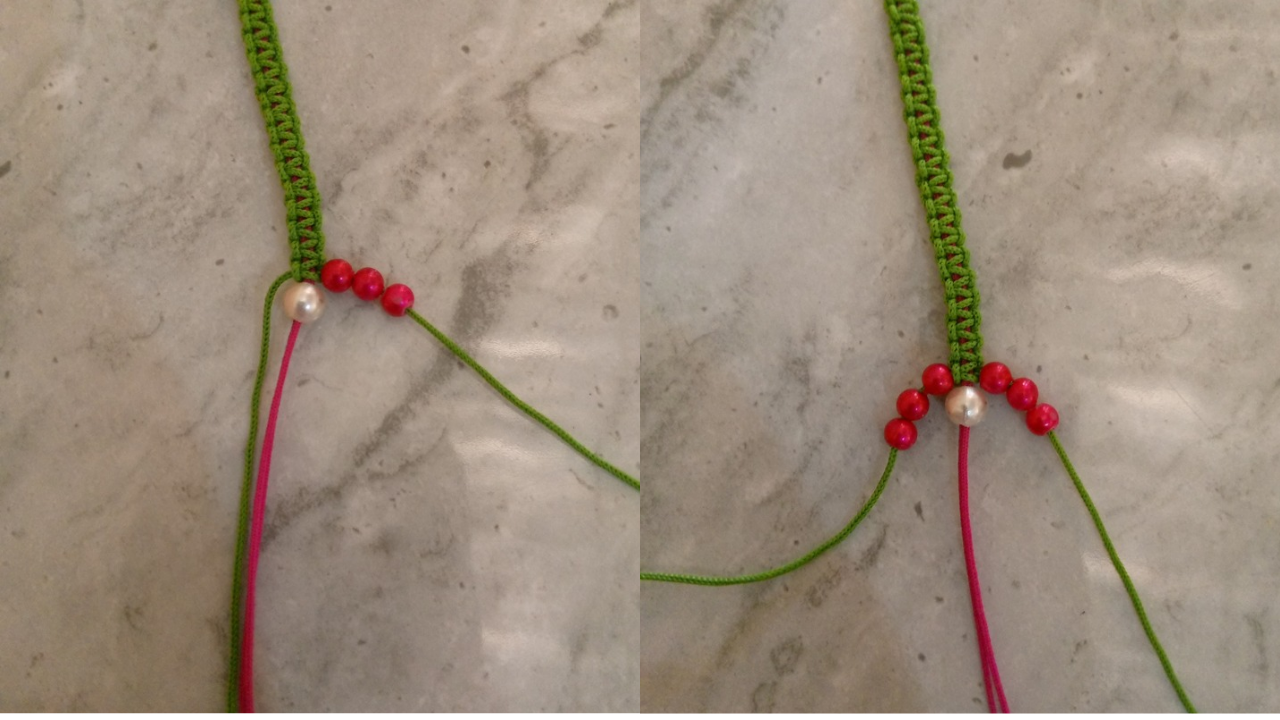
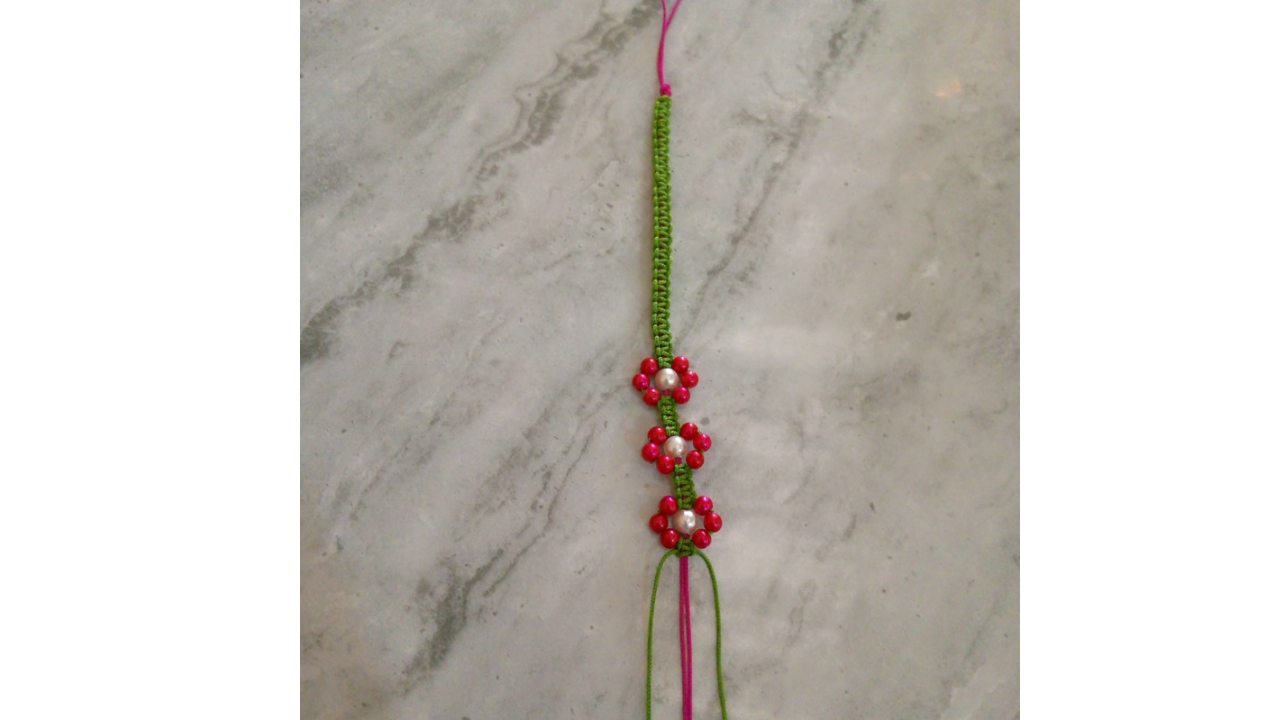
In this step I am already placing the stones to make the flower, I put one in the middle and three stones on one side and also three on the other side and I saw the flower with the fabric and this is how the flower shape remains.
Paso nro 4
Paso nro 4
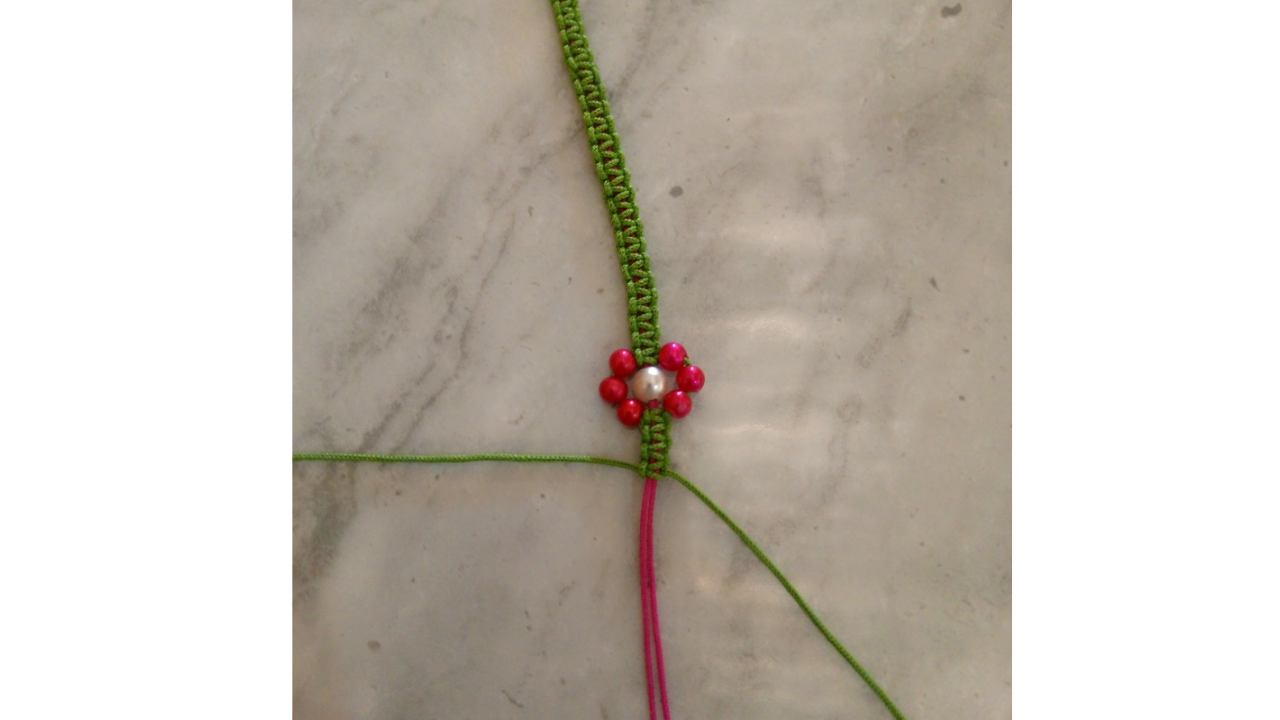
So now the flower is ready. I made three, and I made them so that they would be right in the middle. After I made the flowers, I continued weaving the bracelet until the thread ran out.
Paso nro 5
Paso nro 5
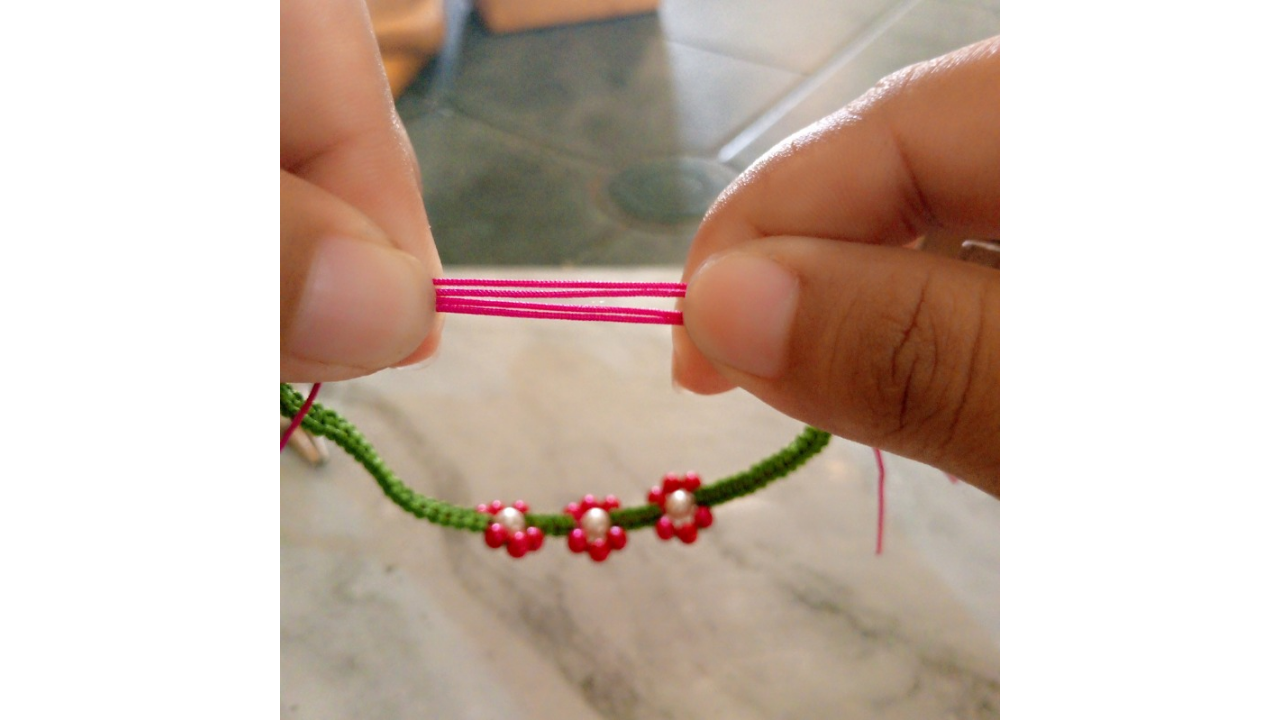
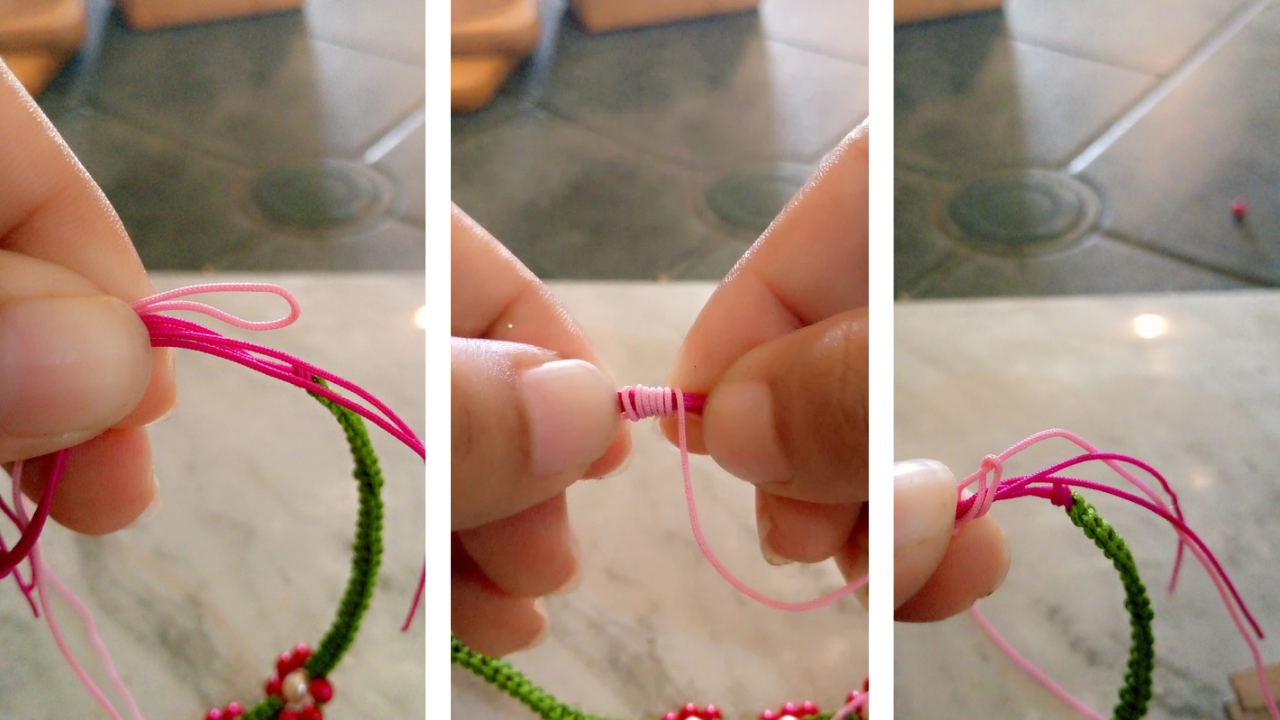
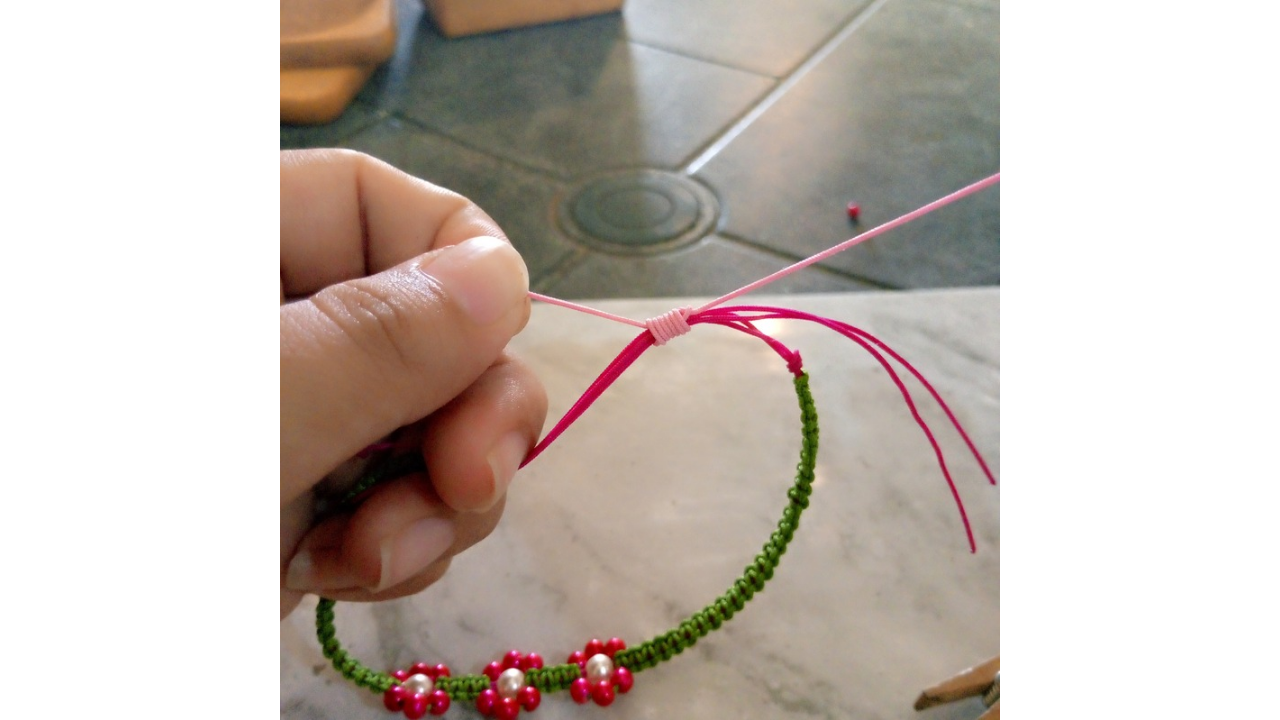
Lastly, I tied a knot to adjust the bracelet. I did this with the pink thread. I folded it and with one of the threads I rolled it around in the direction of the folded part so that the thread comes out through there. This tight knot can also be made with a straw. Then I stretched each side a little and the knot looks like this. I cut the excess thread and with the help of a lighter I sealed the ends of the thread.
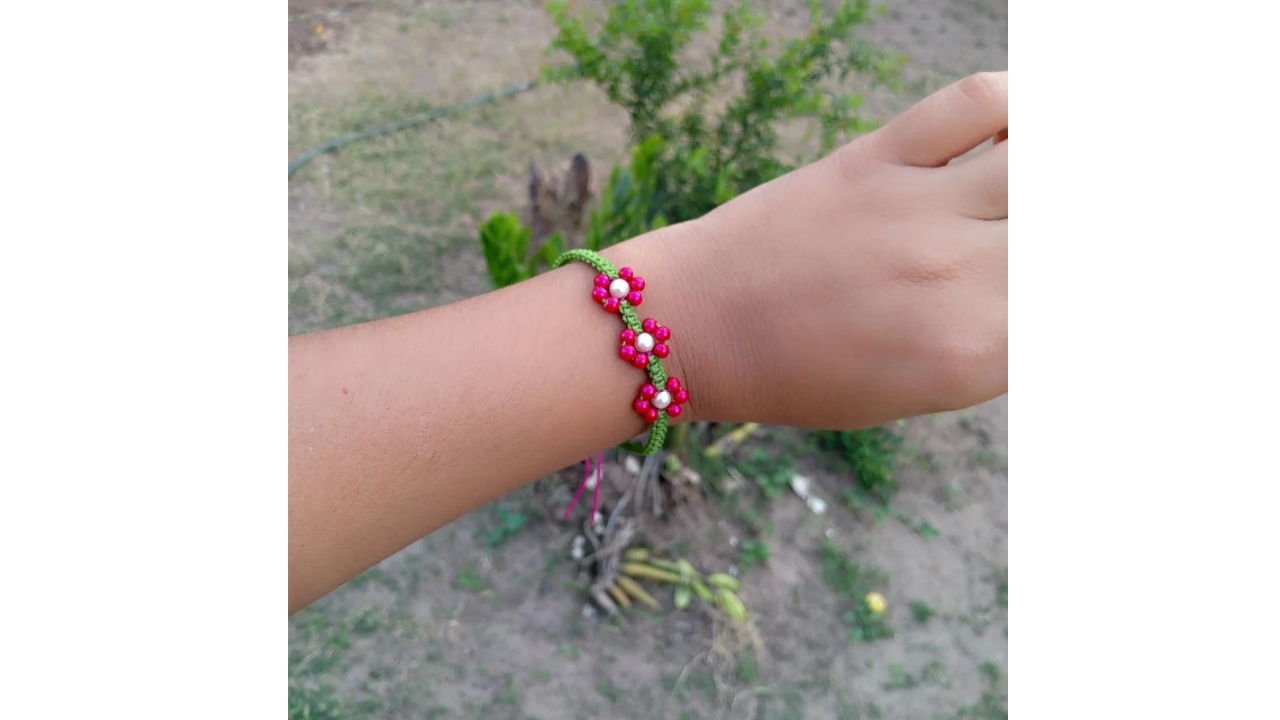
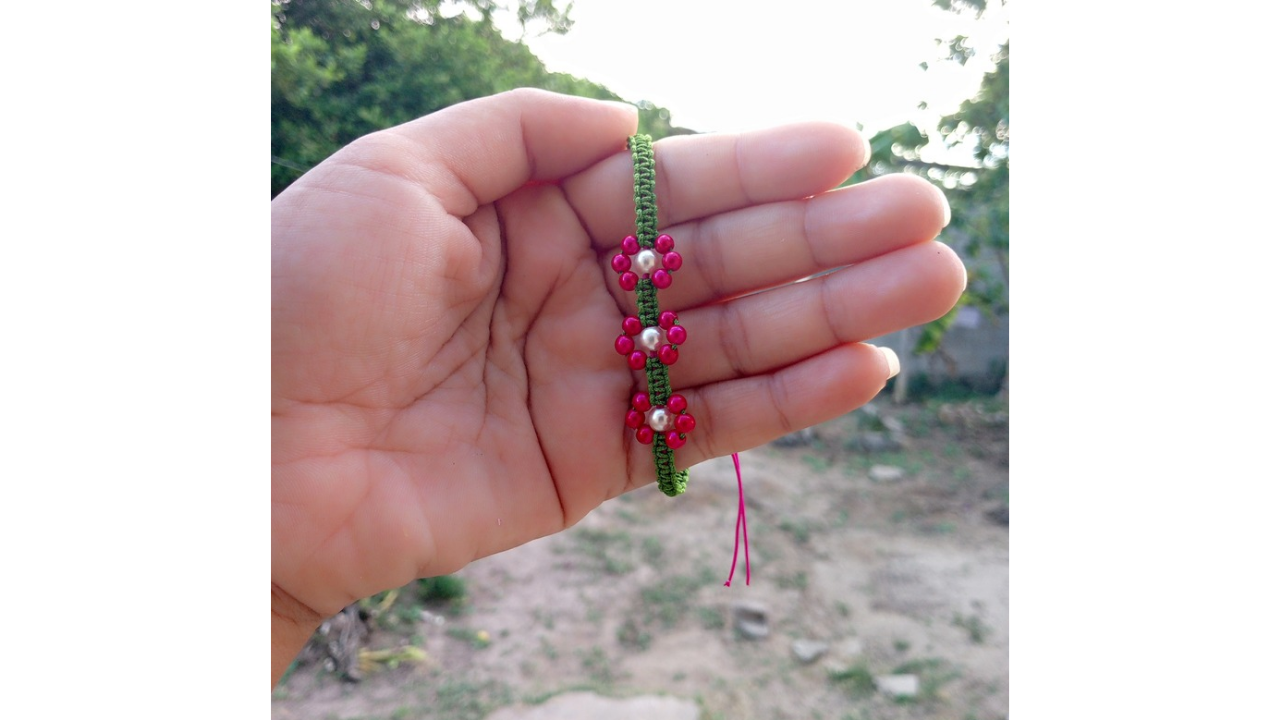
(Resultado final:)||(Bottom line:)
And this way the flower bracelet is finished, I want to thank you if you stopped by here and read and accompanied me in this procedure of making a bracelet and if like me you are a fan of pretty crafts, I hope to continue sharing more and more ideas with you.
Las fotos de este blog son de mi propiedad|Las imágenes son editadas en canva|Fotografías tomadas en mi celular infinix Smart 7|El contenido está traducido en el traductor de Firefox.
Te quedó linda, me gustan mucho las pulseritas con flores.
Hola,a mi también me gustan🤭
😀 👍 🌺
The craft looks beautiful, the colors were beautifully picked and the stone beads were right at the center , exactly where it was supposed to be.
I like the way you used the stone beads to create flowers. It looks stunning
Hello, thank you very much. I'm glad you liked the average and how the bracelet turned out. The truth is that I was even impressed for the first time I've made one.
Saludos. Las pulseras con ese estilo de flores son muy llamativas.
Hola si son muy llamativas y si se utiliza material más colorido quedan mejor , gracias que tengas un buen dia
It is stylish, charming, and beautiful. Love this bracelet's design. Its color combination makes it more appealing. Great work!
Hello, thank you very much
Bella bella 😍
Siiiiii🤭