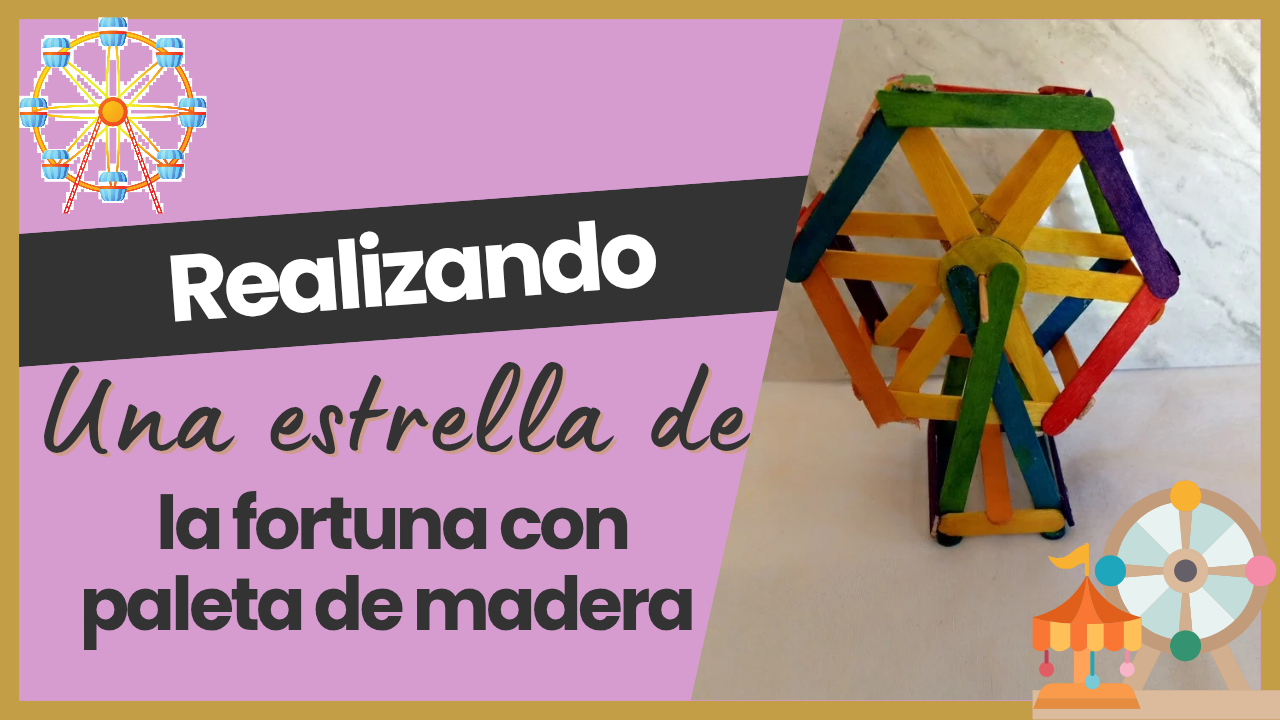
Hello hello! A good day to all of you at DIYHub. I am here again to share with you a craft that has me very excited: the creation of a Ferris wheel using wooden pallets. This craft is not only fun, but it also has a practical purpose as I plan to use it as a decoration for my desk. I have seen that you can place photos on it, which makes it a customizable and unique item. Although I don't have the photos on hand at the moment, I didn't want to wait any longer to see how the Ferris wheel turned out.
I tell you that a while ago I really wanted to make this beautiful craft. I had already accumulated all the necessary wooden pallets and, by the way, they are colored. When I bought them, I thought they would look much better this way, and at the same time, it would save me buying paint. I love the idea of using materials I already have at home, as it is not only cheaper, but also more sustainable. Now, let's get started! But before we dive into the process, let's see what materials I used to make this craft. It is important to have everything ready so that the craft is more fluid and fun.
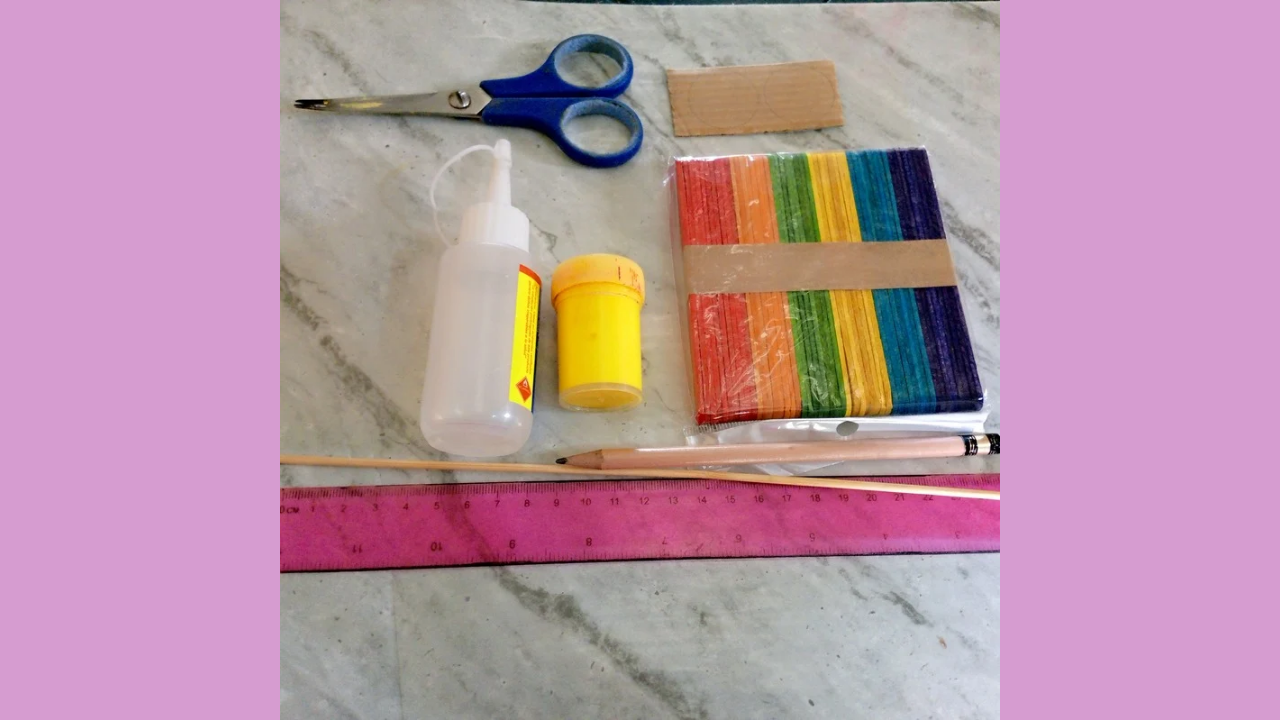
(Materiales:)||(Materials:)
- Paletas de madera
- Silicón líquido
- Tijeras
- Regla
- Lápiz
- Un palito de madera
- Un pedazo de cartón
- Pintura amarilla
- Wooden pallets
- Liquid silicone
- Scissors
- Ruler
- Pencil
- A wooden stick
- A piece of cardboard
- Yellow paint
(Procedimiento:)||(Procedure:)
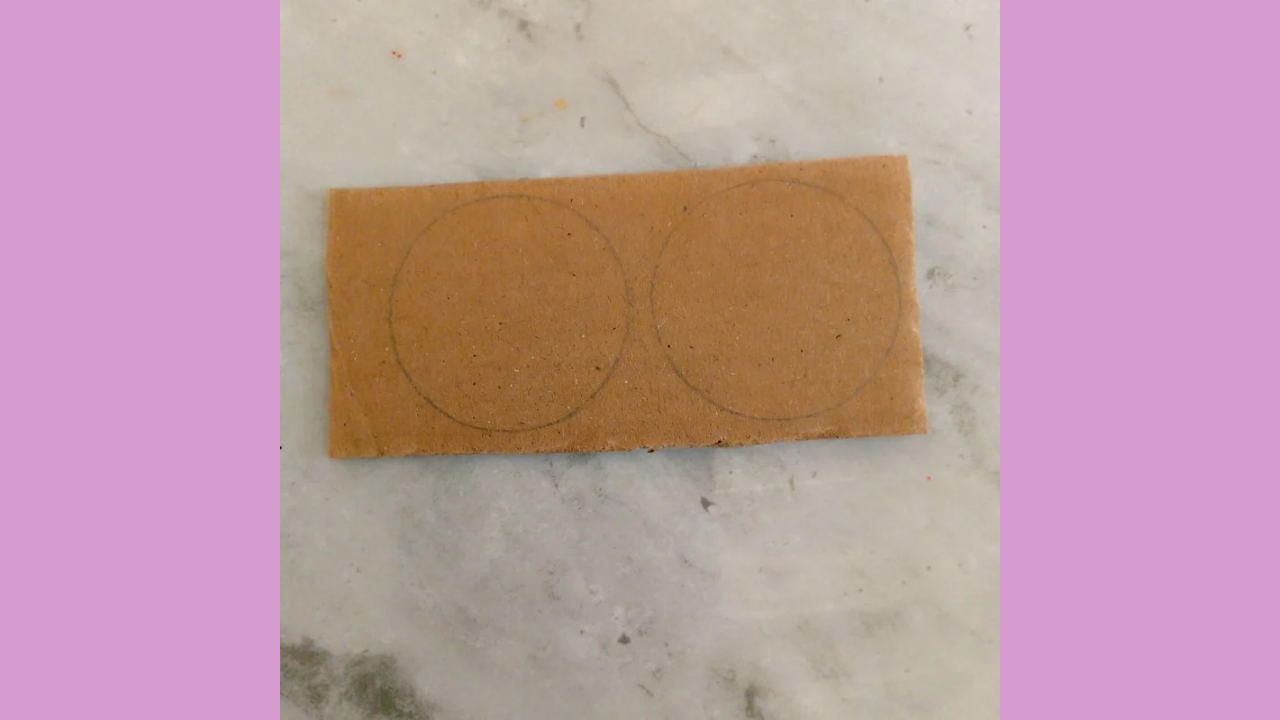
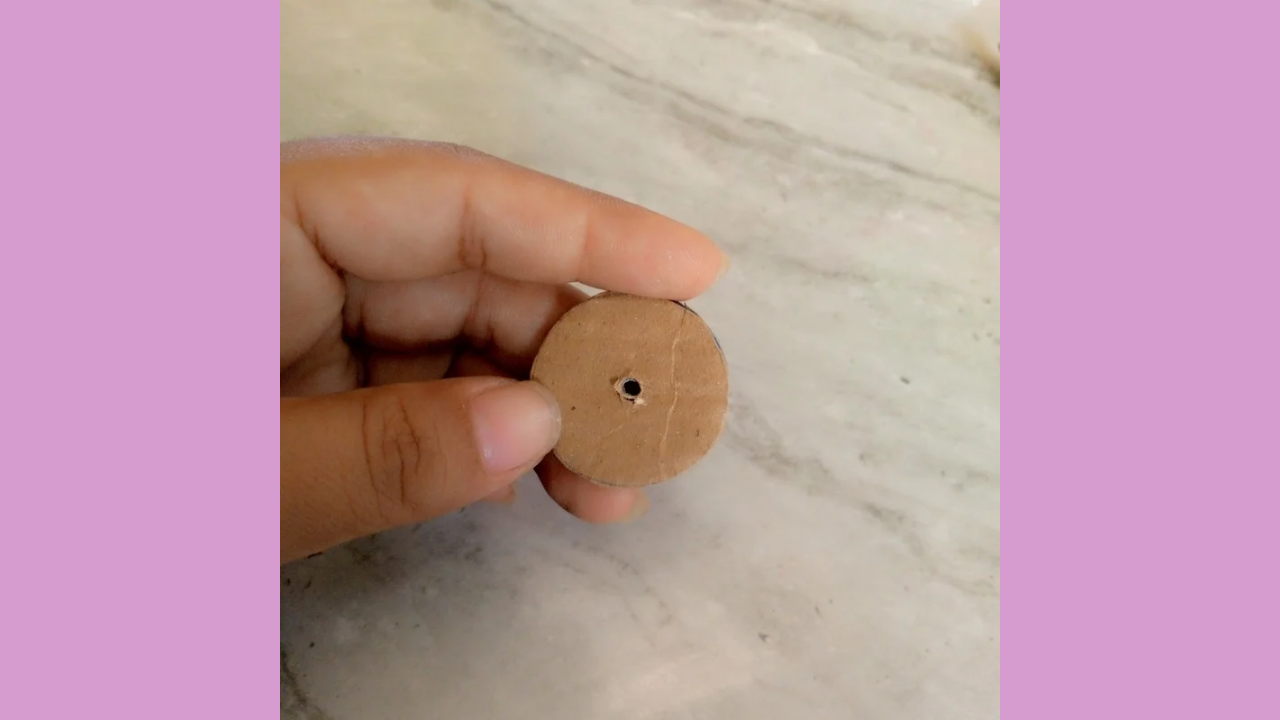
Paso nro 1
Paso nro 1
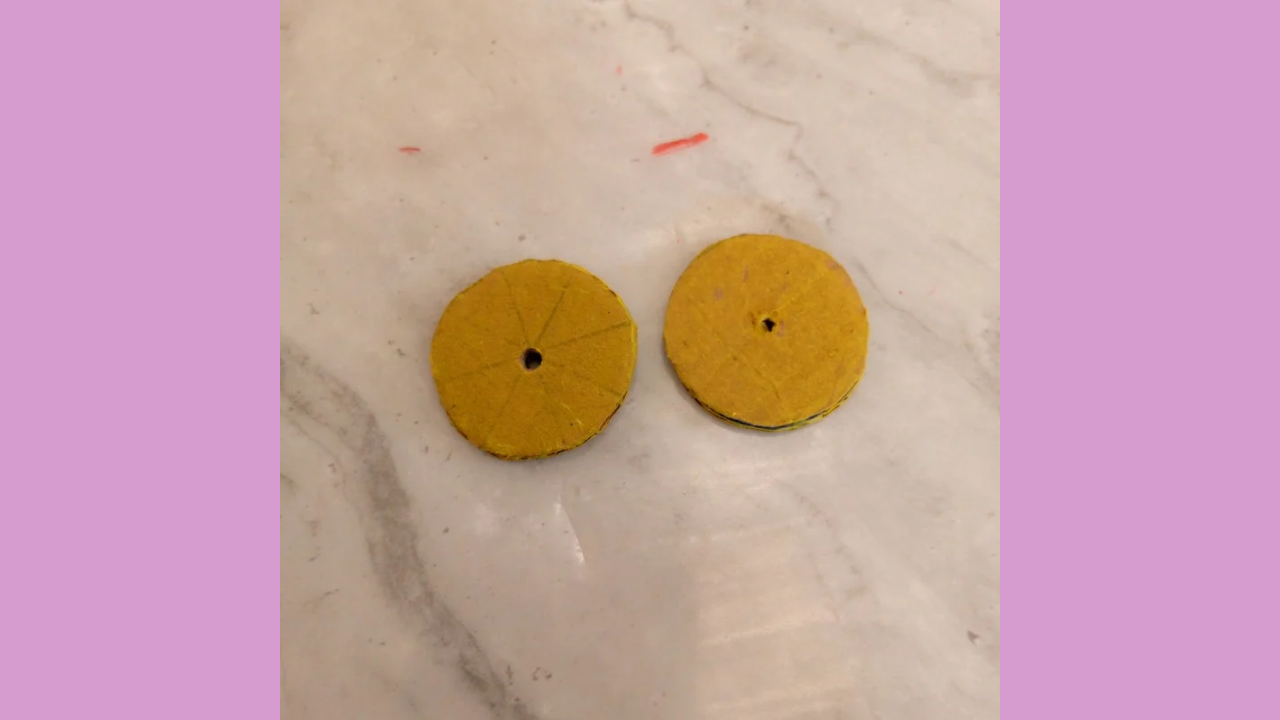
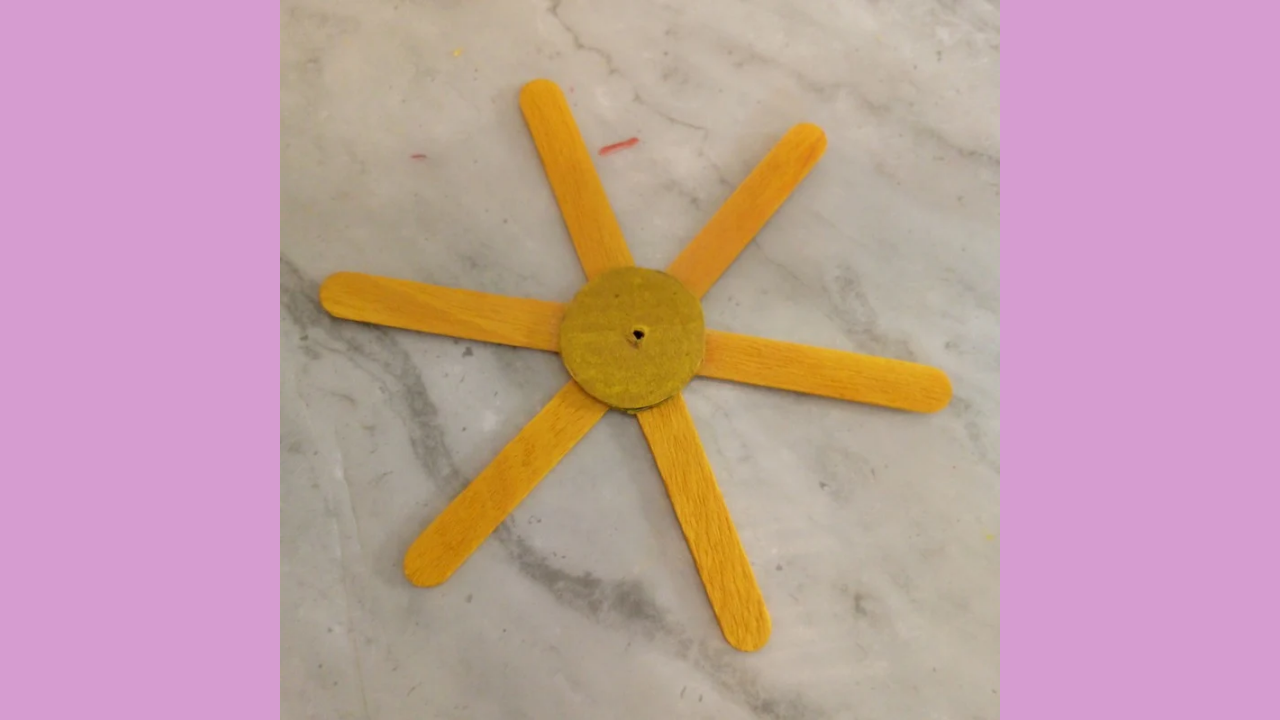
First, I started by marking two circles on a piece of cardboard. To make sure they were symmetrical, I used a ruler to measure the center of each circle and punched a hole, trying to get it centered. This step is crucial, since the hole will be used for the wheel axle later. Once I had the circles ready, I proceeded to paint them a vibrant yellow color. I chose this color because I wanted the wheel to stand out on my desk and add a cheerful touch to the decor. After applying the paint, I let it dry well for a while.
Paso nro 2
Paso nro 2
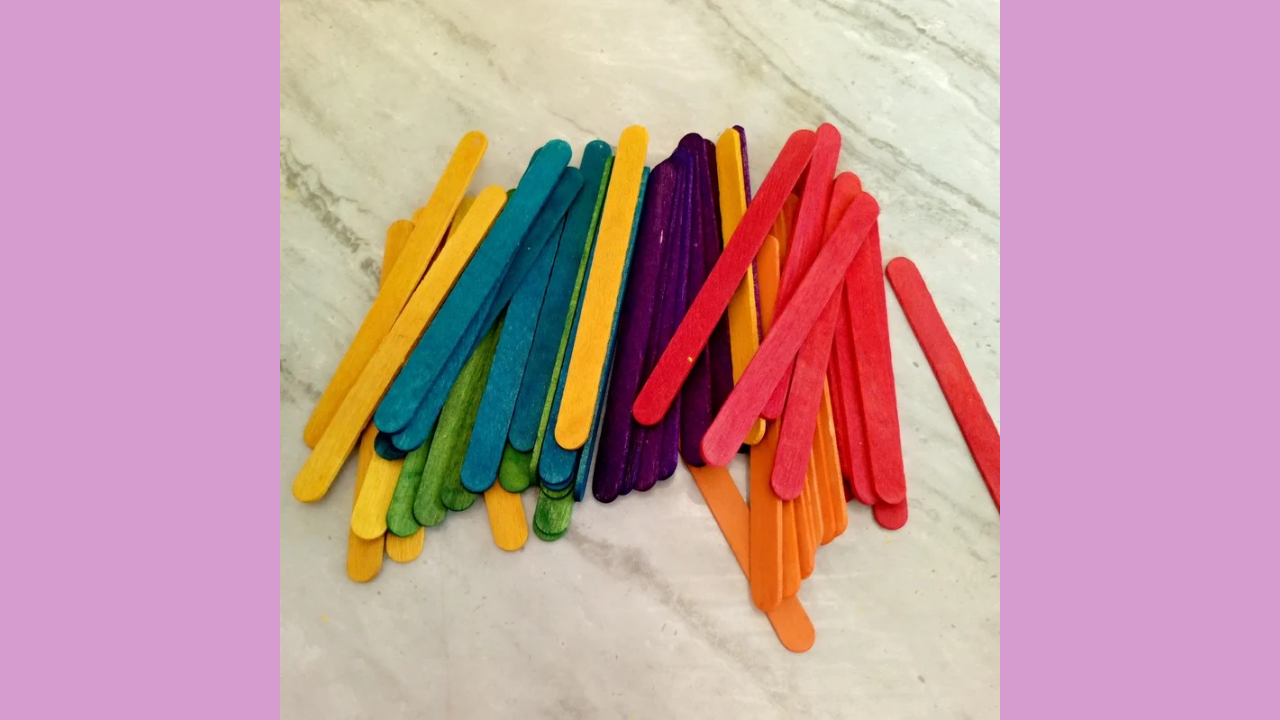
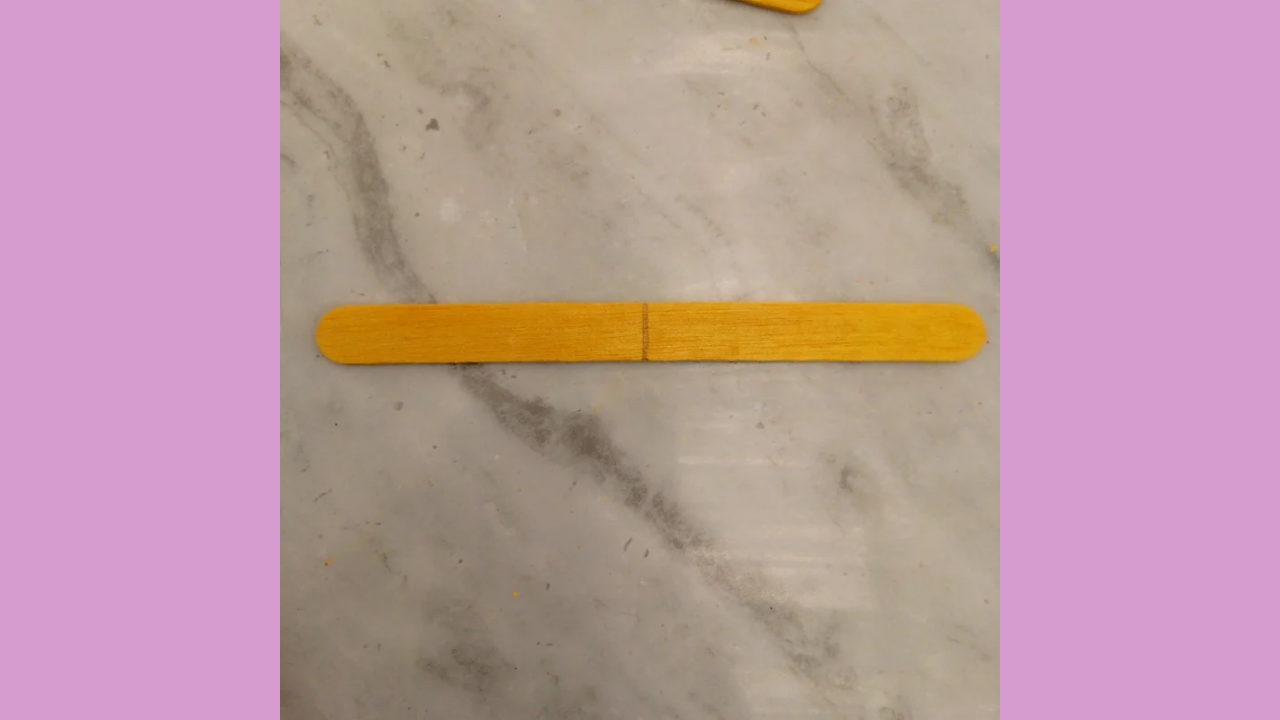
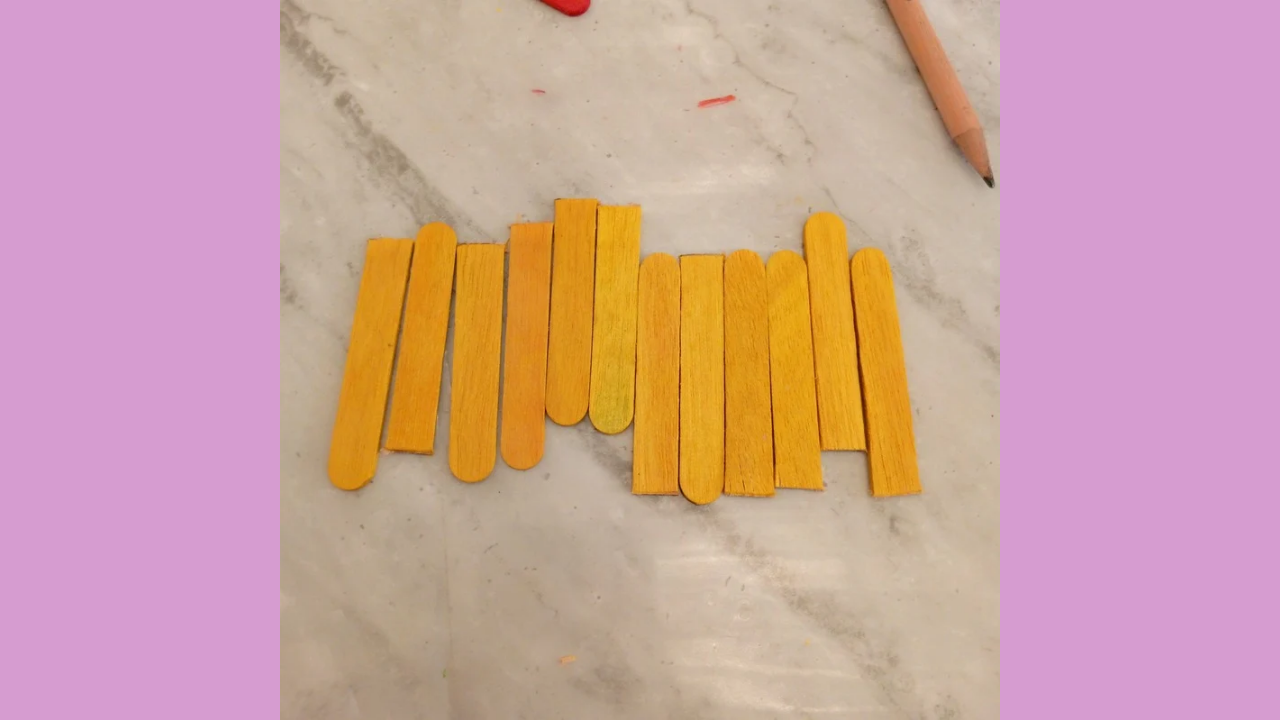
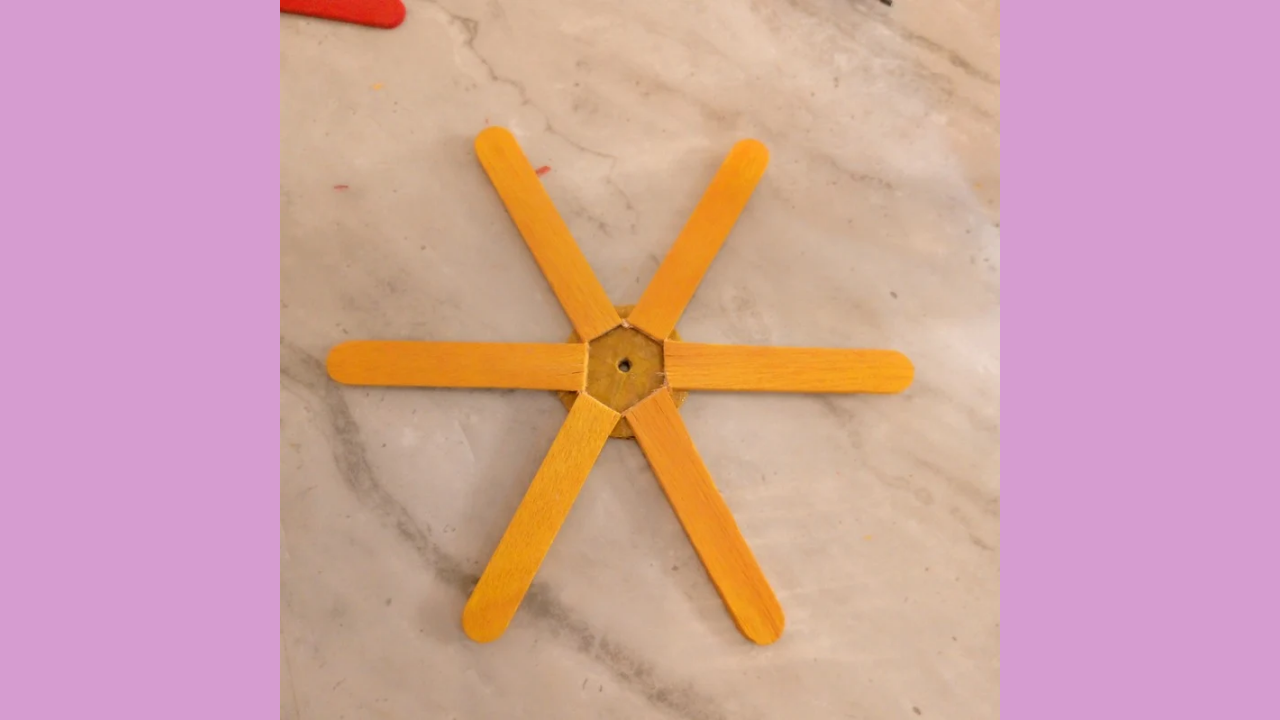
Afterwards, I started thinking about the color of the palettes I wanted to use to continue with the craft. Finally, I decided that yellow would be the perfect color to complement the circles I had already painted. Not only is this color vibrant, but it also brings a sense of joy and energy to the Ferris wheel. So I grabbed all the yellow palettes I had and started working on them. To make sure they were all the same size and shape, I marked half of each pallet. This step is essential so that the pallets look uniform and well aligned on the wheel. Then, carefully, I cut them following the marks I had made. In total, I used 12 pallets. Once I had the 12 popsicles cut, the next step was to glue them around the circles I had prepared previously. To achieve a harmonious design, I decided to place 6 popsicles in each circle. I started by applying a little glue to the edge of one of the circles and placed the popsicles evenly, making sure they were well aligned. The idea is that each pallet adheres firmly so that the structure is solid and durable. I repeated the process with the second circle, paying attention that both sides had a symmetrical design.
Paso nro 3
Paso nro 3
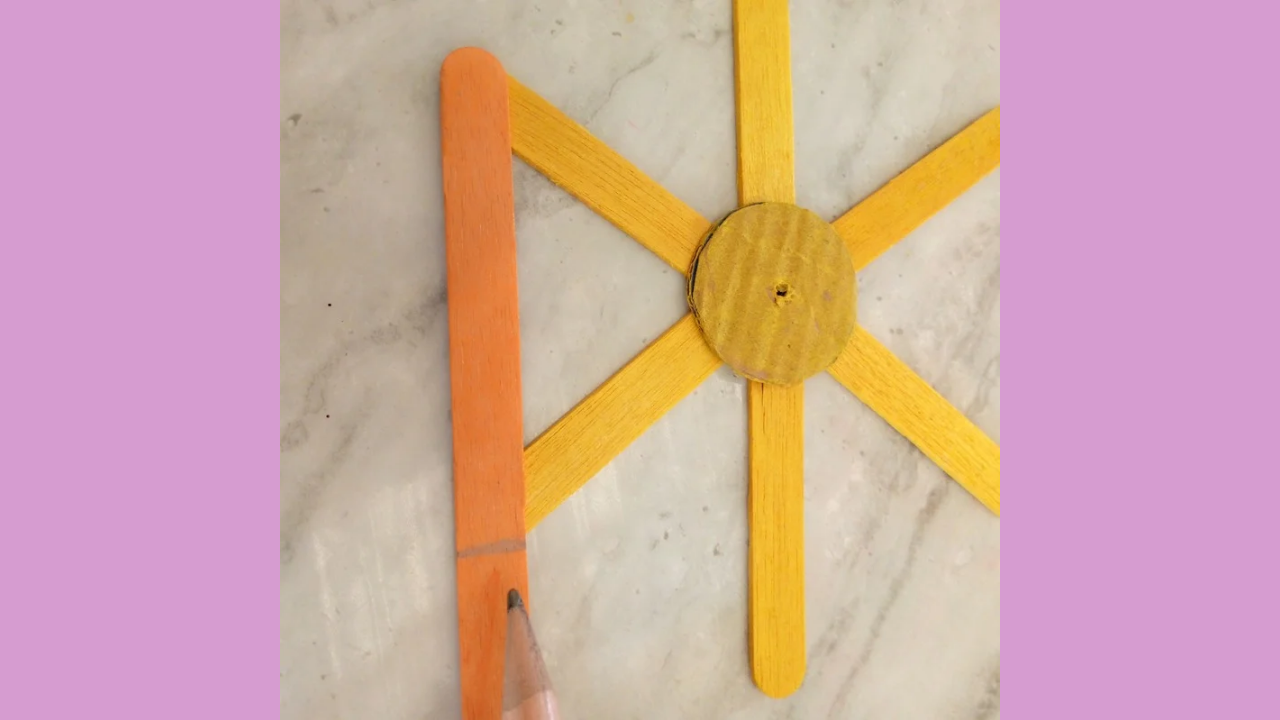
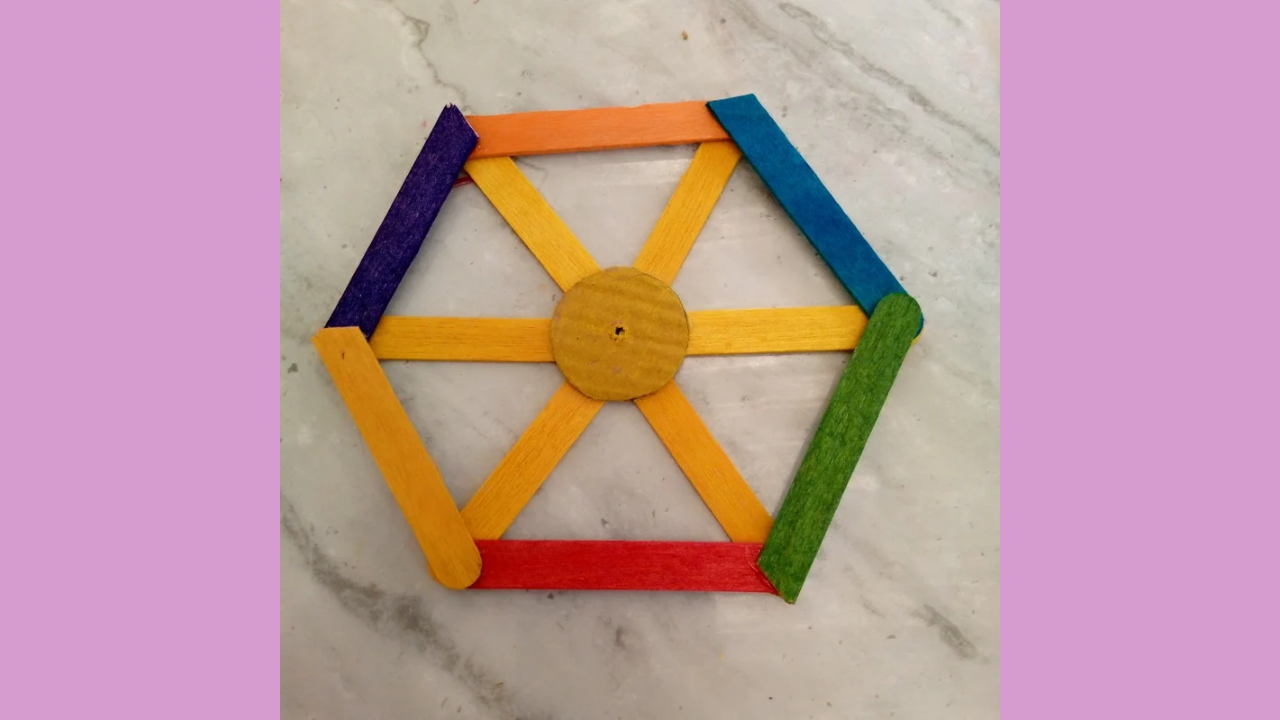
Now in this step, I decided to use several different color palettes to place around the Ferris wheel. I wanted the wheel to have a vibrant and fun look, so I chose a variety of colors that complemented the yellow of the paddles and circles. I started by measuring each paddle according to the distance between each side of the wheel. This step is crucial to ensure that all the pallets are well distributed and aligned. After measuring, I cut off the excess from each paddle, making sure they were the right size to fit perfectly into place. Once I had all the paddles ready, I proceeded to glue them tightly around each wheel. I repeated the same process for the two wheels, paying attention to making the design symmetrical and attractive.
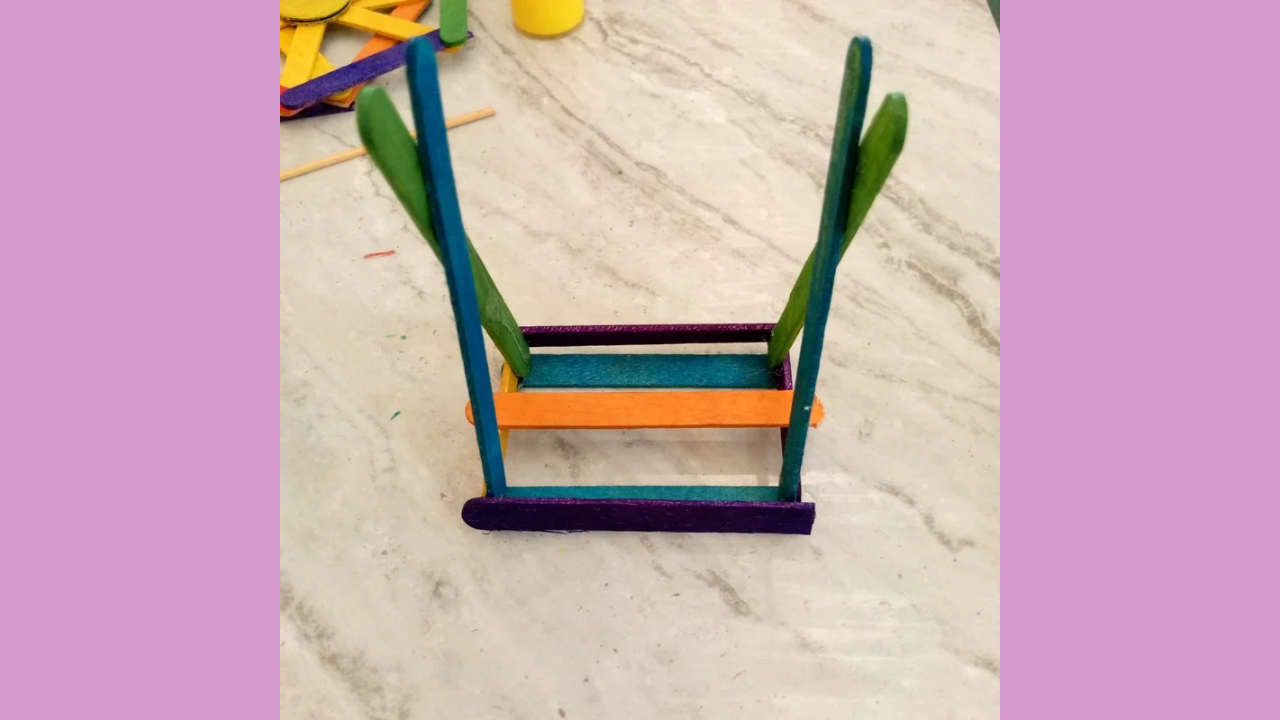
Paso nro 4
Paso nro 4
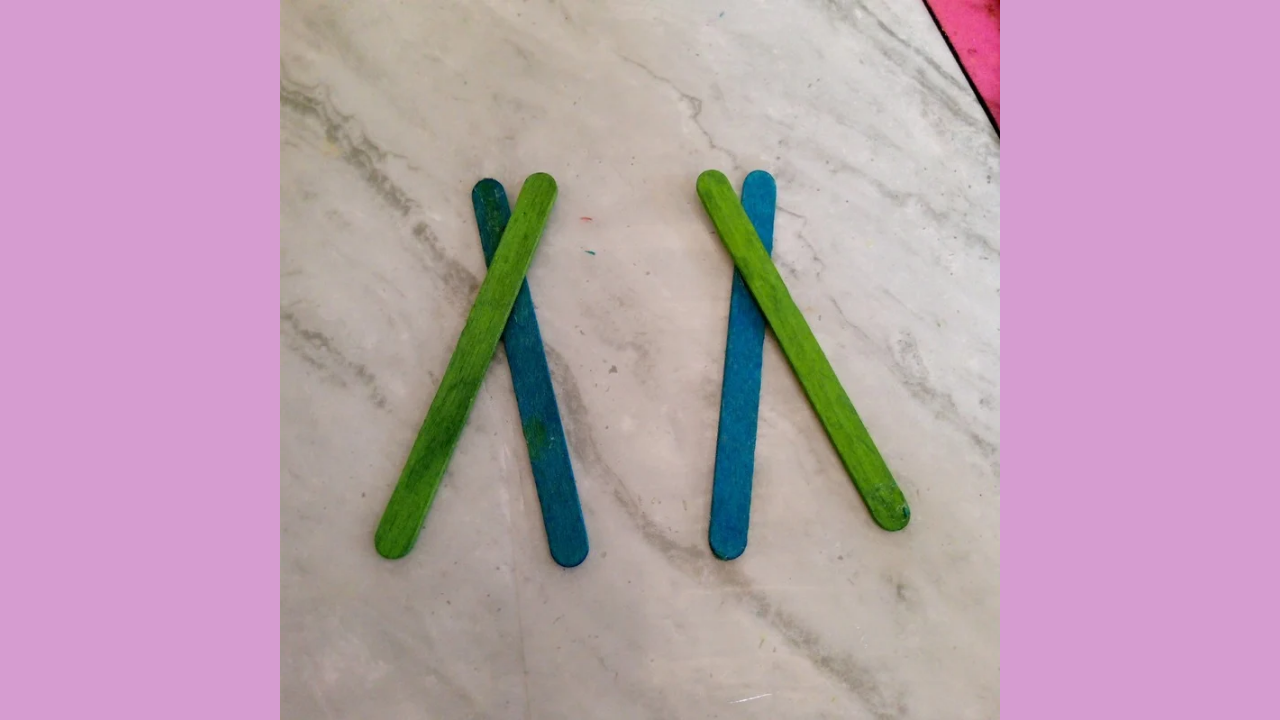
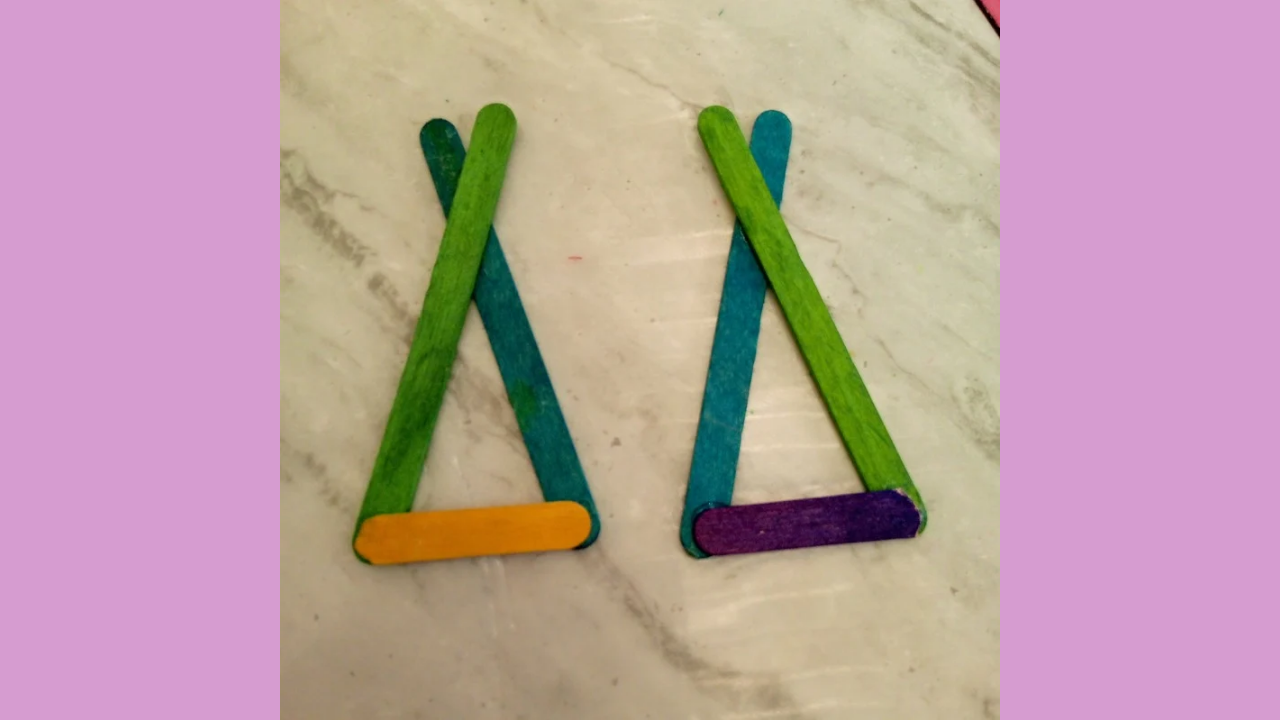
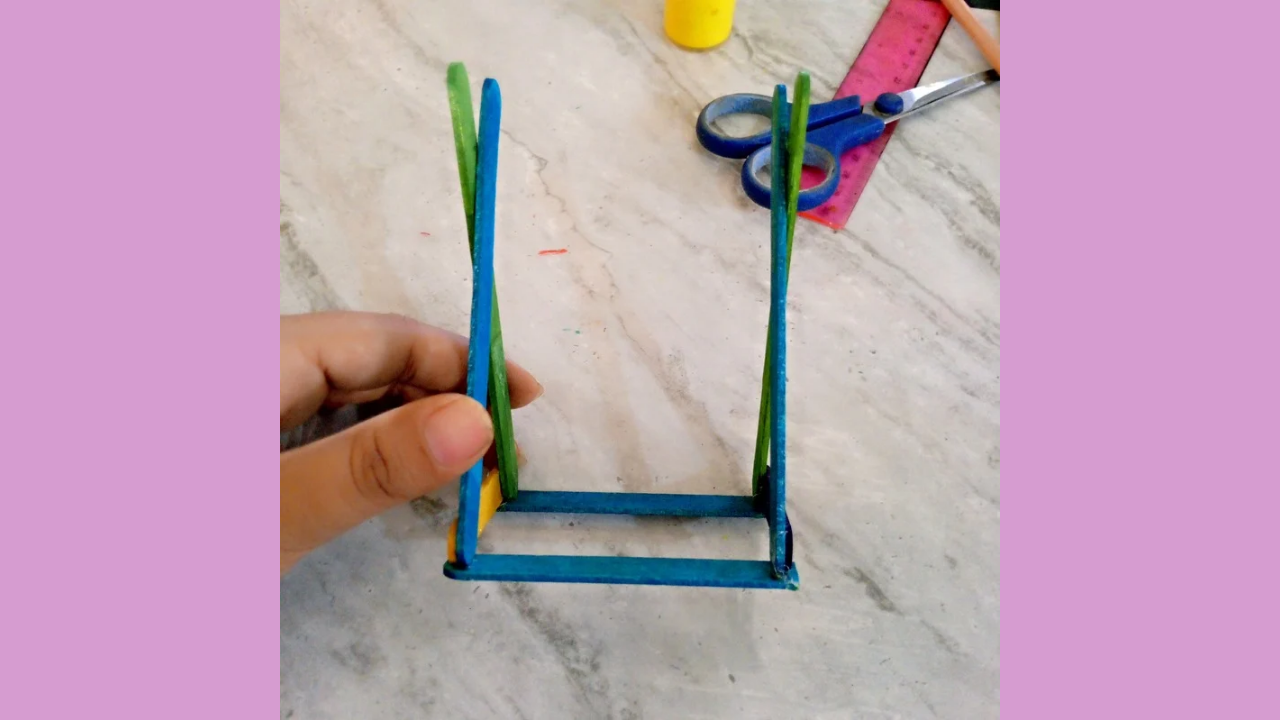
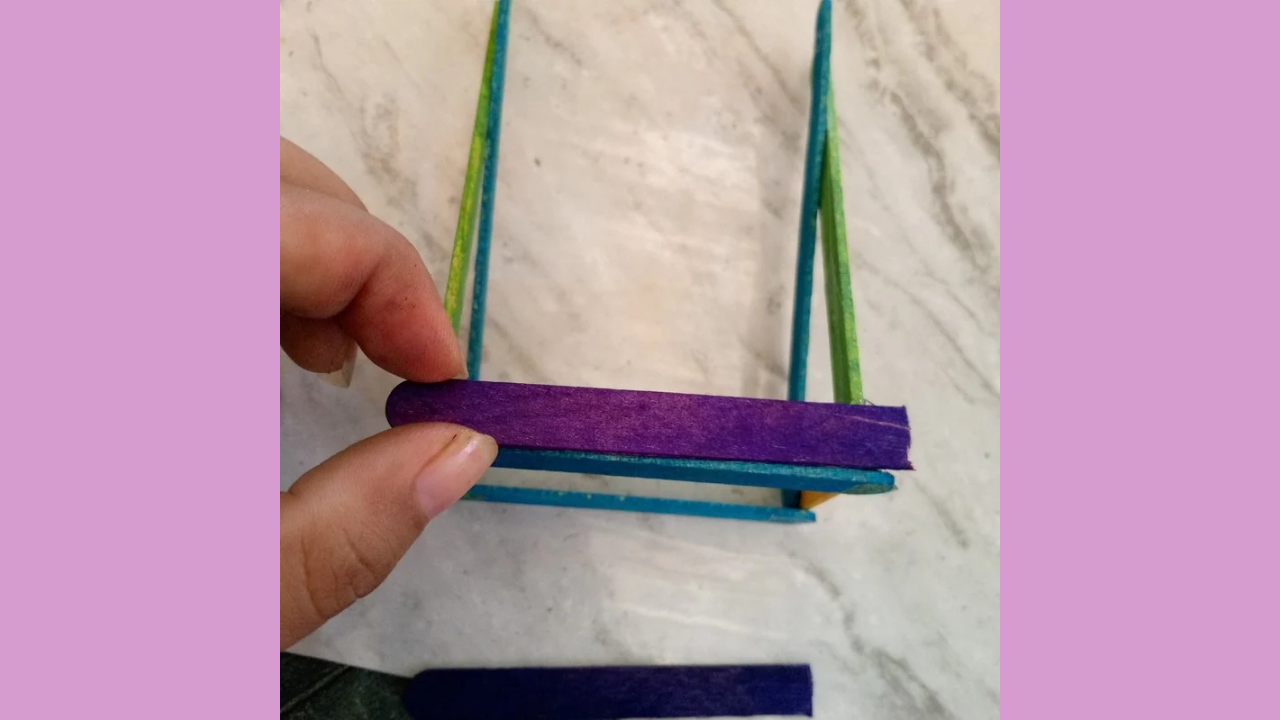
Now I'm going to start making the base that will hold the Ferris wheel. To do this, I took 4 pallets and glued them together in an "X" shape. However, I didn't completely intertwine them; I only did it on the top so they would stay together securely. This design will give initial support to the structure. To increase stability, I glued another pallet to the bottom of the "X". This helps make the base sturdier and able to support the weight of the wheel without wobbling. Next, I lined up two pallets at the length I wanted, making sure they were the correct distance apart so they fit perfectly with the base. After adjusting the measurements, I glued the two pieces I already had, thus creating a more solid structure. I noticed that the base still did not have the stability I wanted, so I decided to glue more pallets on the sides. I also placed a pallet in the middle to further reinforce the structure.
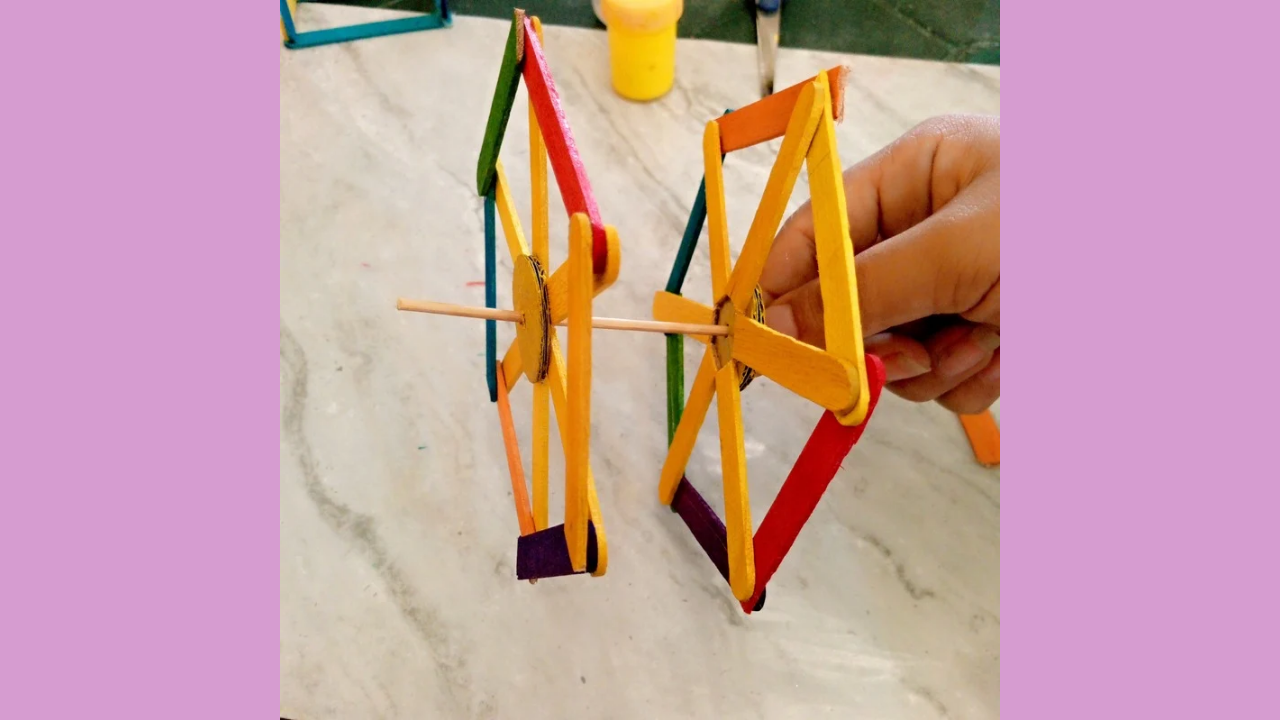
Paso nro 5
Paso nro 5
Continuing with the wheel, now I am going to place the wooden stick in the center of the two wheels. This stick is essential as it will serve as the axis for the Ferris wheel to spin correctly. When testing the stick, I realized that it was too long for the frame. So I decided to cut it a little, but not excessively, since I needed to maintain a suitable size. It is important that the stick is the right length so that it fits well in the base and allows the wheels to turn easily. Once I cut the stick to the correct size, I carefully inserted it into the center hole of the two wheels. Making sure it was properly aligned, this will allow the wheel to spin smoothly without any problems.

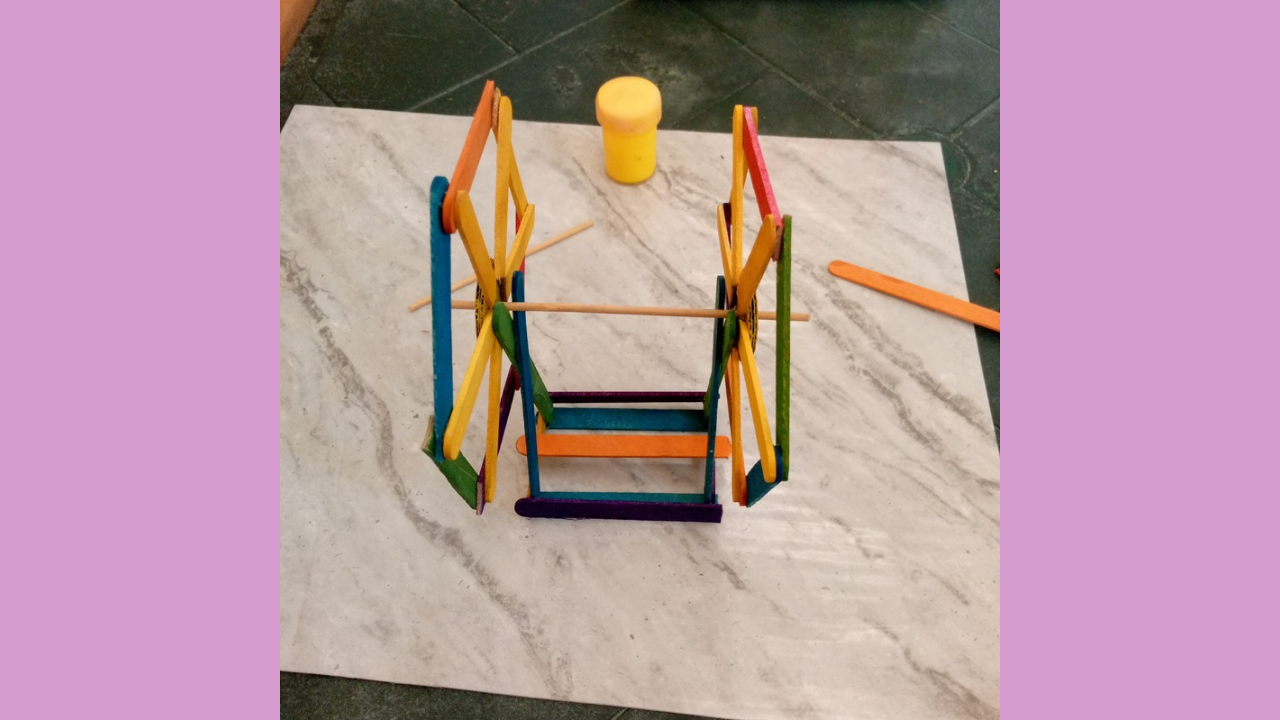
Paso nro 6
Paso nro 6
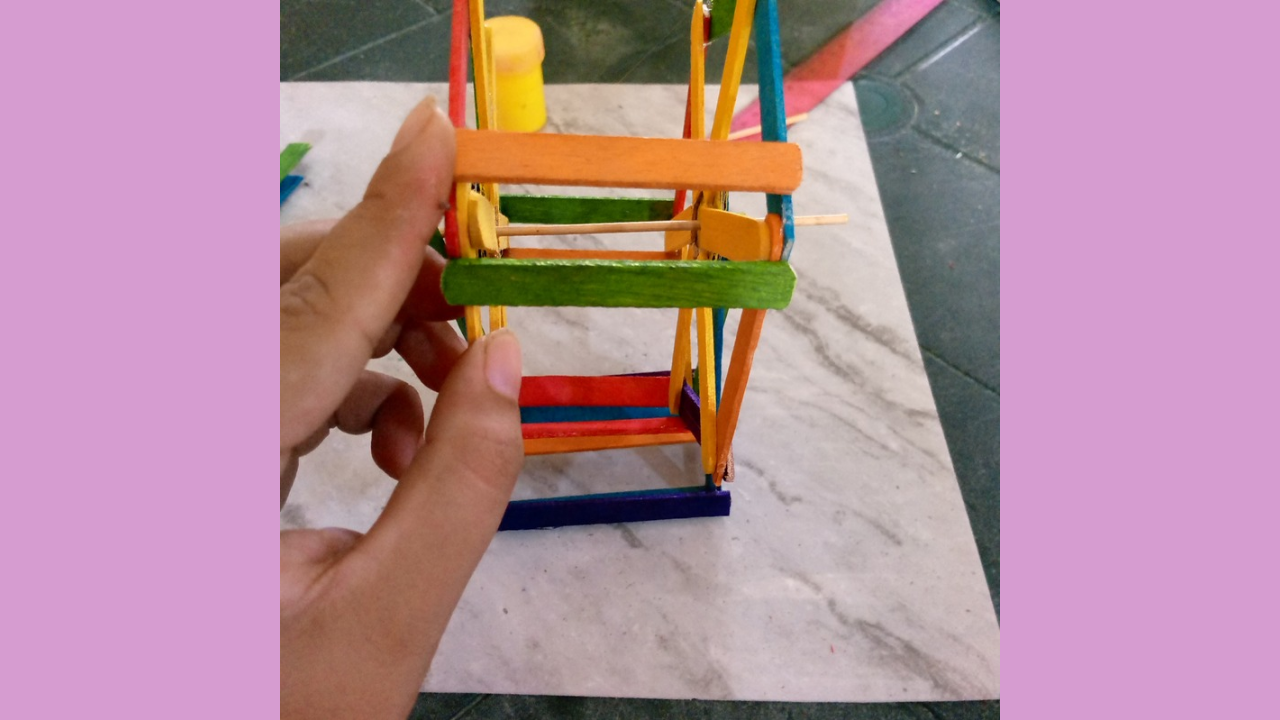
Finally, to further improve the stability of the Ferris wheel, I glued some little paddles measuring the width of the wheel. I decided to place about 10 pallets, making sure they were well distributed so that the structure was solid and sturdy. These pallets not only provide additional stability, but they will also come in handy later when I want to place the photos on the wheel.
(Resultado final:)||(Bottom line:)
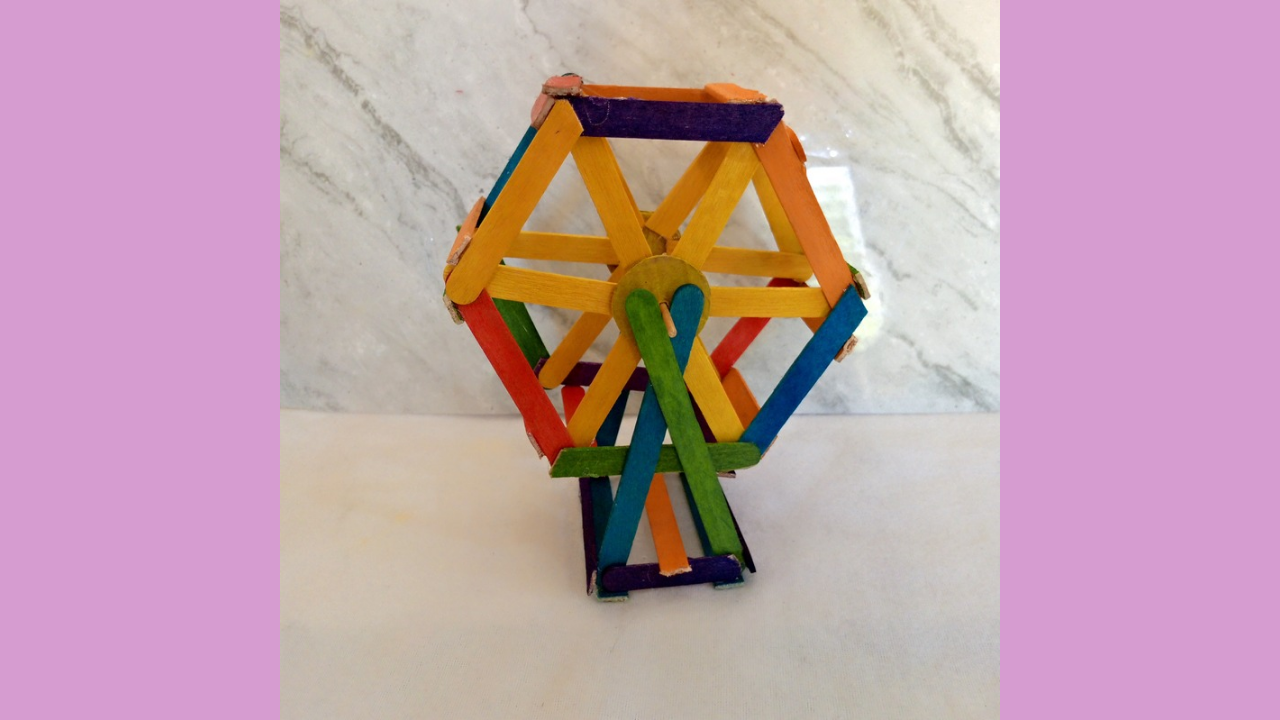
After a creative and fun-filled process, the Ferris wheel has reached its final stage. This project has not only been an opportunity to work with my hands and explore my creativity, but also an exercise in patience and precision. I appreciate every step of the process, from planning to execution, and I am proud of the final result. I hope this project inspires others to create and enjoy crafts, as there is nothing more rewarding than seeing your ideas transformed into a beautiful reality.

Las fotos de este blog son de mi propiedad|Las imágenes son editadas en canva|Fotografías tomadas en mi celular infinix Smart 7|El contenido está traducido en el traductor de Firefox.
Wow te quedó genial 🤩 y qué divertida la forma en la que la armas... Queda perfecta y super colorida 💜 me encantó jaja 🙌🏽 felicidades 🎉
Hola gracias me alegra que te haya gustado ☺️
Una belleza
Gracias
Congratulations @stefany0720! You have completed the following achievement on the Hive blockchain And have been rewarded with New badge(s)
Your next target is to reach 8000 upvotes.
You can view your badges on your board and compare yourself to others in the Ranking
If you no longer want to receive notifications, reply to this comment with the word
STOPCheck out our last posts:
wow, that's great.
hello thank you 😌
Wooden pallets also known as popsicle sticks are known to be used to create beautiful designs but creating this beautiful Ferris wheel of yours with popsicles and paper was a game-changer, bravo!
Hello, I love your comment. It really encourages me. Thank you for your comment.
que bueno y la forma quedo excelente!
how good and the shape was excellent!
Que bonita te Quedó me gustaron los colores