ENGLISH CONTENT
Hello all craft lovers! For my anniversary with my boyfriend, I wanted to make him something special. After he mentioned to me that he wanted to have physical photographs of us, I looked for a way to do it, but in a compact way. That's how I found The Chinese Thread Book, a craft originally created to store sewing implements, such as needles. By making it with paper, you can add messages and in my case, small size photographs. I already explained the first, second and third piece. Today I will tell you about the two that were missing and then, we will put together the book 😉
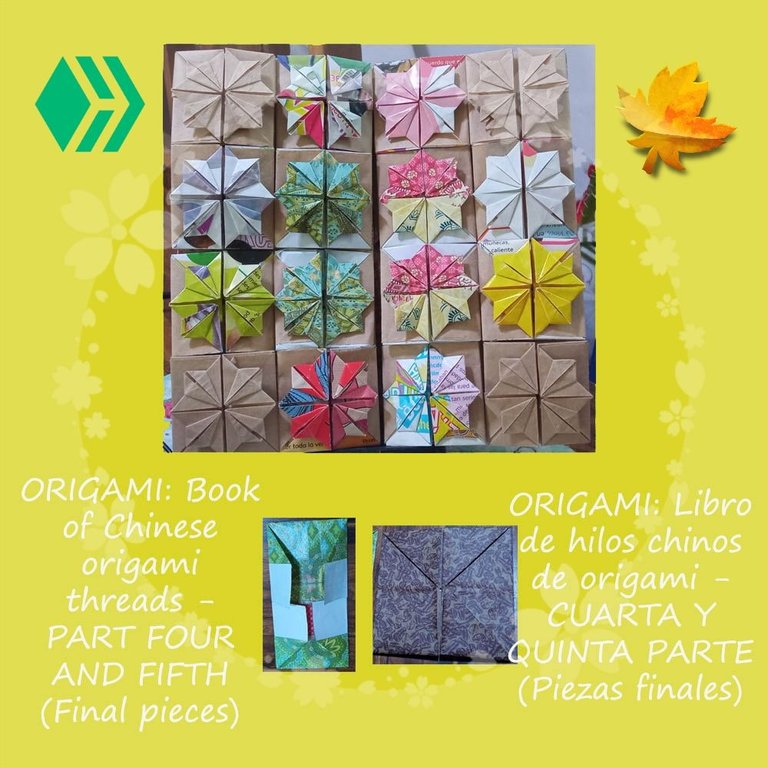
FOURTH PIECE
This piece is identical to the second piece, which I already explained, but varying the size of the paper used and the number of pieces made. The paper I used was gift paper and I verified that it is the worst type of paper for working with origami, at least this specific type of paper, since the marks were not visible (because it was recycled paper and already had marks from a previous use 😢) and since it was very smooth on one side, it was really tedious when making the folds. But the design was beautiful, so it was still worth the stress haha Anyway, this time we will need to cut a 20x40cm piece of paper.
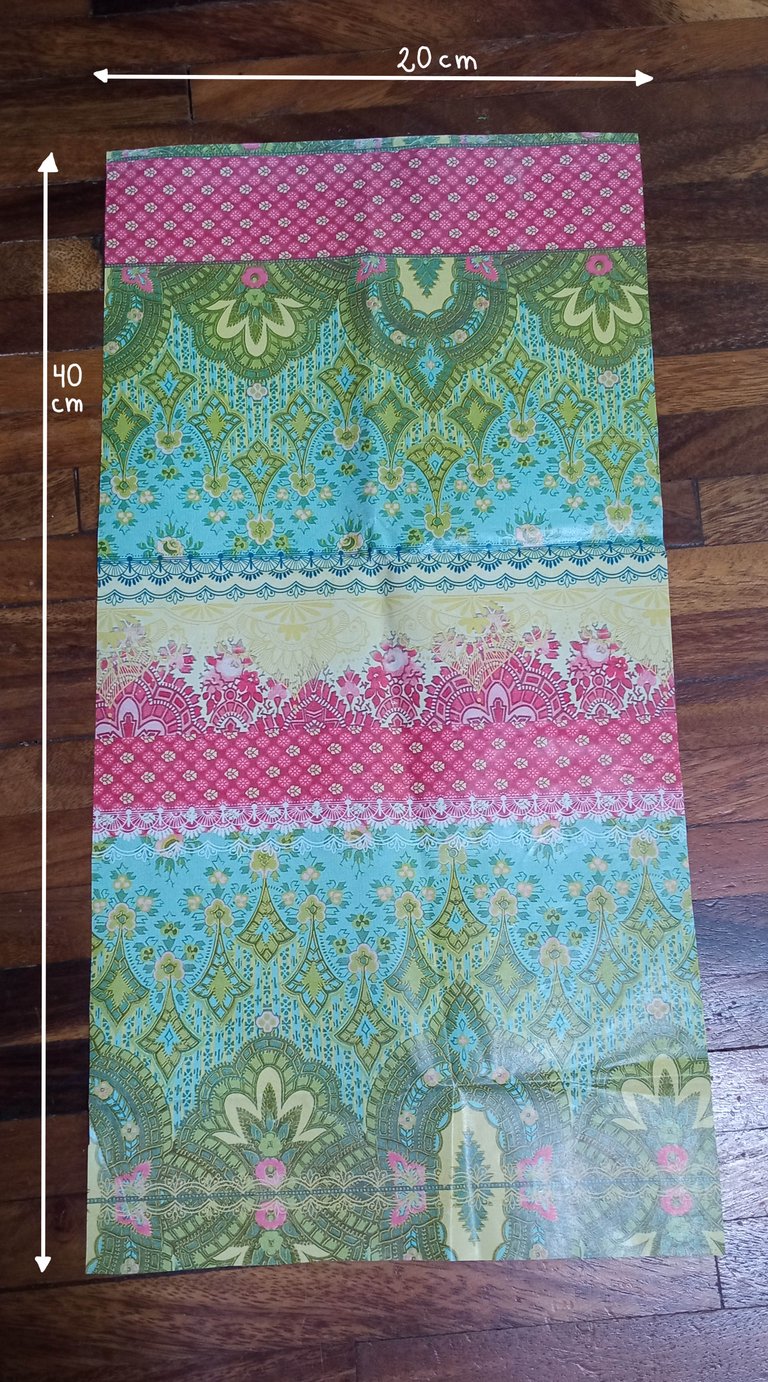
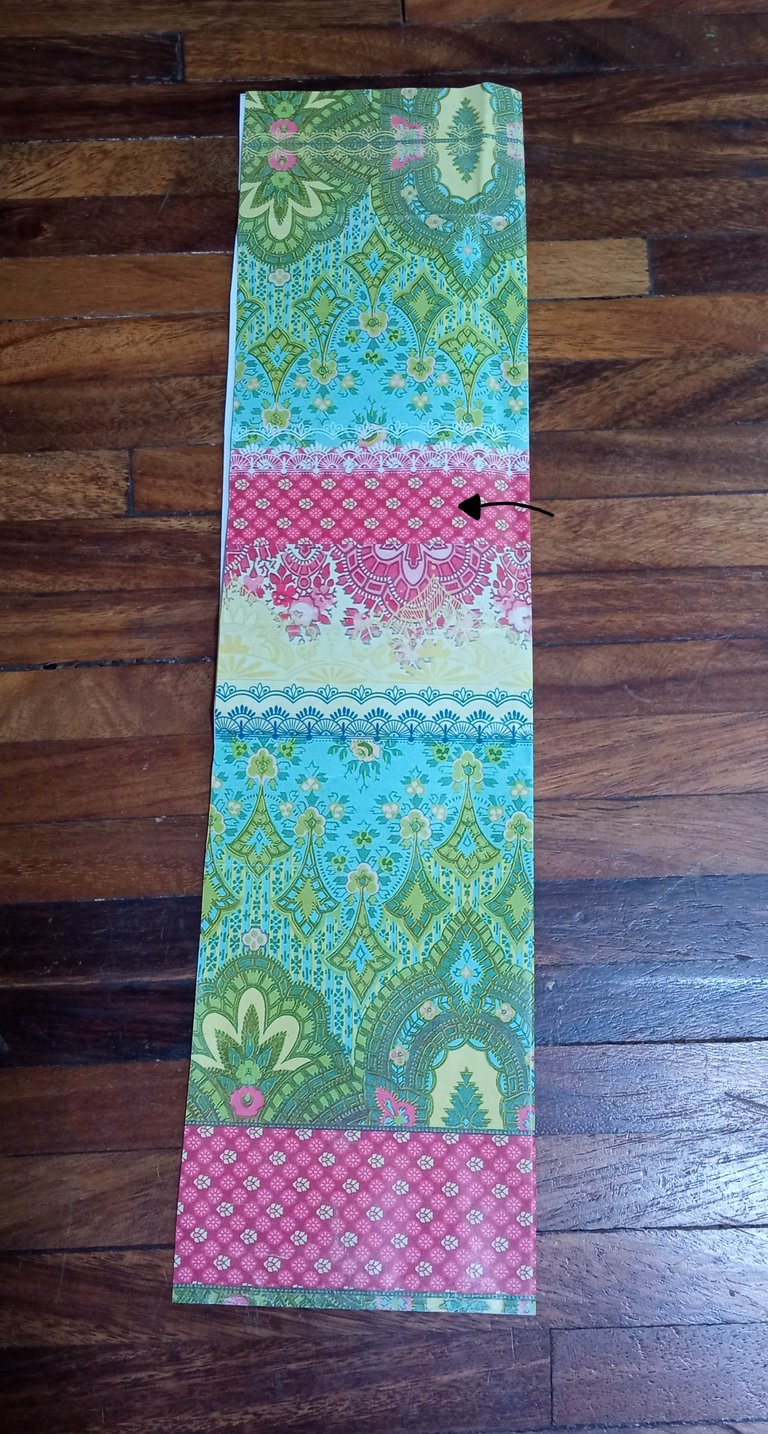
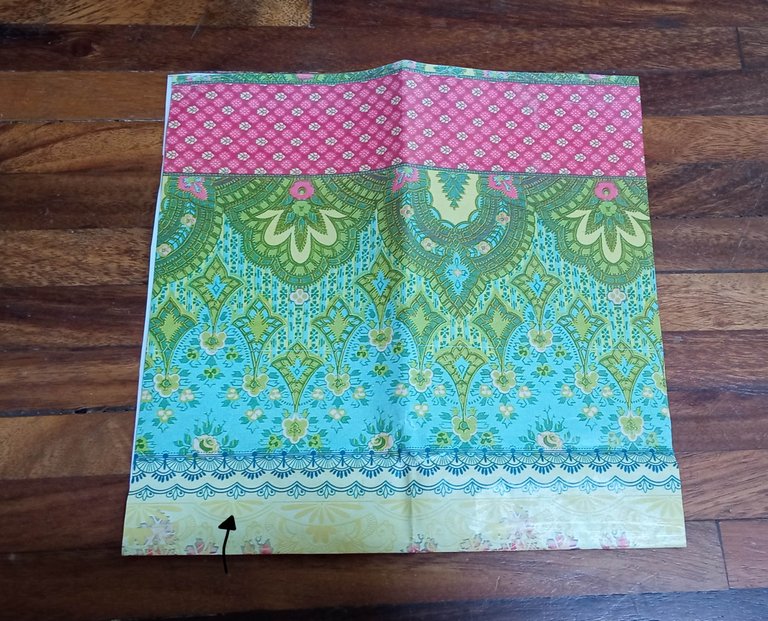
The next thing is to fold the paper from the top to the bottom and from one side to the other, in order to obtain a cross-shaped mark. Thanks to this, we can guide ourselves to make the following folds.
 |  |
|---|
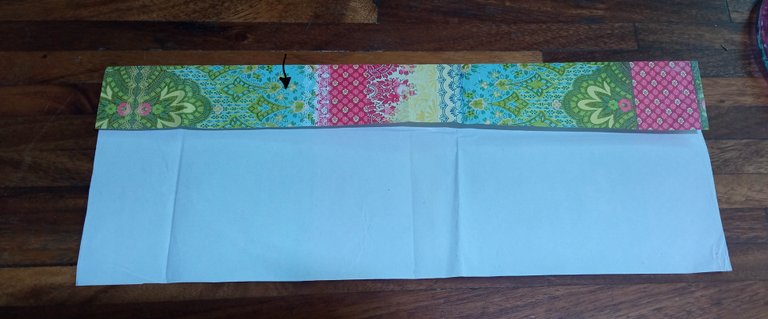 | 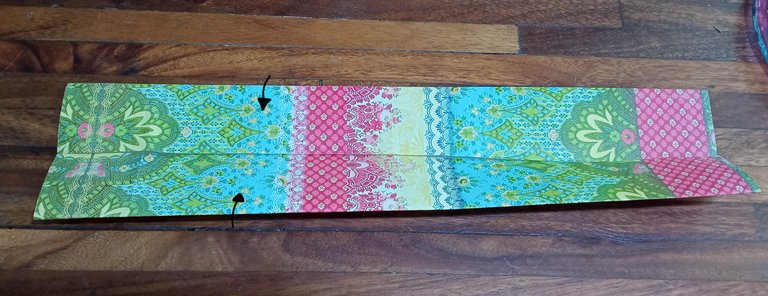 |
|---|
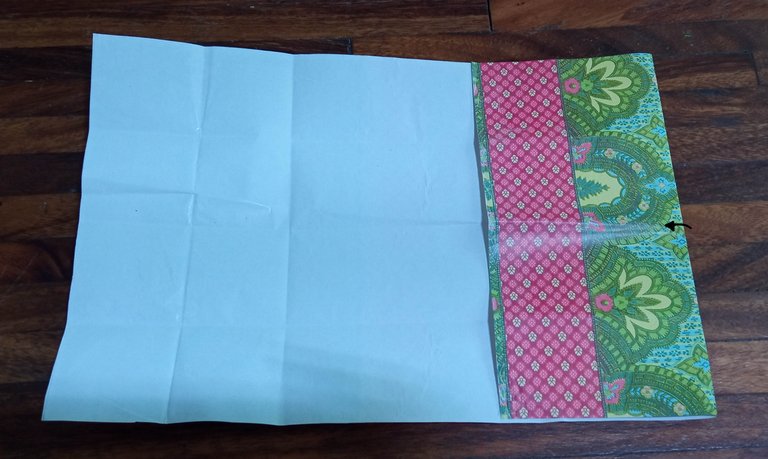 | 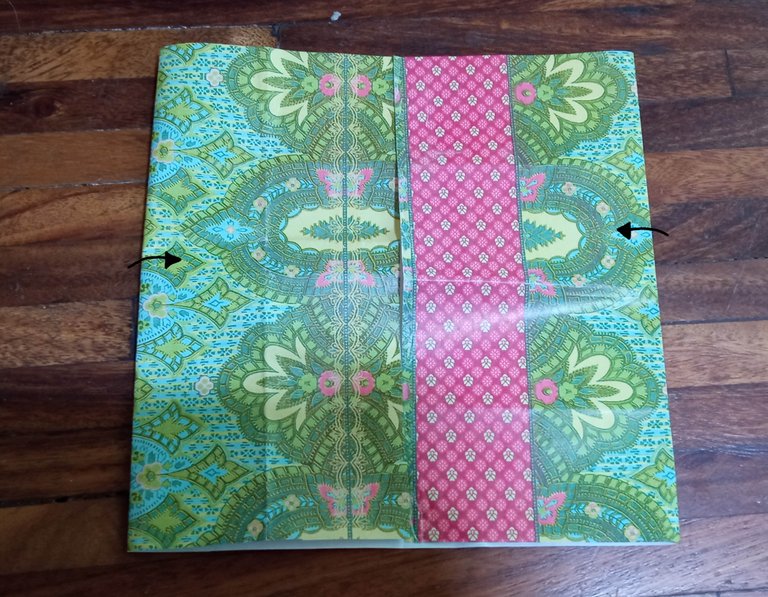 |
|---|
Then, without opening the piece, we proceed to turn it over to proceed to fold the corners and obtain some triangles.
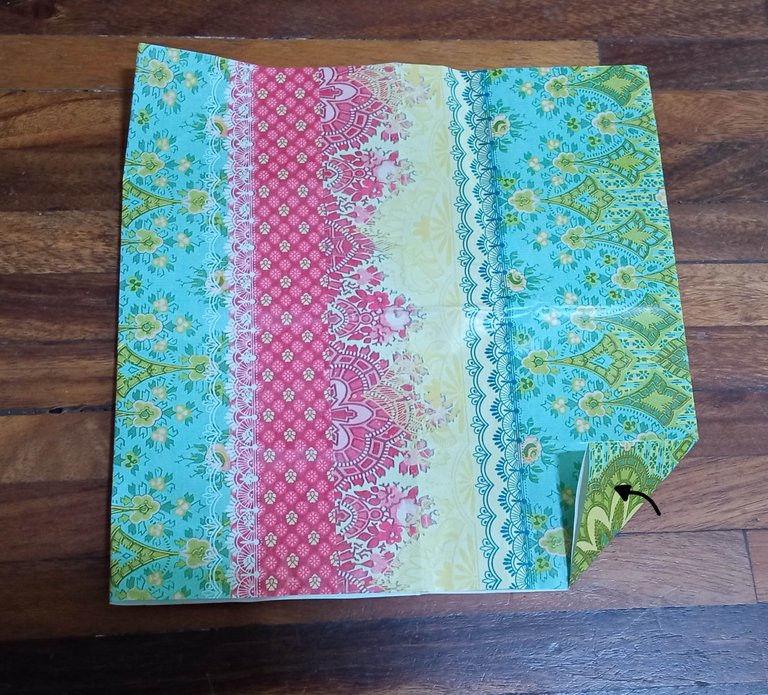 | 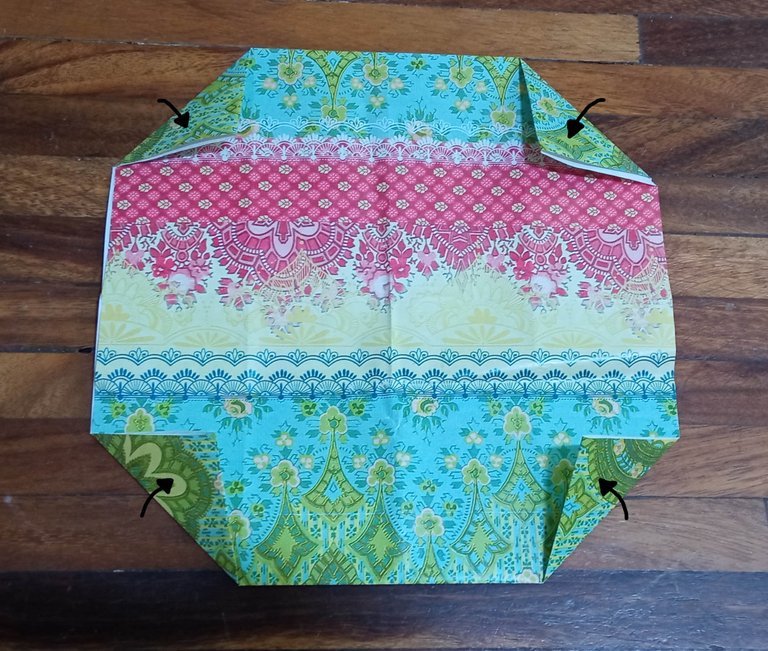 |
|---|
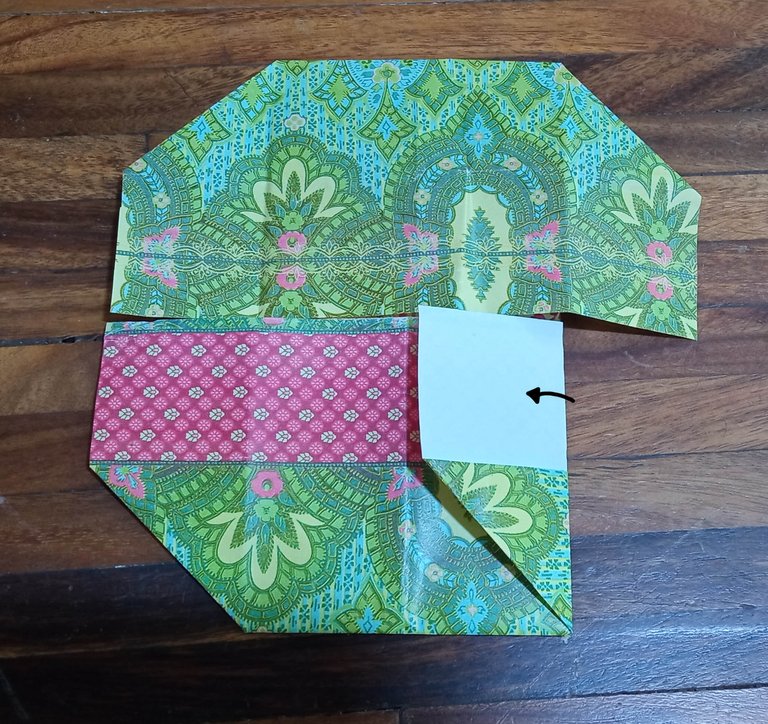
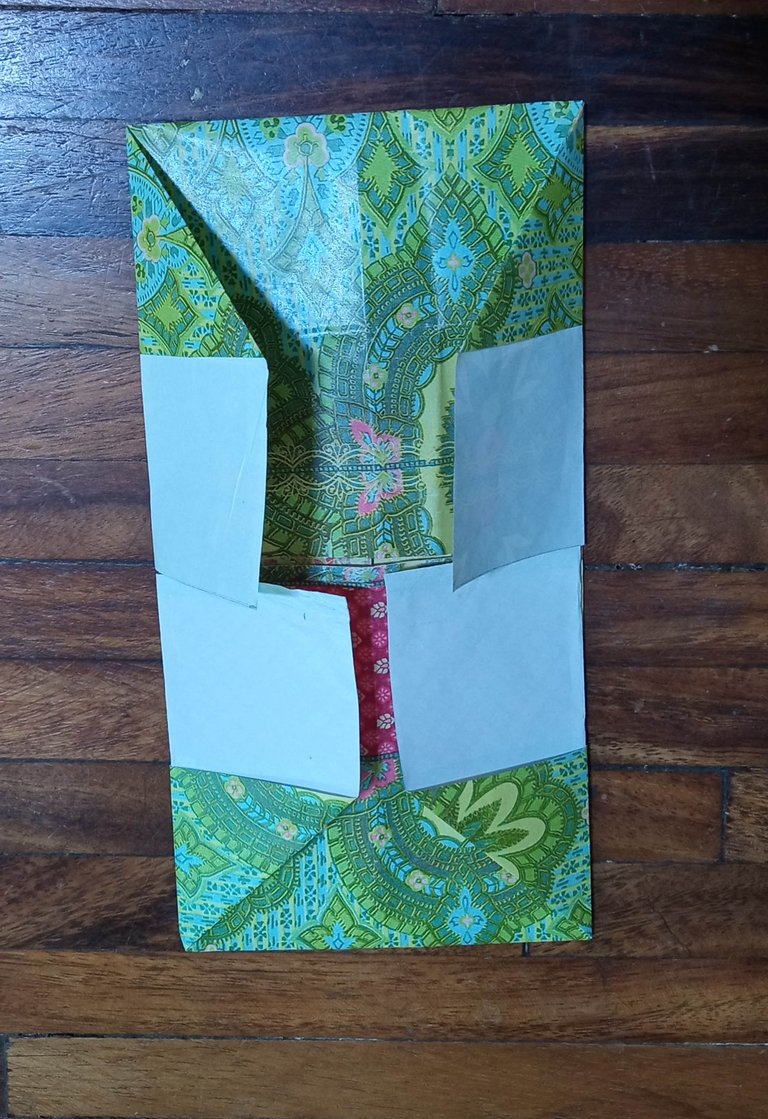
Afterwards, we turn the piece over again and when we open it, the folds we made will allow us to push the paper, first on the sides and then on the top and bottom sides so that it looks like the photographs. Next, we fold the tabs.
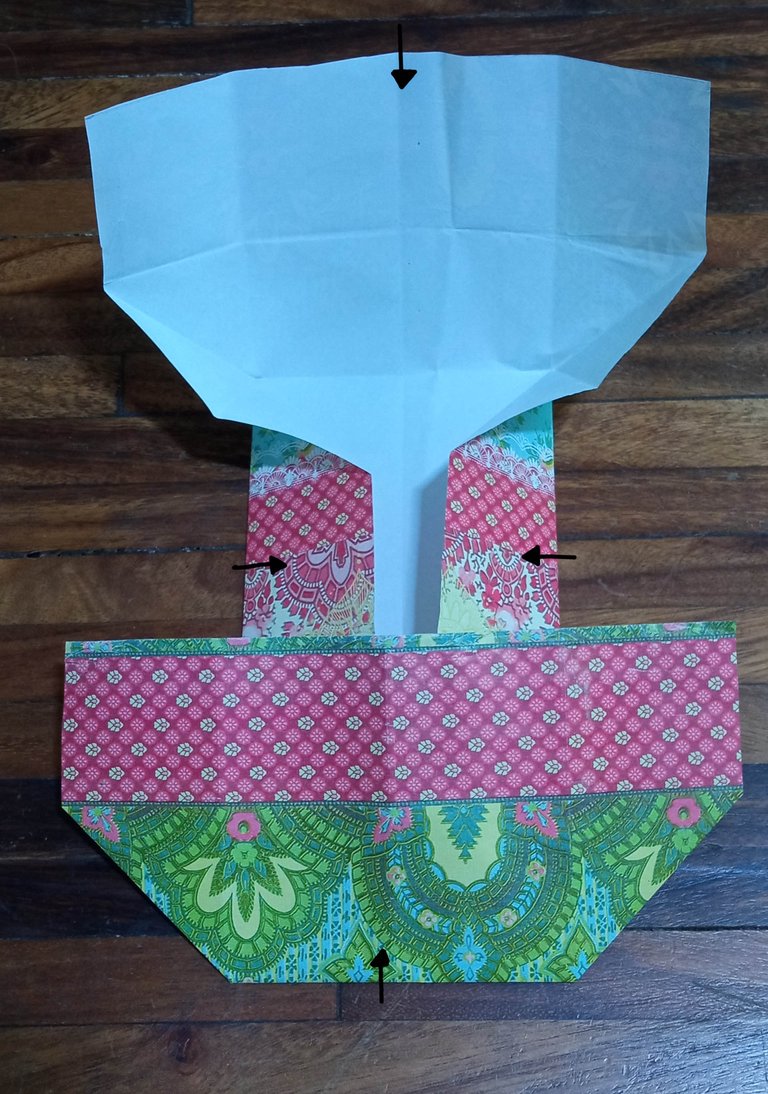 | 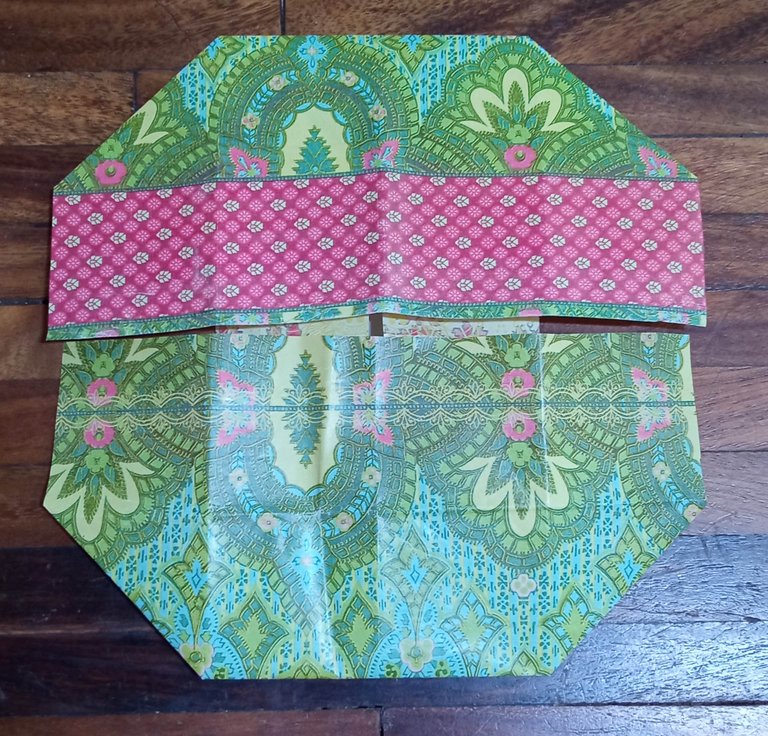 |  |
|---|
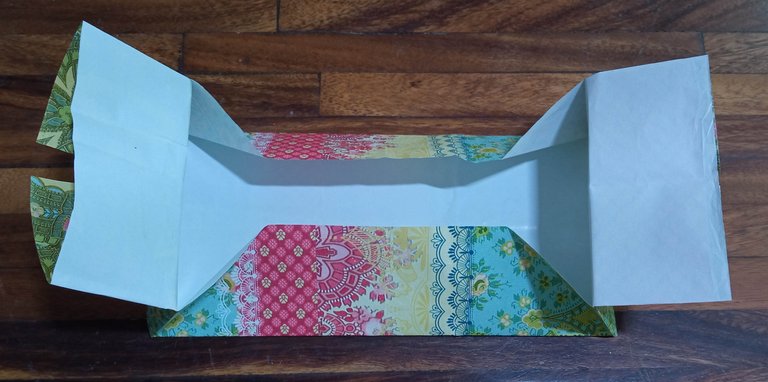
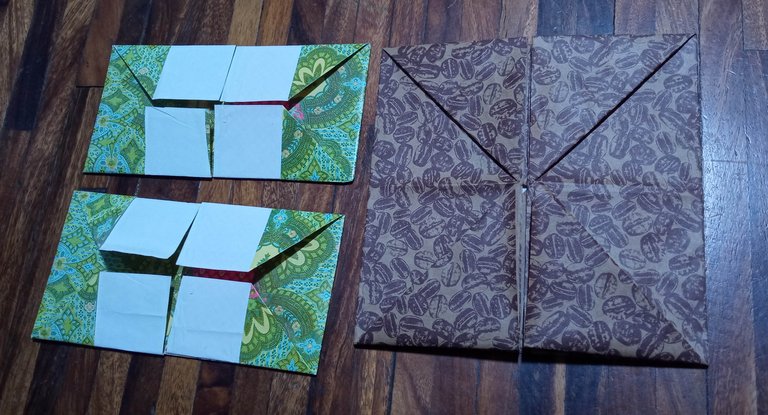
By folding all the corners, we will have the piece ready. For the book, only 2 of this type are necessary.
 |  |
|---|

FIFTH PART (BASE OF THE BOOK)
To make the base of the book, I chose to use some patterned kraft paper that I had. Unlike the other wrapping paper, this one is much thicker and has a rough texture, so it seemed perfect to me to make this piece, which is the largest of all and is the one that can be seen on the outside of the book. To make it, we will need to cut 40x40 cm of the paper of our choice.
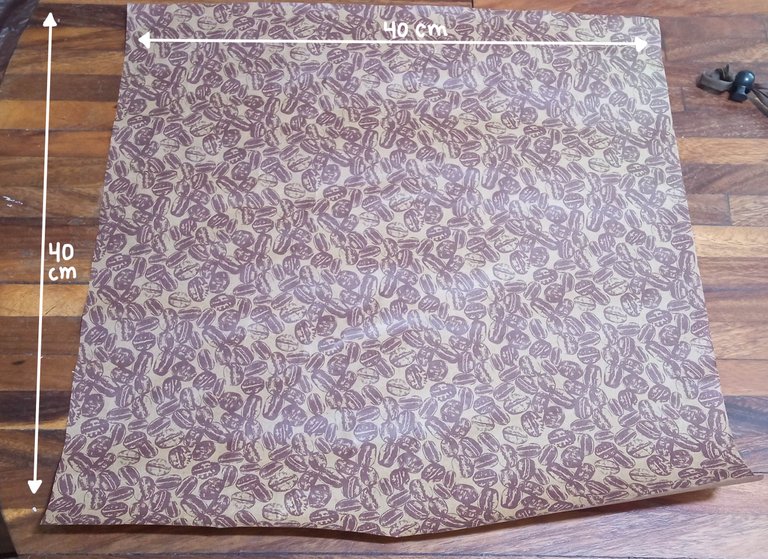
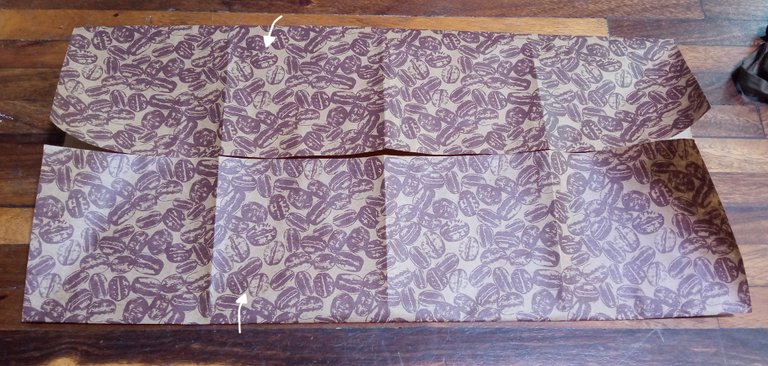
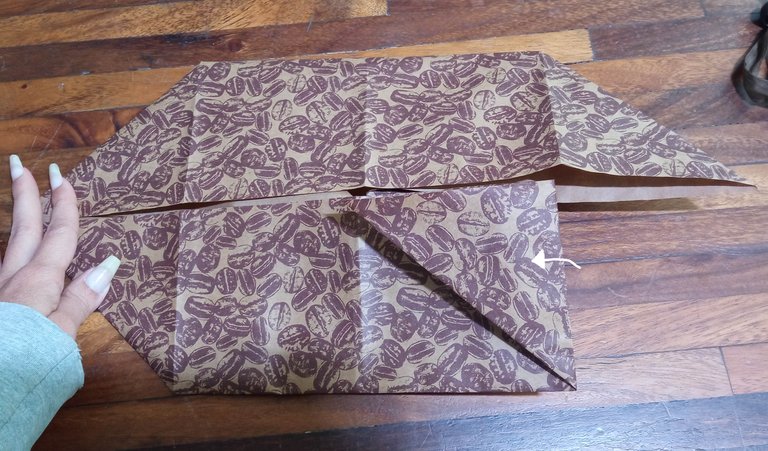
We will fold the paper so that we can obtain the cross-shaped marks. With those marks as a guide, we fold again.
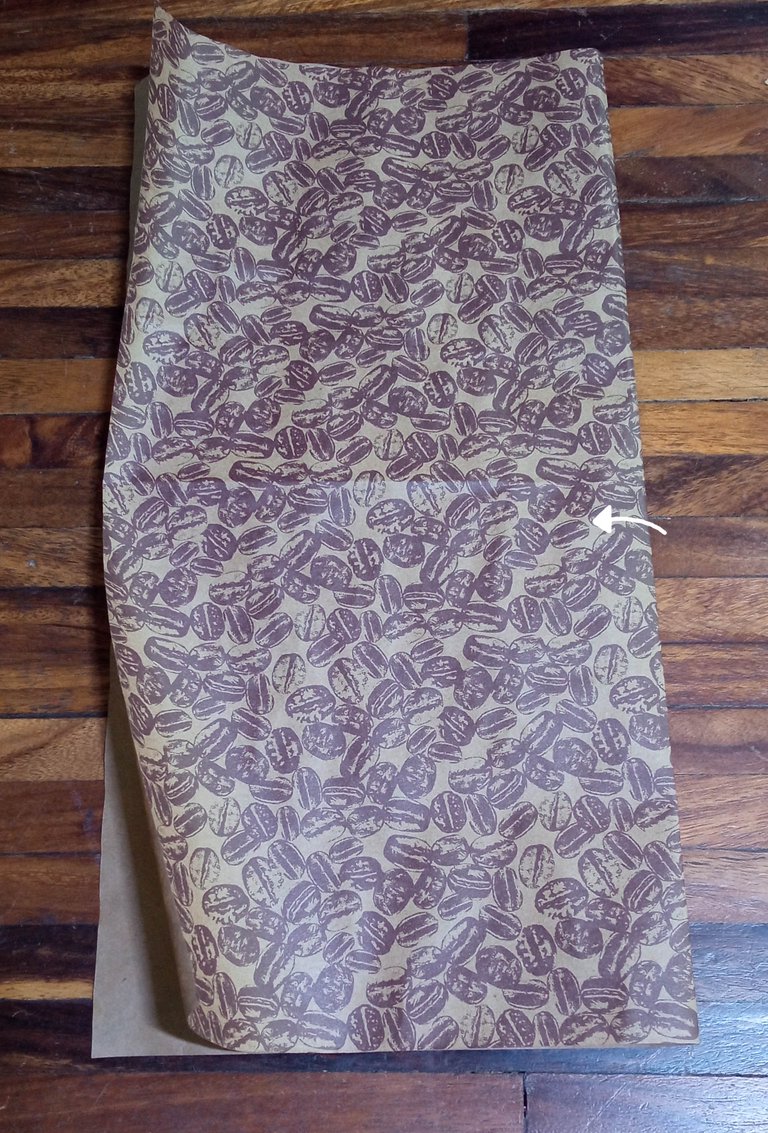 | 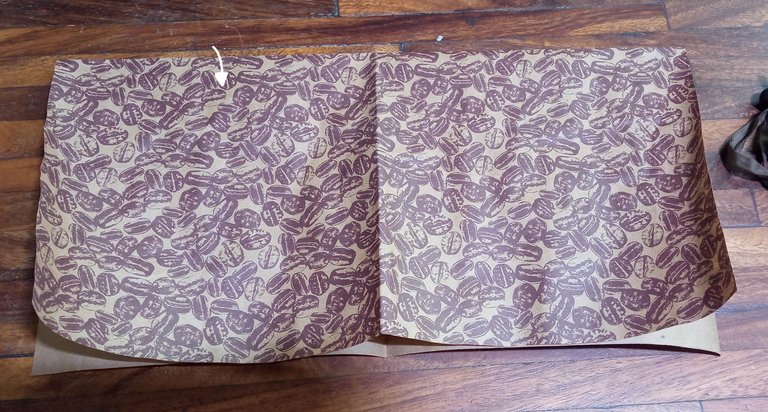 | 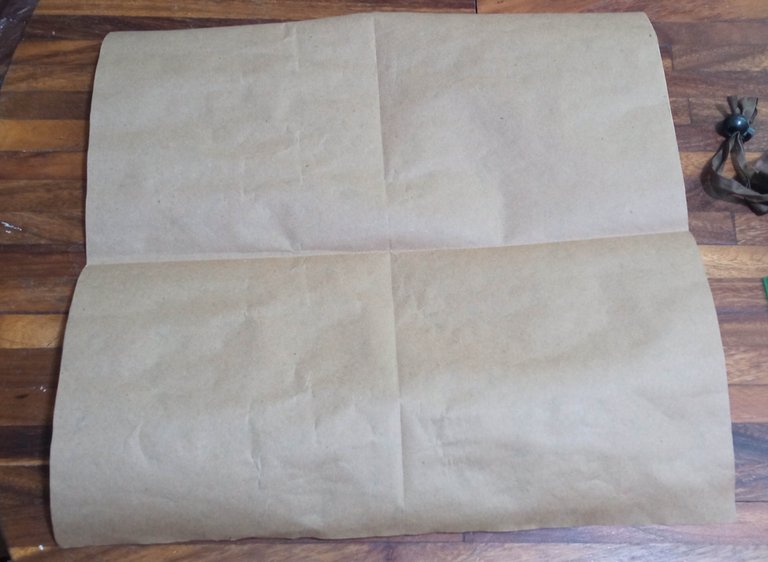 |
|---|
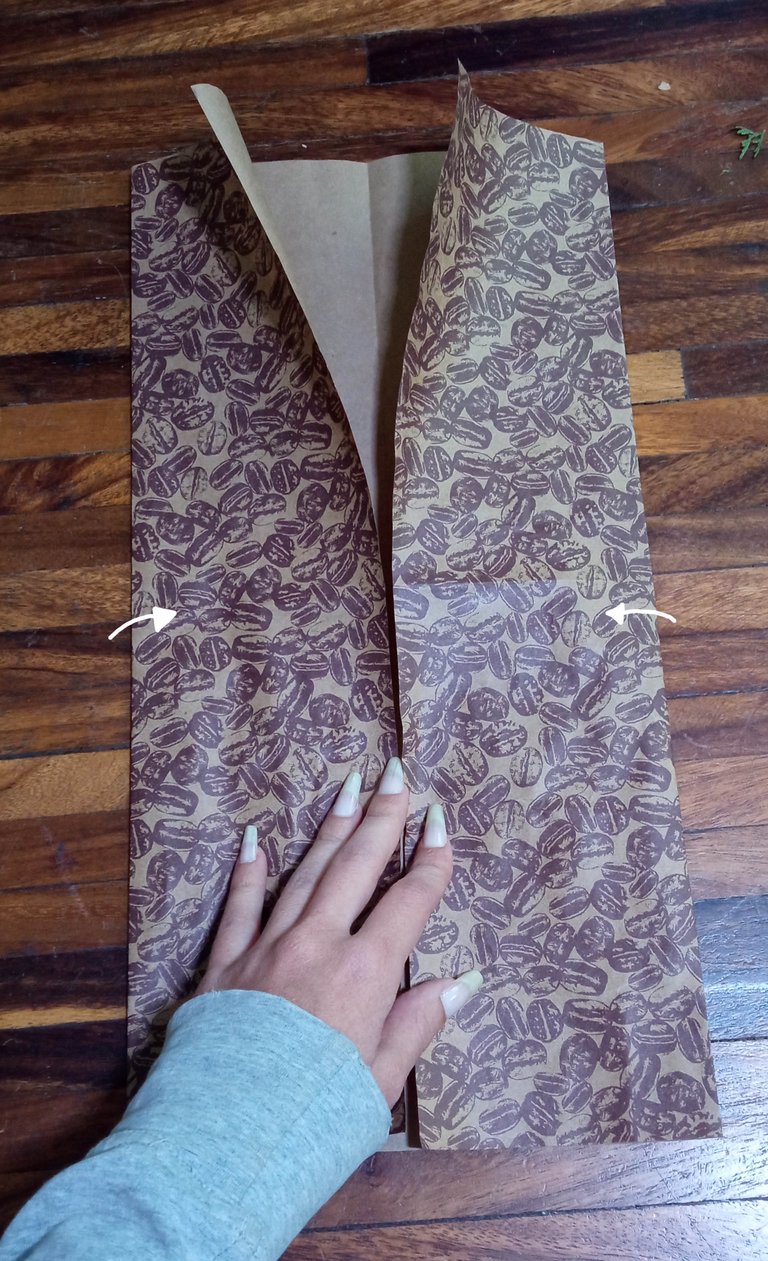 |  |
|---|
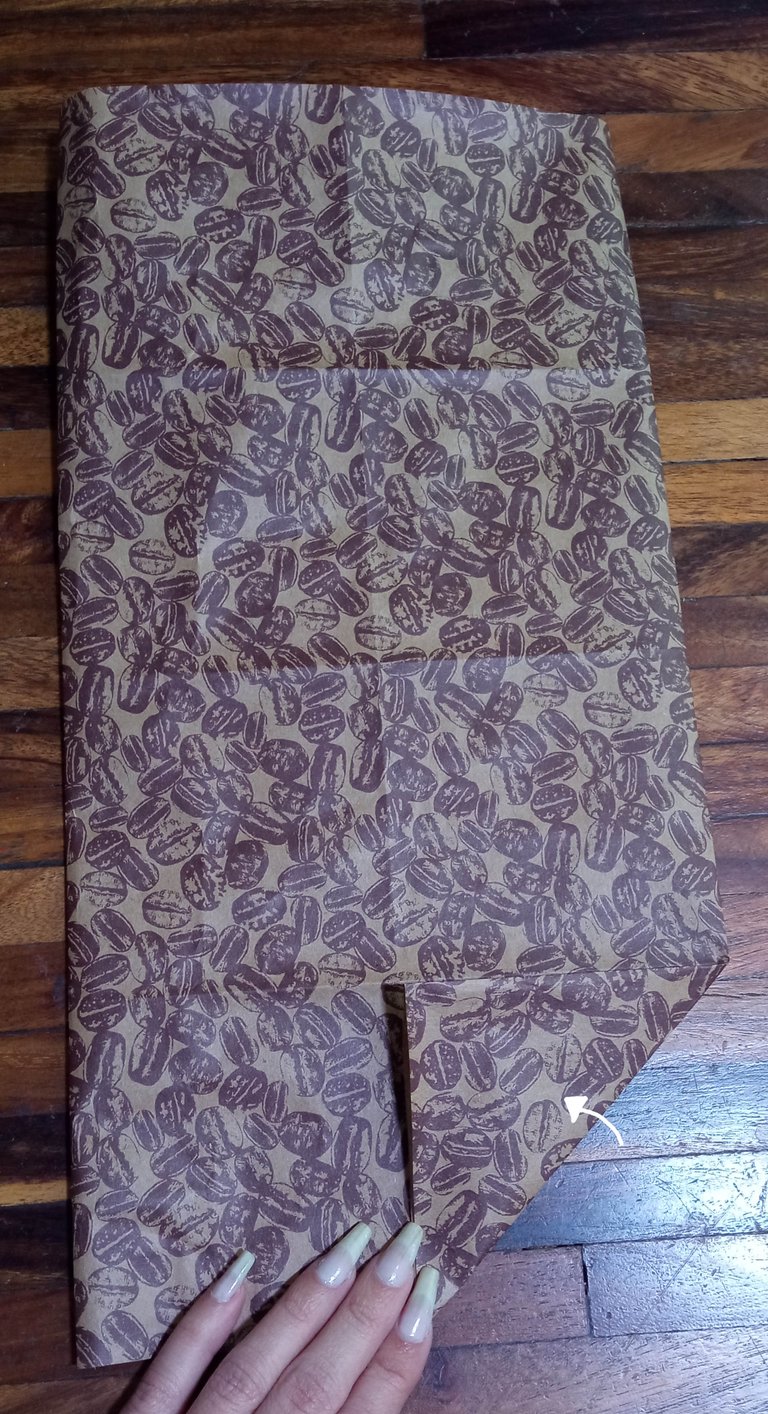
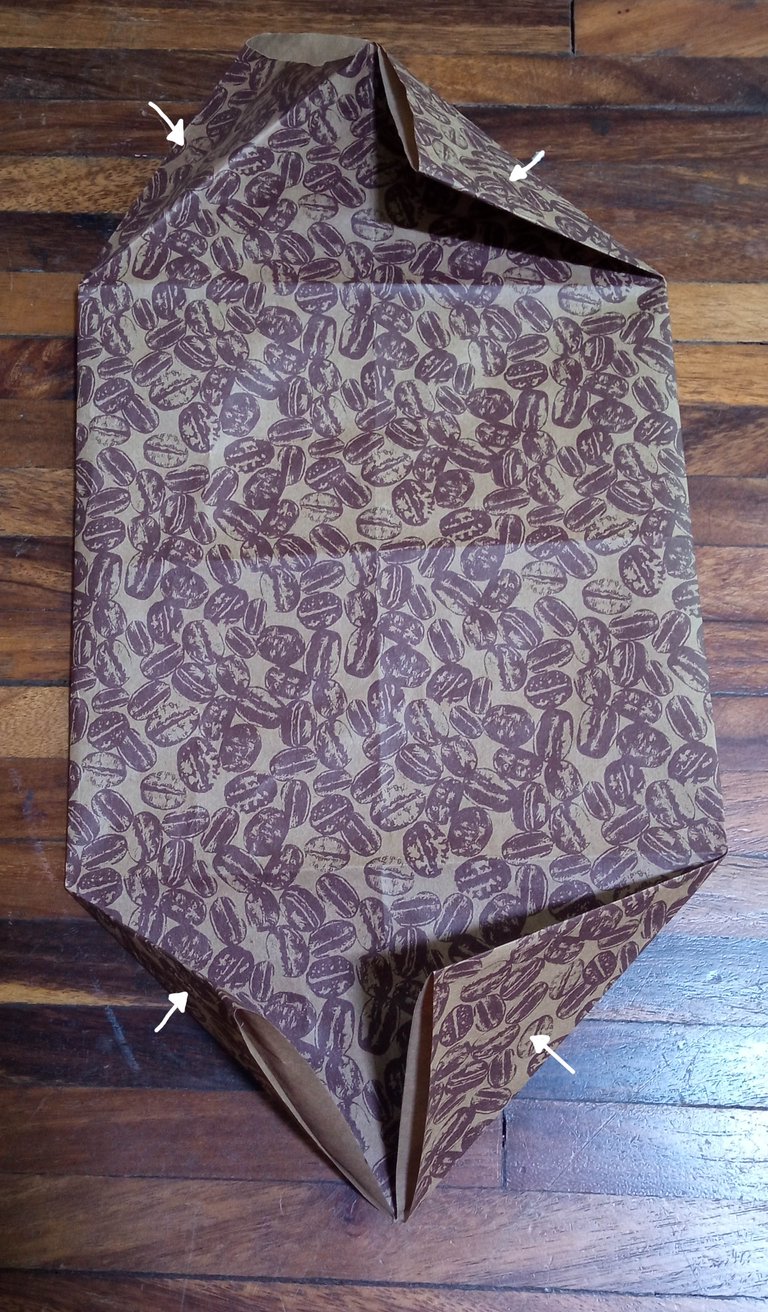
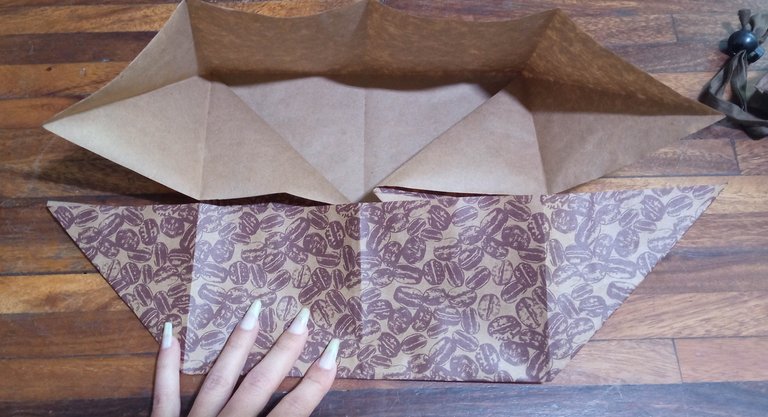
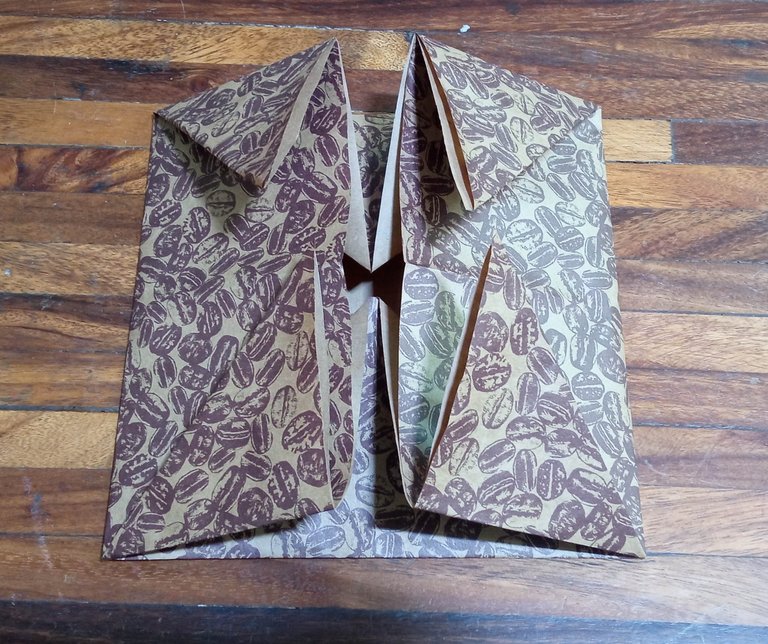
Without opening the piece, we turn it over and proceed to fold the corners, obtaining 4 triangles. Then, we can turn the piece over again, open it and push so that we can obtain the shape seen in the photographs:
 |  |  |
|---|
Then, by folding the tabs, we will have the piece ready. Of this, only one is done.
 |  |
|---|
In this way, we will have the pieces we were missing finished.
In the last post I will finally show you how I put all the pieces together and how the book turned out 😉 Here I will leave the link to the previous pieces:
Thank you very much for visiting my publication. I hope you found it interesting.
Until next time!

CONTENIDO EN ESPAÑOL
¡Hola a todos los amantes de las manualidades! Para el aniversario con mi novio, quise elaborarle algo especial. Luego de que me mencionase que quería tener en físico fotografías de nosotros, busqué la forma de poder hacerlo, pero que fuese de forma compacta. Fue así como encontré El libro de hilos chinos, una manualidad originalmente creada para guardar implementos de costura, como agujas. Haciéndola con papel, se pueden agregar mensajes y en mi caso, fotografías en tamaño reducido. Ya expliqué la primera, segunda y tercera pieza. Hoy les hablaré de las dos que faltaban y después, armaremos el libro 😉

CUARTA PIEZA
Ésta pieza es idéntica a la segunda pieza, que ya expliqué, pero variando el tamaño del papel utilizado y la cantidad de piezas realizadas. El papel que usé, fue el de regalo y verifiqué que es el peor tipo de papel para trabajar el origami, al menos éste tipo de papel en específico, ya que las marcas no se veían (porque era un papel reciclado y ya tenía marcas de un uso anterior 😢) y al ser muy liso de uno de sus lados, era realmente tedioso a la hora de hacer los dobleces. Pero el diseño era precioso, así que igualmente valió la pena el estrés jaja En fin, ésta vez necesitaremos cortar una pieza de papel de 20x40cm.

Lo siguiente, es doblar el papel desde la parte superior hasta la inferior y desde uno de los laterales al otro, con el fin de obtener una marca en forma de cruz. Gracias a ello, podemos guiarnos para hacer los siguientes dobleces.
 |  |
|---|
 |  |
|---|
 |  |
|---|
Luego, sin abrir la pieza, procedemos a voltearla para proceder a doblar las esquinas y obtener unos triángulos.
 |  |
|---|
Después, volvemos a voltear la pieza y al abrirla, los dobleces que hicimos nos va a permitir empujar el papel, primero en los laterales y luego en los lados superior e inferior para que quede como en las fotografías. Seguidamente, doblamos las pestañas.
 |  |  |
|---|
Al doblar todas las esquinas, tendremos la pieza lista. Para el libro, son necesarias sólo 2 de éste tipo.
 |  |
|---|

QUINTA PIEZA (BASE DEL LIBRO)
Para hacer la base del libro, opté por utilizar un papel kraft estampado que tenía. A diferencia del otro papel de regalo, éste es mucho más grueso y de textura áspera, así que me pareció perfecto para realizar ésta pieza, que es la más grande de todas y es la que se aprecia en el exterior del libro. Para realizarla, necesitaremos cortar 40x40 cm del papel de nuestra preferencia.

Doblaremos el papel de forma que podamos obtener las marcas en forma de cruz. Con esas marcas como guía, volvemos a doblar.
 |  |  |
|---|
 |  |
|---|
Sin abrir la pieza, la volteamos y procedemos a doblar las esquinas, obteniendo 4 triángulos. Luego, podremos voltear de nuevo la pieza, abrirla y empujar para que podamos obtener la forma apreciada en las fotografías:
 |  |  |
|---|
Luego, al doblar las pestañas, tendremos la pieza lista. De ésta, solo se realiza una.
 |  |
|---|
De ésta forma, tendremos las piezas que nos faltaban terminadas.

En el último post por fin les mostraré como junté todas las piezas y cómo quedó el libro 😉 Aquí les dejaré el enlace a las piezas anteriores:
Muchas gracias por haber visitado mi publicación. Espero que les haya parecido interesante.
¡Hasta una próxima oportunidad!
Muy lindos, el origami es un arte asiático muy hermoso que se ha extendido por todo el mundo con creatividad. Me encantó este post.
Así es, el origami te ayuda a hacer hermosos proyectos y a desarrollar la paciencia jaja muchas gracias por haber visitado mi publicación, me alegra que haya sido de tu agrado 😘💚
You made a beautiful craft, nice job.
It is a beautiful piece that raised my self-esteem upon finishing 😊 Thank you very much for visiting my post and for commenting 😘💚
Yeehaw! This blog post is as thrilling as a wild rodeo!
Hehe, thanks, I'm glad you liked it 😁💚