Happy day friends, how did you spend the 14th of February? 🌷 I hope super well and with lots of love in your homes.
That day I did a little bit of everything, I did a raffle drawing, a cake, cupcakes, a topper, a birthday card, I did the shopping... Anyway, I was back and forth, doing what I love and listening to music during the whole process.
Love inspires us.
My mother-in-law looks forward to this day every year with joy, not because it is a day that celebrates love, no, no, no... She waits for it to taste her surprise birthday cake with a nice cup of coffee and my mother-in-law was not brought by the stork, she was brought by cupid 🤭.
In these almost 8 years that I have known her, it has become a tradition to give her a cake and a card with a dedication, as soon as she wakes up we sing her birthday and let's go eat cake!
At home we celebrate a birthday and the day of love and friendship as a family 🤭 so that day if or if there are sweets and cards to give away, for us it is a day when love abounds in our house.
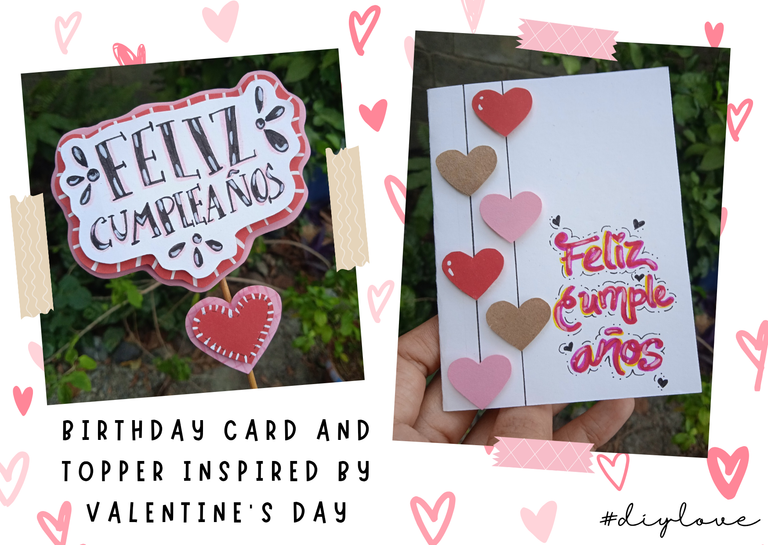
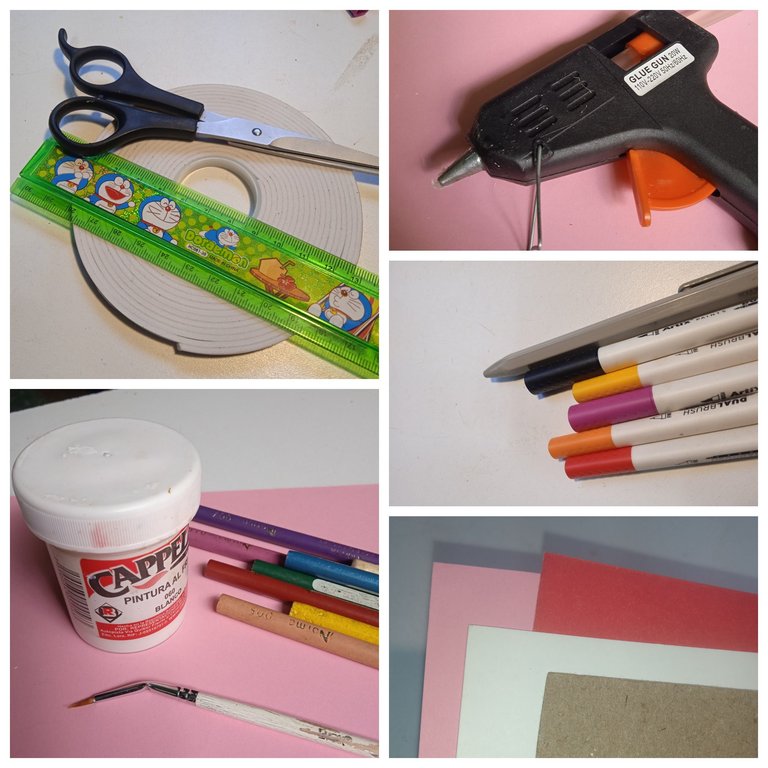
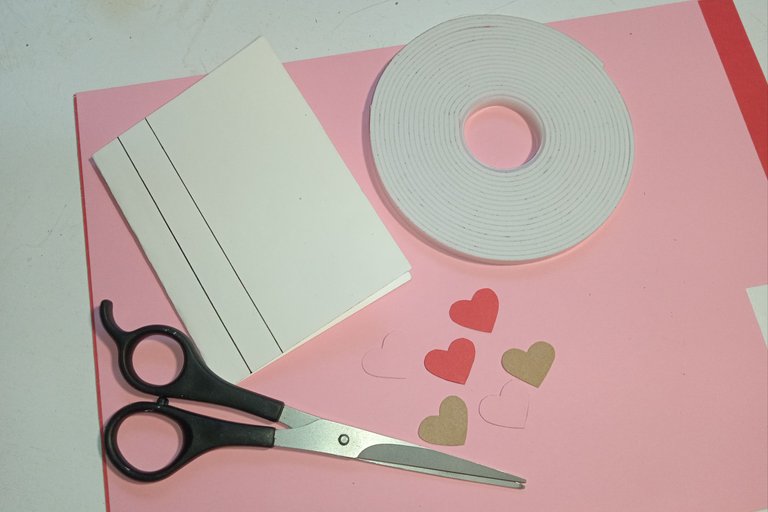
Today I show you the step by step of two crafts with which you can express your appreciation and love, which is valid for birthday boys and girls and lovers 😁. You will need these materials:
- White, red, brown and pink cardboard.
- Scissors.
- Ruler.
- Markers and colors.
- Double-sided tape.
- White paint.
- Fine brush.
- Height stick.
- Glue gun.

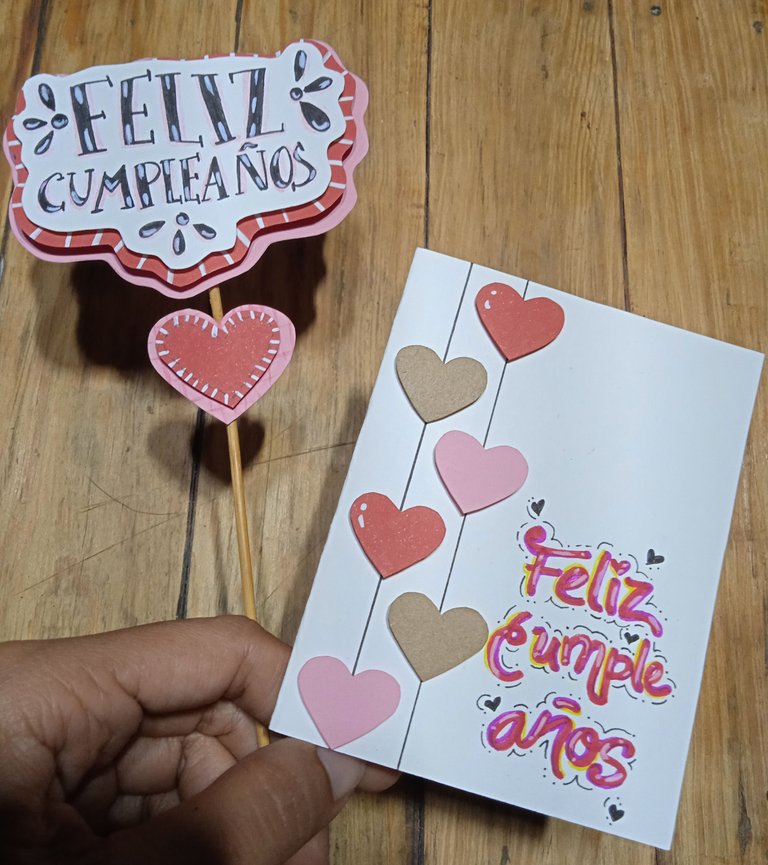
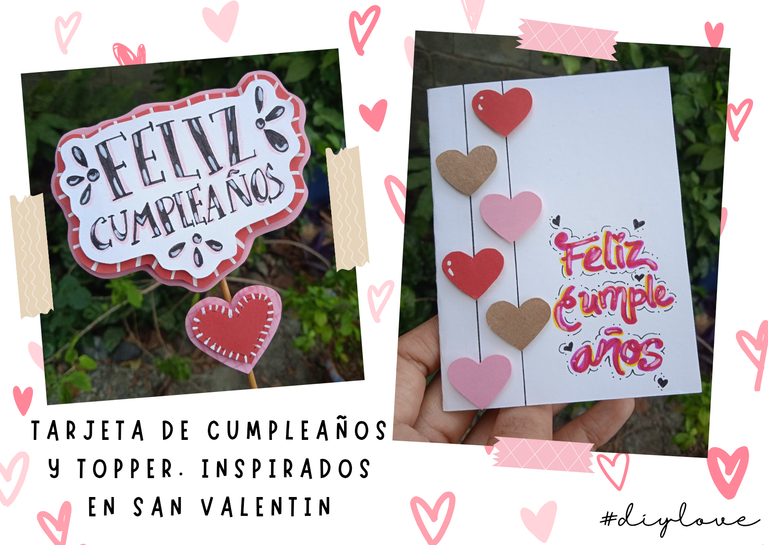
Love-inspired card ✨
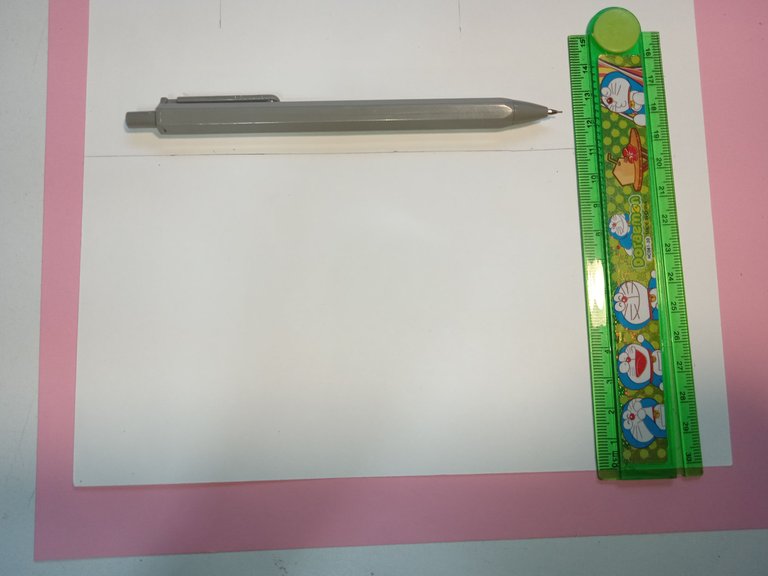
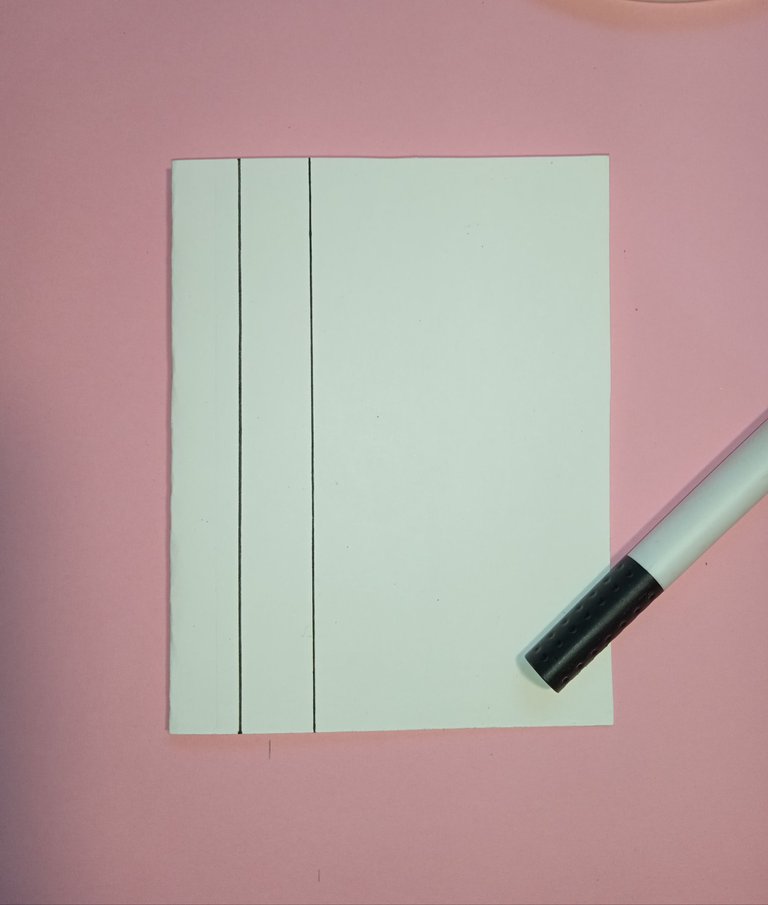
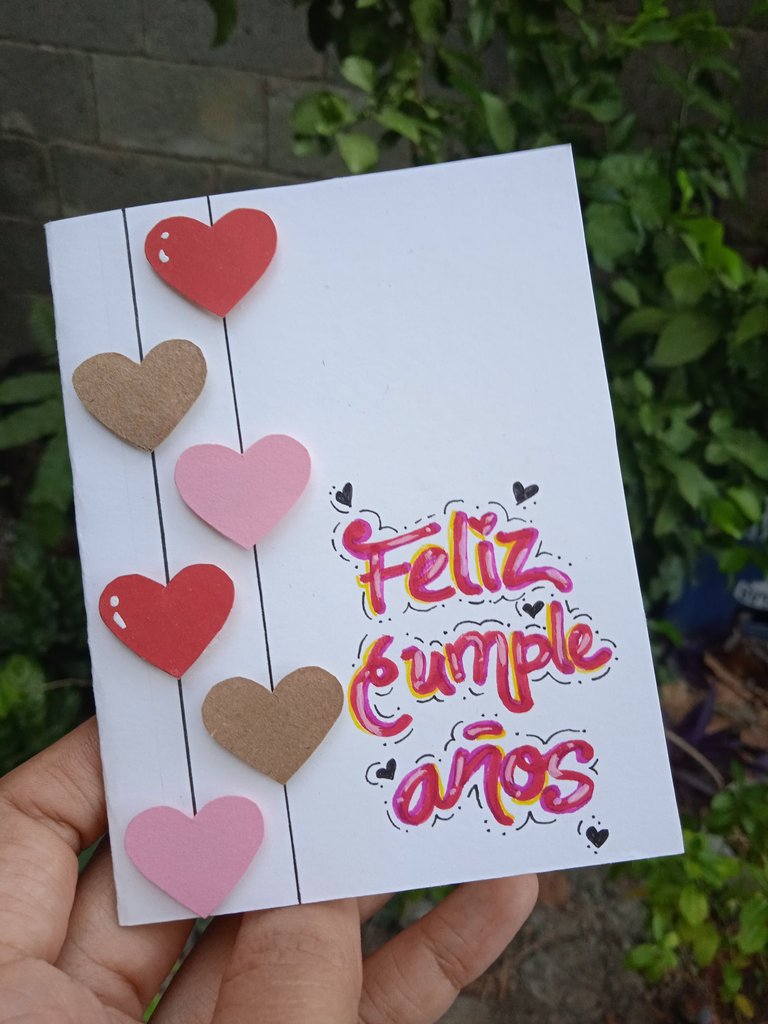
On the white cardstock we trace a rectangle measuring 17 cm x 11 cm, then cut it out and fold it in half.
We draw two vertical lines and go over them with a black marker.
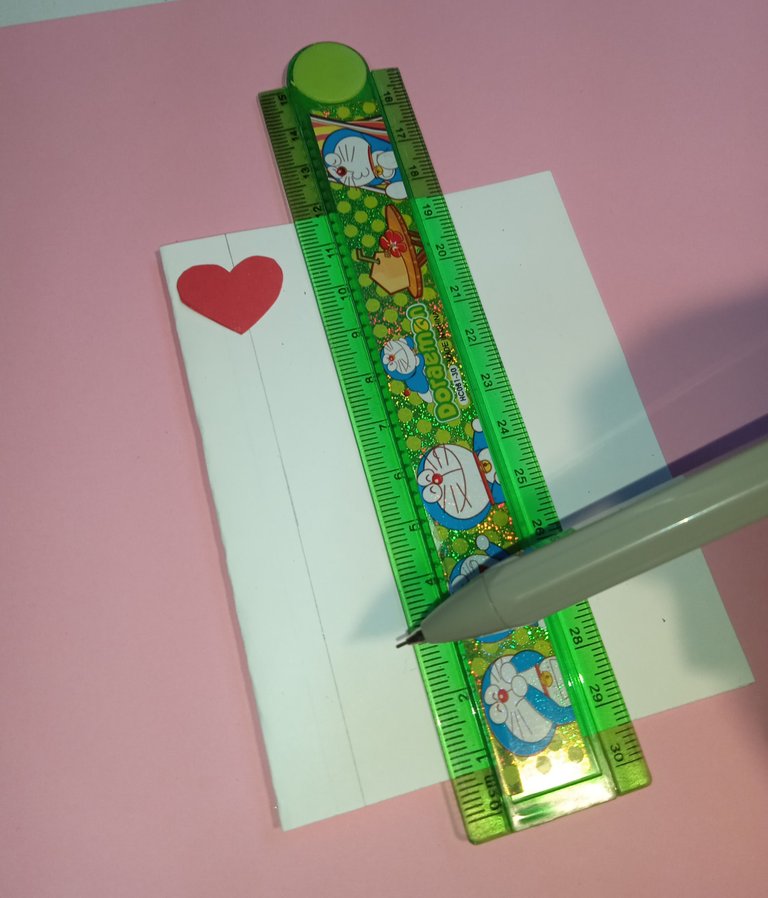
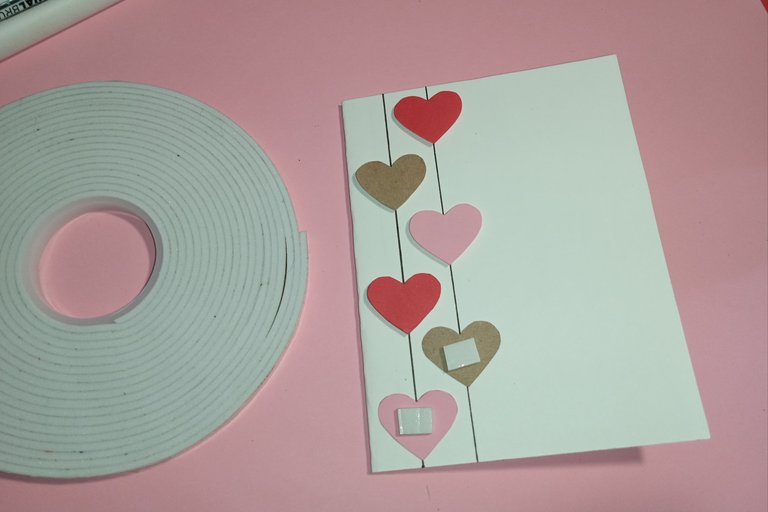
Draw and cut out 6 hearts, which we will glue with the help of the double-sided tape.


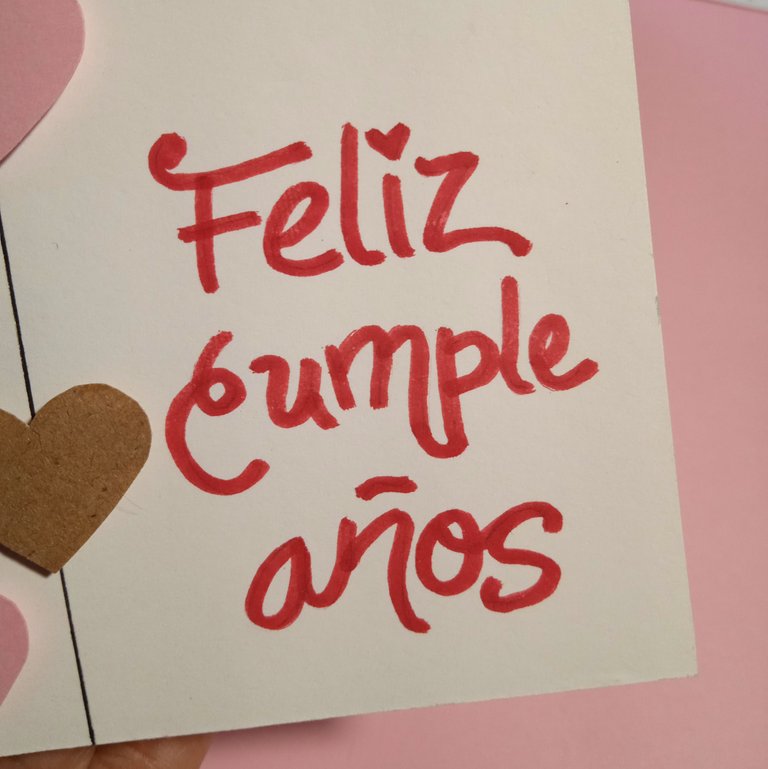
In this part we must bring out our lettering skills, using three different color markers and some white paint (or white marker). In my case I wrote "happy birthday" but you could write any short phrase you like.
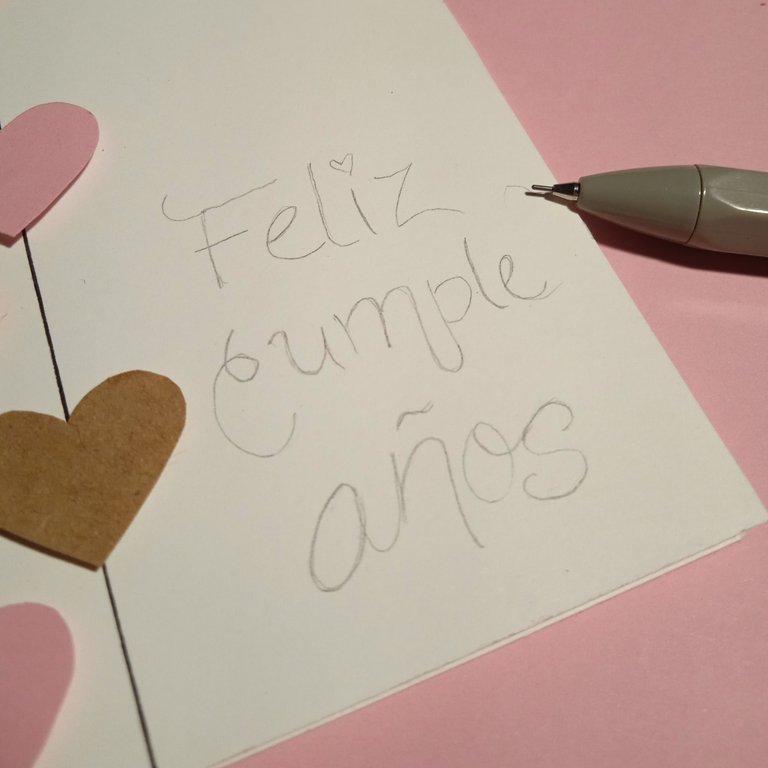
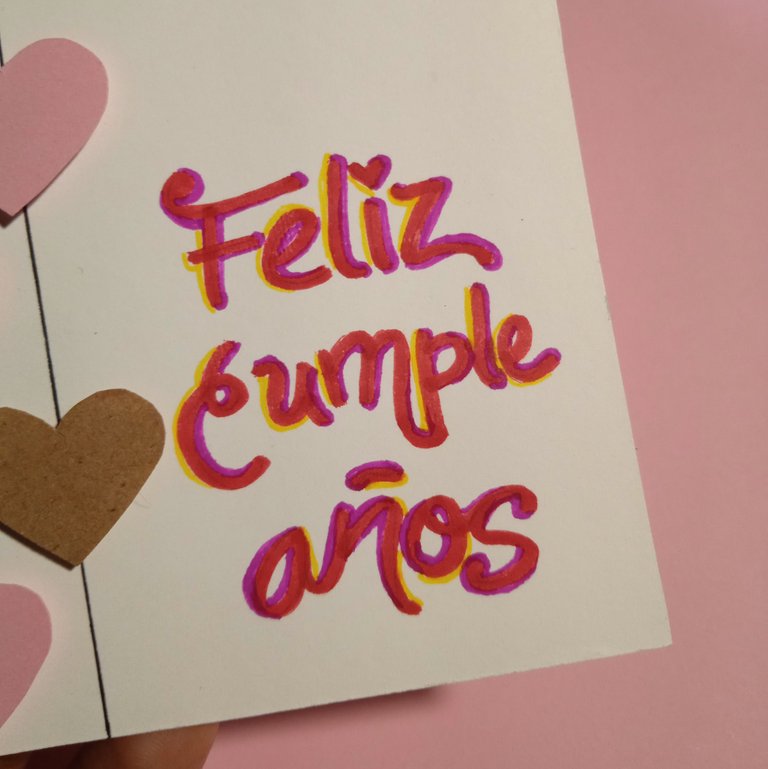
I got the reference from Pinterest because I don't know much about lettering 😅. I started by going over everything with red, then used some yellow and purple.
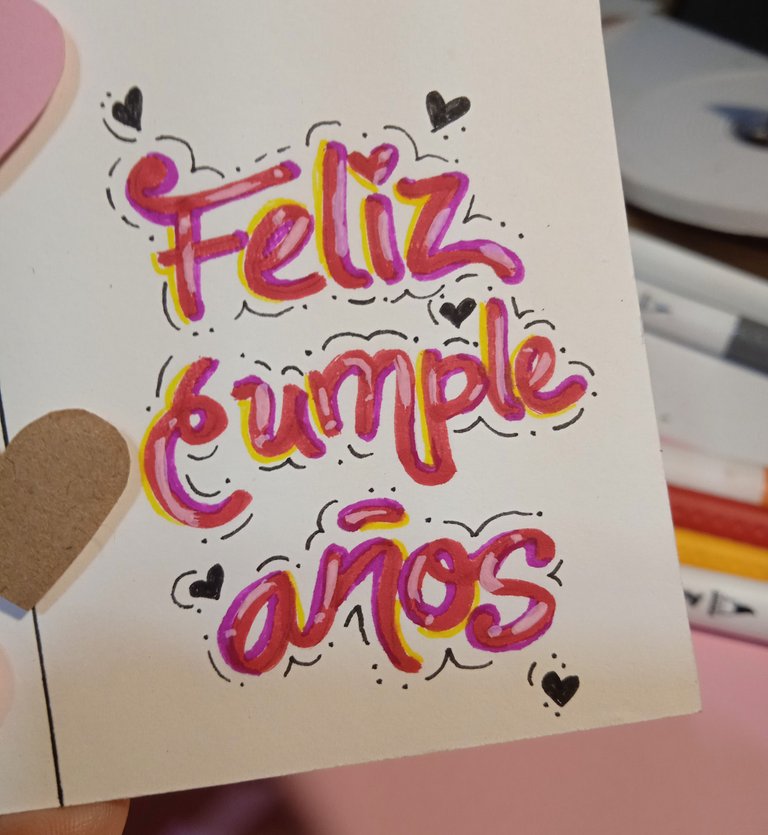
To finish, I used the white paint and a black fine tip marker to make some details such as: dots and lines all around.
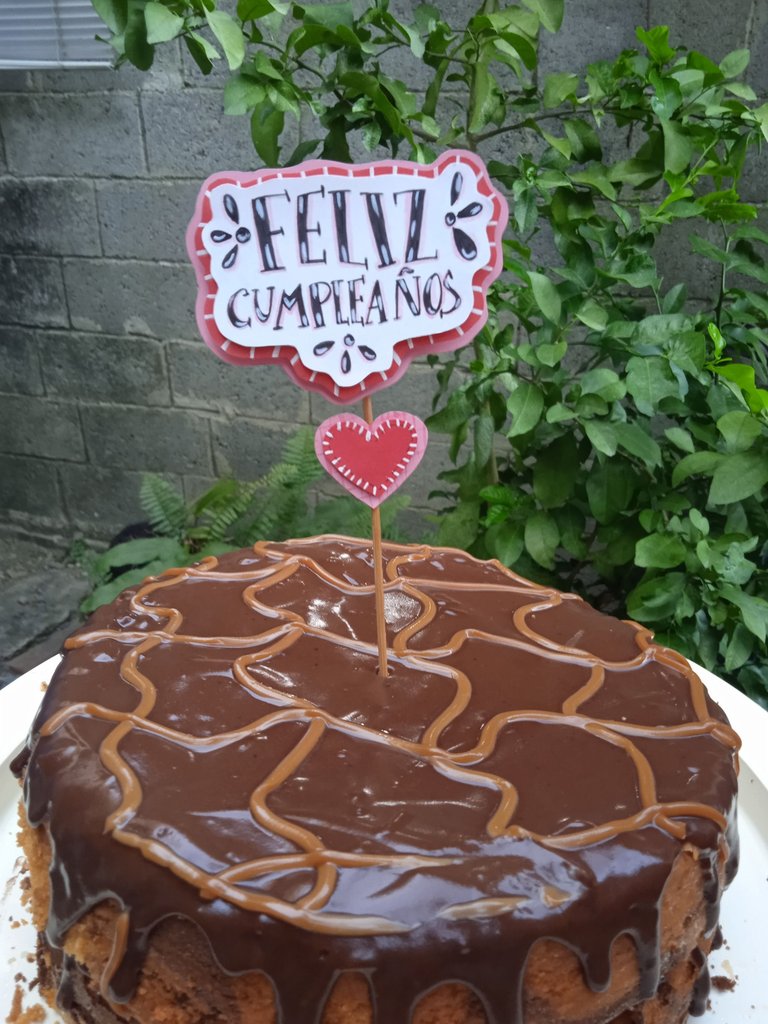
Topper 💘
You will be surprised to discover how fast you can make this decoration for your birthday or anniversary cake.
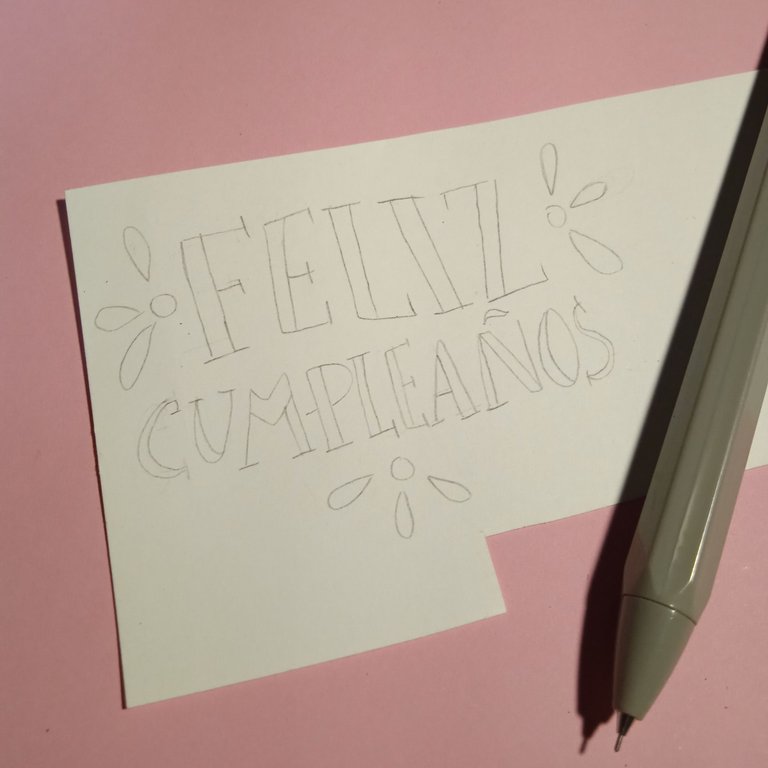
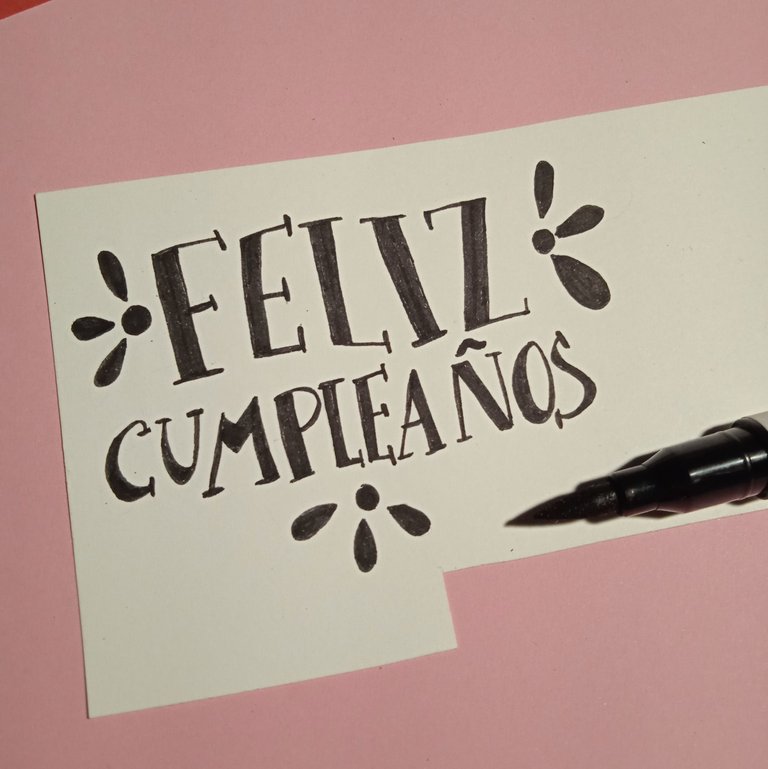
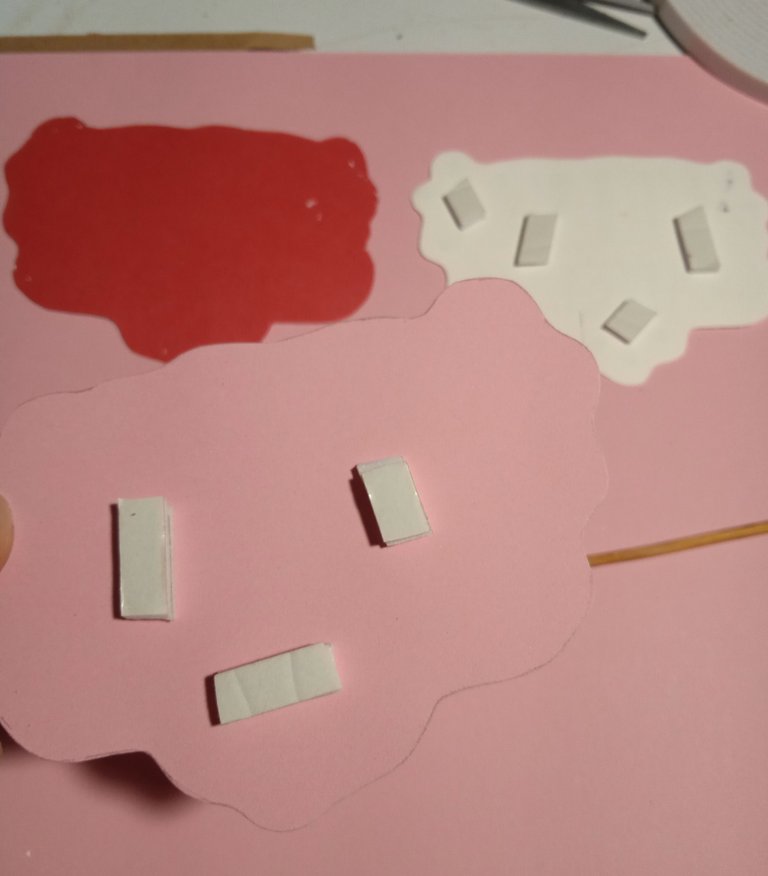
We start by writing "happy birthday", first with pencil and then with black marking we fill in each letter.
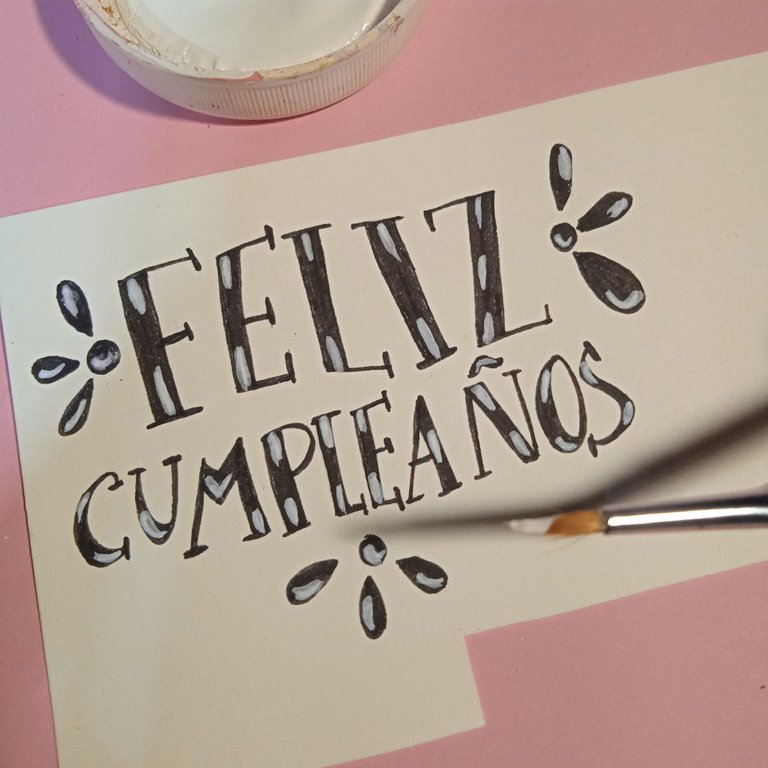
With the white paint we make these little details that give it more style.
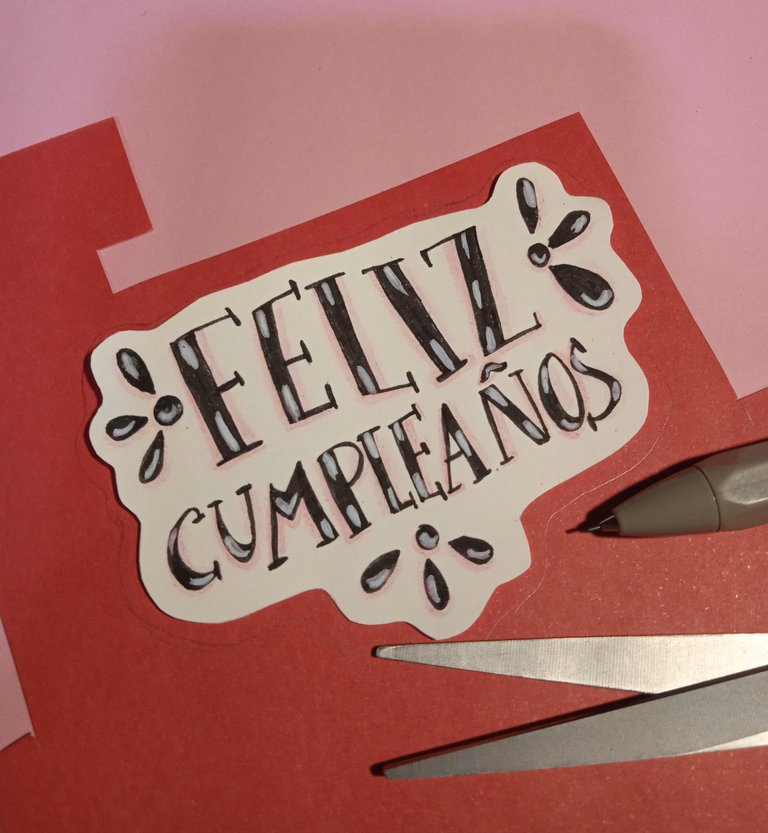
We cut around the letters leaving a small margin, then we will repeat this action but with the red and pink cardboard, increasing the size of the margin.
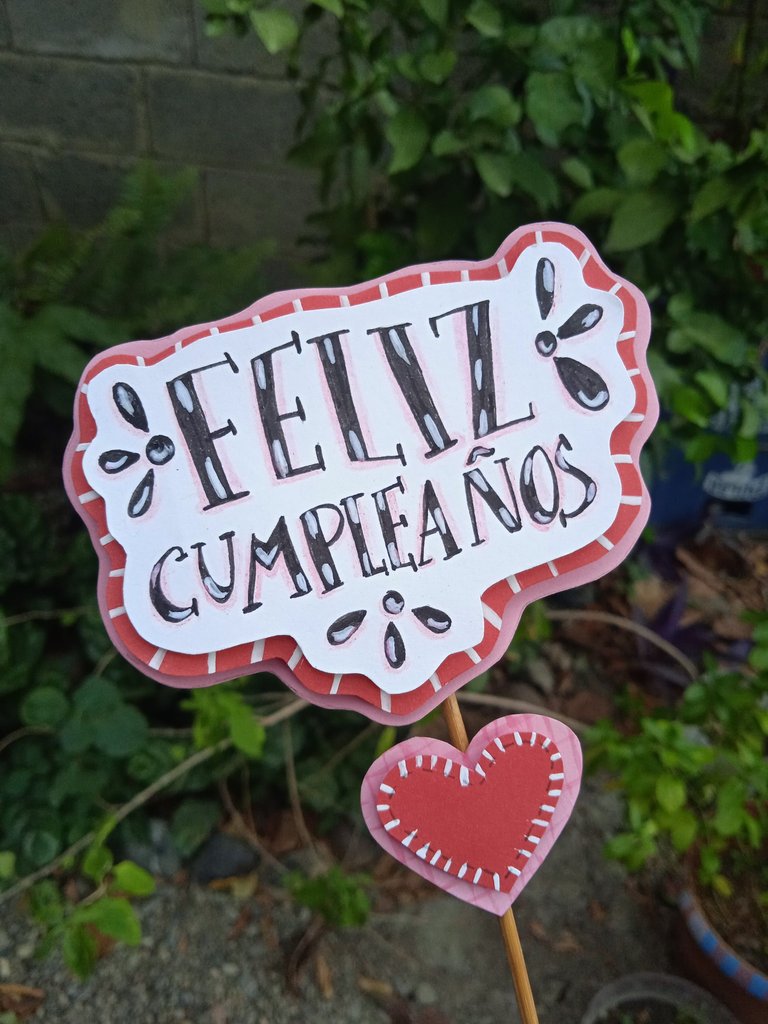
We finish our second craft, gluing each cardboard where it belongs, with the help of the double-sided tape. The toothpick will be glued with the hot silicone, I made this additional heart and glued it to the toothpick to feel the love 🤭.
Well, this is how it turned out, very useful and quick to make for those moments when you need to decorate a cake and want to add personality with some original message 😉.
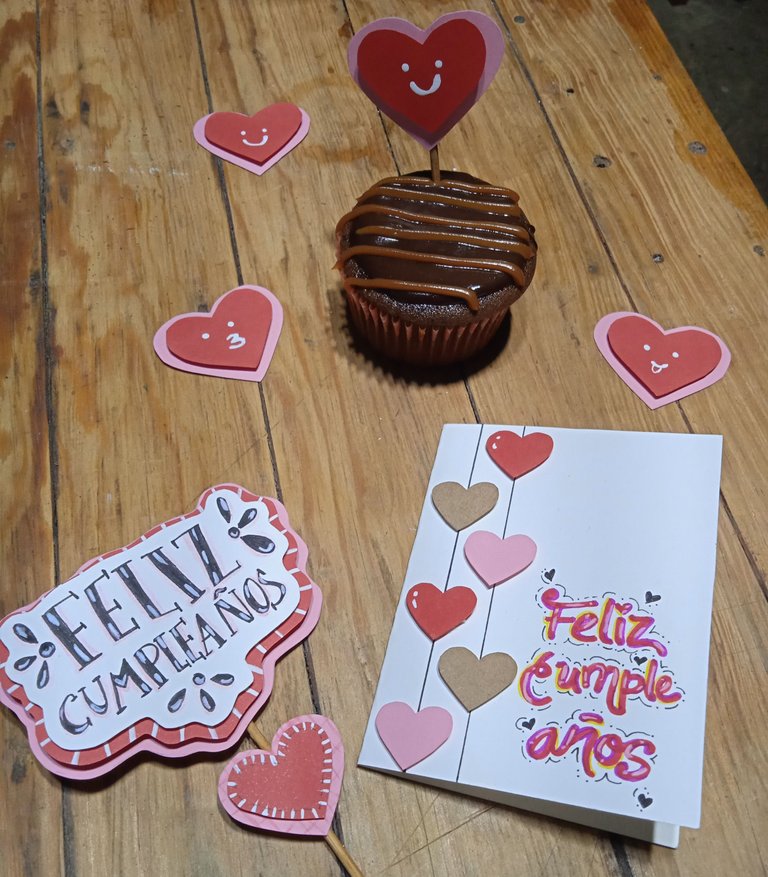
I hope you liked the crafts I'm sharing with you today and I encourage you to make them, they go great with a delicious dessert 🤭 don't you think so?🐝
See you in another post, have a nice weekend everyone!
Credits:
- Cover made in Canva.
- Translation done at DeepL.
Feliz día amigos, ¿Cómo la pasaron el 14 de febrero? 🌷 Espero que super bien y con mucho amor en sus hogares.
Ese día yo hice de todo un poco, hice el sorteo de una rifa, un pastel, cupcakes, un topper, una tarjeta de cumpleaños, hice las compras... En fin, estuve de aquí para allá, haciendo lo que me gusta y escuchando música durante todo el proceso.
El amor nos inspira.
Mi suegra espera este día cada año con alegría, no por ser un día que celebra el amor, no, no, no... Ella lo espera para probar su pastel sorpresa de cumpleaños con una rica taza de café y es que a mí suegra no la trajo la cigüeña, la trajo cupido 🤭.
En estos casi 8 años que llevo conociéndola, se ha vuelto tradición regalarle una torta y una tarjeta con dedicatoria, apenas se despierta le cantamos cumpleaños y ¡a comer pastel se ha dicho!
En casa celebramos un cumpleaños y el día del amor y la amistad en familia 🤭 así que ese día si o si hay dulces y tarjetas para regalar, para nosotros es un día en el que abunda el amor en nuestra casita.
Hoy te enseño el paso a paso de dos manualidades con las que puedes expresar tu aprecio y amor, que es válida para cumpleañeros y enamorados 😁. Necesitarás estos materiales:
- Cartulina de color blanco, rojo, marrón y rosa.
- Tijera.
- Regla.
- Marcadores y colores.
- Cinta doble faz.
- Pintura blanca.
- Pincel fino.
- Palito de altura.
- Pistola de silicona.
Tarjeta inspirada en el amor ✨
En la cartulina blanca trazamos un rectángulo que mida 17 cm x 11 cm, a continuación lo recortamos y lo doblamos a la mitad.
Trazamos dos líneas verticales y las repasamos con un marcador negro.
Dibujamos y recortamos 6 corazones, que pegaremos con la ayuda de la cinta doble faz.
En esta parte debemos sacar nuestras habilidades de lettering, usando tres marcadores de diferente color y un poco de pintura blanca (o marcador de color blanco). En mi caso escribí "feliz cumpleaños" pero tú podrías escribir cualquier frase corta que te guste.
La referencia la saqué de Pinterest porque yo de lettering no sé mucho 😅. Empecé por repasar todo con color rojo, luego utilicé un poco de amarillo y violeta.
Para finalizar, usé la pintura de color blanco y un marcador negro punta fina para hacer unos detalles como: puntos y líneas al rededor.
Topper 💘
Te vas a sorprender al descubrir lo rápido que puedes hacer esta decoración para tu pastel de cumpleaños o aniversario.
Comenzamos escribiendo "feliz cumpleaños", primero con lápiz y luego con marcado negro rellenamos cada letra.
Con la pintura de color blanco hacemos estos pequeños detalles que le dan más estilo.
Recortamos al rededor de las letras dejando un pequeño margen, luego volveremos a repetir esta acción pero con la cartulina roja y rosa, aumentando el tamaño del margen.
Finalizamos nuestra segunda manualidad, pegando cada cartulina donde corresponde, con ayuda de la cinta doble faz. El palillo lo pegaremos con la silicona caliente, hice este corazón adicional y lo pegué al palillo para que se sienta el amor 🤭
Bueno, así es como ha quedado, muy útil y rápido de hacer para esos momentos cuando necesitas decorar un pastel y quieres agregar personalidad con algún mensaje original 😉.
Espero que les hayan gustado las manualidades que les comparto el día de hoy y se animen a realizarlas, combinan de maravilla con un rico postre 🤭 ¿no les parece?🐝
Nos vemos en otro post. ¡Buen fin de semana a todos!
Créditos:
- Portada hecha en Canva.
- Traducción hecha en DeepL.
Tu suegra debe estar contenta que tengas esos lindos detalles todos los años, te quedo hermoso, esa tarjeta me enamore de el contraste de colores.
Such a sweet and beautiful way to celebrate 🥳🥂 your mother-in-law, I wish her a birthday filled with blessings and happiness.
Your card is lovely, beautiful, and thoughtful. !DIY
She loved it! in fact the topper she placed it as a decoration on her mirror 🤭 thanks for your good wishes ✨.
You are welcome 🤗
Awww que bonito cumplir el día del amor y la amistad😍 es un cumpleaños lleno de mucho amor 💖 te han quedado hermosas las dos manualidades y ambos formatos de letras quedaron geniales✨
¡Gracias! Un día lleno de amor y dulce 🤭 aunque quiero aprender más sobre lettering 👍🏼
A card and a cake topper in combination, is a spectacular detail
Thanks, this is the topper I usually make 🤭 as it is very easy and almost no materials are needed.
You can query your personal balance by
@funshee just sent you a DIY token as a little appreciation for your post dear @verdeayer! Feel free to multiply it by sending someone else !DIY in a comment :) You can do that x times a day depending on your balance so:!DIYSTATSlindo y creativo
cute and creative
¡Gracias! Y útil para cualquier ocasión 😉
The final result is pretty good. It is charming, beautiful, and lovely. Love it. Good to see how you made it. Well done!
https://bsky.app/profile/did:plc:rag2mftdy2alo7rtmyttmpk4/post/3liuobxc6p72d
The rewards earned on this comment will go to the author of the blog post.https://bsky.app/profile/did:plc:rag2mftdy2alo7rtmyttmpk4/post/3liuobxc6p72d