Beautiful design with beads and beads inspired by Hardy Stonefish

in DIYHubyesterday

1 (18).jpeg


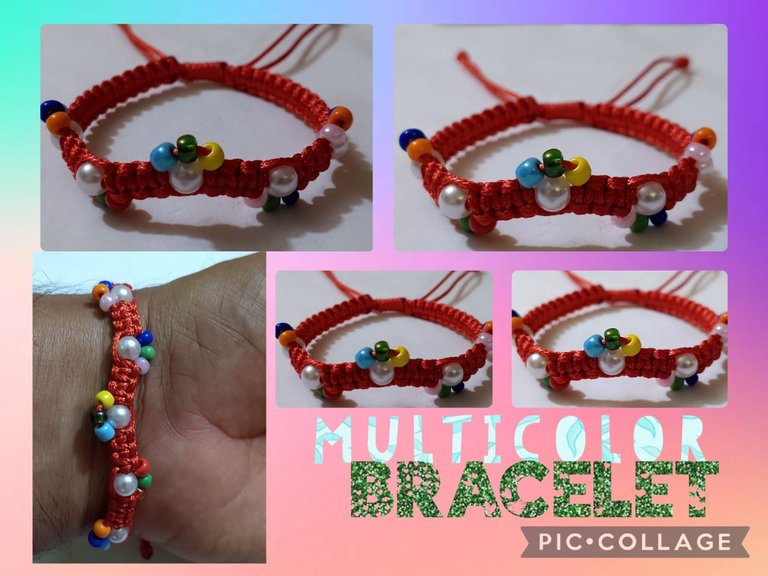
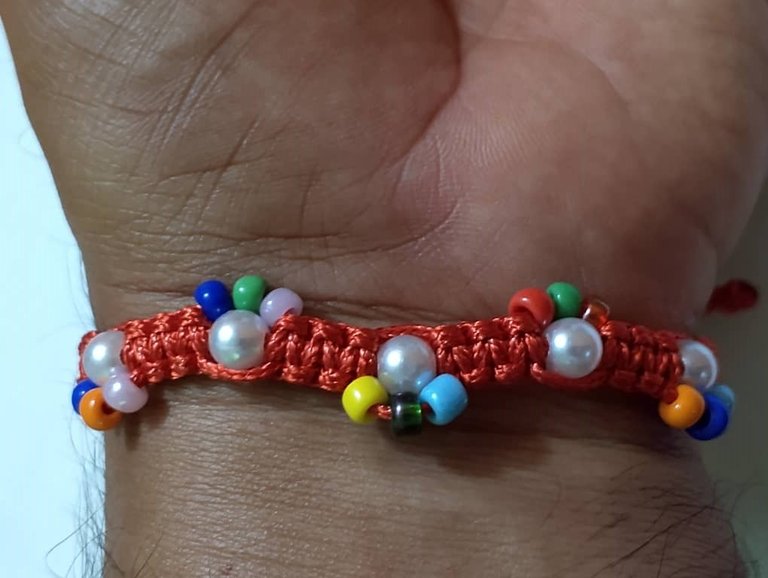
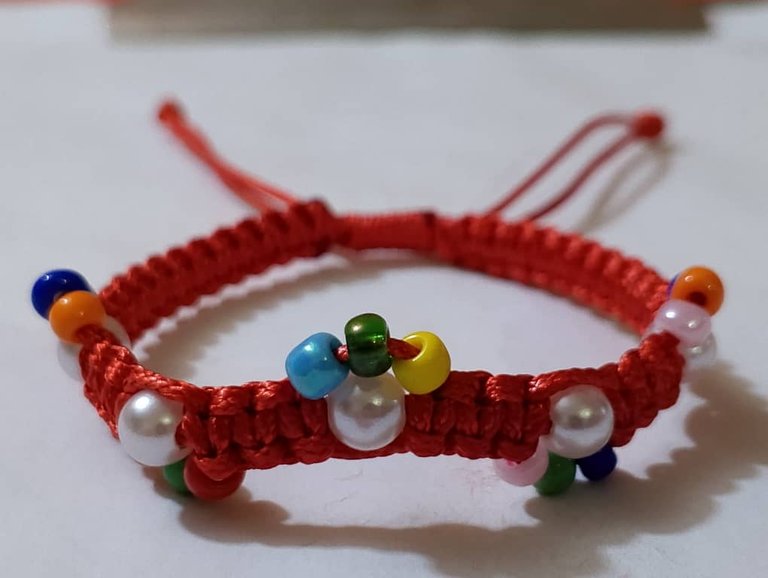
My fan art is a beautiful flat knot bracelet with beads and beads of various colors alluding to the character that highlight and provide an elegant style.
With no more time to waste I invite you to join me in this fascinating creation and put your hands to the thread. 
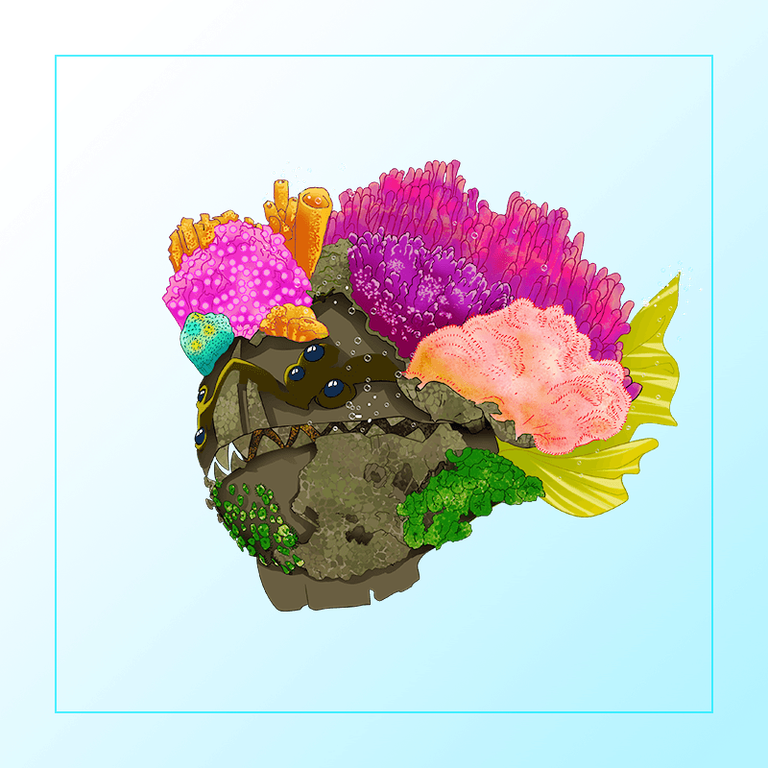
Hello #diyhub community, happy to greet you and wish you a happy and blessed weekend. This time I share with you a fan art inspired by the variety of colors of the splinterlands character known as Hardy Stonefish.


Mi fan art es una hermosa pulsera nudo plano con perlas y mostacillas de varios colores alusivos al personaje que resaltan y brindan un estilo elegante.
Sin más tiempo que perder les invito a acompañarme en esta fascinante creación y poner manos al hilo. Hola comunidad #diyhub encantado en saludarles y desearles feliz y bendecido fin de semana. En esta ocasión les comparto un fan art inspirado en la variedad de colores del personaje de splinterlands conocido como Hardy Stonefish.

1 (1).jpeg

1 (2).jpeg

separador virgilio 1.gif


The materials I used to make this fan art are as follows:
Snakeskin thread
Scissors
Tinder
Adhesive tape
Beads
Beads

Los materiales que usé para realizar éste fan art son los siguientes:
Hilo piel de serpiente
Tijera
Yesquero
Cinta adhesiva
Perlas
Mostacillas

1 (11).jpeg


I started by cutting a 40cm strand of yarn for the base of the bracelet

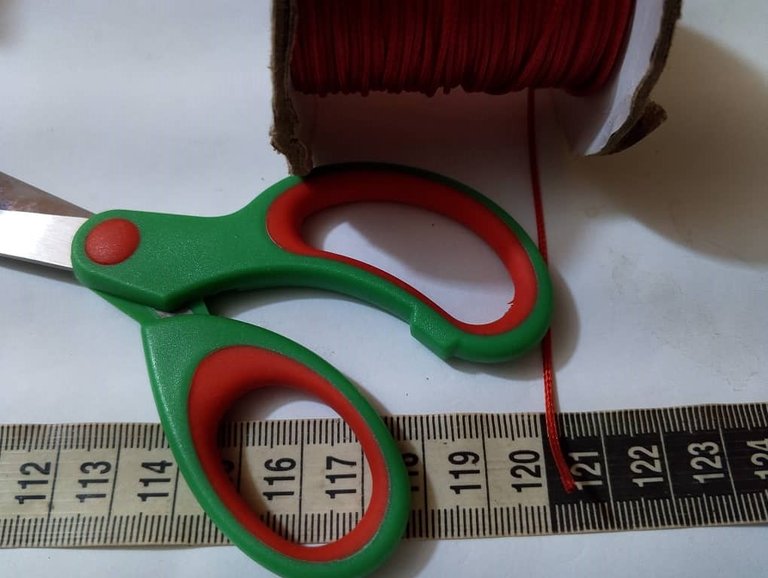
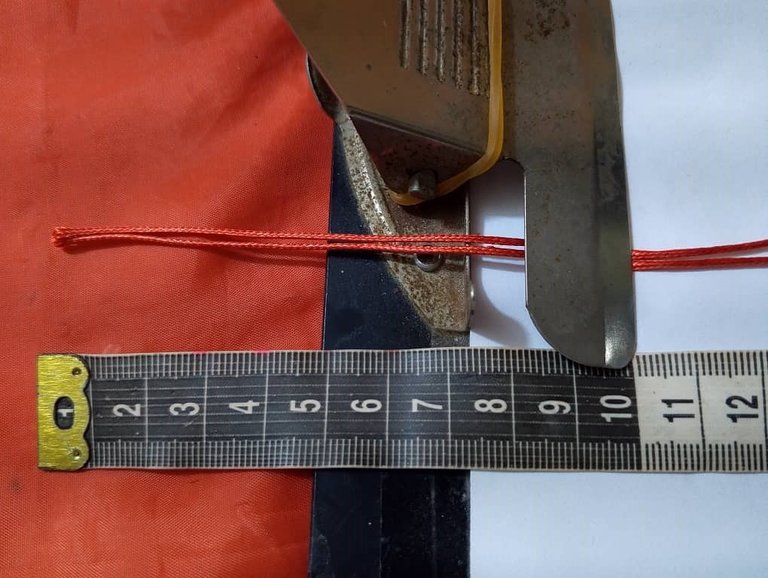
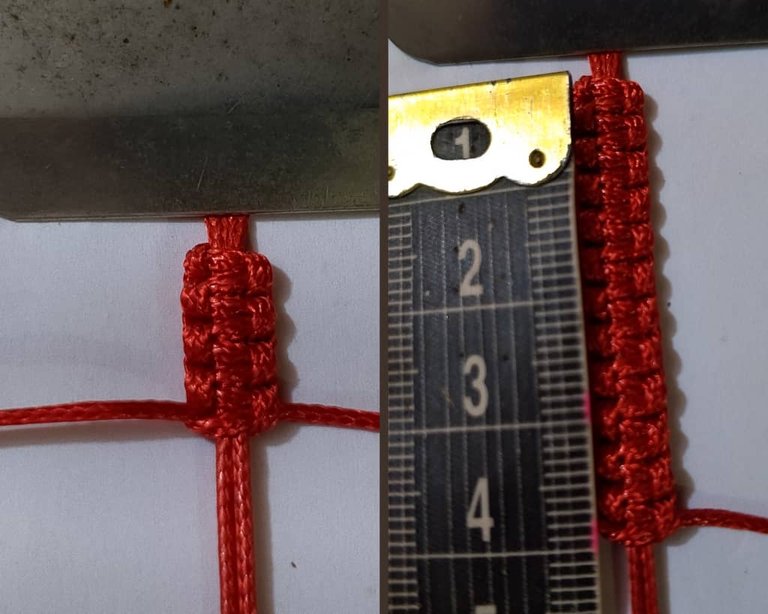
Inicié cortando una hebra de hilo de 40cm para la base de la pulsera.

1 (9).jpeg


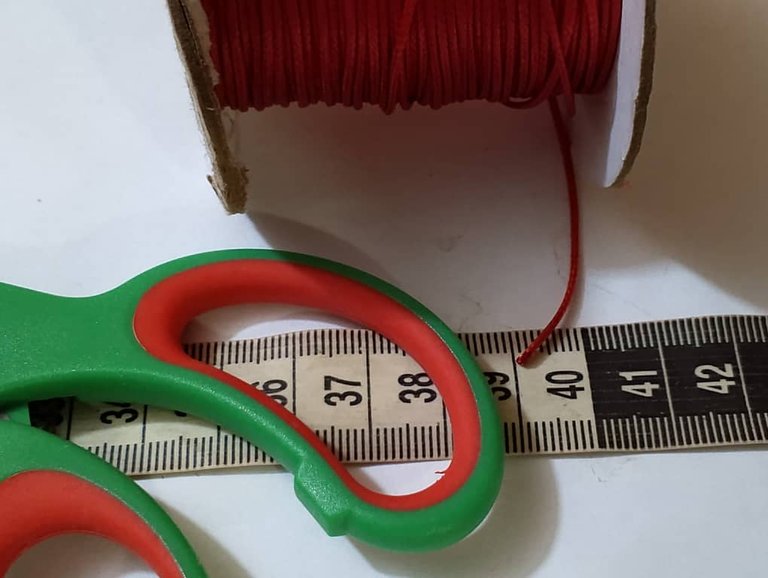
Then I cut a 120cm strand of thread to make the flat weave of the bracelet.

Después corté una hebra de hilo de 120cm para realizar el tejido plano de la pulsera.

1 (10).jpeg

separador virgilio.png


Next I measured 10cm from the top of the base threads down and fastened with a hook, then I took the 120cm strand of thread and passed it under the base threads.
Seguidamente medí 10cm desde la parte superior de los hilos base hacia abajo y sujeté con un gancho, Luego tomé la hebra de hilo de 120cm y lo pasé por debajo de los hilos base.

1 (7).jpeg


I started the bracelet by making 12 complete flat knots as follows: First I took the right strand, passed it over the base, made a P shape, then took the left strand, passed it over the right strand (which was on the left side), then passed it over the base and pulled it through the inside of the right strand (the P shape). Then I stretched the thread on each side evenly to make the knot. With your fingers you press it so that it is even on both sides and so we start our weaving.
Inicié la pulsera realizando 12 nudos planos completos de la siguiente manera: Primero tomé el hilo derecho, lo pasé por encima de la base , hice una forna de P, luego tomé el hilo izquierdo, lo pase por encima del hilo derecho (que estaba del lado izquierdo) , seguidamente lo pasé por dejado de la base y lo saqué por dentro del hilo derecho (la forma de P). Después estiré el hilo de cada lado uniformemente para hacer el nudo. Con los dedos se presiona para que quede igual de ambos lados Así comenzamos nuestro tejido.

1 (16).jpeg


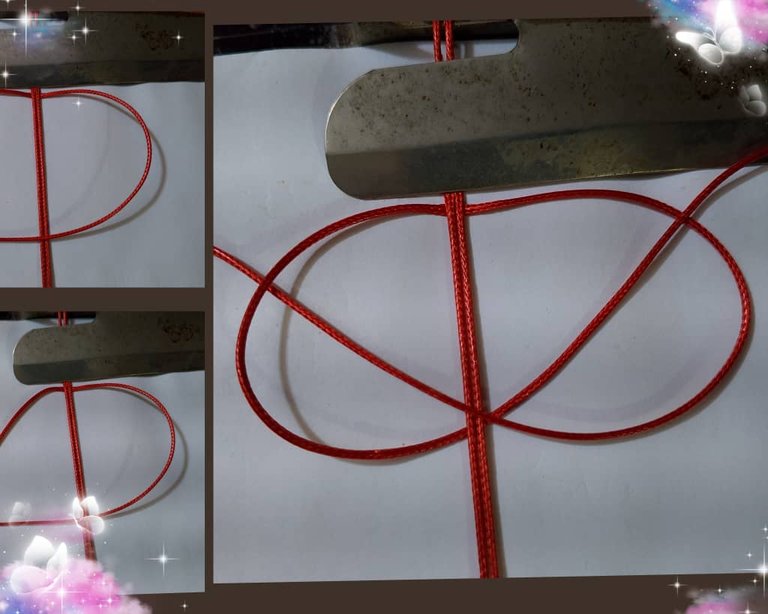
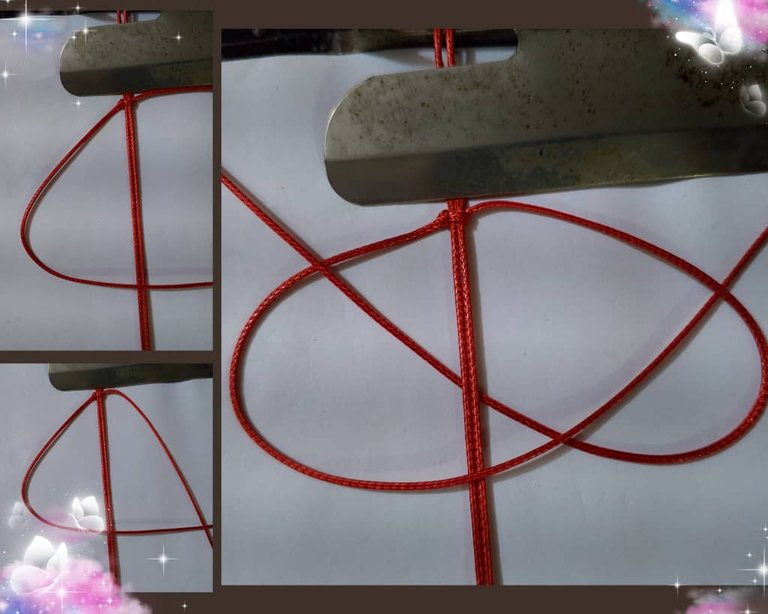
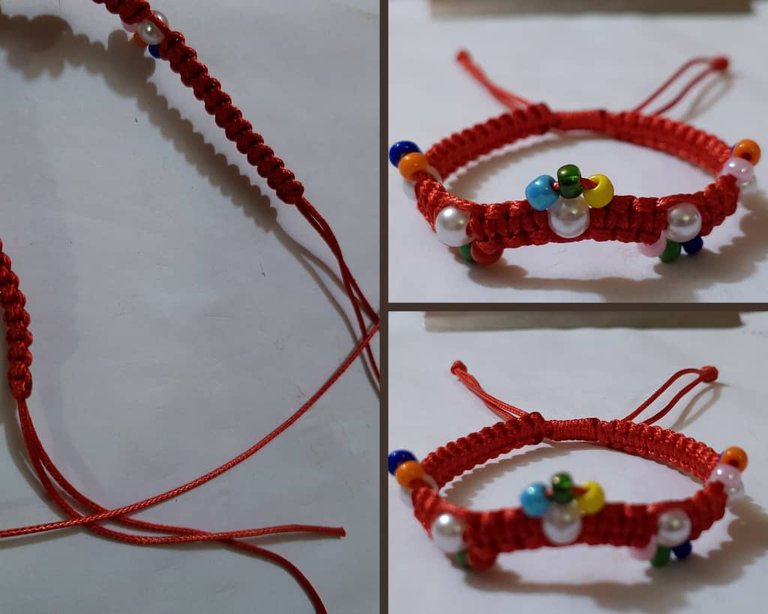
Now we take the thread on the left side and pass it over the base thread, we form a kind of four, then we pass the thread on the right side over the left thread that we have on the right side, then we pass it under the base thread and take it out through the inside or ring of the left thread as shown in the image. Then we press with our fingers so that both sides have similarity.

Ahora tomamos el hilo del lado izquierdo y lo pasé por encima del hilo base, formamos una especie de cuatro, luego pasamos el hilo del lado derecho por encima del hilo izquierdo que tenemos en el lado derecho, después lo pasamos por debajo del hilo base y lo sacamos por el interior o argolla del hilo izquierdo como nos lo señala la imagen. Seguidamente con los dedos presionamos para que de ambos lados tengan similitud.

1 (17).jpeg


I continued doing the same procedure until I reached a measurement of 4cm.

Continué haciendo el mismo procedimiento hasta llegar a una medida de 4cm.

1 (14).jpeg


I then inserted a bead through the base strands. Then I placed three beads through the knotting thread on the left side. Then I made three complete flat knots.

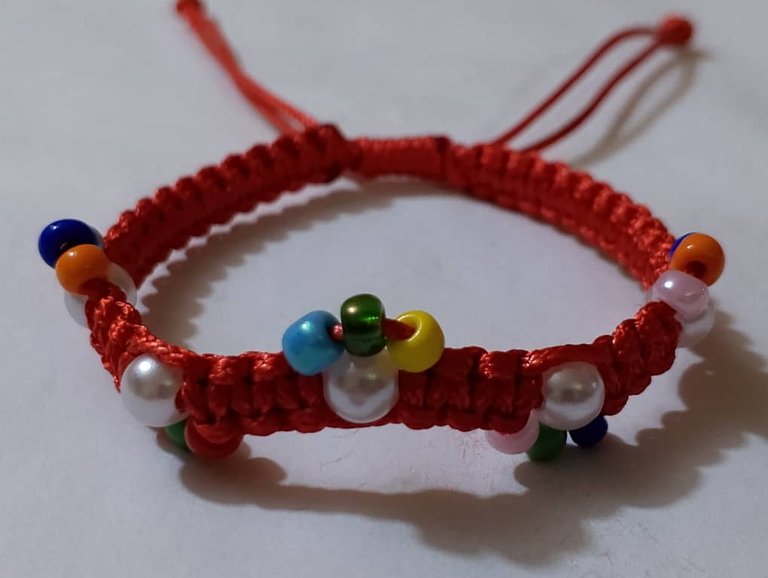
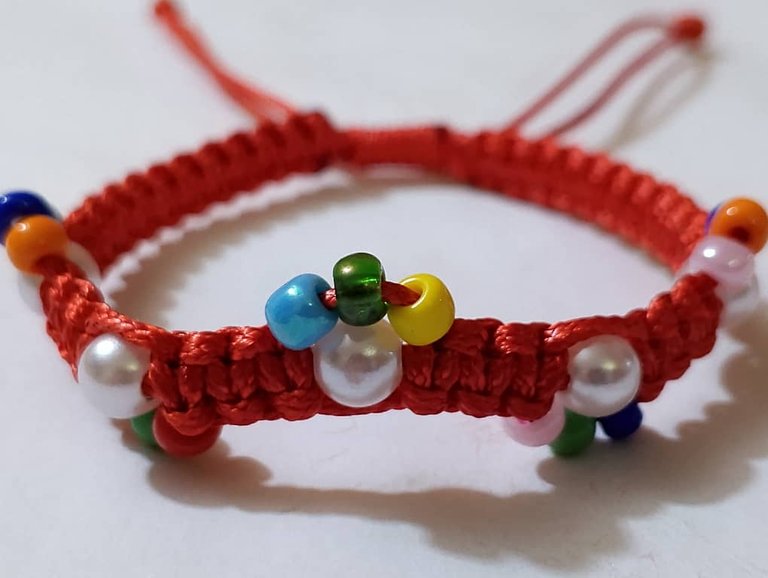
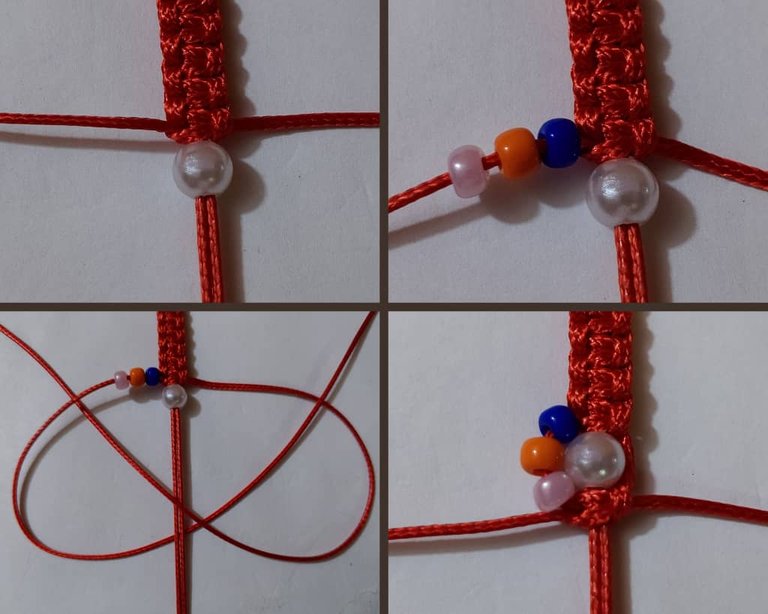
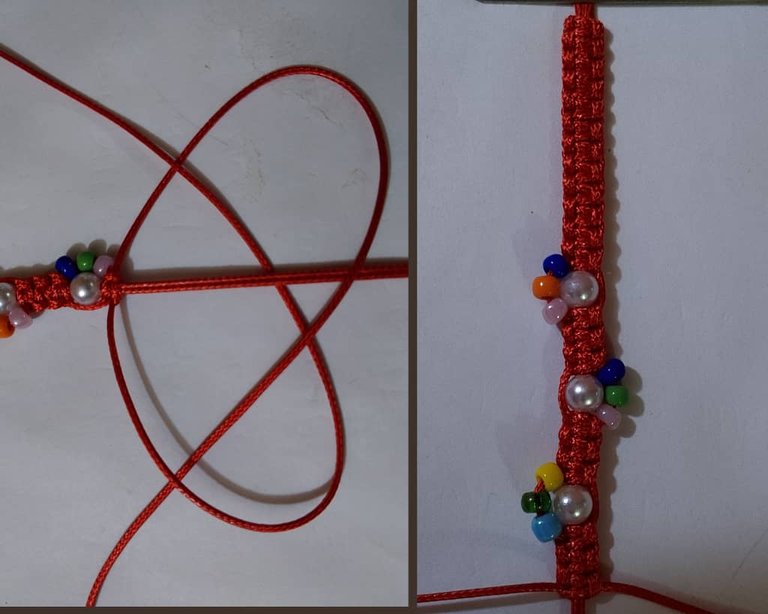
Luego introduje una perla por los hilos base. Seguidamente coloqué tres mostacillas por el hilo anudador del lado izquierdo. Después realicé tres nudos planos completos.

1 (13).jpeg


I repeated the same procedure but this time I placed the beads on the knotting thread on the right side.
Repetí el mismo procedimiento pero en esta ocasión las mostacillas las coloqué en el hilo anudador del lado derecho.

1 (12).jpeg


I continued making the same pattern until I reached the desired size. Then I cut the excess threads and sealed.
Continué realizando el mismo patrón hasta llegar a la medida deseada. Después corté los hilos sobrantes y sellé.

1 (6).jpeg


Then I cut a 20cm strand of yarn and tied a flat knot for the locking ring of this beautiful jewel.
Luego corté una hebra de hilo de 20cm y realicé un nudo plano para el trancadero de esta hermosa joya.

1 (15).jpeg


This is how this beautiful bracelet inspired by this splinterlands warrior turned out.

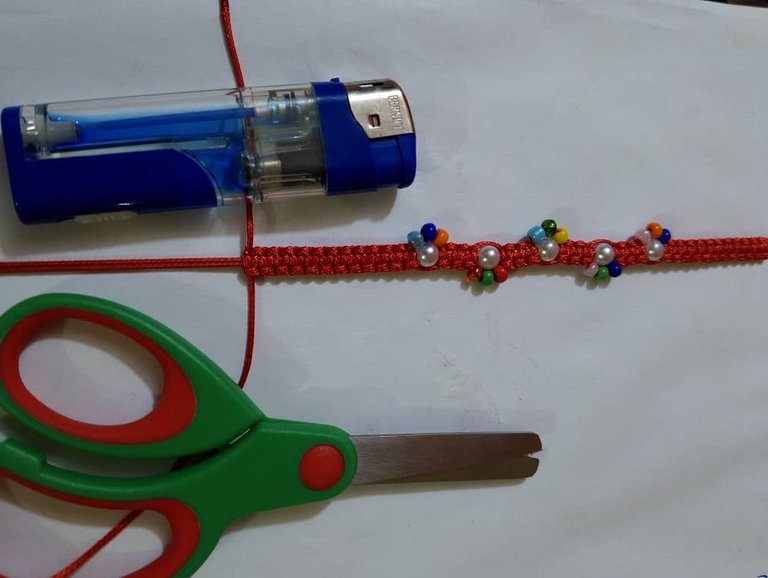
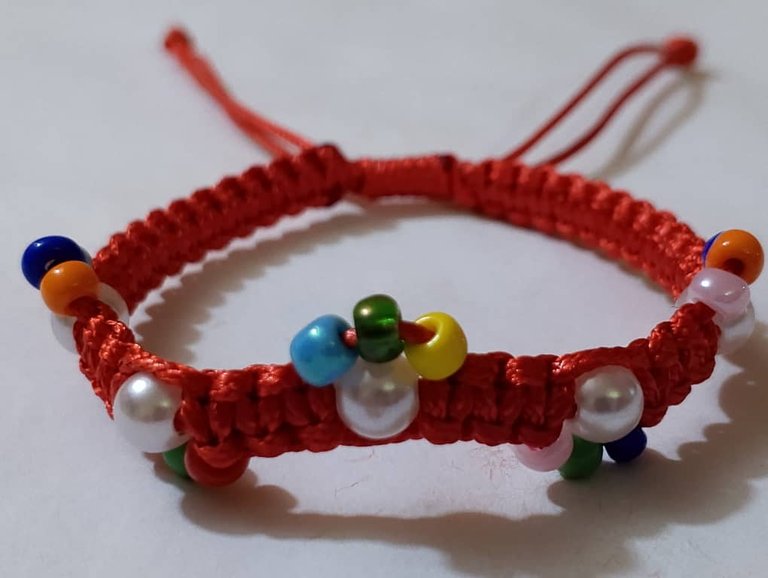
Así quedó esta hermosa pulsera inspirada en esté guerrero de splinterlands.

1 (3).jpeg


Blessings, Grace and Peace!

¡Bendiciones, Gracia y Paz!

1 (5).jpeg


image.png
fuente


separador virgilio 1.gif


1 (4).jpeg

separador virgilio.png


                  All images are my own, dividers courtesy of @kattycrochet.

                                                           
             Todas las imágenes son de mi autoría, divisores cortesía de @kattycrochet.
Translated with https://www.deepl.com/translator
Sort:  

This post has been supported by @Splinterboost with a 12% upvote! Delagate HP to Splinterboost to Earn Daily HIVE rewards for supporting the @Splinterlands community!

Delegate HP | Join Discord

Made a wonderful bracelet with great skill. Thanks for sharing this wonderful art that looks beautiful in your hands.

Blessed day. Thank you so much for stopping by and supporting.

Thank you!!!

Yes my pleasure I always support you we are family

Certainly, greetings and many blessings!!!

Yes you are most welcome

buen trabajo los colores y con el rojo resalta mas!


nice job on the colors and with the red it stands out more!

Muchas gracias por tu apreciación a mis contenidos. Agradezco tus amables palabras

 yesterday  

It is stylish, charming, and beautiful. Love its design and color which make it more appealing. Well done! Keep it up!

Thank you very much for your kind words and I appreciate your support for my content.
May you have success and prosperity in everything you undertake.