بسم اللہ الرحمن الرحیم
🇦 🇱 🇱 🇦 🇭= 𝚃𝙷𝙴 C͎R͎E͎A͎T͎O͎R͎
Wʜᴏ ɪs ᴍᴏsᴛ ɢʀᴀᴄɪᴏᴜs ᴀɴᴅ ᴍᴇʀᴄɪғᴜʟ.
اسلام علیکم
Mᴀʏ THY ʙᴇ S͜͡P͜͡R͜͡I͜͡N͜͡K͜͡L͜͡E͜͡D͜͡ ʙʏ 🅗︎🅘︎🅢︎ ʙʟᴇssɪɴɢs ᴀɴᴅ ᴘᴇᴀᴄᴇ.
HELLO MY LOVELY BUZZY 🐝zzz𝘽𝙀𝙀zzz🐝
English Version.
Русская версия.
Versión en español.
Deutsche Fassung.
English version
I am thankful to God that I am alive, managing to write and translate my work and as usual Actifit is my best friend. Actifit app counts your every physical movement. And yesterday, I hit minimum count of 5000. Yesterday, I was busy with my friend @mubashiranees. We were finding some place to open a small lunch shop. Kindly pray for us.
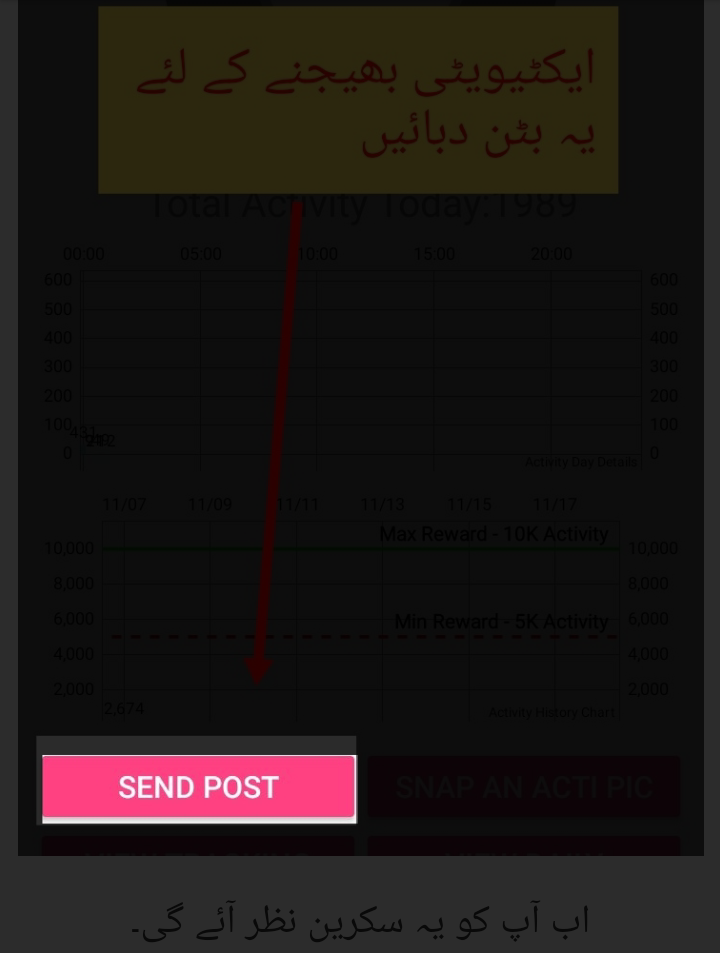
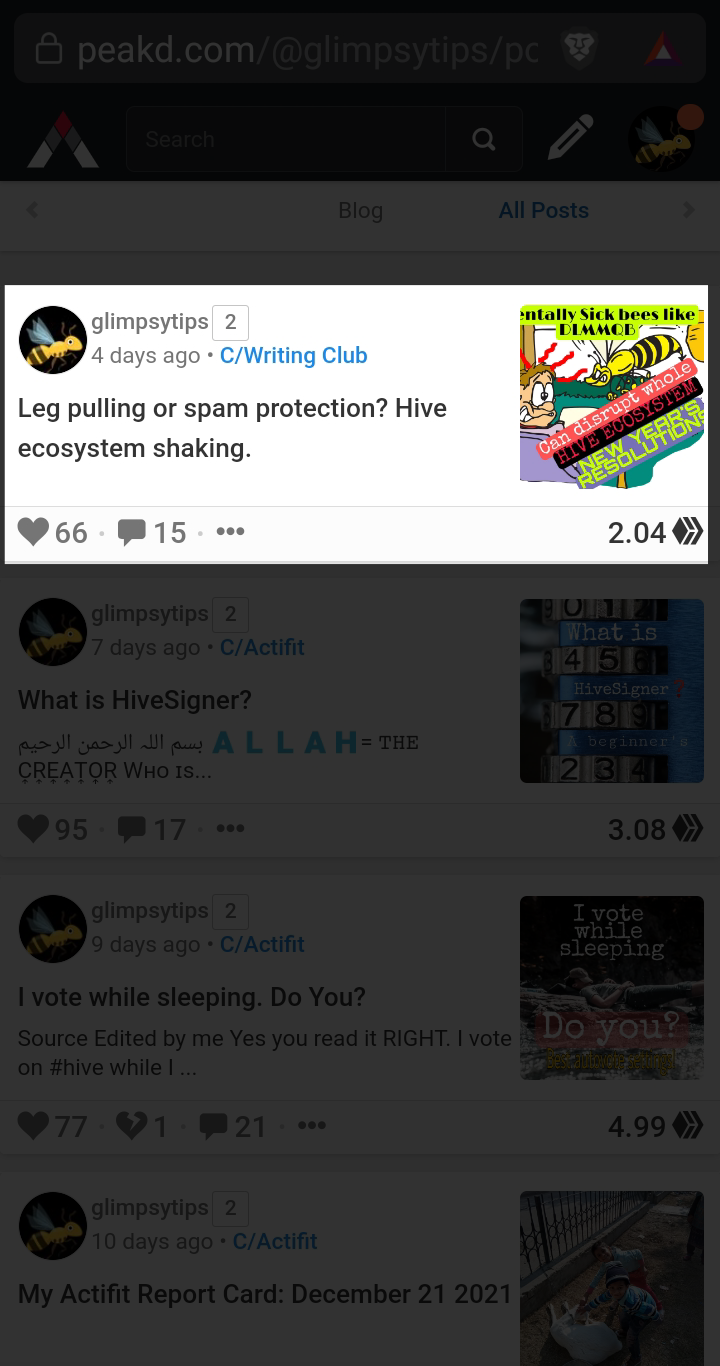
My friend @winly asked me twice that how do I highlight certain areas in my pictures like this
Or like this.
Well solution is simple.
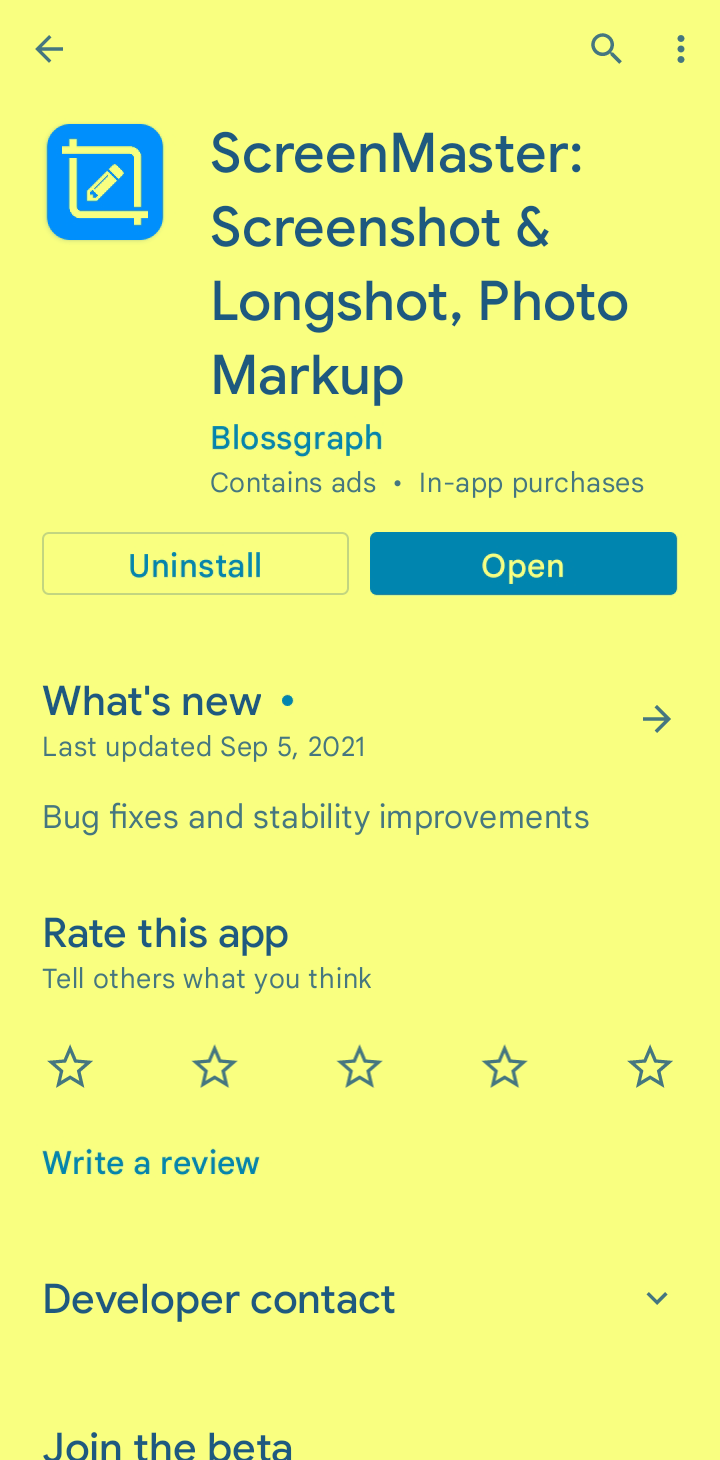
Install the app from above link then open. This would be the first screen you will see.
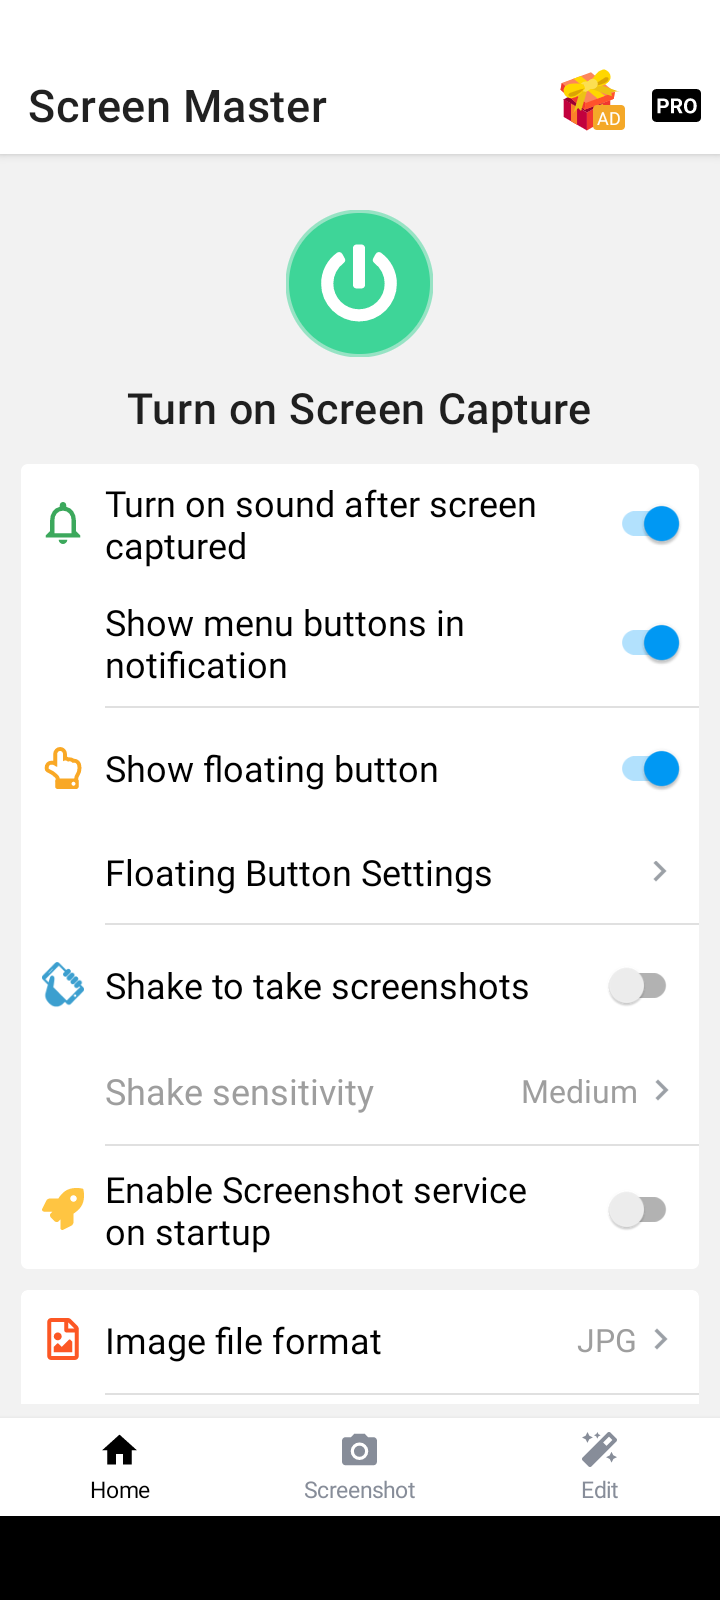
Guide made according to these settings. So make sure to turn on the buttons shown below.
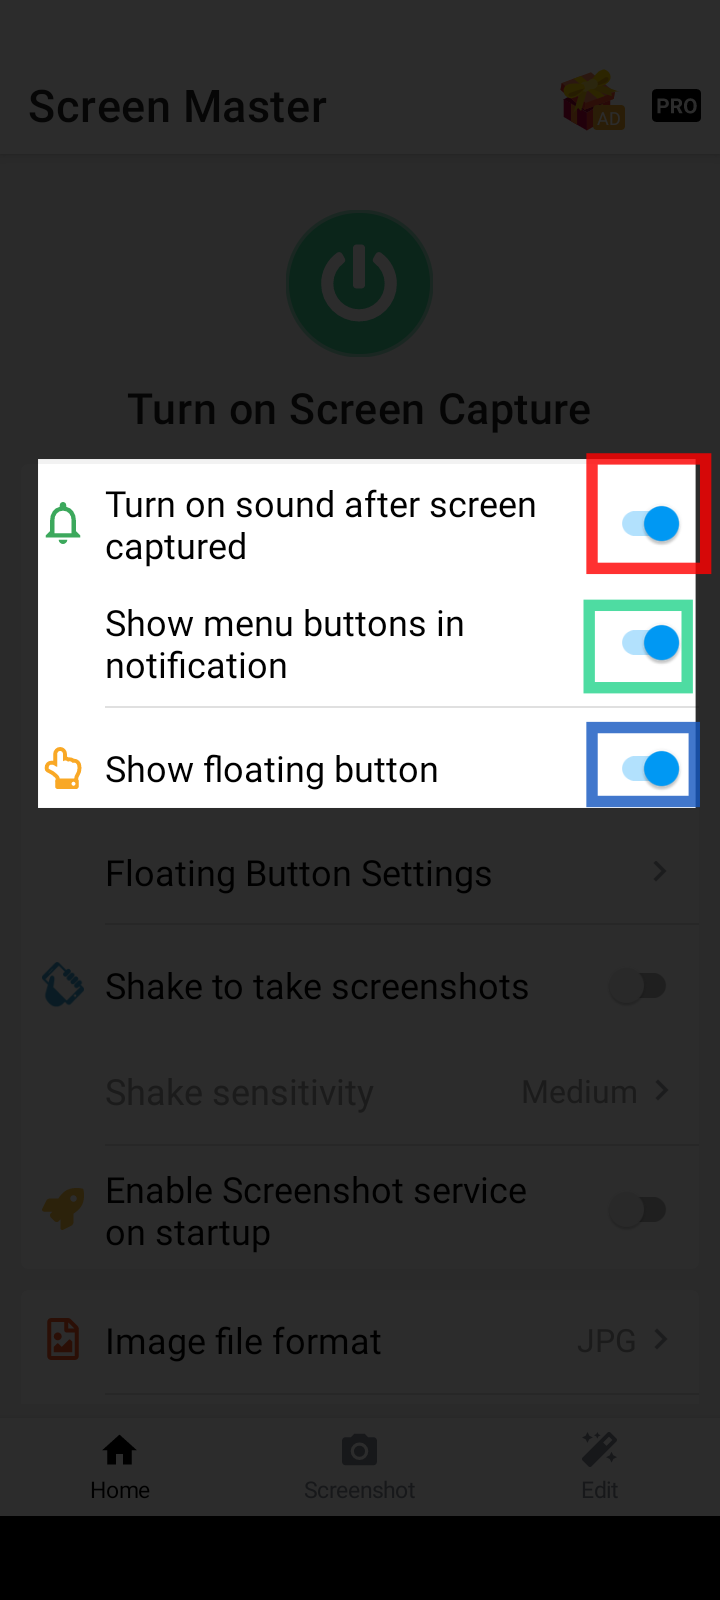
By default ScreenMaster is disabled and you will see a green big power button as below.
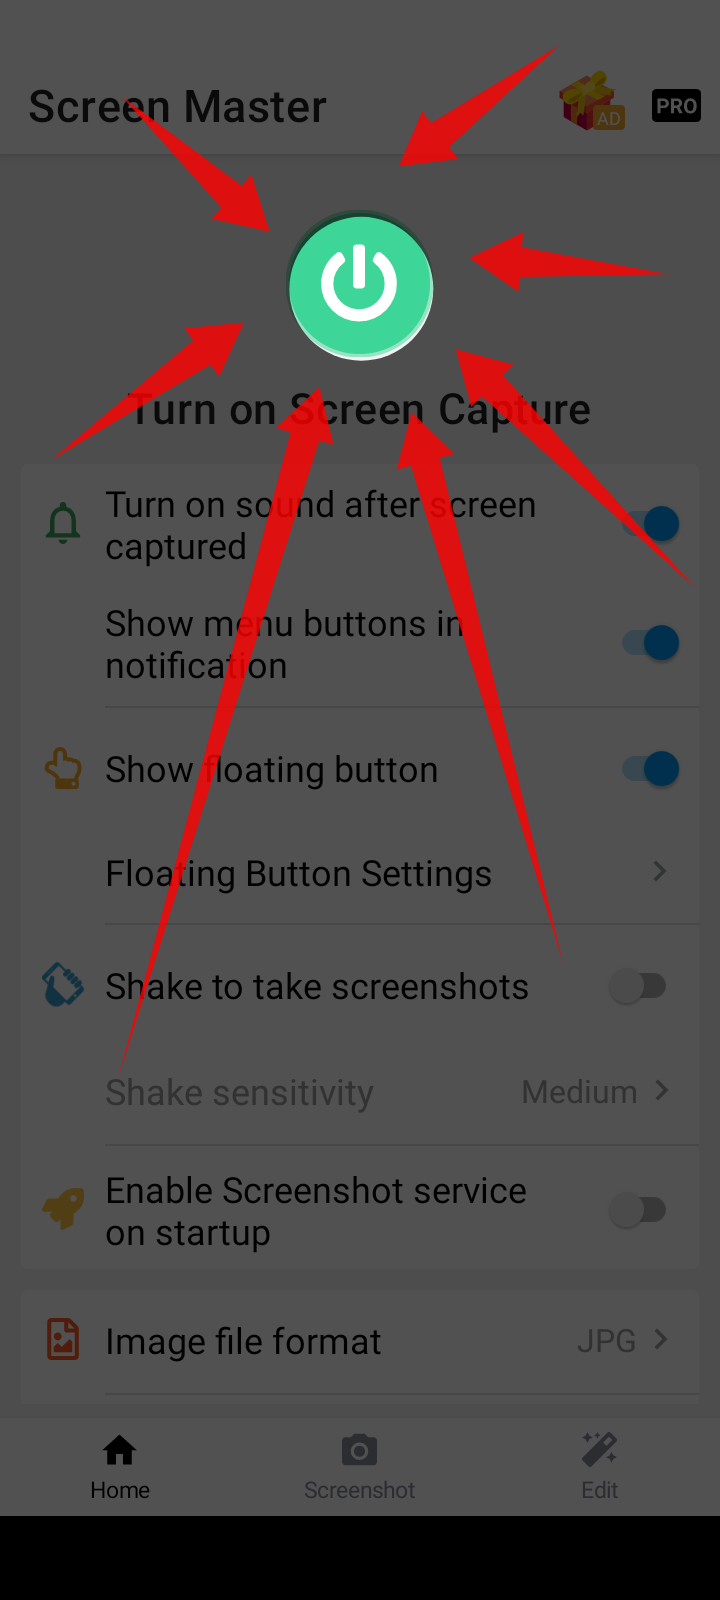
Touch this green power button to start ScreenMaster properly. You may see a confirmation message like this.
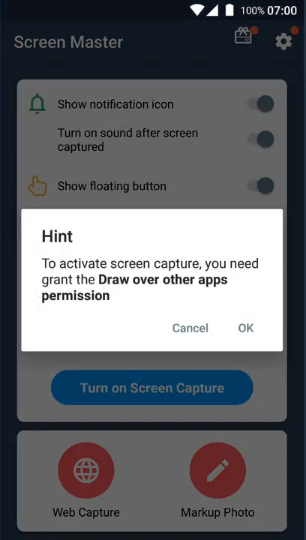
Click ok
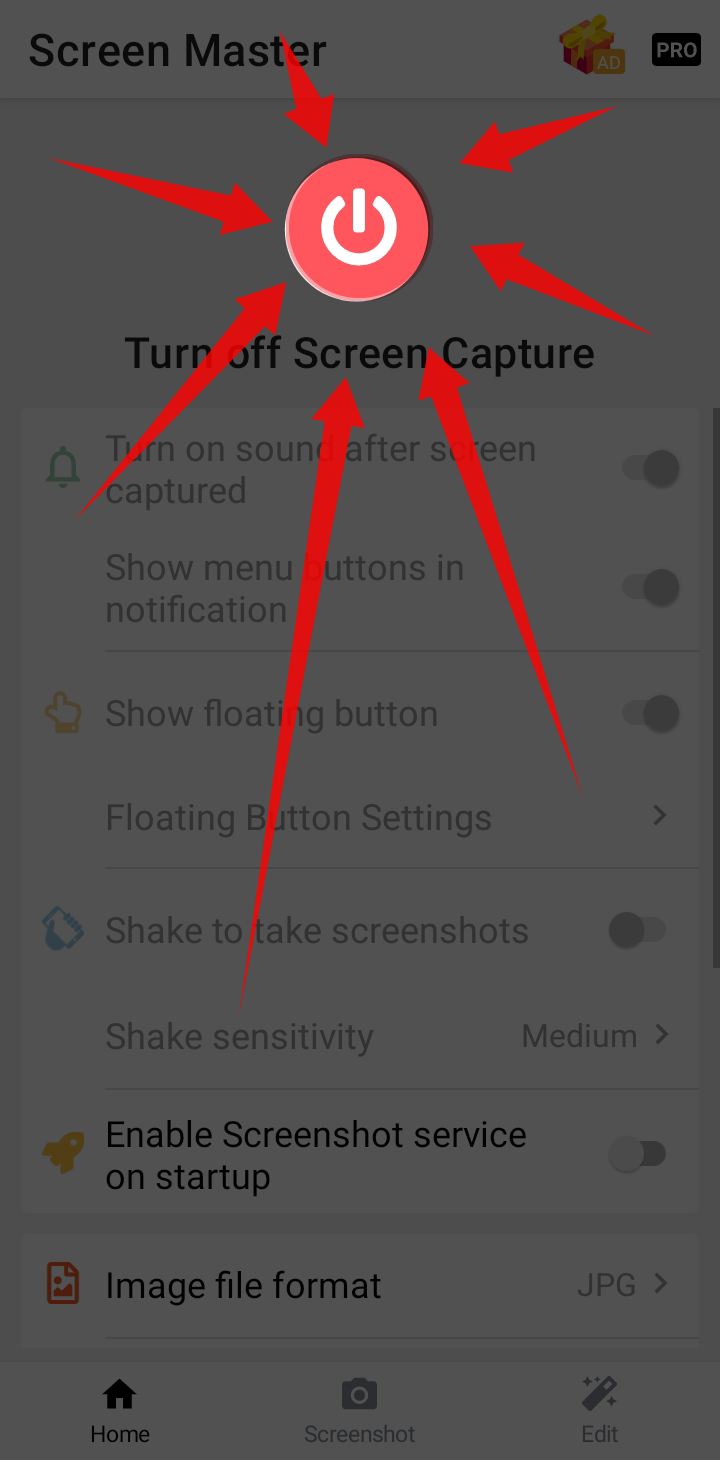
Now you will see a big red power button to turn off ScreenMaster. This means that now the ScreenMaster is ON and showing a floating button on the screen.
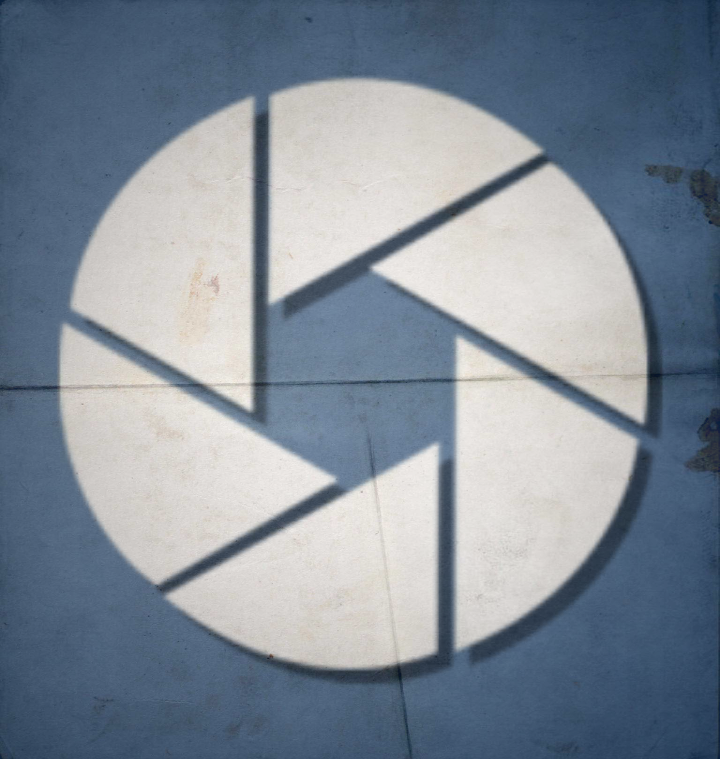
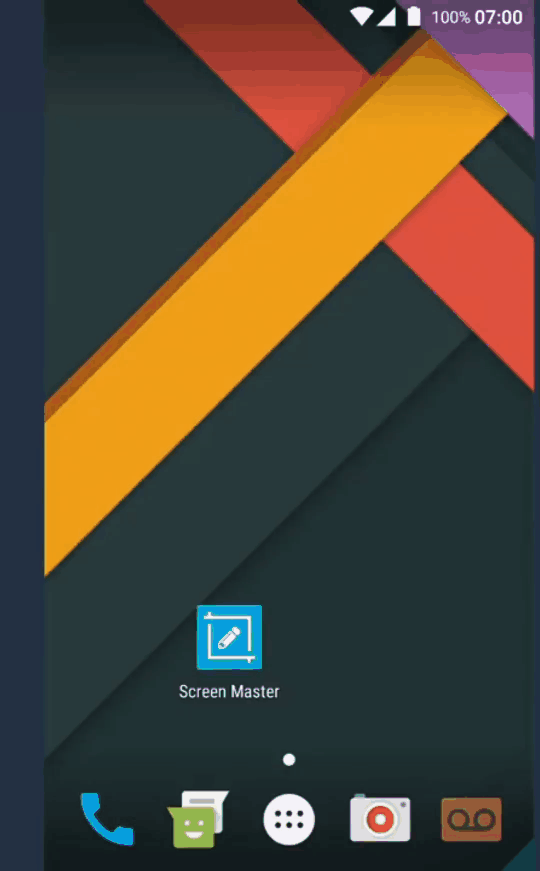
This is the floating button icon that is now visible on the screen.
Basic Icon
Icon on screen
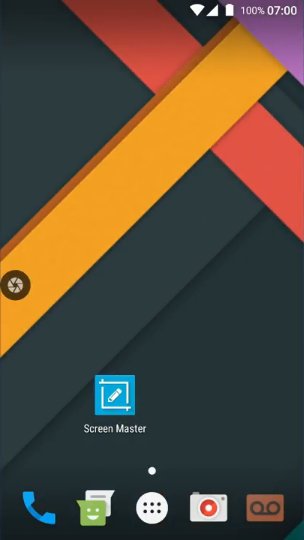
You just need to press this Icon
Here see on the left side circled yellow
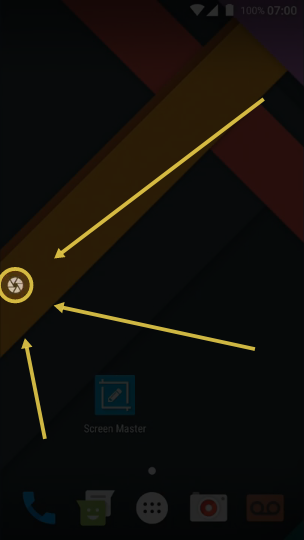
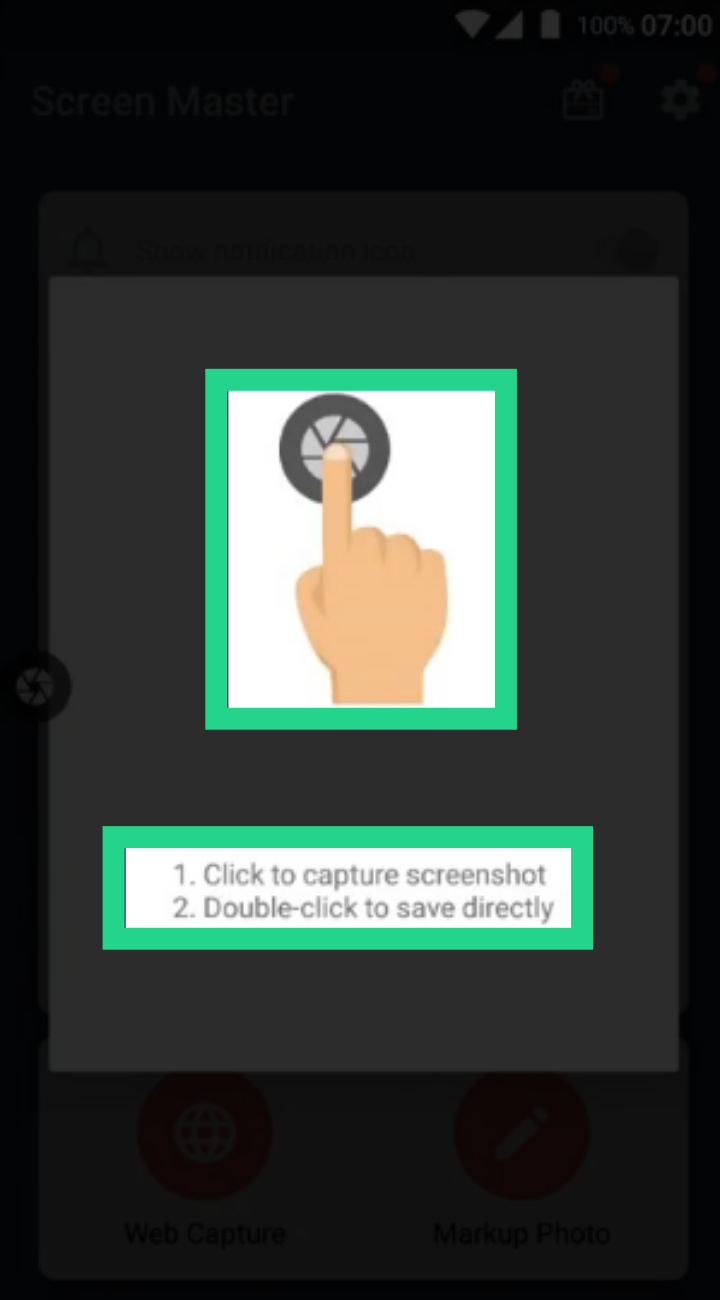
Single tap options like custom area and edit to highlight area. Double tap autosave screenshot to ScreenMaster default folder.
After every restart ScreenMaster floating button touch will always bring this window.
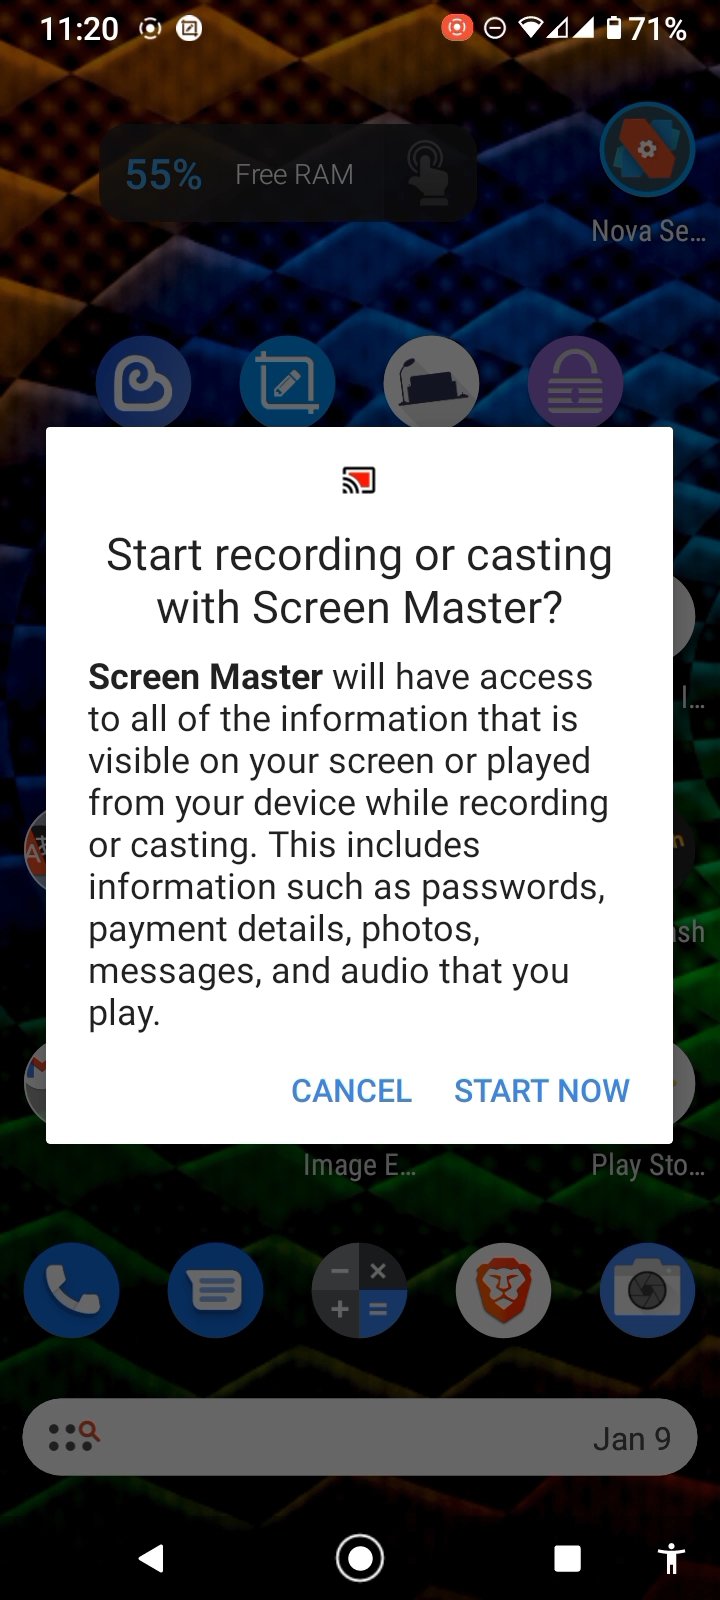
The floating button showed in above pictures can be single touched anytime to take screenshot. Then adjust your desired area and touch save. As shown below.
To highlight some area in your screenshot you need to touch the edit button as shown below.
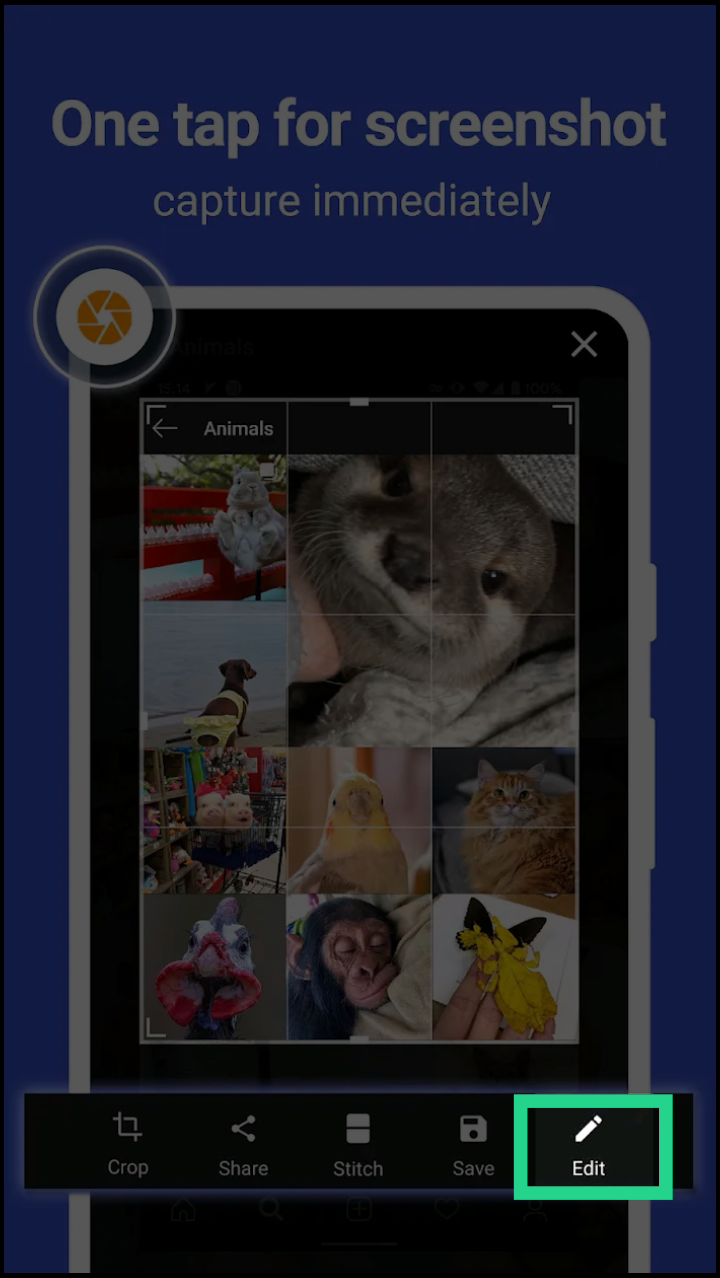
Then press the spotlight button as shown below
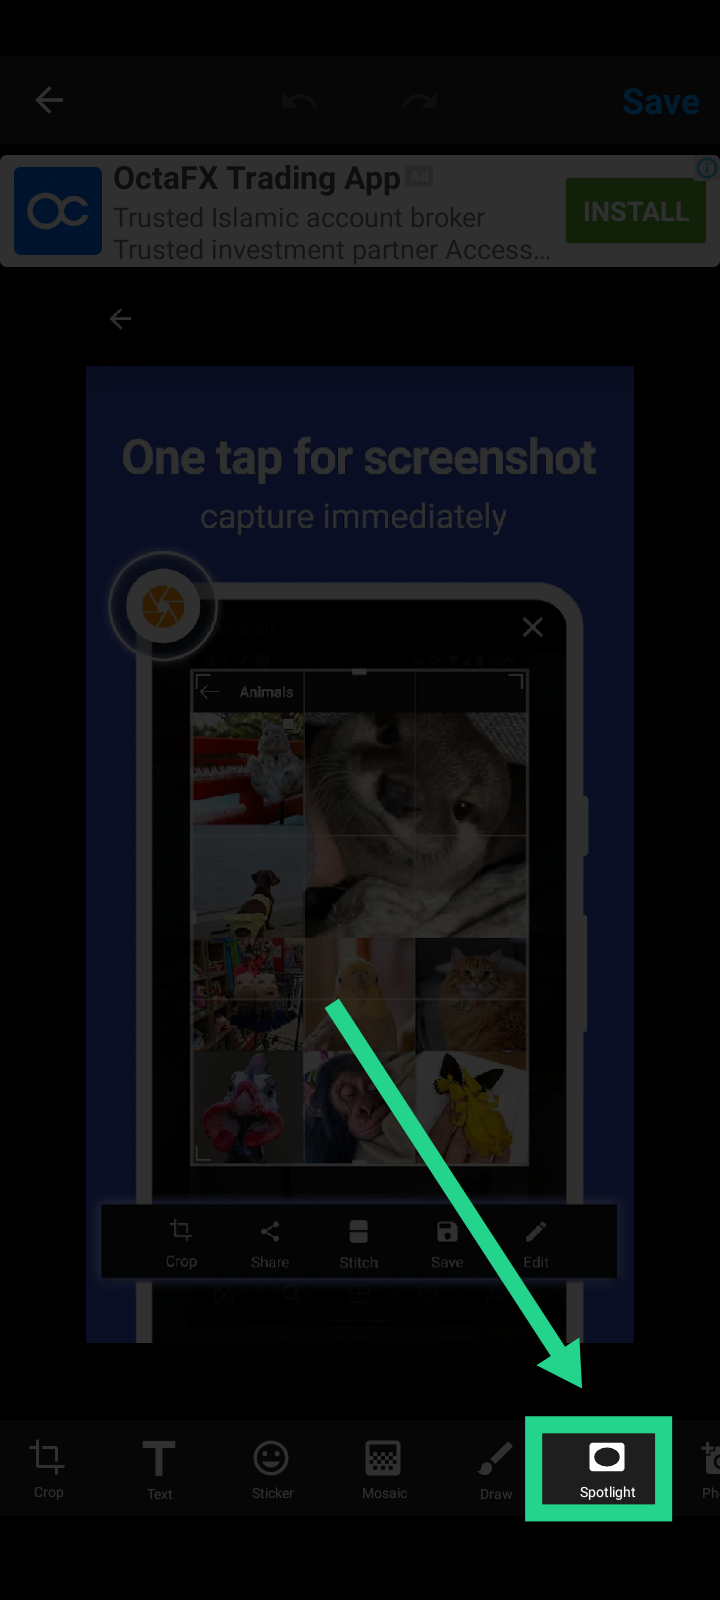
After that select your desired area for spotlight.
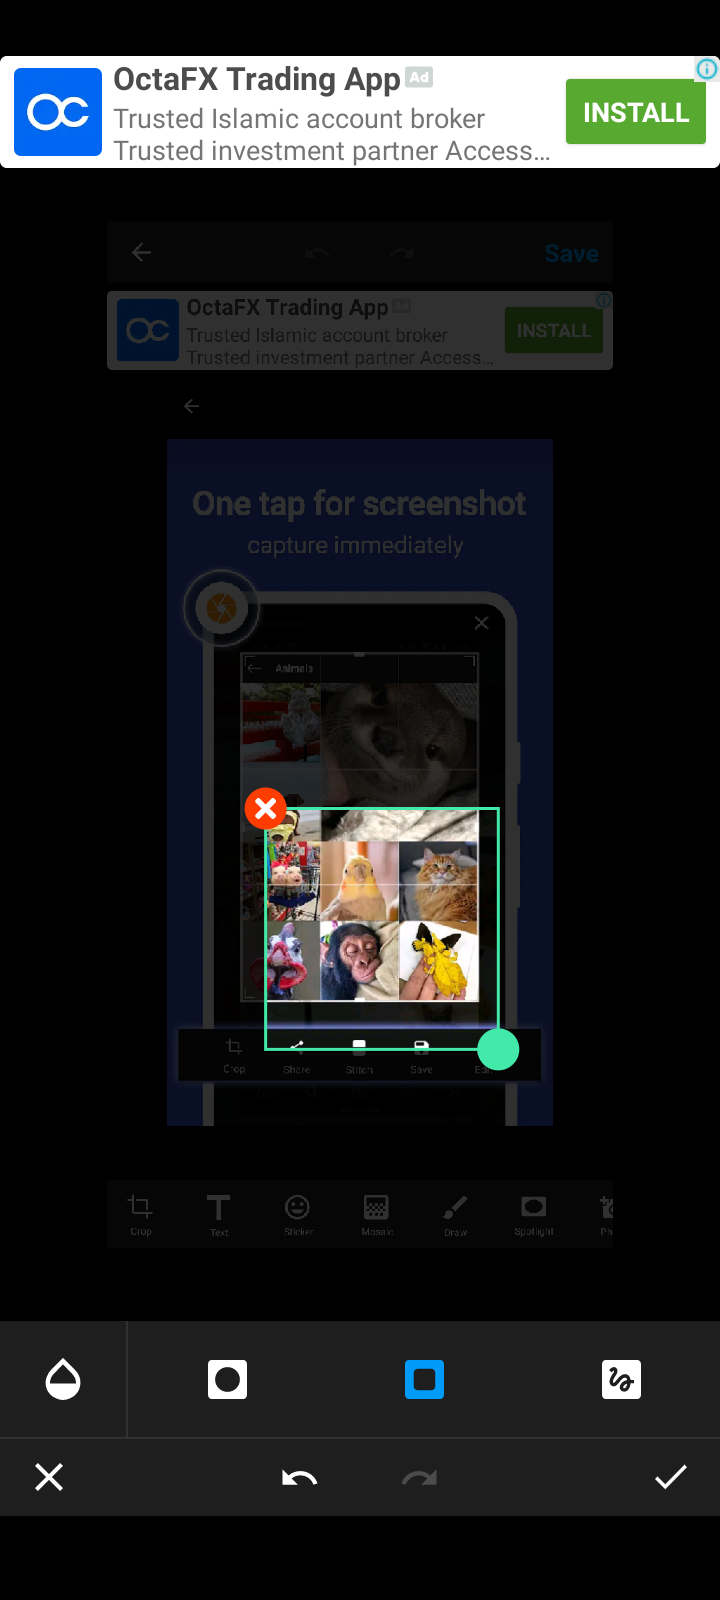
You can change the spotlight shape to circle.
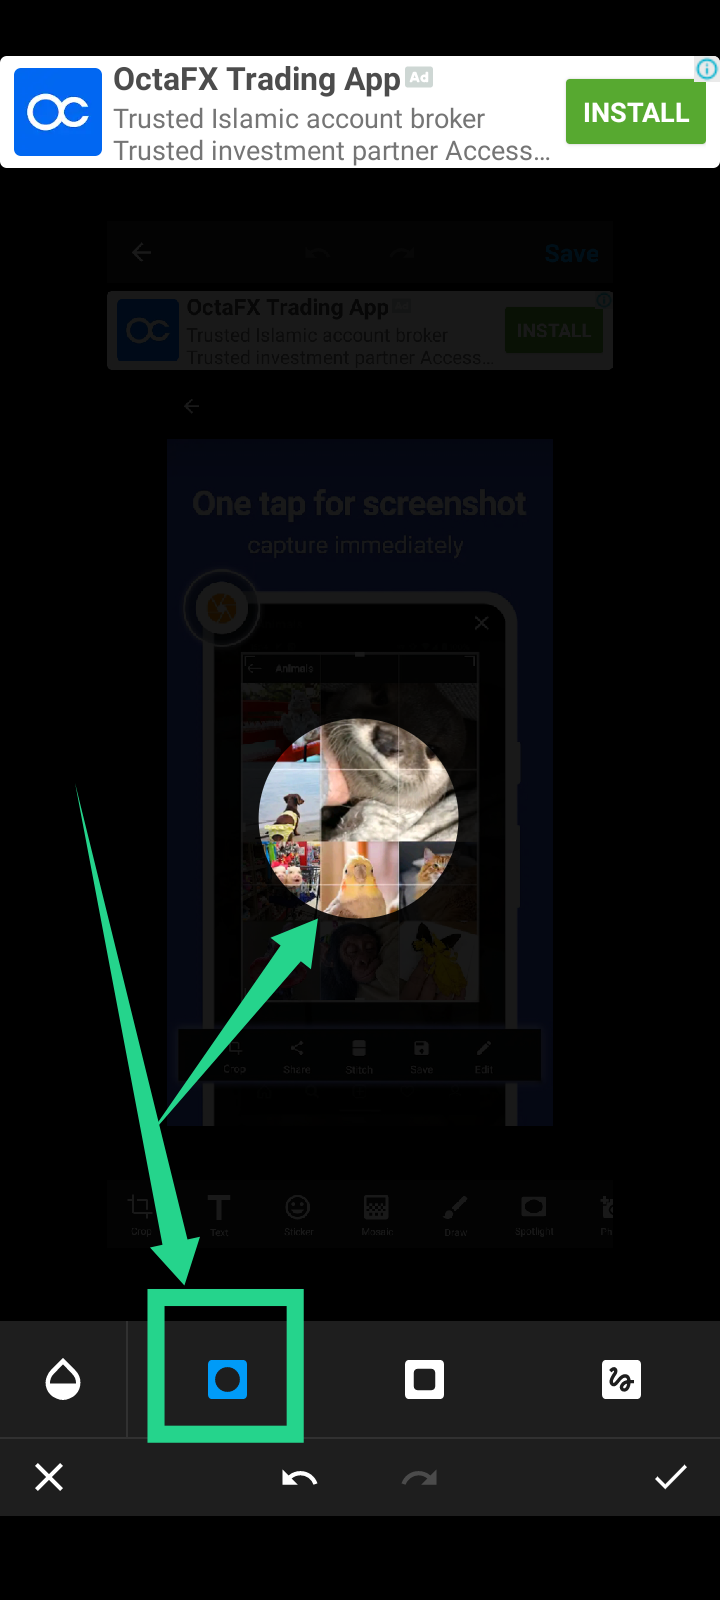
And square or rectangle.
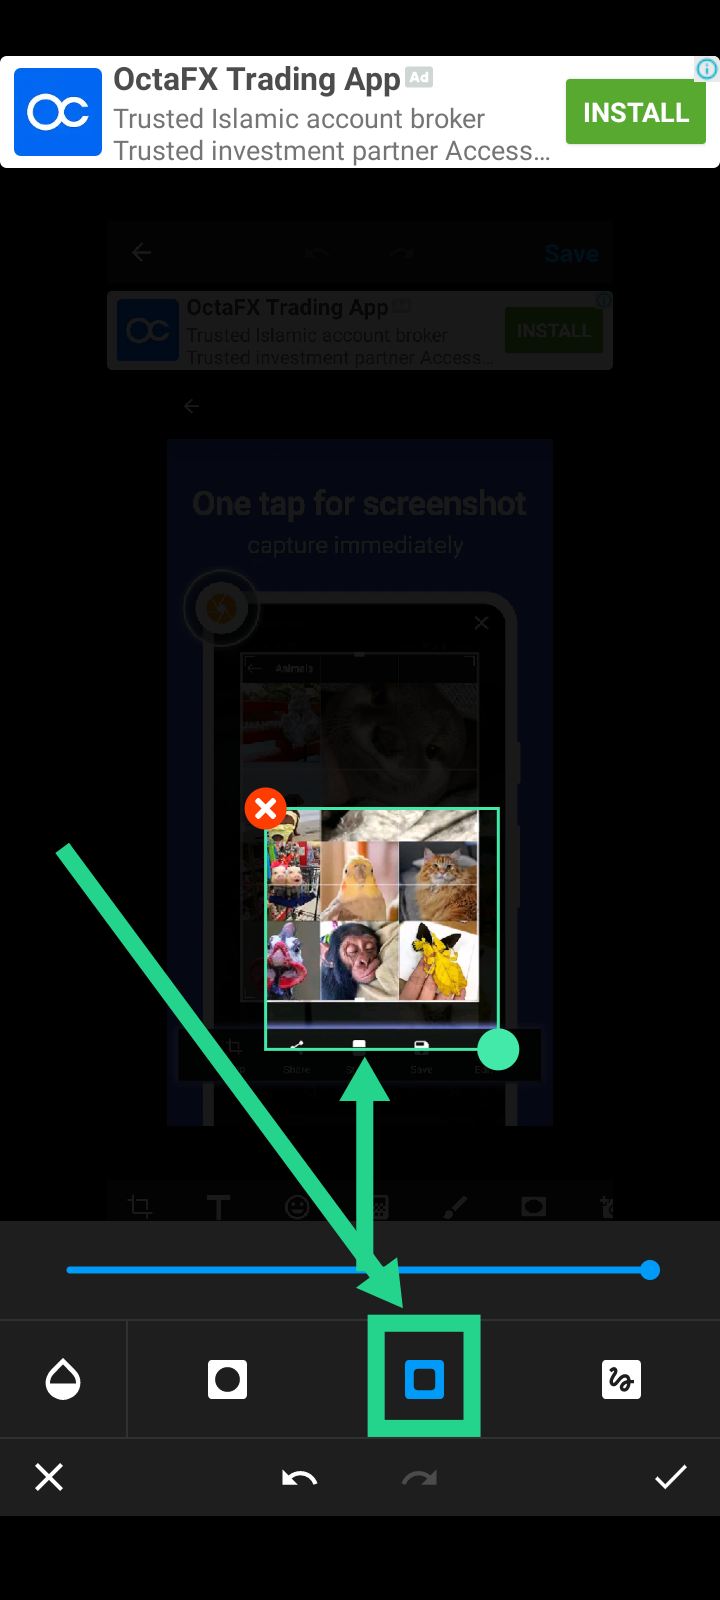
To adjust background intensity. Click color drop button as shown below.
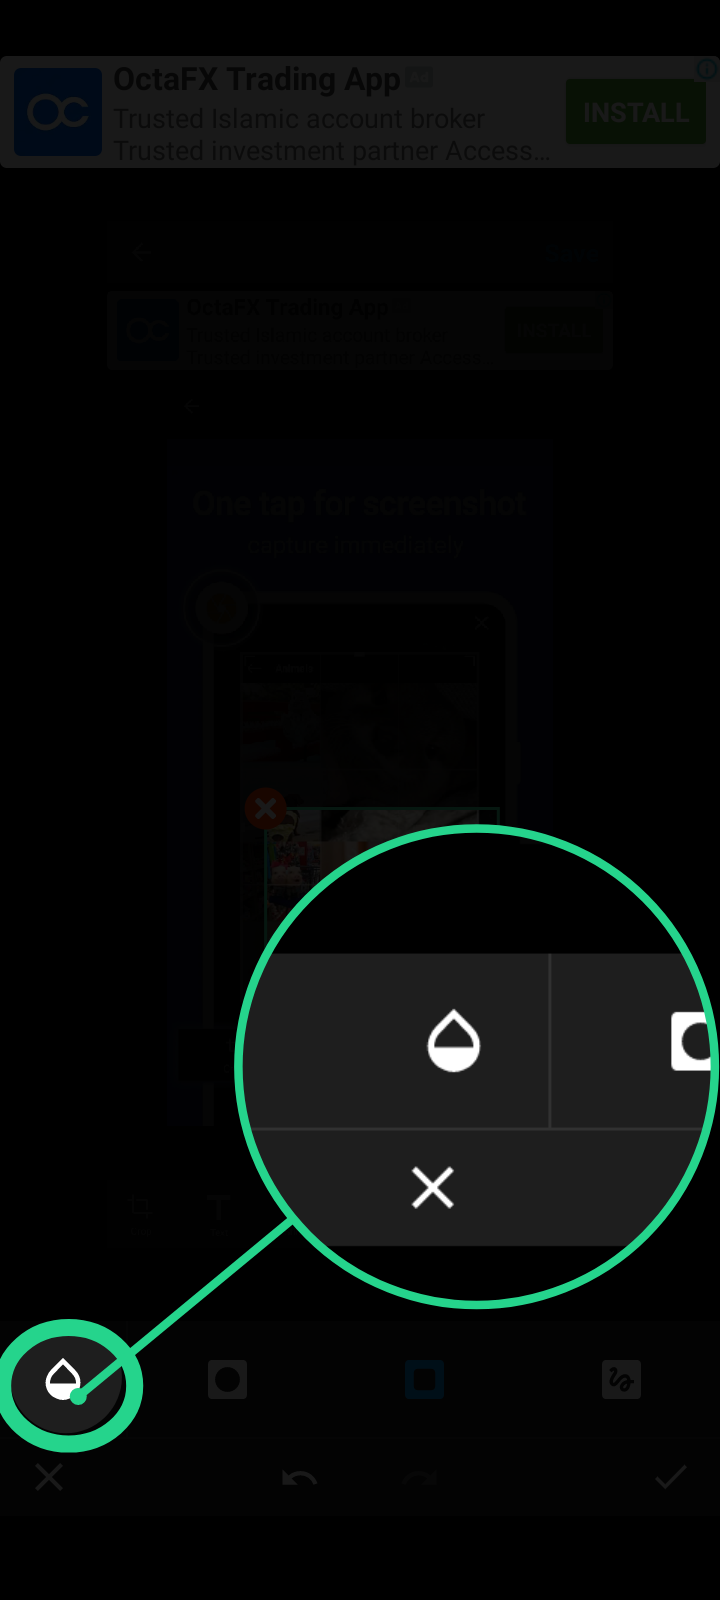
Now adjust slider towards right to make background dark.
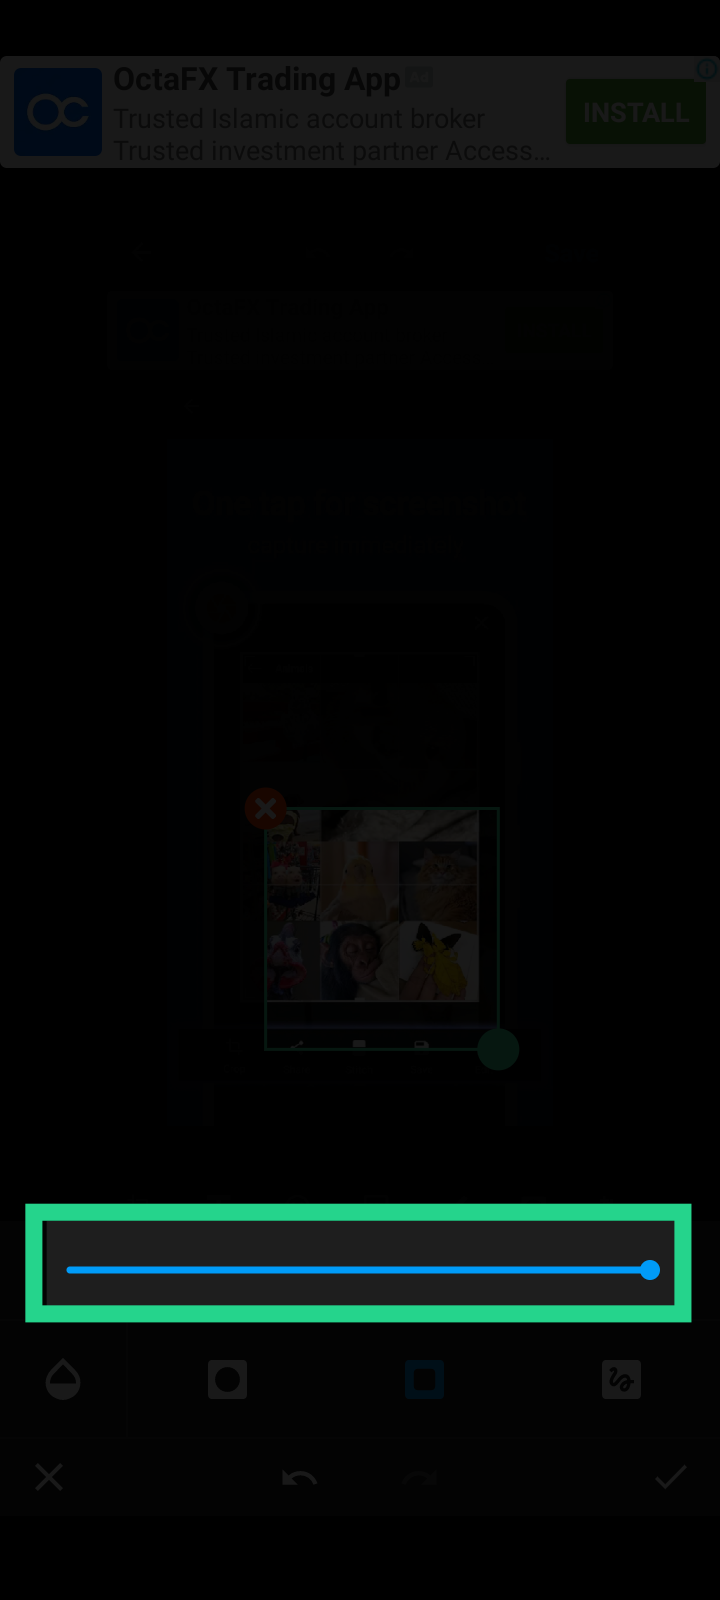
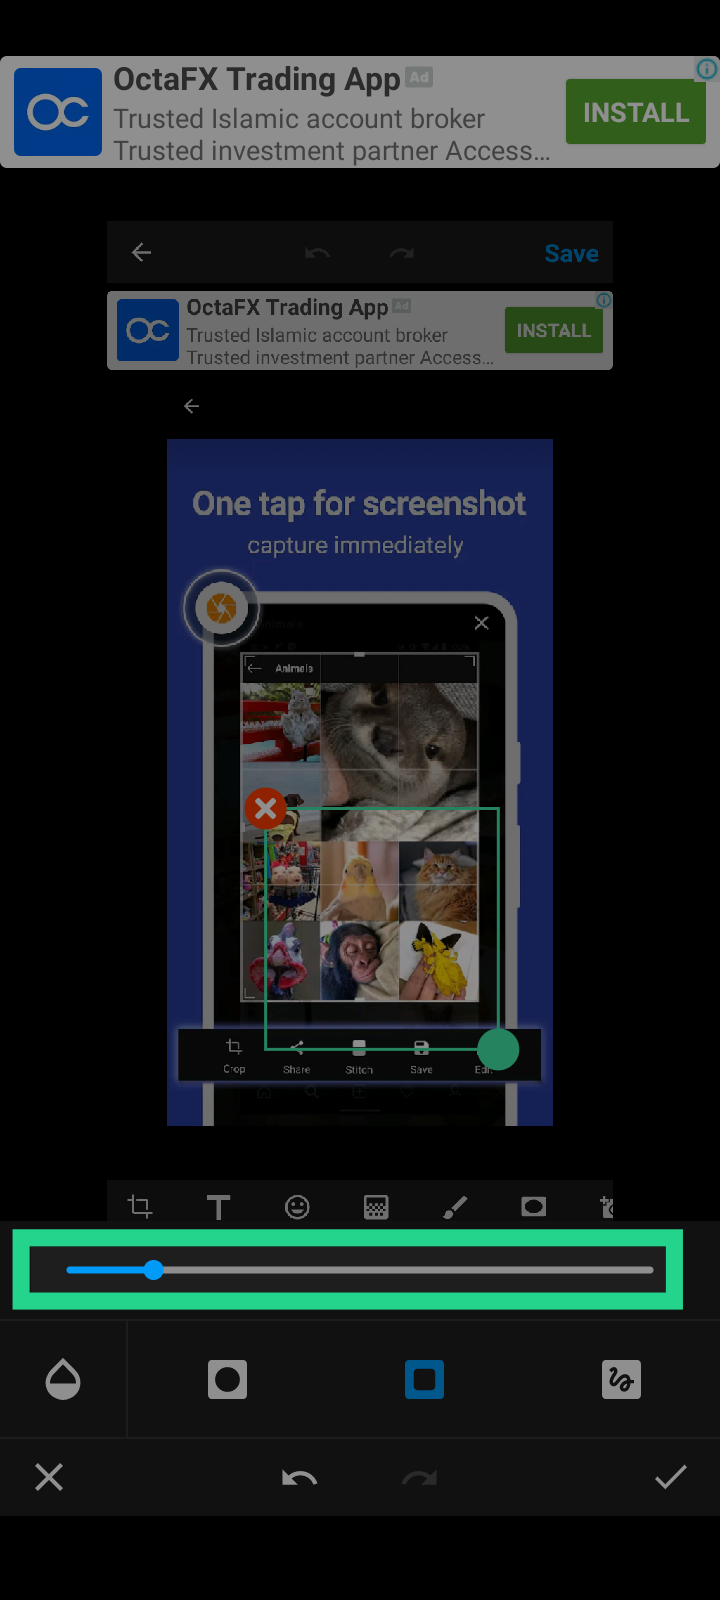
And move towards left for more background visibility.
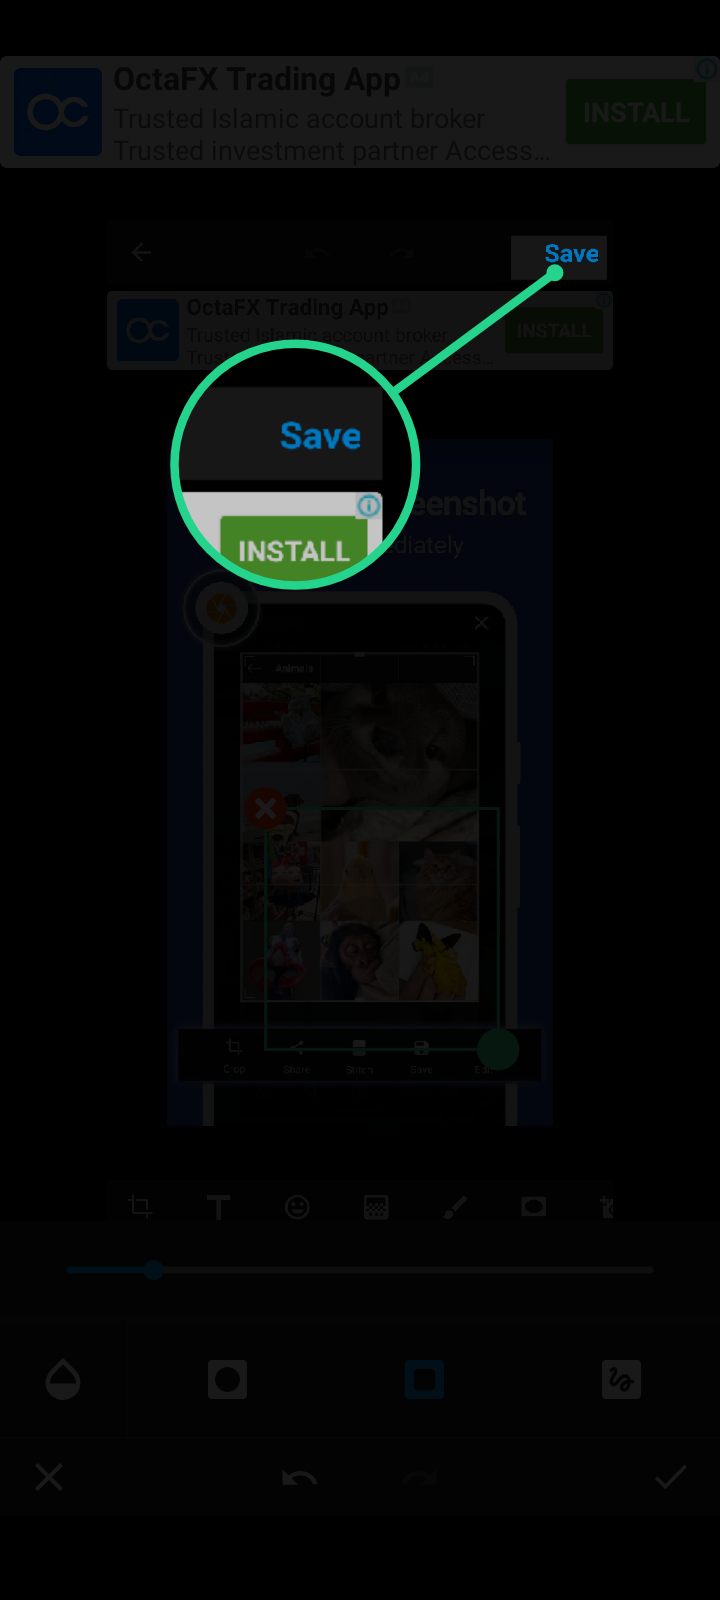
And the final step is to save your edited screenshot.
There are more features like add text, crop picture, zoom certain area, add arrows, circles or squares. You can easily check other options. But if face trouble feel free to ask in comments below.
Русская версия.
Я благодарен Богу за то, что я жив, мне удается писать и переводить свои произведения, и, как обычно, Actifit - мой лучший друг. Приложение Actifit учитывает каждое ваше физическое движение. А вчера я набрал минимальное количество 5000. Вчера я был занят со своим другом @mubashiranees. Мы искали какое-нибудь место, чтобы открыть небольшой ресторан. Пожалуйста, молитесь за нас.
Мой друг @winly дважды спрашивал, как я могу таким образом выделить определенные области на своих фотографиях

Или вот так.

Что ж, решение простое.

Установите приложение по ссылке выше, затем откройте. Это будет первый экран, который вы увидите.

Руководство составлено в соответствии с этими настройками. Поэтому обязательно включите кнопки, показанные ниже.

По умолчанию ScreenMaster отключен, и вы увидите большую зеленую кнопку питания, как показано ниже.

Нажмите эту зеленую кнопку питания, чтобы правильно запустить ScreenMaster. Вы можете увидеть сообщение с подтверждением, подобное этому.

Нажмите кнопку ок.
Теперь вы увидите большую красную кнопку питания, чтобы выключить ScreenMaster. Это означает, что #ScreenMaster теперь включен и показывает плавающую кнопку на экране.

Это значок плавающей кнопки, который теперь виден на экране.
Главная Иконка.

Значок на экране.

Вам просто нужно прикоснуться к этому значку.

Видите, с левой стороны он отмечен желтым кружком.

Выберите параметры одним щелчком мыши, такие как пользовательская область и редактирование, чтобы выделить область. Дважды коснитесь автосохранения скриншота в папке Мастера экрана по умолчанию.
После каждой перезагрузки устройства нажатие кнопки "Плавающий мастер экрана" всегда вызывает это окно.

Плавающую кнопку, показанную на рисунках выше, можно нажать одним нажатием в любое время, чтобы сделать снимок экрана. Затем отрегулируйте нужную область и нажмите кнопку Сохранить. Как показано ниже.

Чтобы выделить любую область на снимке экрана, вам нужно нажать кнопку "Изменить", как показано ниже.

Затем нажмите кнопку прожектора, как показано ниже.

После этого выберите нужную область для прожектора.

Вы можете изменить форму прожектора на круг.

И квадрат или прямоугольник.

Для регулировки интенсивности фона. Нажмите кнопку выбора цвета, как показано ниже.

Теперь переместите ползунок вправо, чтобы сделать фон темным.

И переместитесь влево для большей видимости фона.

И в правом верхнем углу последний шаг - сохранить отредактированный снимок экрана.

Существуют и другие функции, такие как добавление текста, обрезка изображения, увеличение определенной области, добавление стрелок, кругов или квадратов. Вы можете легко проверить другие варианты. Но если вы столкнетесь с проблемой, не стесняйтесь спрашивать в комментариях ниже.
Versión española.
Doy gracias a Dios de que estoy vivo, de que consigo escribir y traducir mis obras y, como siempre, de que Actifit es mi mejor amigo. La app Actifit tiene en cuenta todos tus movimientos físicos. Y ayer alcancé el mínimo de 5000. Ayer estuve ocupado con mi amigo @mubashiranees. Estábamos buscando un lugar para abrir un pequeño restaurante. Por favor, ruega por nosotros.
Mi amigo @winly preguntó dos veces cómo puedo resaltar áreas específicas en mis fotos de esta manera.

O como en la foto de abajo.

Bueno, la solución es simple.

Instale la aplicación desde el enlace de arriba, luego ábrala. Esta será la primera pantalla que verá.

El manual se compila de acuerdo con estos ajustes. Así que asegúrese de incluir los botones que se muestran a continuación.

De forma predeterminada, ScreenMaster está desactivado y verá un gran botón de encendido verde como se muestra a continuación.

Presione este botón de encendido verde para iniciar ScreenMaster correctamente. Puede ver un mensaje de confirmación como este.

Haga clic en aceptar.
Ahora verá un gran botón de encendido rojo para apagar ScreenMaster. Esto significa que #ScreenMaster ahora está habilitado y muestra un botón flotante en la pantalla.

Este es el ícono del botón flotante que ahora es visible en la pantalla.
Icono Principal.

Icono en la pantalla.

Solo tienes que tocar ese ícono.

Verás, en el lado izquierdo está marcado con un círculo amarillo.

Seleccione opciones con un solo clic, como área personalizada y edición, para resaltar el área. Toca dos veces la captura de pantalla guardada automáticamente en la carpeta predeterminada.
Después de cada reinicio del dispositivo, al hacer clic en el botón "asistente de pantalla Flotante" siempre aparece esta ventana.

El botón flotante que se muestra en las imágenes de arriba se puede tocar con un solo toque en cualquier momento para tomar una captura de pantalla. A continuación, ajuste el área deseada y haga clic en Guardar. Como se muestra a continuación.

Para resaltar cualquier área de la captura de pantalla, debe hacer clic en el botón Editar. Compruebe a continuación.

A continuación, haga clic en el botón SpotLight. Compruebe a continuación.

Después de eso, seleccione el área deseada para resaltar.

Puede seleccionar la forma de círculo.

Y un cuadrado o un rectángulo.

Para ajustar la intensidad del fondo. Haga clic en el botón selección de color. Véase más adelante.

Ahora mueva el control deslizante hacia la derecha para oscurecer el fondo.

Y muévete a la izquierda para obtener más visibilidad de fondo.

Y en la esquina superior derecha, el último paso es guardar la captura de pantalla editada.

Hay otras funciones, como agregar texto, recortar una imagen, ampliar un área específica, agregar flechas, círculos o cuadrados. Puede consultar fácilmente otras opciones. Pero si tiene un problema, no dude en preguntar en los comentarios a continuación.
Deutsche Fassung.
Ich danke Gott, dass ich lebe, dass ich es schaffe, meine Werke zu schreiben und zu übersetzen, und dass Actifit wie immer mein bester Freund ist. Die Actifit App berücksichtigt alle Ihre körperlichen Bewegungen. Und gestern habe ich das Minimum von 5000 erreicht. Gestern war ich mit meinem Freund @mubashiranees beschäftigt. Wir suchten einen Ort, um ein kleines Restaurant zu eröffnen. Bitte betet für uns.
Mein Freund @winly er fragte zweimal, wie ich bestimmte Bereiche in meinen Fotos auf diese Weise hervorheben kann.

Oder wie auf dem Foto unten.

Nun, die Lösung ist einfach.

Installieren Sie die App über den obigen Link und öffnen Sie sie. Dies ist der erste Bildschirm, den Sie sehen werden.

Das Handbuch wird nach diesen Einstellungen zusammengestellt. Achten Sie also darauf, die unten gezeigten Schaltflächen einzuschließen.

Standardmäßig ist ScreenMaster deaktiviert und Sie sehen einen großen grünen Netzschalter, wie unten gezeigt.

Drücken Sie diese grüne Power-Taste, um ScreenMaster korrekt zu starten. Sie können eine Bestätigungsnachricht wie diese sehen.

berühren Sie OK
Sie sehen nun einen großen roten Netzschalter, um ScreenMaster auszuschalten. Dies bedeutet, dass #ScreenMaster jetzt aktiviert ist und eine schwebende Schaltfläche auf dem Bildschirm anzeigt.

Dies ist das schwebende Schaltflächensymbol, das jetzt auf dem Bildschirm angezeigt wird.
Haupt-Symbol.

Symbol auf dem Bildschirm.

Berühren Sie einfach dieses Symbol.

Sie sehen, auf der linken Seite ist es mit einem gelben Kreis markiert.

Wählen Sie Ein-Klick-Optionen wie Benutzerdefinierter Bereich und Bearbeiten, um den Bereich hervorzuheben. Doppeltippen Sie, um den Screenshot automatisch im Standardordner zu speichern.
Nach jedem Neustart des Geräts wird dieses Fenster immer angezeigt, indem Sie auf die Schaltfläche "Floating Button" klicken.

Die in den obigen Bildern gezeigte schwebende Schaltfläche kann jederzeit mit einer einzigen Berührung berührt werden, um einen Screenshot aufzunehmen. Passen Sie dann den gewünschten Bereich an und klicken Sie auf Speichern. Wie unten gezeigt.

Um einen Bereich des Screenshots hervorzuheben, müssen Sie auf die Schaltfläche Bearbeiten klicken. Überprüfen Sie unten.

Klicken Sie dann auf die Schaltfläche SpotLight. Überprüfen sie unten bild.

Wählen Sie danach den gewünschten Bereich aus, der hervorgehoben werden soll.

Sie können die Kreisform wählen.

Und ein Quadrat oder ein Rechteck.

So passen Sie die Intensität des Hintergrunds an. Klicken Sie auf die Schaltfläche Farbauswahl. Siehe unten.

Bewegen Sie nun den Schieberegler nach rechts, um den Hintergrund abzudunkeln.

Und bewegen Sie sich nach links, um mehr Hintergrundsichtbarkeit zu erhalten.

In der oberen rechten Ecke müssen Sie als letzten Schritt den bearbeiteten Screenshot speichern.

Es gibt andere Funktionen wie das Hinzufügen von Text, das Zuschneiden eines Bildes, das Vergrößern eines bestimmten Bereichs, das Hinzufügen von Pfeilen, Kreisen oder Quadraten. Sie können leicht auf andere Optionen verweisen. Aber wenn Sie ein Problem haben, fühlen Sie sich frei, in den Kommentaren unten zu fragen.
Take Care
🇦 🇱 🇱 🇦 🇭 -🇭 🇦 🇫 🇮 🇿
🅼︎🅰︎🆈︎ 🅶︎🅾︎🅳︎ 🅿︎🆁︎🅾︎🆃︎🅴︎🅲︎🆃︎ 🆈︎🅾︎🆄︎.
This report was published via Actifit app (Android | iOS). Check out the original version here on actifit.io




Hello @glimpsytips
I think You worked hard to create this post.
Stay safe and.!ALIVE
@glimpsytips! You Are Alive so I just staked 0.1 $ALIVE to your account on behalf of @masoom. (4/10)
The tip has been paid for by the We Are Alive Tribe through the earnings on @alive.chat, feel free to swing by our daily chat any time you want.

Good to see your new post, friend! Thanks for a really useful guide😊
Hi there, the #IAmAliveChallenge is about celebrating being alive despite all troubles, I can't see that in your post.
!ALIVE
Hello my respected senior Hive bee.
I tried to mention that though I faced all the troubles while writing this post. But I still enjoyed these troubles cause these are minor hurdles of life. But if still I could not explain these feelings of mine. Then I apologize that I could not manage wisely enough to explain my feelings.
Hope you got my theme. Next time I will try to be more elaborative.
Take Care. ALLAH HAFIZ
@glimpsytips! You Are Alive so I just staked 0.1 $ALIVE to your account on behalf of @flaxz.alive. (6/30)
The tip has been paid for by the We Are Alive Tribe through the earnings on @alive.chat, feel free to swing by our daily chat any time you want.

Congratulations @glimpsytips! You have completed the following achievement on the Hive blockchain and have been rewarded with new badge(s):
Your next target is to reach 60 posts.
You can view your badges on your board and compare yourself to others in the Ranking
If you no longer want to receive notifications, reply to this comment with the word
STOPTo support your work, I also upvoted your post!
Check out the last post from @hivebuzz:
Support the HiveBuzz project. Vote for our proposal!
Congrats on providing Proof of Activity via your Actifit report!
You have been rewarded 37.93 AFIT tokens for your effort in reaching 5109 activity, as well as your user rank and report quality!
You also received a 0.87% upvote via @actifit account.
Actifit rewards and upvotes are based on your:
To improve your user rank, delegate more, pile up more AFIT and AFITX tokens, and post more.
To improve your post score, get to the max activity count, work on improving your post content, improve your user rank, engage with the community to get more upvotes and quality comments.
Actifit is a Hive Witness. If you believe in our project, consider voting for us
Chat with us on discord | Visit our website
Download on playstore | Download on app store
FAQs | Text Tutorial | Video Tutorial
Dear @glimpsytips
Waiting for your post
STAY. !ALIVE
@glimpsytips! You Are Alive so I just staked 0.1 $ALIVE to your account on behalf of @masoom. (2/10)
The tip has been paid for by the We Are Alive Tribe through the earnings on @alive.chat, feel free to swing by our daily chat any time you want.
