Nikon D750 | ISO 100 | Sigma 28-70 mm @f/16 | 105 sec. exposure time
Good afternoon, friends of cultivated light art photography.
As you can already guess from the cover picture, today's article is about Halloween, creeps and horror. But if you're expecting the typical kitschy pictures with pumpkins and co, I'm afraid you're in for a disappointment. Kitschy Halloween pictures are not my cup of tea. By the way, I feel the same way about kitschy Christmas pictures. I'm more like "Team Grinch" there 😣.
Guten Tag, Freunde der gepflegten Lichtkunst-Fotografie.
Im heutigen Beitrag geht es, wie am Titelbild bereits zu erahnen ist, um Halloween, Grusel und Horror. Wer jetzt allerdings die typischen Kitschbilder mit Kürbis und Co. erwartet, den muss ich leider enttäuschen. Kitschige Halloween Bilder sind überhaupt nicht mein Fall. Ähnlich verhält es sich übrigens bei mir mit kitschigen Weihnachtsbildern. Da bin ich eher "Team Grinch" 😣.

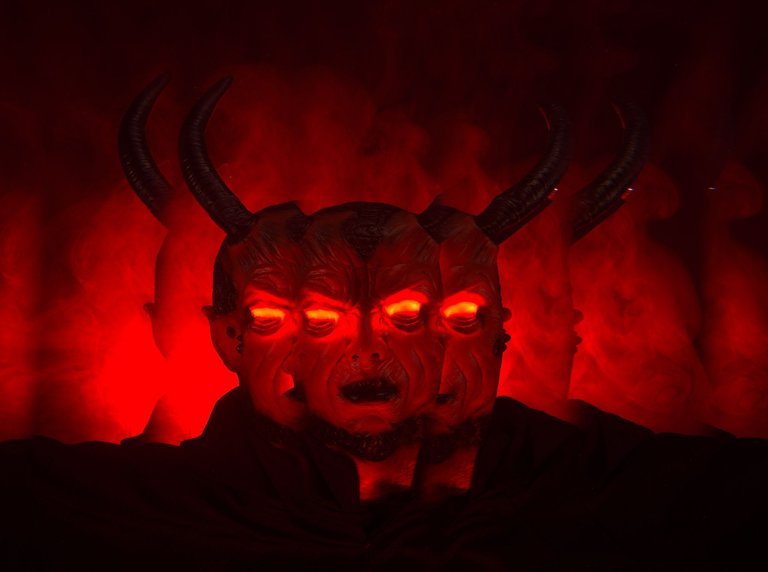
The cover image was taken in my studio. Once again, I used a cheap and willing model who not only keeps still during the exposure, but also doesn't talk. Very pleasant! I bought the devil with the horns from a trusted Asian overseas. When I started to set up the set for it, I noticed that the latex mask with the horns was not very stable. The face fell in and the horns were hanging somewhere. In between, the good devil looked more like a bull. So I had to use Udo, the dead skull. I stuffed the horns with cotton wool. I placed the dead skull with the mask on a tripod. To cover it up, I had to give the nice devil a black cape. I created the broad shoulders with styrofoam in the cape. Before, the fellow looked a bit starved.
Das Titelbild entstand in meinem Studio. Zum Einsatz kam wieder ein billiges und williges Model, was während der Belichtung nicht nur still hält, sondern auch nicht redet. Sehr angenehm! Den Teufel mit den Hörner habe ich käuflich bei einem Asiaten meines Vertrauens in Übersee erworben. Als ich angefangen habe das Set dafür einzurichten, bemerkte ich, dass die Latexmaske mit den Hörner nicht besonders stabil war. Das Gesicht viel ein und die Hörner hingen irgendwo. Zwischendurch sah der gute Teufel eher aus wie ein Stier. Also musste Udo, der tote Totenkopf ran. Die Hörner habe ich zusätzlich mit Watte ausgestopft. Den toten Todenkopf mit der Maske habe ich auf einem Stativ platziert. Um dieses zu verdecken, musste ich dem netten Teufel noch einen schwarzen Umhang verpassen. Die breiten Schultern habe ich mit Styropor im Umhang erzeugt. Vorher sah der Bursche etwas verhungert aus.
Behind the scenes
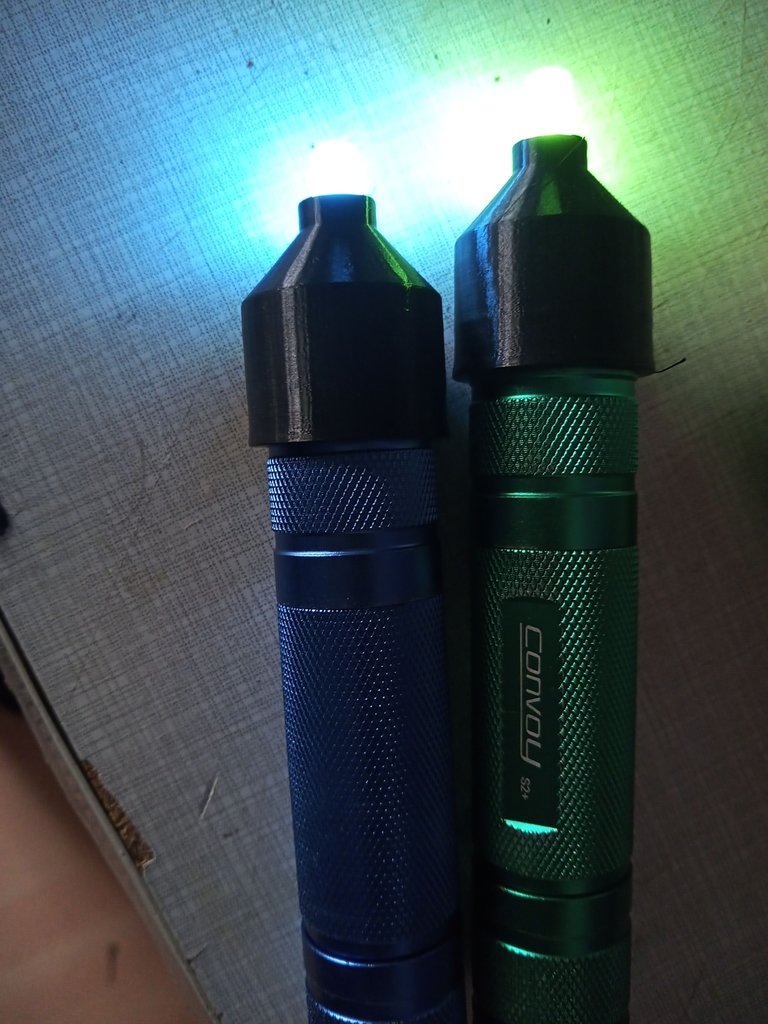
I created the diffuse light with a red torch and some fog. For the eyes I painted with a small "light pen". The attachment goes on the torch. Again, I thank @Lichtkunstfoto for the great attachment.
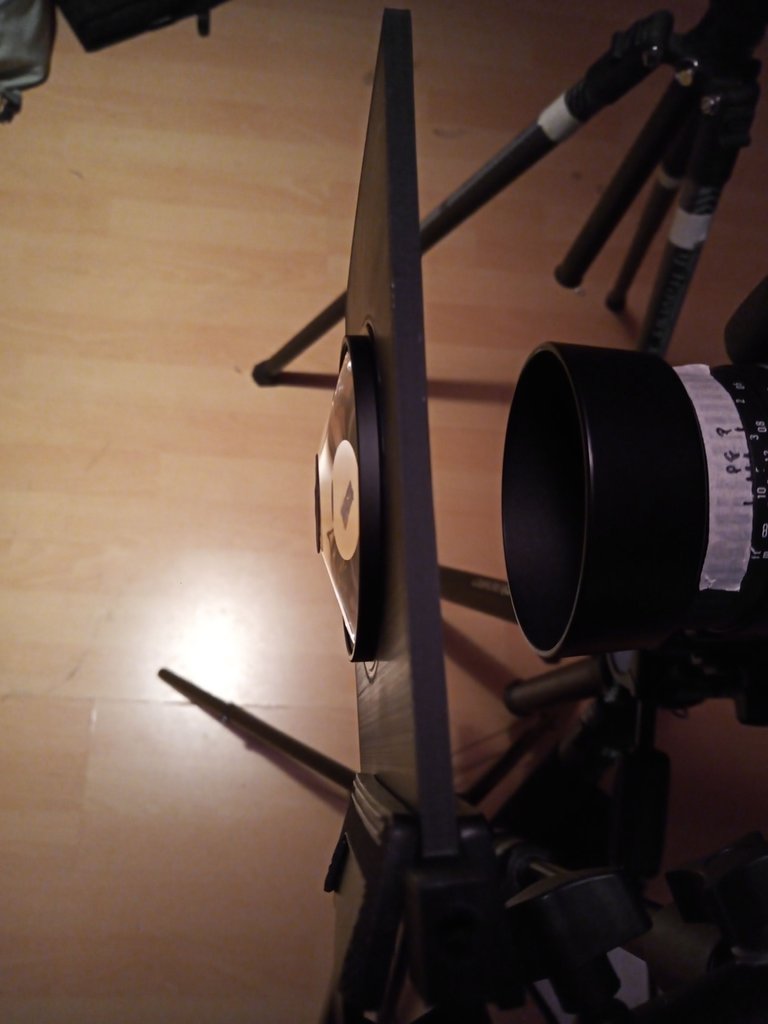
To get the devil into the frame several times, I used a prism with lines. In the example picture you can see how I placed the prism in front of the camera. Normally you just screw the prisms onto the lens, as long as the prism has the right diameter. @lichtkunstfoto kindly printed me a holder for the prism. This gives me more leeway and allows me to vary the distance to the lens. Likewise, I can place the prism more to the left and right, as well as up and down, depending on what effect I need for my image. What I have now touted as an advantage was the biggest challenge for the picture with the devil. I wanted to have a certain symmetry in the picture. In the middle the whole devil, on the left and right only one half of the face. What a fumble, but after what felt like an eternity and a few test pictures, everything was aligned.Das diffuse Licht habe ich mit einer roten Taschenlampe und etwas Nebel erzeugt. Für die Augen habe ich mit einem kleinen "Lichtstift" gemalt. Der Aufsatz kommt auf die Taschenlampe. Auch hier danke ich @Lichtkunstfoto für den tollen Aufsatz.
Um den Teufel mehrfach ins Bild zu bekommen, habe ich ein Prisma mit Linien benutzt. In dem Beispielbild seht Ihr wie ich das Prisma vor der Kamera platziert habe. Normalerweise schraubt man die Prismen einfach auf das Objektiv, sofern das Prisma den richtigen Durchmesser hat. @lichtkunstfoto hat mir freundlicherweise eine Halterung für das Prisma gedruckt. Dadurch habe ich mehr Spielraum und kann den Abstand zum Objektiv variieren. Genauso kann ich das Prisma mehr nach links und recht, sowie nach oben und unten platzieren, je nach dem was ich für einen Effekt für mein Bild benötige. Was ich hier jetzt als Vorteil angepriesen habe, war für das Bild mit dem Teufel die größte Herausforderung. Ich wollte eine gewisse Symmetrie im Bild habe. In der Mitte den ganzen Teufel, links und rechts jeweils nur eine Gesichtshälfte. Was für einen Fummelei, aber nach einer gefühlten Ewigkeit und einigen Testbildern war alles ausgerichtet.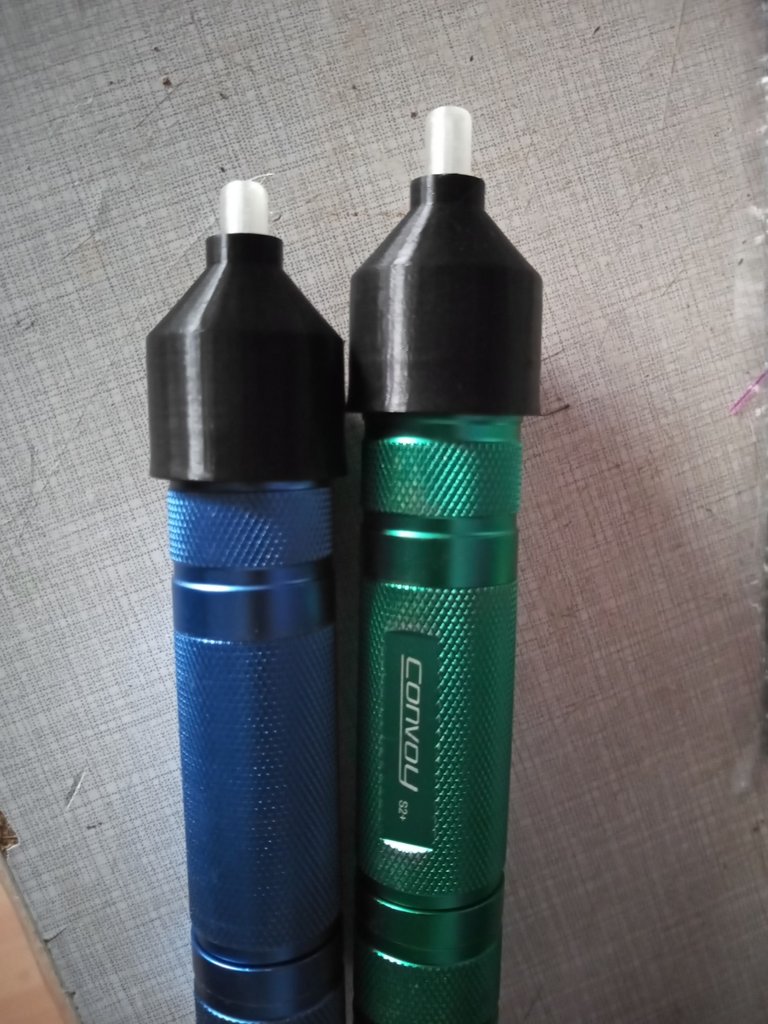
(Behind the scenes)
(Behind the scenes)
Nikon D750 | ISO 100 | Sigma 28-70 mm | 211 sec. exposure time
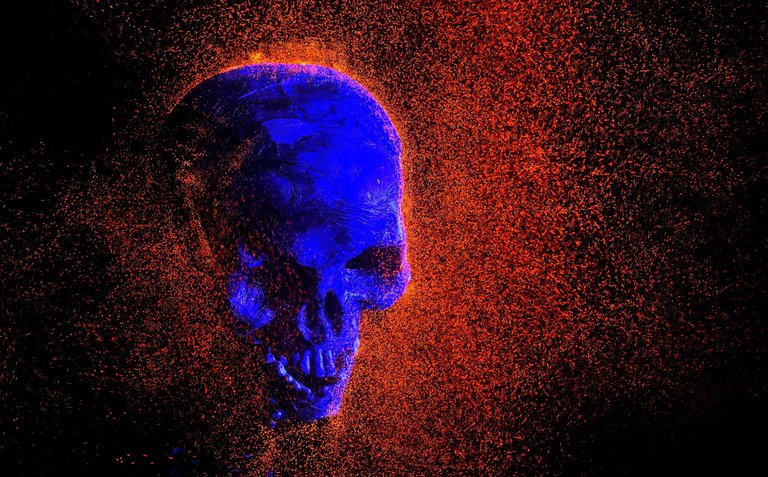
I had already introduced you to Udo the dead skull. For this shot, I only needed a blue Convoy S2+ and a black fibre-optic duster with a Ryu's torch, orange colour filters and a very fast stroboscope frequency. The slow movement of the fibre optic duster then creates these "dots" rather than strokes or light trails. After a few rounds of practice, I found out how fast/slow I could/must move the fibre-optic duster.
Udo den toten Totenkopf hatte ich euch ja bereits vorgestellt. Für dieses Bild benötigte ich lediglich eine blaue Convoy S2+ und einen schwarzen Glasfaserwedel mit einer Ryu´s Taschenlampe, orangenen Farbfilter und einer sehr schnellen Stroboskop-Frequenz. Durch die langsame Bewegung des Glasfaserwedels entstehen dann diese "Punkte" und keine Striche oder Lichtspuren. Nach ein paar Übungsrunden habe ich dann auch herausgefunden, wie schnell/langsam ich den Glasfaserwedel bewegen darf/muss.
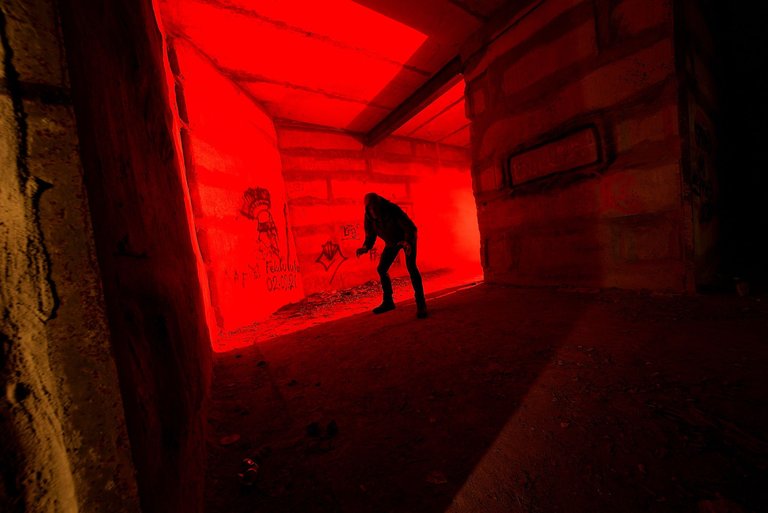
Nikon D750 | ISO 100 | Laowa 12 mm @f/8 | 103 sec. exposure time
Encounter with a zombie
Last year, when I was exploring the area around Berlin with @lichtkunstfoto and Hans, we encountered this strange creature in a corridor of an old aircraft hangar. This kind of zombie was not very friendly towards us. So I quickly took a picture and then we took to our legs and escaped. You can see in the picture that he was already in attack position, so we didn't think twice and ran away.
Begegnung mit einem Zombie
Als ich im letzten Jahr mit @lichtkunstfoto und Hans die Gegend um Berlin unsicher gemacht habe, begegneten wir in einem Gang eines alten Flugzeughangars diese seltsame Kreatur. Diese Art Zombie war uns nicht sehr freundlich gesinnt. Also habe ich schnell ein Bild gemacht und dann haben wir die Beine in die Hand genommen und sind geflüchtet. Im Bild zu erkennen, er war bereits in Angriffsposition, da haben wir nicht lange überlegt und sind abgehauen.
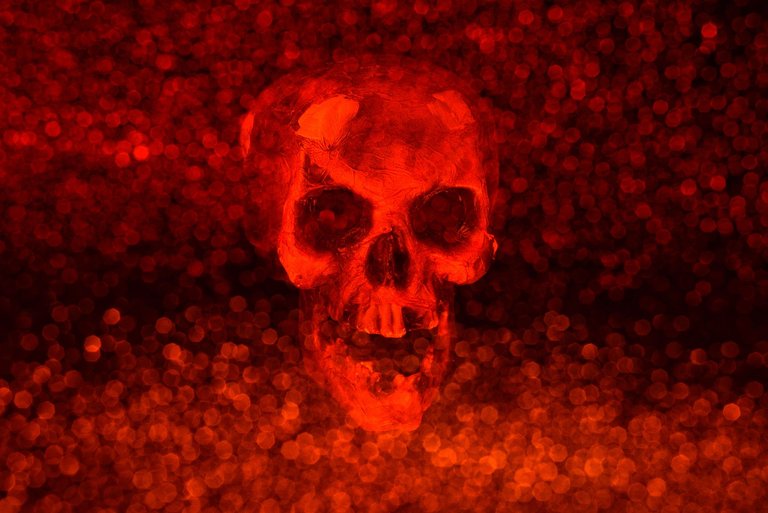
Nikon D750 | ISO 100 |
Laowa 100 mm Macro @f/ 8 & f/ 16 | 129 sec. exposure time
Udo in hell
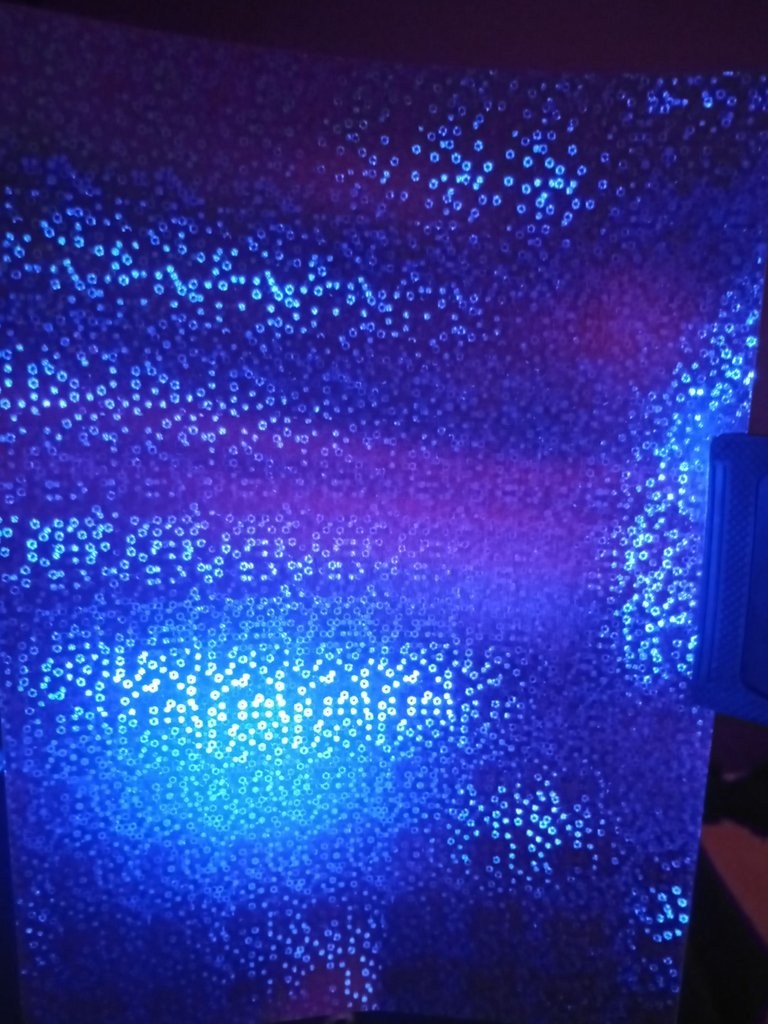
Here is another picture with Udo in his complete ugliness. Two tripods and my Laowa 100 mm macro were used for the image. In the first set (tripod) I lit the skull from the side, with an Emisar D4K and a colour filter. Once I was happy with the light, I covered the lens and mounted the camera on the second tripod. Before I started the exposure, I had already aligned my effects paper (see image below) with the light in front of the camera. By using the macro lens, this dreamlike bokeh is created, which you can see in the image.
Because I had aligned everything well in advance and, for once, did not make any mistakes after starting the exposure, the picture was ready after the first attempt.
Udo in der Hölle
Hier noch ein Bild mit Udo in seiner kompletten Hässlichkeit. Für das Bild kamen zwei Stative zum Einsatz und mein Laowa 100 mm Macro. Im ersten Set (Stativ) habe ich den Totenkopf seitlich, mit einer Emisar D4K und einem Farbfilter beleuchtet. Nachdem ich mit dem Licht zufrieden war, habe ich das Objektiv abgedeckt und die Kamera auf dem zweiten Stativ montiert. Bevor ich die Belichtung gestartet habe, hatte ich bereits mein Effektpapier (siehe Bild unten) mit dem entsprechenden Licht vor der Kamera ausgerichtet. Durch den Einsatz des Macroobjektivs, entsteht dann dieses traumhafte Bokeh, was man im Bild sieht.
Dadurch, dass ich im Vorfeld alles gut ausgerichtet habe und nach dem Start der Belichtung ausnahmsweise mal keinen Fehler gemacht habe, war das Bild nach dem ersten Versuch im Kasten.
Behind the scenes
Effect-paper / Effektpapier
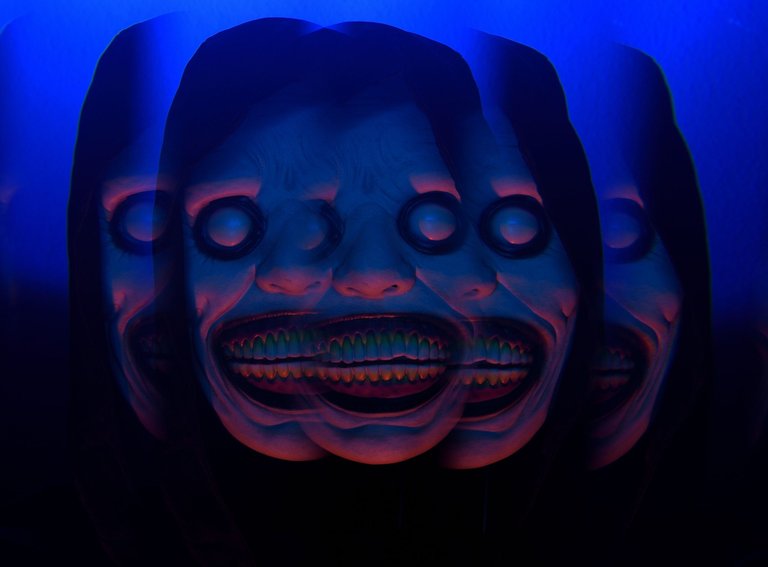
The last shot in today's post was also taken in my studio and with a prism in front of the camera. The rest of the picture was relatively easy to realise. Blue light from behind, from a Convoy S2+ and some fog to soften the light. And orange light from below from an Emisar D4 with colour filter. One of my fastest light painting shots with 6 seconds exposure time.
Das letztes Bild des heutigen Beitrags entstand ebenfalls in meinem Studio und mit einem Prisma vor der Kamera. Der Rest im Bild war relativ einfach umzusetzen. Blaues Licht von hinten, aus einer Convoy S2+ und etwas Nebel, um das Licht weicher zu machen. Und orangenes Licht von unten aus einer Emisar D4 mit Farbfilter. Eines meiner schnellsten Lightpainting-Bilder mit 6 Sekunden Belichtungszeit.
Nikon D750 | ISO 100 | Sigma 28-70 mm @f/ 16 | 6 sec. exposure time
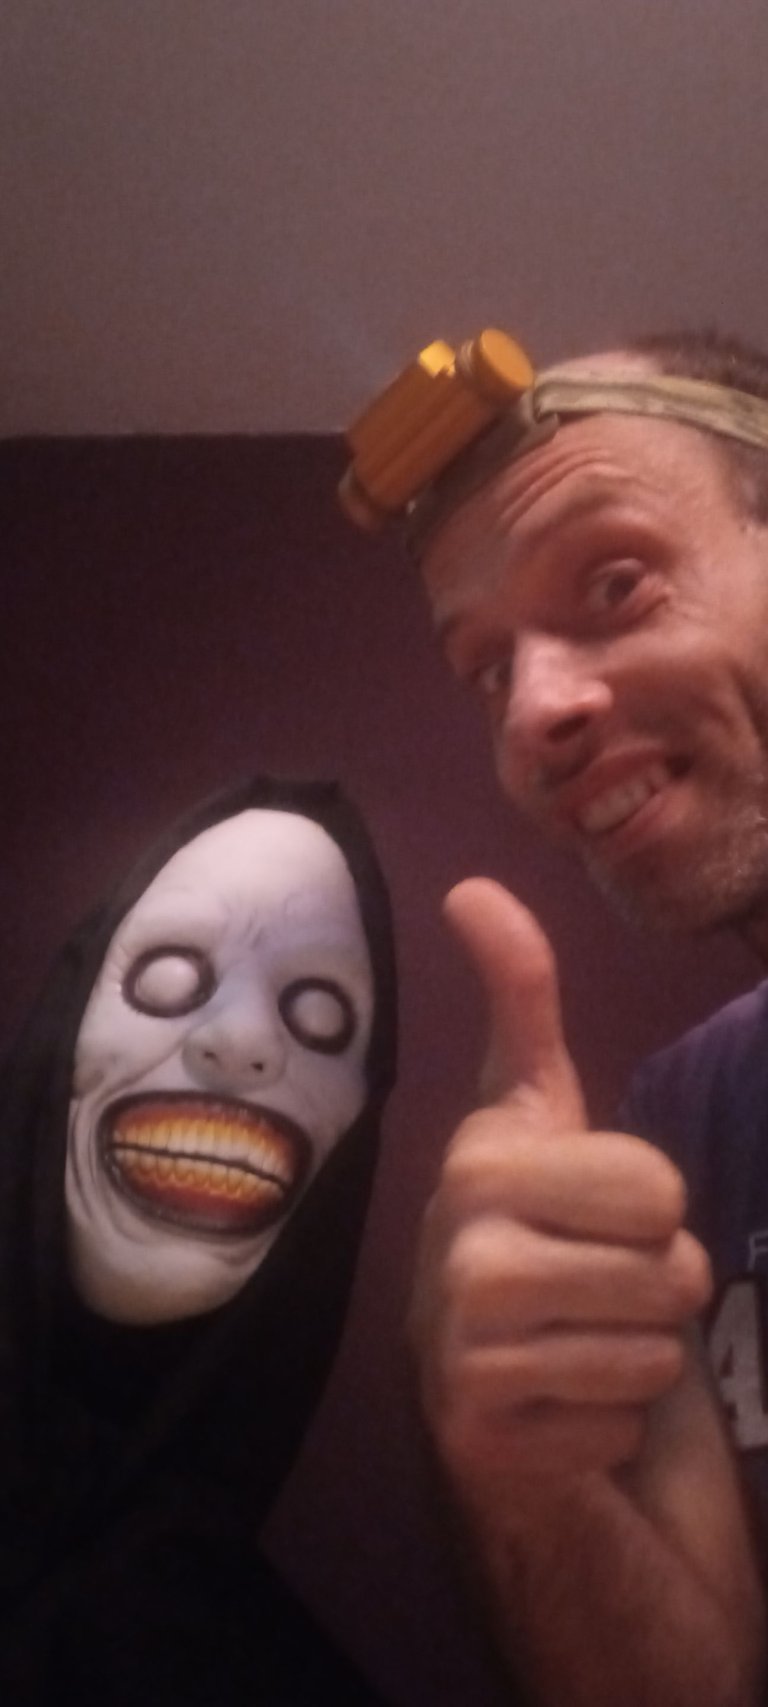
Selfie with my Model 😎
By the way, the creepy Grin Man and I have become friends. We decided to go out on 31 October and scare little kids in the neighbourhood.
We are already at the end of the first part. Thank you for reading to the end. The second part will come soon, tomorrow or so.
Der gruselige Grinsemann und ich sind übrigens Freunde geworden. Wir haben beschlossen am 31.10. mal loszuziehen und kleine Kinder in der Nachbarschaft zu erschrecken.
Wir sind schon wieder am Ende des ersten Teils. Vielen Dank wer bis zum Ende gelesen hat. Der zweite Teil kommt zeitnah, morgen oder so.

Created in real time captured to the camera in one single photographic frame. Nothing is added or removed in post processing. #nophotoshop #AIfree

Stepko Light Painting Photography
My Name is Stefan aka Stepko, I am a Lightpainting Artist, currently based in Hannover, Germany.
Darkness is my canvas and I love to create artworks out of light.
If you like my art you can join me on
Facebook , Flickr and Twitter for more Light Painting Photography.

You like the art of light painting and want to see more amazing shots, then visit these Artists, they will blow your mind: @fadetoblack @martbarras @fastchrisuk @lichtkunstfoto @dawnoner @oddballgraphics @gunnarheilmann @candelart @marlasinger666 @ryuslightworks @maxpateau @yo-hoho @lacelight @ryuslightworks @maximepateau @neilru75 @lightstabeu and follow them and/or give them an upvote.
AAAAAHHHH ja wie geil .. I like Udo!
Compliance is everything, when it comes to models!
😁 Der Udo ist perfekt, hält auch immer schön still.
Sehr geil mein Lieber. "Ein billiges, williges Model, dass nicht redet." 😂😂😂
Guten Morgen und vielen Dank. Ja solch ein Model macht die Arbeit viel einfacher. Wobei Hans auch sehr professionell ist und redet kein dummes Zeug, wenn er in unseren Bildern mitwirkt.
Das stimmt wohl. 😊
Wie immer lieferst du perfekt umgesetzte Bildideen @stepko ! Gratulation! Ich weiß nicht wie es dir geht, aber wenn ich das letzte Bild auf meinem Monitor betrachte fange ich an zu schielen. 🤪 Die Komposition und die Farbwahl ergeben diesen Effekt. Ganz schön gruselig. 😱
Vielen Dank für die Blumen 🤗.
Das letzte Bild war mehr Fummelarbeit als ich gedacht habe. Kamera, Prisma und Model auf Linie zu bringen war gar nicht so einfach. Das Licht habe ich etwas verändert, verglichen mit dem Licht für das andere Bild mit der Grinse-Fratze. Kann sein, dass das diesen Effekt ergibt.
WOW!... great work @stepko friend!
!discovery shots
!VSC
A big Thank you for your support @jlinaresp mate. I am very glad that you like it and it motivates me very much. 🤓
@jlinaresp has sent VSC to @stepko
This post was rewarded with 0.1 VSC to support your work.
Join our photography communityVisual Shots
Check here to view or trade VSC Tokens
Be part of our Curation Trail
@jlinaresp ha enviado VSC a @stepko
Éste post fue recompensado con 0.1 VSC para apoyar tu trabajo.
Únete a nuestra comunidad de fotografía Visual Shots
Consulte aquí para ver o intercambiar VSC Tokens
Se parte de nuestro Trail de Curación
This post was shared and voted inside the discord by the curators team of Discovery-it in collaboration with Visual Shots community.
Discovery-it is also a Witness, vote for us here
Delegate to us for passive income. Check our 80% fee-back Program