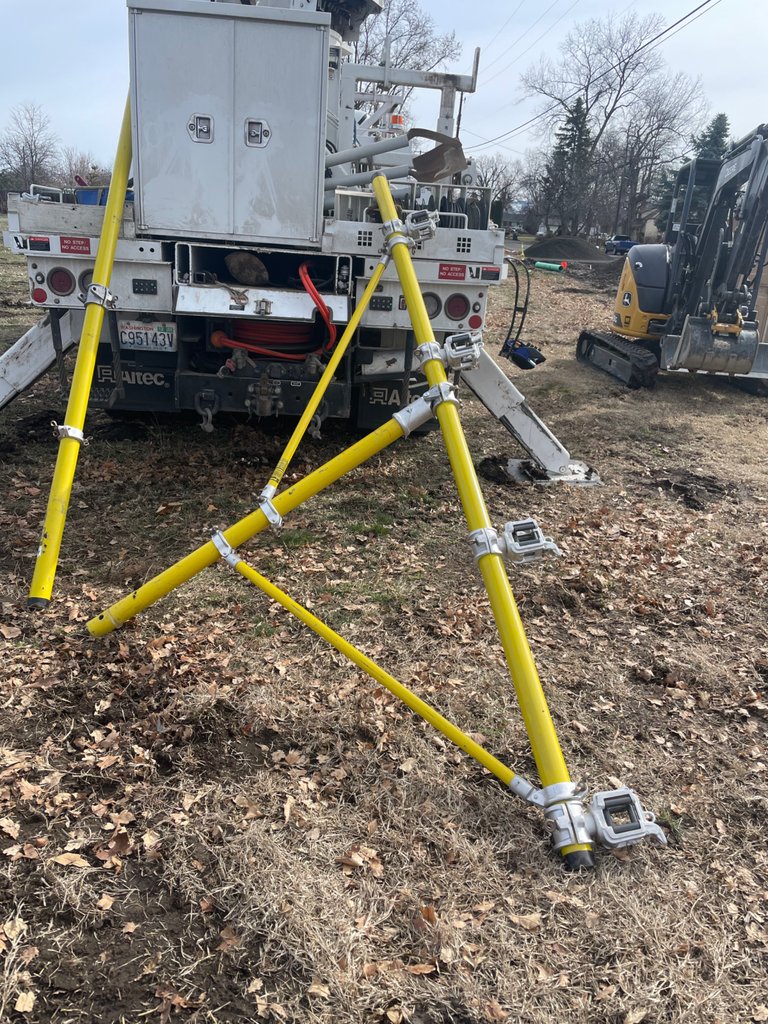
There are many different ways to change out a power pole while keeping the electricity flowing and the lights on. We call it a Hot Pole Changeout. Every pole presents different challenges and obstacles we have to overcome and adapt to. The type of pole top framing that is used is a big one, when determining how to change out a pole. Access… how many trucks can we get in a good position to do the pole change out. Are we going to have to get some guys in their hooks? Spread the wire out and set the pole in between the energized conductors? Up-strain, Down-strain, side-strain… What about the adjacent poles?? Are they old and rotten? Are the insulator ties good? There is a whole checklist of things we we get together and go over before changing out a pole hot. This time around we decided the best bet was to use our 10 foot fiberglass tree to hold all the conductors up and out of the way. If your truck can get positioned right this things works awesome!!
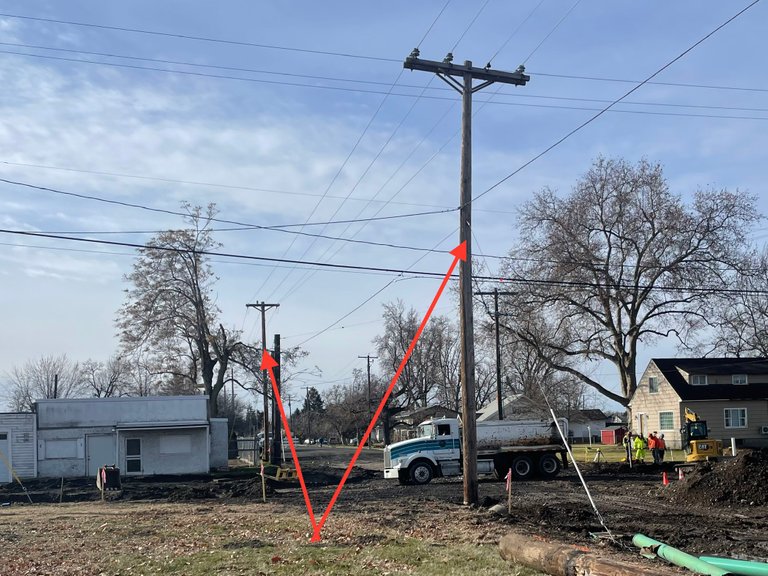
Around here they seem to be obsessed with putting in roundabouts. There is one in town that is like an oblong egg shape thing that is really small. If nobody is around I typically drive right through the middle. Anyway they are installing a new roundabout and we need to move a couple poles out of the way. One pole needs to move 8 feet to the north and 2 feet to the east. The other just needed to move 4 feet to the east.
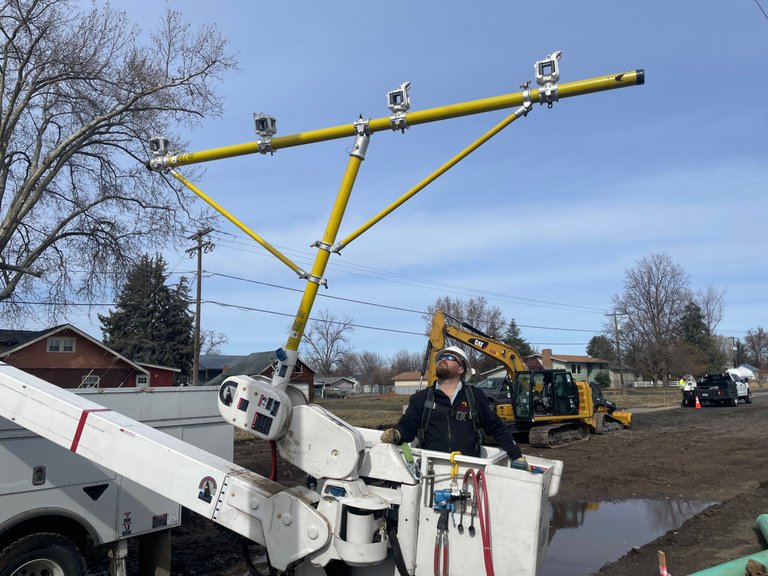
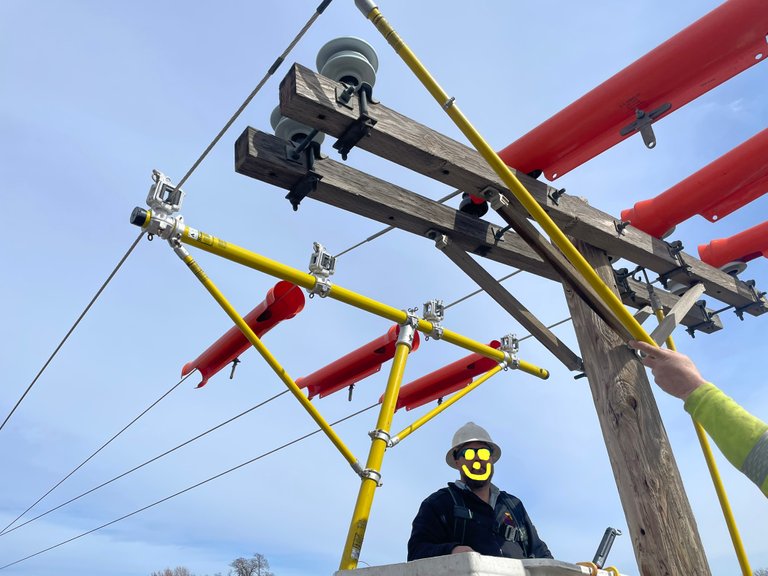
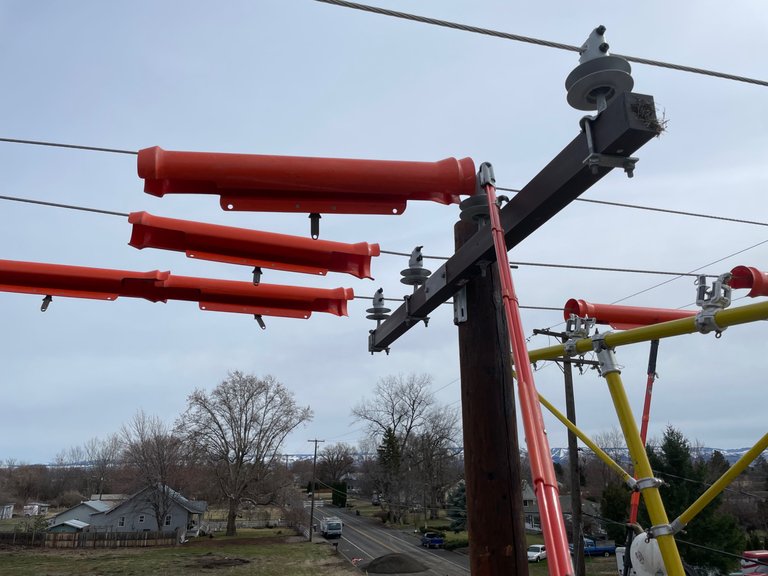
The Tree, as we Lineman call it, has 4 conductor supports on it. You can adjust them side to side in order to line them up perfectly under the conductors. If they are a little off when trying to get it right on the ground, they can be loosened, moved and tightened back down with a hot stick in the air. For those that don’t know a Hot Stick is a foam filled fiberglass stick we use to work on energized conductors. There are a million different attachments that can go on the end depending on what you are trying to accomplish. They are tested at 75,000 volts per foot, even when wet. The Tree is tested the same way every year.
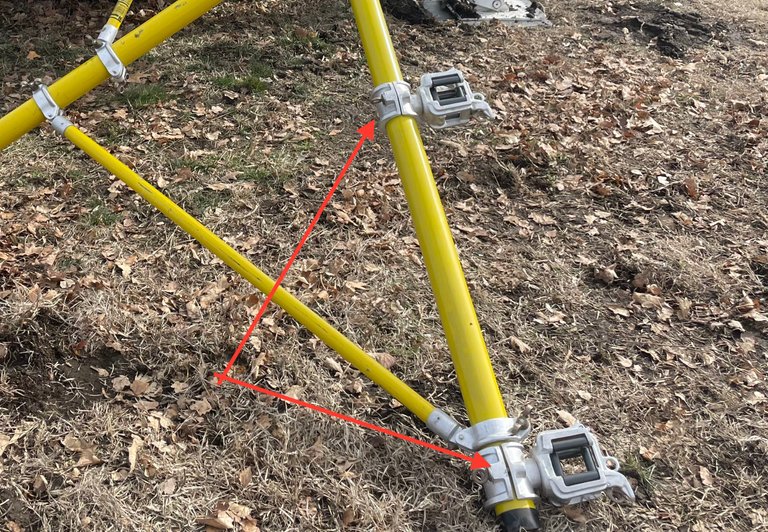
Each of these conductor supports has rollers on all 4 sides. This allows the Tree to slide along the conductors when moving them. There is a spring loaded latch on the top that opens up by pulling on a ring. Once the conductor is in the support, you close the latch. This keeps the conductor in the support even if there is a significant amount of up-strain.
Our bucket is equipped with a jib and winch line, also known as a material handler. It’s rated at 2,000 pounds max depending on your boom angle. The winch line attachment gets removed and the Tree goes in it’s place. Our jib has 2 hinge points, where a lot of them only have one. It can also be unpinned and rotated at 45* angles and re-pinned into place.
The old pole had double arms, double pins, and double ties. We use plastic covers to cover and conductors that we are not working on. If one of the ties was ti get loose and contact the other conductor… BOOOM. Big Ol’ Fireball!!
Taking the conductors ties off can be a bit of a pain in the ass sometimes. We use a few different attachments to install and remove conductors ties. That might be a something to post about later…
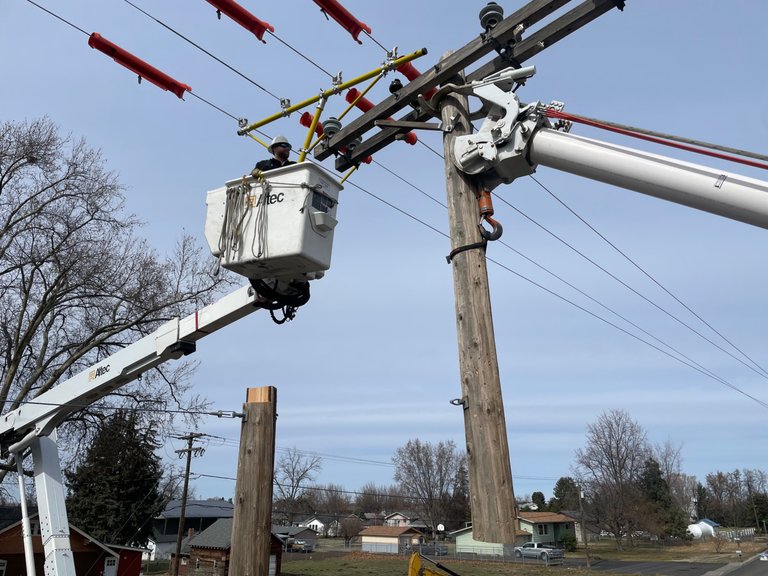
After getting one side untied, we positioned the tree under the conductors and got them all in the conductor supports. The adjacent poles were not framed the same way, so it out all kinds of weird angles of tension on the wire. One had down-strain, one had up, and the other 2 had side strain in opposite directions… if that makes any sense… lol
As you can see this one floated off to the side of the insulator once we untied it
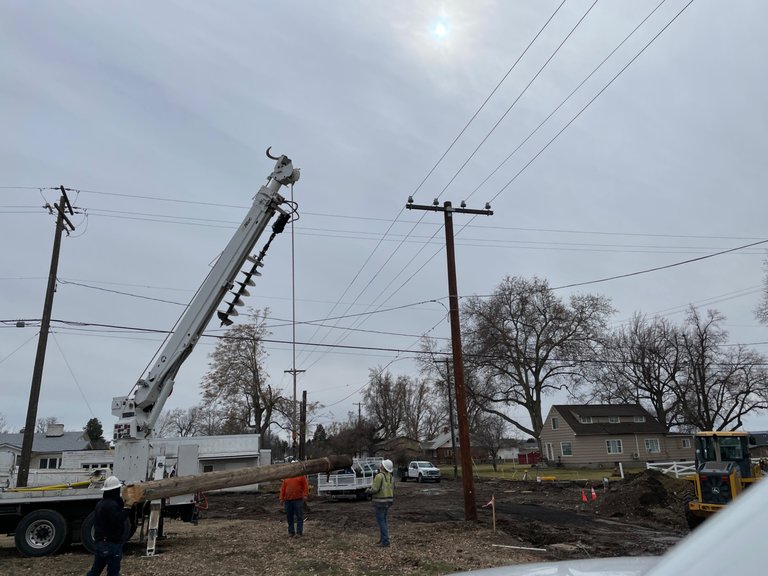
Once all the conductors were untied from the old pole and in the Tree, we needed to get rid of the old pole top. First we lifted and moved all the conductors out of the way with them in the Tree. Then we grabbed the top of the pole with the grabbers of the line truck and used the winch line to hold the weight. Then simply the pole with a chainsaw and fly that thing out and to the ground.
Having the conductors covered and moved out of the way, us Lineman in the air help guide the pole into place. Once in the hole, it is straightened up using a plumb-bob then the hole is backfilled and compacted with a hydraulic tamp
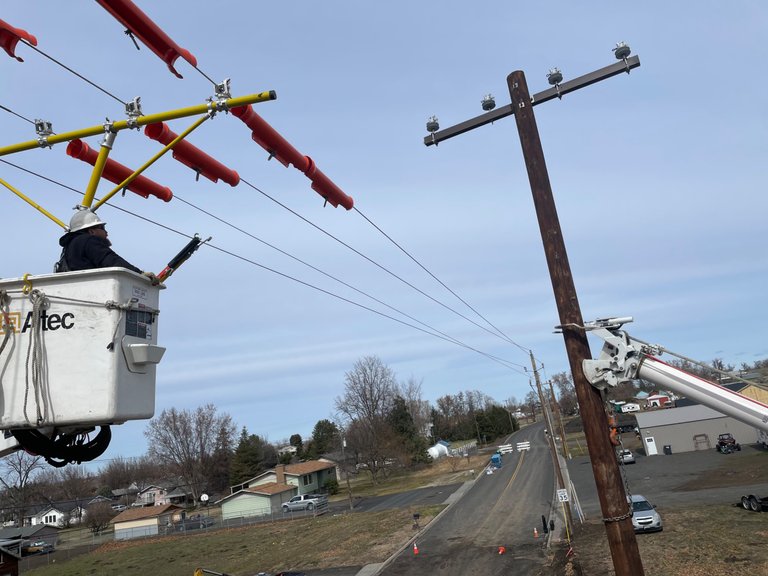
Once the pole is set, it’s time to fly the conductors into place on the new pole. Instead of porcelain insulators and conductor ties, we have been buying these new plastic insulators. They use 2 plastic bolts to clamp down on the conductor to hold them in place. They have an eye on the end that we can put a hot stick in and tighten them down. Once they are at proper torque the plastic eye breaks off leaving a hex head if you ever need to remove the conductor from the insulator at a later time. Let’s just say, tying the conductor into the new pole was a million times faster than untying from the old. It almost feels like we are cheating.
Clean up our mess, put the tree away and onto the next pole.
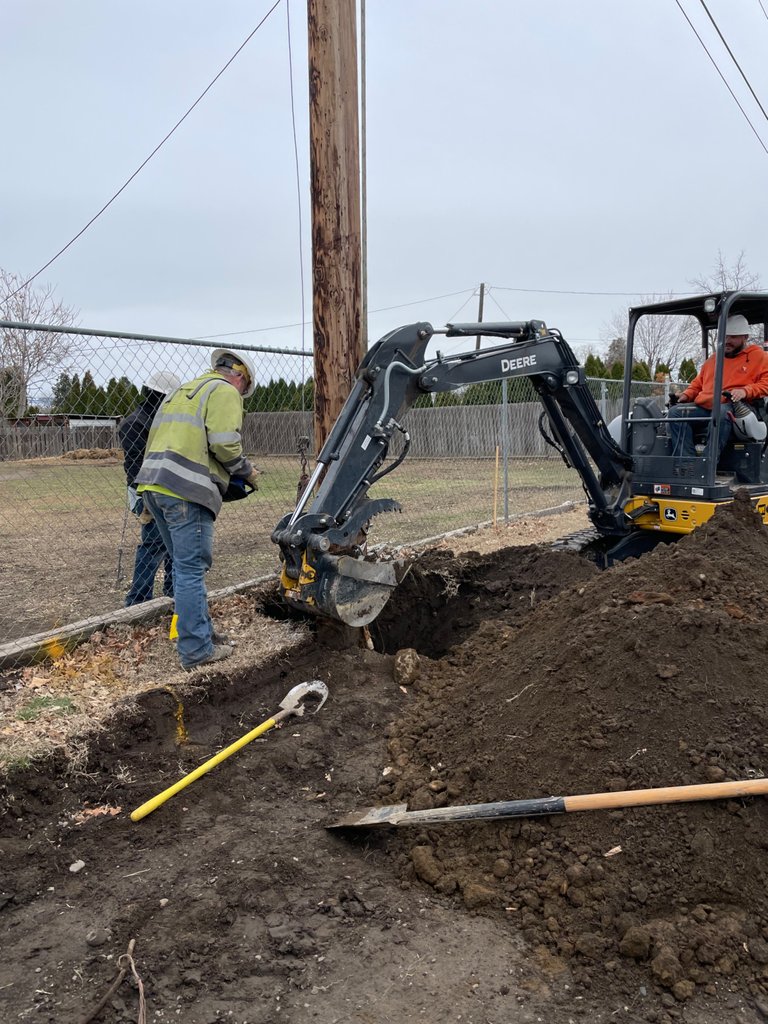
We put our heads together and figured out the easiest and safest way to move this pole over 4 feet was to dig a trench next to it and slide it over. It’s actually not that simple but essentially what we did.
First we grabbed the pole top with the line truck and ran the winch line down and grabbed the butt of the pole with a chain. This way we have control of both the top and bottom of the pole.
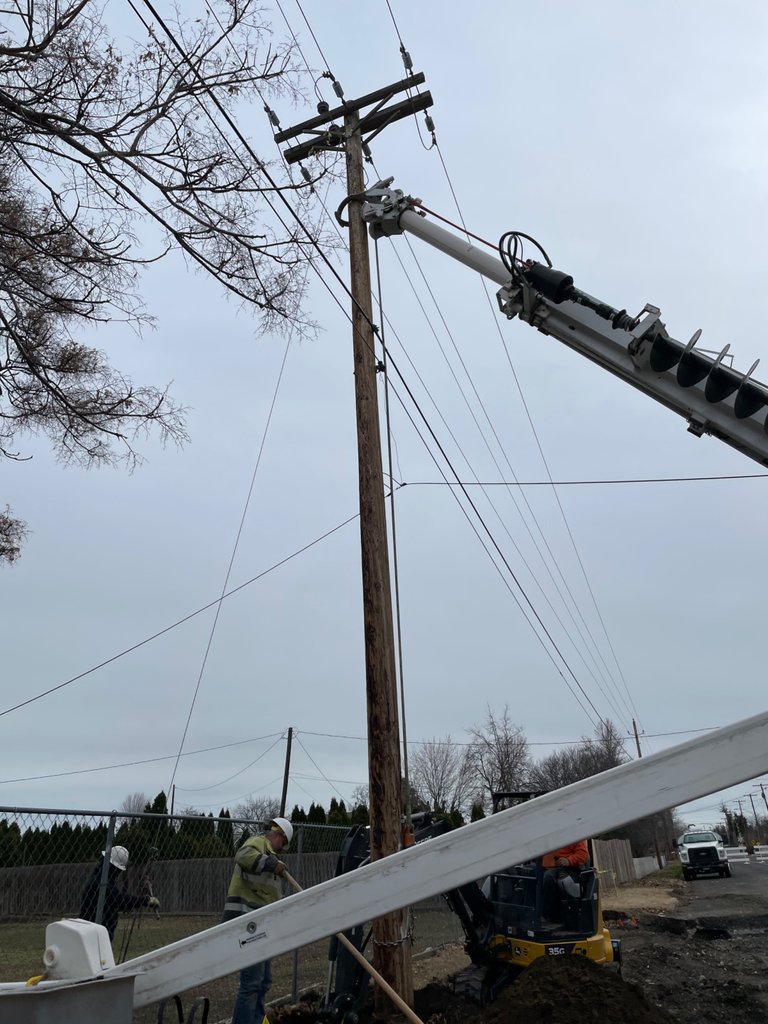
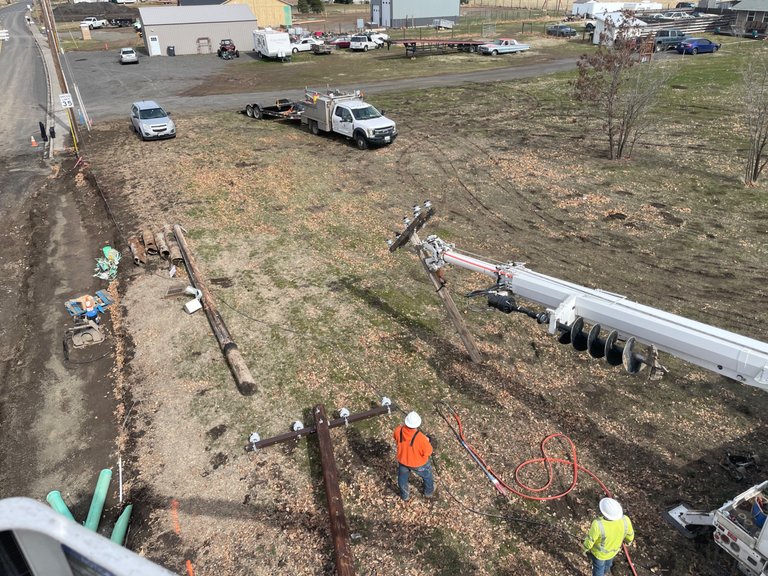
Using the mini excavator we dug down next to the pole all the way to the bottom of the pole and to the east where it needed to be moved.
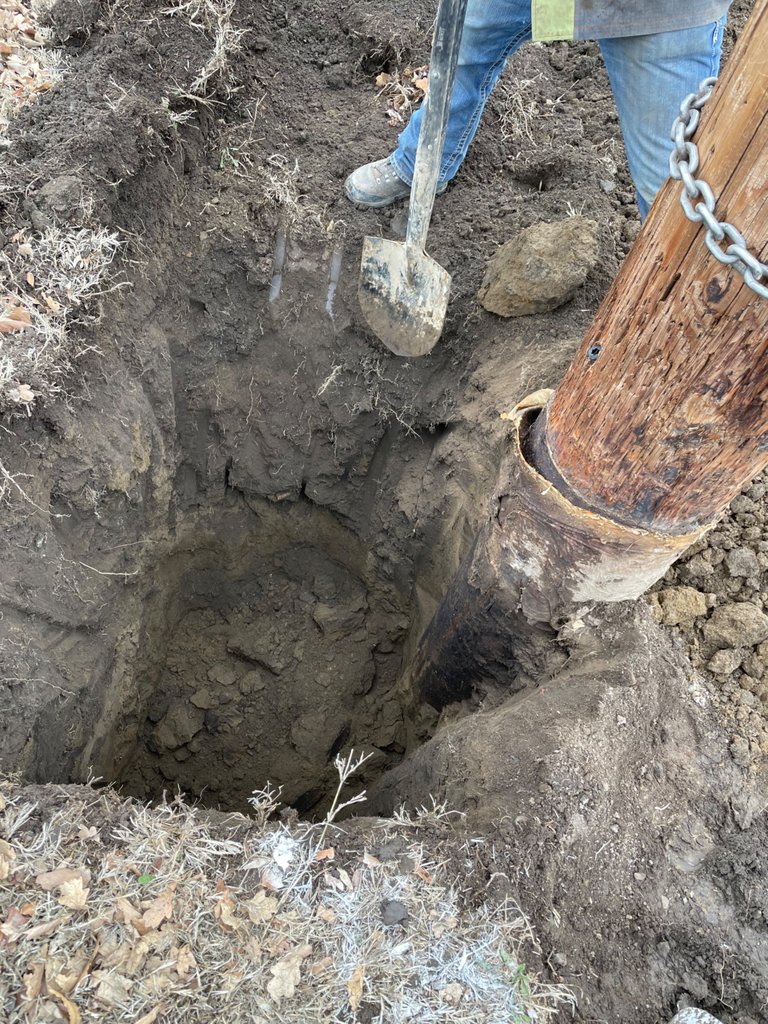
After scraping the off the dirt around the pole butt, we attached another chain to the bucket of the excavator. This allows us to move the pole in all directions in order to plumb it up. Then a little lift with the line truck to get the pole off the ground and move the whole pole with wire and all to its new location.
Since then top can only move east and west due to the wire, we had to move the butt of the pole around in order to make it straight. The line truck can straighten it east and west by lowering the boom or retracting it. Once the pole it plumb, we backfilled and compacted the dirt.

The first pole was a bit time consuming but the second one went real quick. Now that our poles are out of the way, let’s hope this roundabout doesn’t turn out like that other piece of junk they have in town. Lol
Another episode of A Day With a Lineman is in the books!! Thanks for stopping by and taking the time to see what Lineman do to install, maintain, and repair the electrical grid.

Your Random
Dose of...


y
This post was shared and voted inside the discord by the curators team of discovery-it
Join our Community and follow our Curation Trail
Discovery-it is also a Witness, vote for us here
Delegate to us for passive income. Check our 80% fee-back Program
That's why we love this community, we get to learn about all sorts of things that we never notice or think about. Thanks a luto for sharing!
One of my favorite shows was Dirty Jobs with Mike Rowe. If you haven’t seen it, it’s one to watch.

I would get electrocuted so fast trying to do this job.
Safety safety safety… all of our safety work procedures were written in blood.
“Let’s see if we do this..”
“Well we can’t do that because Ron is dead now”
That’s how it was back in the early days of Linework.
I was an electrician on the Apache helicopter back in the day and have shocked myself plenty of times.
It comes with the territory… lol
What kind of voltages did those bad boys use?
They use AC and DC, but some of the capacitors for the strobe lights can store crazy amounts of electricity. Those are the ones that you dont want to get shocked by, lol.
HAHAHA I bet!! There are capacitors on our 14,400 volt system that help during the high demand of river pumping stations. I hate messing with them, and when they go bad… it’s an explosion I would like to see from a distance. 🤣😂
Damn look at that big ol drill.. made my skid steer rental auger look like a toy.
I believe it’s a 24”. I’ve been around some 48” augers when doing big transmission poles. 16 feet deep!!! That’s a lot of dirt coming out of the ground.
Gosh, I feel like the trees in my area could use some replacements.
!discovery 37
One would be amazed at how strong they are despite their looks. Lol