Putting the power of PDF to the test
Shoutout to nuhmanpk on Github

In this article you will find:
- Introduction
- Example 1
- Example 2
- Example 3
- Example 4
Greetings to all. A long time without writing a post in the Coding Basics series. However, today all that will change. In the previous chapter, we saw one of the most used Python library management packages: PyPDF2.
From reading to joining and separating PDF files, making them preserve information, we can perform a large number of operations with this package. However, we still do not see the full capabilities of PyPDF2 and how it can be used in practice.
This is why we will go over some practical examples of using PyPDF2, so you can imagine how you can improve your experience when working with PDFs from non-graphical interfaces. If you want to know more about this, keep reading.
Example 1
Shoutout to Aspose Blog
For this first example, we will see a functionality that we did not explain previously, which however can be of great help if you want to be able to read your files correctly. This is rotateClockwise.
We are asked to design a program that prompts the user for a PDF file and specifies the name of the new file they want to create with the rotated content. In addition to this, we must indicate the rotation angle for the new file.
To clarify how rotateClockwise works is that it rotates the file clockwise according to a rotation angle that we give it as a parameter. If for example we used myfile.rotateClockwise(90), then the content of the page we obtained would be rotated 90 degrees clockwise.
Now, we know that to allow the user to enter information, we must use the input function with a str before making the request for a string strict for the files and int to indicate that they can only be numbers when we ask for the angle.
Then, based on the information in the inputs, we use open taking the information collected as the file name, both for the file we are going to read and where we want to write.
In order to see what we would do next, let's take a look at the code:
import PyPDF2

file_read = str(input('Enter the name of the file (Please include .pdf extension):'))
file_rotated = str(input('Create a name for your rotated file (Please include.pdf extension): '))
rotation = int(input('How much do you want to rotate the content? (Numbers only):'))


pdf_in = open(file_read, 'rb')
pdf_out = open(file_rotated, 'wb')

def rotate(pdf_in, pdf_out, rotation):
     try:
         pdf_reader = PyPDF2.PdfFileReader(pdf_in)
         pdf_writer = PyPDF2.PdfFileWriter()
         for page in range(pdf_reader.numPages):
             page = pdf_reader.getPage(page)
             page.rotateClockwise(rotation)
             pdf_writer.addPage(page)
         pdf_writer.write(pdf_out)
     except ValueError:
         raise Exception('You can only insert numbers into the rotation angle')
     except:
         raise Exception('Use the .pdf extension in both files')

rotate(pdf_in, pdf_out, rotation)

pdf_out.close()
pdf_in.close()
We can see that then, either through a function or directly, we create a reader that takes as a parameter one of the pdf names we requested, which will be the one we want to rotate.
Additionally, we create a writer and then, with a for loop for the number of pages in the file (which we can obtain with numPages from the reader), we will use getPage to obtain the page information and then with rotateClockwise, we rotate this and add it to the writer , a process that will be repeated for each page. Finally, the contents of the write are written to the new file with the write method.
Note: We use Try/Except to prevent an exception from being thrown if string or numeric values are not entered (A ValueError), adding another exception in case the .pdf extension is not entered.
Finally, we invoke the function with the file parameters and rotation that we collected at the beginning, ending by closing the input and output file.
So, if we have the following file:
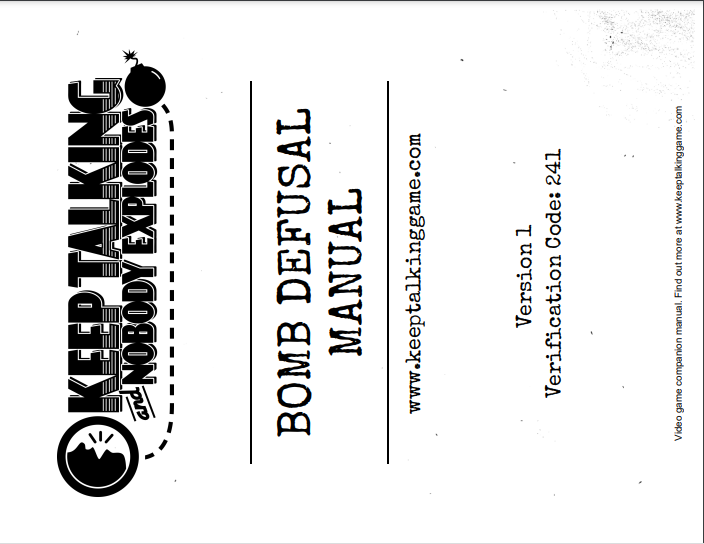
It looks like it's rotated. Just by rotating it 90 degrees clockwise, we would make it straight. Thus, running the program:
Enter the name of the file (Please include .pdf extension):Manualrotated.pdf
Create a name for your rotated file (Please include.pdf extension): Manualstraight.pdf
How much do you want to rotate the content? (Numbers only):90
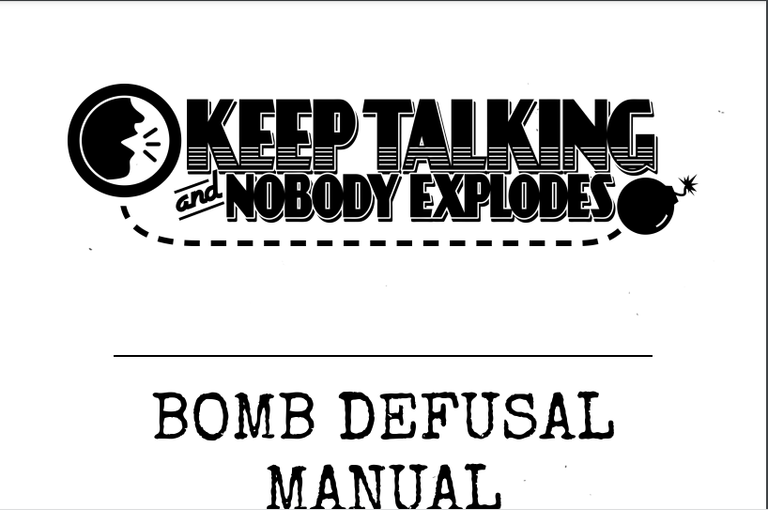
And looking at the new file, we'll see that it's straight.
Example 2
Shoutout to Semantic Scholar
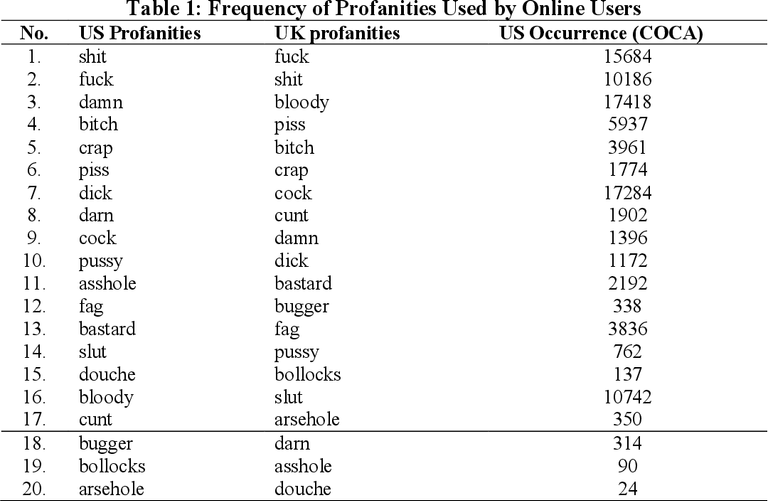
Following one of the examples that we applied in [previous editions](https://hive.blog/hive-196387/@jesalmofficial/regular-expressions-in-practice-examples-expresiones-regulares-en-practica-exercises-coding- basics-22) from coding basics, for this we will create a program that not only allows us to extract the text from any PDF file, but also censors bad words within it.
Remembering regular expressions, specifically the re module, we know that it has a function called sub, which is used to replace characters that match our regular expressions within a string. For example, if we have a string variable that has the content 'hellohowareyou' and we create a regular expression that has r'[]\b', using sub:
import re
regex = r'[*]\b'
text = 'Hello*how*are*you?'

final_text = re.sub(regex, ' ', text)

print(final_text)
We will have as a result:
>>> Hello how are you?
Now, if we apply this to an example that we will explain part by part:
import PyPDF2
import re

curse_file = str(input('Insert a file to remove the curse words (WARNING: Use .pdf extension at the end): '))
try:
     file_pdf = open(curse_file, 'rb')
     pdf_reader = PyPDF2.PdfFileReader(file_pdf)
     regex = r'\bFuck\b|\bfuck\b|\bShit\b|\bshit\b|\bDamn\b|\bdamn\b'
     for page in range(pdf_reader.numPages):
         page = pdf_reader.getPage(page)
         text = page.extractText()
         curse_words = re.sub(regex, 'BLEEP', text)
         print(curse_words, end=" ")
except:
     raise Exception('The file must have a .pdf extension at the end')
We see that as in previous examples, we ask the user to provide us with the name of the program, reminding them that it must have the name .pdf at the end, which if not met, an exception will be executed to remind us. Also, we will have another exception if the file does not exist.
Then, with the information provided, we create a PdfFileReader that opens the file and at the same time a regular expression that filters different words (We remember that \b is used to recognize if characters are at the end or beginning of a string and | works like an 'or' operator).
Through a for loop for each page, we obtain them, extract the text with extractText() and then, through sub, using the regular expression and the extracted text as parameters, we replace the bad words with a 'BLEEP' and finally , we print the resulting string:
>>>
Insert a file to remove the curse words (WARNING: Use .pdf extension at the end): ExampleCurseWords.pdf

Good Morning America, Hows everyone doi
BLEEP! BLEEP! BLEEP! Id just hit
my
pinky
against
the desk, sorry for that.
Example 3
Shoutout to PDFfiller
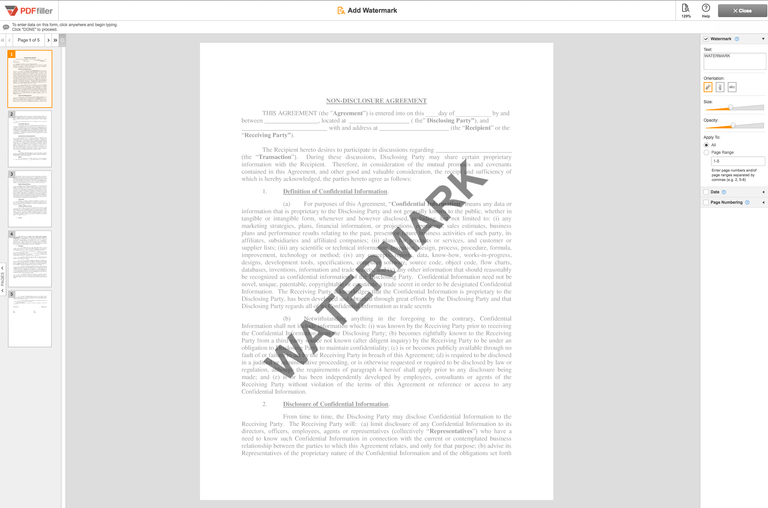
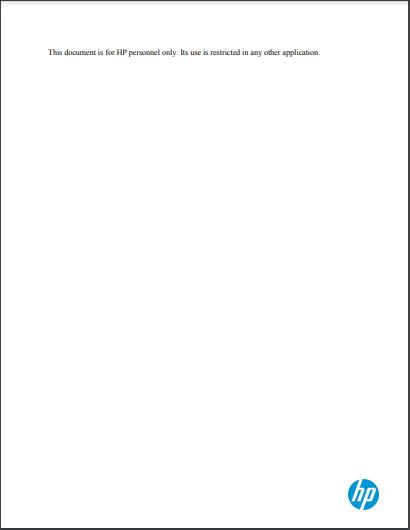
One of the worst things that can happen to your work, projects and anything you write in a PDF file is that someone copies them and does not give you credit for their authorship. This is why adding a watermark is essential.
For this, PyPDF2 brings an excellent method that allows us to mix the content of two pages into one: mergePage. For this, we only need to create two instances of the PDFFileReader class, one for each PDF of which we want to merge a page. Then, using getPage, we take the two pages we want to merge and with mergePage, we join them both.
You see, mergePage is used as the method of one of the two pages we want to merge, while the parameter will be the other page. For example:
myfile = created_file.getPage(0)
mysecondfile = readfile.getPage(0)
myfile.mergePage(mysecondfile)
Thus, we would combine both pages. If we see this applied to our example:
import PyPDF2
content_file = str(input('Insert the name of the pdf where your content is: '))
watermark = str(input('Insert the name of the pdf where your watermark is: '))
merged_file = str(input('Insert the name of the new file where you want to put the merged file: '))

def creating_writer(content_file, watermark, merged_file):
     input_file = open(content_file,'rb')
     input_pdf = PyPDF2.PdfFileReader(input_file)
     watermark_file = open(watermark,'rb')
     watermark_pdf = PyPDF2.PdfFileReader(watermark_file)
     watermark_page = watermark_pdf.getPage(0)
     output = PyPDF2.PdfFileWriter()
     for page in range(input_pdf.numPages):
         pdf_page = input_pdf.getPage(page)
         pdf_page.mergePage(watermark_page)
         output.addPage(pdf_page)


creating_writer(content_file, watermark, merged_file)

merged_file = open(merged_file,'wb')
output.write(merged_file)
merged_file.close()
watermark_file.close()
input_file.close()
We can see that the first steps will be identical to the first example. We ask the user for the data of the file they want to add the watermark to, the watermark file, and the new file where the two are to be combined.
Then, we use this data to open the watermark and content files, creating a reader for each. Assuming the watermark will only be one page, so we only take the first one.
Then, with the for loop, we go through each page of the content file and with the getPage for each page we add the watermark through mergePage. Finally, we add each one to the writer.
We conclude by opening or creating the new file to which the data will be added and with a write operation, the content is written. Closing each class.
Insert the name of the pdf where you content is: HpRestrictedDocument.pdf
Insert the name of the pdf where your watermark is: hpwatermark.pdf
Insert the name of the new file where you want to put the merged file: hpfile.pdf
The versatility that the packages offer us can be seen in PyPDF2, which with its functionalities allows us to do really interesting things.
After this post, you will have inspiration and the knowledge to apply what you learned in your own projects, remembering that this is just the tip of the iceberg regarding what PyPDF2 can do.
If you want to see what other great experiments you can do with this package, just check out the PyPDF2 official page

Poniendo el poder del PDF a prueba
Shoutout to nuhmanpk on Github
En este artículo encontrarás:
- Introducción
- Ejemplo 1
- Ejemplo 2
- Ejemplo 3
- Ejemplo 4
Un saludo a todos. Un largo tiempo sin escribir un post en la serie de Coding Basics. Sin embargo, hoy todo eso cambiará. En el capítulo anterior, vimos uno de los paquetes de manejo de librerías en Python más utilizados: PyPDF2.
Desde leer hasta unir y separar archivos PDFs haciendo que conserven la información, podemos realizar una gran cantidad de operaciones con este paquete. Sin embargo, aún no vemos el total de las capacidades de PyPDF2 y como puede ser utilizado en la práctica.
Es por esto, que iremos sobre algunos ejemplos prácticos del uso de PyPDF2, esto para que puedas imaginar como puedes mejorar tu experiencia al trabajar con PDFs desde interfaces no gráficas. Si quieres saber más sobre esto, sigue leyendo.
Ejemplo 1
Shoutout to Aspose Blog
Para este primer ejemplo, veremos una funcionalidad que no explicamos anteriormente, que sin embargo puede ser de gran ayuda si deseas poder leer tus archivos de manera correcta. Esta es rotateClockwise.
Se nos pide diseñar un programa que pida al usuario un archivo PDF y que especifique el nombre del nuevo archivo que desea crear con el contenido rotado. Además de esto, debemos de indicar el ángulo de rotación para el nuevo archivo.
Para clarificar forma en que rotateClockwise funciona es que rota el archivo en sentido de las agujas del reloj de acuerdo a un ángulo de rotación que le demos como parámetro. Si por ejemplo usaramos myfile.rotateClockwise(90), entonces el contenido de la página que obtuvimos se rotaría 90 grados en sentido de las manecillas.
Ahora bien, sabemos que para permitir que el usuario ingrese información, debemos de usar la función input con un str antes que haga estricta la petición de una string para los archivos e int para indicar que solo pueden ser números cuando pidamos el ángulo.
Luego, en base a la información de los inputs, usamos open tomando como nombre de archivo la información recopilada, tanto para el archivo que vamos a leer como en donde queremos escribir.
En orden de ver lo que haríamos luego, echemos un vistazo al código:
import PyPDF2

file_read = str(input('Enter the name of the file (Please include .pdf extension):'))
file_rotated = str(input('Create a name for your rotated file (Please include.pdf extension): '))
rotation = int(input('How much do you want to rotate the content? (Numbers only):'))


pdf_in = open(file_read, 'rb')
pdf_out = open(file_rotated, 'wb')

def rotate(pdf_in, pdf_out, rotation):
    try:
        pdf_reader = PyPDF2.PdfFileReader(pdf_in)
        pdf_writer = PyPDF2.PdfFileWriter()
        for page in range(pdf_reader.numPages):
            page = pdf_reader.getPage(page)
            page.rotateClockwise(rotation)
            pdf_writer.addPage(page)
        pdf_writer.write(pdf_out)
    except ValueError:
        raise Exception('You can only insert numbers into the rotation angle')
    except:
        raise Exception('Use the .pdf extension in both files')

rotate(pdf_in, pdf_out, rotation)

pdf_out.close()
pdf_in.close()
Podemos observar que luego, ya sea por medio de una función o de manera directa, creamos un reader que tome como parámetro uno de los nombres de pdf que pedimos, que será el que queremos rotar.
Además, creamos un writer y luego, con un ciclo for para la cantidad de páginas del archivo (Que podemos obtener con numPages del reader), usaremos getPage para obtener la información de la página y luego con rotateClockwise, rotamos esta y la añadimos al writer, proceso que se repetirá para cada página. Finalmente, se escribe el contenido del write en el nuevo archivo con el método write.
Nota: Usamos el Try/Except para evitar que en caso de que no se coloquen valores de tipo string o numérico (Un ValueError), nos salte una excepción, añadiendo otra excepción en caso de que no se coloque la extensión .pdf.
Finalmente, invocamos la función con los parámetros de los archivos y la rotación que recopilamos al principio, terminando al cerrar el archivo de entrada y de salida.
Así, si tenemos el siguiente archive:
Se ve que está rotado. Con solo rotarlo 90 grados en las manecillas del reloj, conseguiríamos que esté derecho. Así, ejecutando el programa:
Enter the name of the file (Please include .pdf extension):Manualrotated.pdf
Create a name for your rotated file (Please include.pdf extension): Manualstraight.pdf
How much do you want to rotate the content? (Numbers only):90
Y al observar el nuevo archivo, veremos que está derecho.
Ejemplo 2
Shoutout to Semantic Scholar
Siguiendo uno de los ejemplos que aplicamos en ediciones anteriores de coding basics, para este crearemos un programa que no solo nos permita extraer el texto de cualquier archivo PDF, sino que también censore las malas palabras dentro de este.
Recordando las expresiones regulares, específicamente el módulo re, sabemos que este tiene una función llamada sub, la cual es usada para reemplazar caracteres que encajen con nuestras expresiones regulares dentro de una string. Por ejemplo, si tenemos una variable string que tenga el contenido 'hellohowareyou' y creamos una expresión regular que tenga r'[]\b', al usar sub:
import re
regex = r'[*]\b'
text = 'Hello*how*are*you?'

final_text = re.sub(regex, ' ', text)

print(final_text)
Tendremos como resultado:
>>> Hello how are you?
Ahora, si aplicamos esto a un ejemplo que explicaremos parte por parte:
import PyPDF2
import re

curse_file = str(input('Insert a file to remove the curse words (WARNING: Use .pdf extension at the end): '))
try:
    file_pdf = open(curse_file, 'rb')
    pdf_reader = PyPDF2.PdfFileReader(file_pdf)
    regex = r'\bFuck\b|\bfuck\b|\bShit\b|\bshit\b|\bDamn\b|\bdamn\b'
    for page in range(pdf_reader.numPages):
        page = pdf_reader.getPage(page)
        text = page.extractText()
        curse_words = re.sub(regex, 'BLEEP', text)
        print(curse_words, end=" ")
except:
    raise Exception('The file must have a .pdf extension at the end')
Vemos que como en ejemplos anteriores, le solicitamos al usuario que nos facilite el nombre del programa, recordándole que debe tener el nombre .pdf al final, cosa que en caso de no cumplirse, se ejecutará una excepción que nos lo recuerde. También, tendremos otra excepción si el archivo no existe.
Luego, con la información proporcionada, creamos un PdfFileReader que abra el archivo y al mismo tiempo una expresión regular que filtre diferentes palabras (Recordamos que \b se usa para reconocer si los caracteres están al final o al principio de una string y | funciona como un operador 'or').
Por medio de un ciclo for para cada página, las obtenemos, extraemos el texto con extractText() y luego, por medio de sub, usando como parámetros la expresión regular y el texto extraido, reemplazamos las malas palabras por un 'BLEEP' y finalmente, imprimimos la cadena string resultante:
>>>
Insert a file to remove the curse words (WARNING: Use .pdf extension at the end): ExampleCurseWords.pdf

Good Morning America, Hows everyone doi
BLEEP! BLEEP! BLEEP! Id just hit
my
pinky
against
the desk, sorry for that.
Ejemplo 3
Shoutout to PDFfiller
Una de las peores cosas que te pueden pasar con tus trabajos, proyectos y cualquier cosa que escribas en un archivo PDF es que alguien los copie y no te el crédito por la autoría de estos. Es por esto, que el agregar una marca de agua es esencial.
Para esto, PyPDF2 trae un excelente método que nos permite mezclar el contenido de dos páginas en una sola: mergePage. Para esto, solo debemos crear dos instancias de la clase PDFFileReader, una para cada PDF del cual querramos mezclar una página. Luego, por medio de getPage, tomamos las dos páginas que queremos mezclar y con mergePage, las unimos a los dos.
Verás, mergePage se usa como el método de una de las dos páginas que quedamos mezclar, mientras que el parámetro será la otra página. Por ejemplo:
myfile = created_file.getPage(0)
mysecondfile = readfile.getPage(0)
myfile.mergePage(mysecondfile)
Así, combinaríamos ambas páginas. Si vemos esto aplicado a nuestro ejemplo:
import PyPDF2
content_file = str(input('Insert the name of the pdf where you content is: '))
watermark = str(input('Insert the name of the pdf where your watermark is: '))
merged_file = str(input('Insert the name of the new file where you want to put the merged file: '))

def creating_writer(content_file, watermark, merged_file):
    input_file = open(content_file,'rb')
    input_pdf = PyPDF2.PdfFileReader(input_file)
    watermark_file = open(watermark,'rb')
    watermark_pdf = PyPDF2.PdfFileReader(watermark_file)
    watermark_page = watermark_pdf.getPage(0)
    output = PyPDF2.PdfFileWriter()
    for page in range(input_pdf.numPages):
        pdf_page = input_pdf.getPage(page)
        pdf_page.mergePage(watermark_page)
        output.addPage(pdf_page)


creating_writer(content_file, watermark, merged_file)

merged_file = open(merged_file,'wb')
output.write(merged_file)
merged_file.close()
watermark_file.close()
input_file.close()
Podemos observar que los primeros pasos serán idénticos al primer ejemplo. Le pedimos al usuario los datos del archivo al que desea agregar la marca de agua, el archivo de la marca de agua y el nuevo archivo donde se van a combinar los dos.
Luego, utilizamos estos datos para abrir los archivos del watermark y contenido, creando un reader para cada uno. Asumiendo que la marca de agua solo será una página, por lo que solo tomamos la primera.
Luego, con el ciclo for, recorremos cada página del archivo de contenido y con el getPage para cada página le agregamos el watermark por medio de mergePage. Finalmente, agregamos cada una al writer.
Concluimos al abrir o crear el nuevo archivo a donde se agregarán los datos y con una operación de write, se escribe el contenido. Cerrando cada clase.
Insert the name of the pdf where you content is: HpRestrictedDocument.pdf
Insert the name of the pdf where your watermark is: hpwatermark.pdf
Insert the name of the new file where you want to put the merged file: hpfile.pdf
La versatilidad que los paquetes nos brindan se puede evidenciar en PyPDF2, que con sus funcionalidades nos permite realizar cosas realmente interesantes.
Después de este post, tendrás inspiración y los conocimientos para aplicar lo aprendido en tus propios proyectos, recordando que esto es solo la punta del iceberg con respecto a lo que PyPDF2 puede hacer.
Si deseas ver que otros excelentes experimentos puedes realizar con este paquete, solo echa un vistazo a la página oficial de PyPDF2
phyton esta increible para trabajar con archivos PDF :D
Si que lo es :). Además, si quieres hacer cosas más complejas como escribir cosas nuevas justo en el lugar que quieras de la página puedes usar otras librerías como PyMuPDF y PDFNetPython3.
Bash is also very useful for this ^^