
Saludos apreciados amigos de esta comunidad.
Hoy les compartiré un tutorial dedicado a los amigos que tienen gaticos como mascotas. Les cuento, a los pocos meses de traer a París, Adriana mi hija trajo una linda gatica a la casa y pude conocer y compartir un tiempo con ella, 3 años, era muy cariñosa, todas las mañanas me aruñaba la puerta del cuarto para que la acariciara y le diera de comer, ella era la amiga de París vivían juntas para arriba y para abajo, jugaban persiguiéndose una a otra, pero un día se fué en la noche y el otro día murió envenenada. Desde ese entonces no quise tener otro gatico, porque duele mucho cuando ya no están y bueno en otra oportunidad les mostraré fotos de ella, me dá tristeza pero ahora sólo me queda recordarla. Y bueno hoy decidí hacerles este tutorial, es un lindo envase realizado con materiales reciclados y que le podrás dar el uso que quieras, yo lo hice como contenedor para comida. Entonces ya no los hago esperar más.
Greetings dear friends of this community.
Today I will share with you a tutorial dedicated to friends who have kittens as pets. I tell you, a few months after bringing Paris, Adriana my daughter brought a nice kitten to the house and I was able to meet and share some time with her, 3 years old, she was very affectionate, every morning she would growl at the door of the room for me to pet her and feed her, she was Paris' friend, they lived together up and down, they played chasing each other, but one day she left at night and the other day she died poisoned. Since then I didn't want to have another kitten, because it hurts a lot when they are gone and well another time I will show you pictures of her, it makes me sad but now I can only remember her. And well today I decided to make this tutorial, it is a nice container made with recycled materials and you can use it as you want, I made it as a container for food. So I won't make you wait any longer.
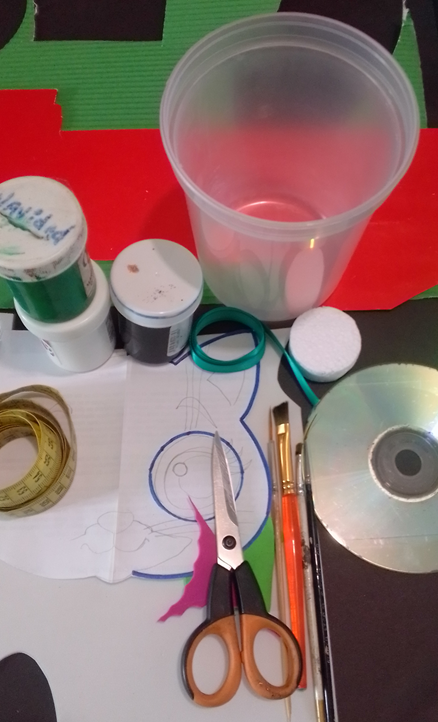
Los materiales a usar son:
The materials to be used are:
| Envase plástico | Cartulinas |
|---|---|
| Pinturas | Pinceles |
| Tapa de refresco | Trocito de anime |
| Cinta de tela | Foami |
| Lápiz | Silicón líquido |
| Dibujo de gato | Palito de madera |
| Tijeras | Cinta métrica |
| CD |
| Plastic packaging | Cardboards |
|---|---|
| Paints | Brushes |
| Soda bottle cap | Anime piece |
| Fabric tape | Foami |
| Pencil | Liquid silicone |
| Cat drawing | Wooden stick |
| Scissors | Tape measure |
| CD |
Elaboración:
Elaboration:
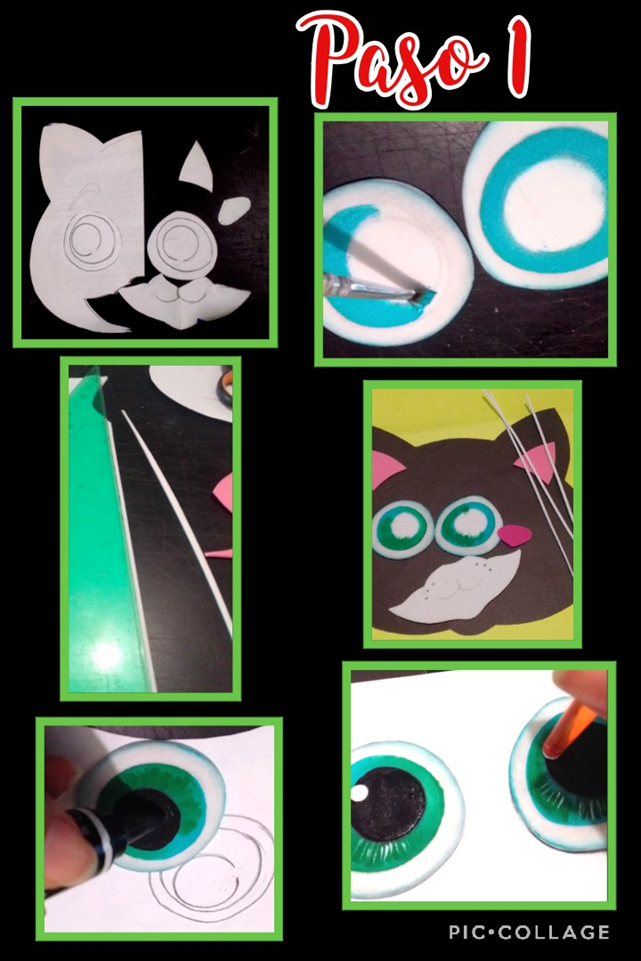
- Desglosar el dibujo y recortar todas las piezas en foami.
- Pintar los ojos sombreando la orilla, pintar el centro del ojo en verde y azul y por último dibujar con marcador la pupila y poner el punto de luz con pincel.
- Break down the drawing and cut out all the pieces in foami.
- Paint the eyes by shading the border, paint the center of the
eye in green and blue and finally draw the pupil with a marker and put the light spot with a brush.
- Dibujar la boca y abrir unos orificios con el palito de altura y meter en los orificios los bigotes de foami recortados.
- Pegar un triángulo en la parte de atrás para fijar los bigotes.
-Aplicar silicon y seguir pegando y armando la cara. - Aplicar silicón por toda la orilla de la cara.
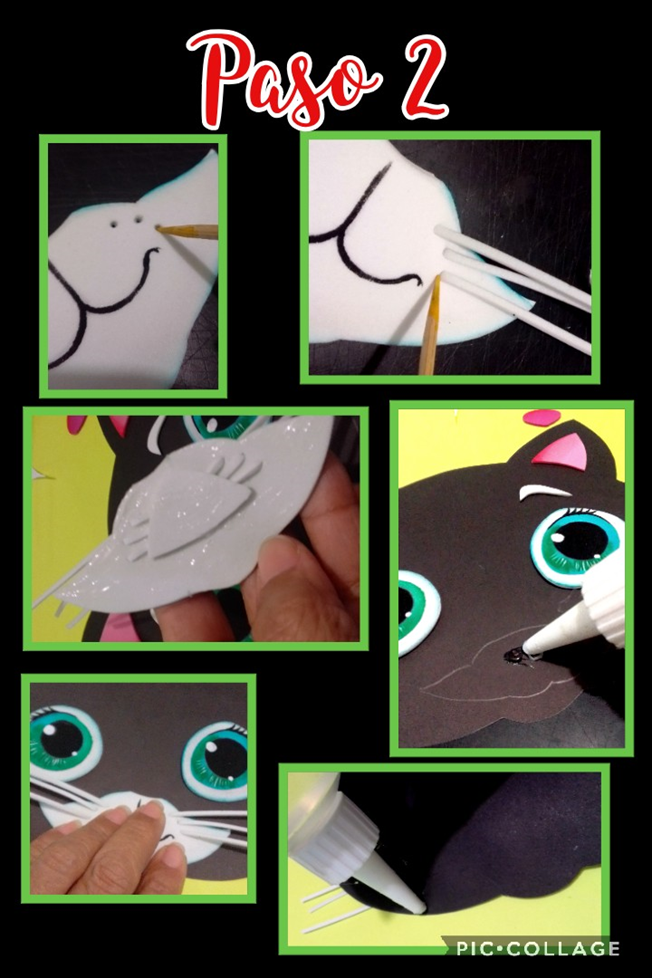
- Dibujar la boca y abrir unos orificios con el palito de altura y meter en los orificios los bigotes de foami recortados.
- Pegar un triángulo en la parte de atrás para fijar los bigotes.
- Aplicar silicon y seguir pegando y armando la cara.
- Aplicar silicón por toda la orilla de la cara.
- Pegar sobre la cartulina verde y recortar dejando una pequeña orilla de 3 mm.
- Marcar todo el contorno de al orilla del CD a la cartulina corrugada verde, pegar y recortar.
- Marcar una tira de 3x40cms de largo, doblar una pestaña de 5 mm y sacar triángulos par pegar al CD.
- Pegar El círculo de cartulina verde.
- A la tapa de refresco rellenar con un poquito de anime.
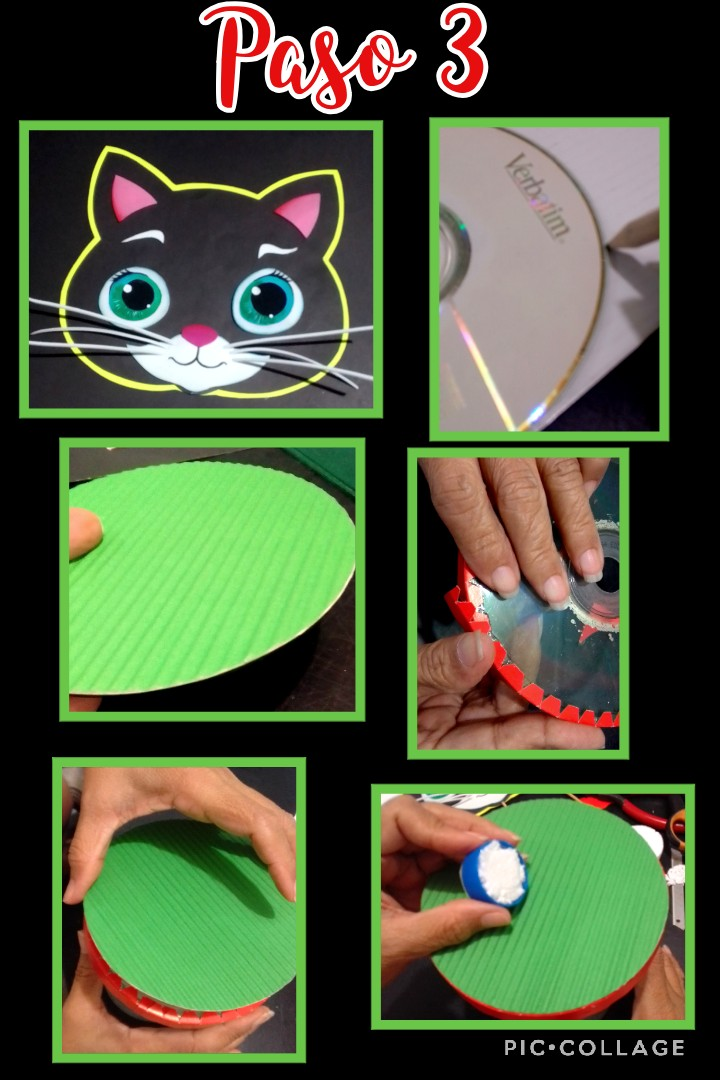
- Paste on the green cardboard and cut out leaving a small border of 3 mm.
- Mark all around the edge of the CD on the green corrugated cardboard, glue and cut out.
- Mark a 3x40cms long strip, fold a 5 mm tab and cut out triangles to glue to the CD.
- Glue the green cardboard circle.
- Fill the soda lid with a little bit of anime.
- Pegar la tapa de refresco y forrar con cartulina roja.
- Meter un palito de madera en la cara y luego abrir un orificio en la tapa de refresco, aplicar silicón y meter fijando bien la cabeza.
- Con la cinta de tela dar dos vueltas en el cuello y hacer un lazo en el frente.
- En cartulina blanca, dibujar una etiqueta, dibujar con marcador y recortar corazón en foami.
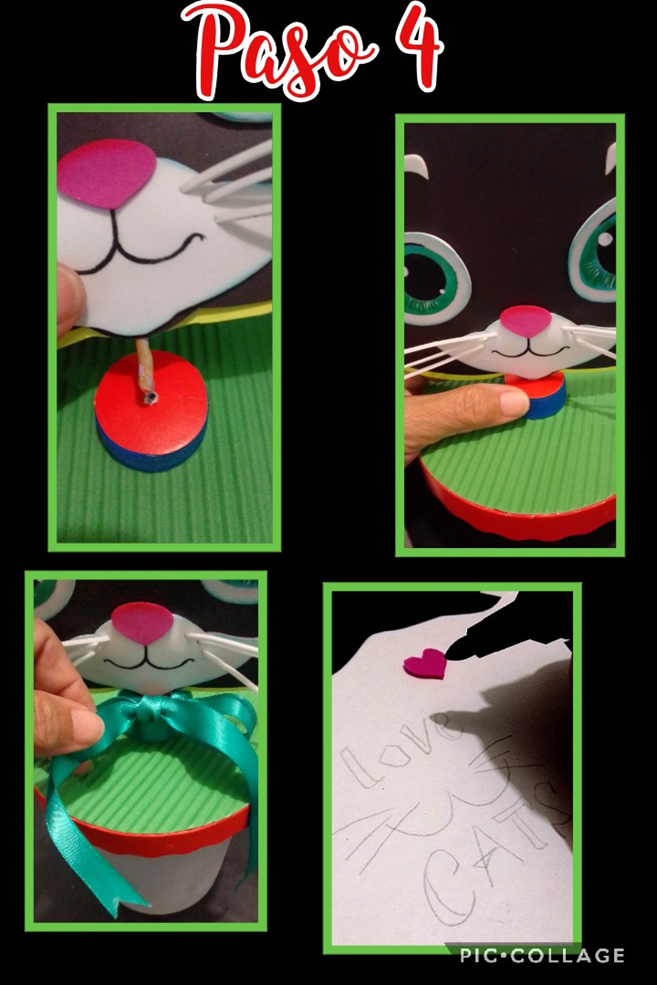
- Glue the soda cap and line it with red cardboard.
- Stick a wooden stick in the face and then open a hole in the soda lid, apply silicone and stick it in, fixing the head well.
- With the fabric ribbon, make two laps around the neck and tie a bow in the front.
- On white cardboard, draw a label, draw with marker and cut out a heart in foami.
- Recortar un círculo, pegar el corazón en la naríz y pespuntear la orilla.
- Aplicar silicon en el círculo y pegar al envase plástico.
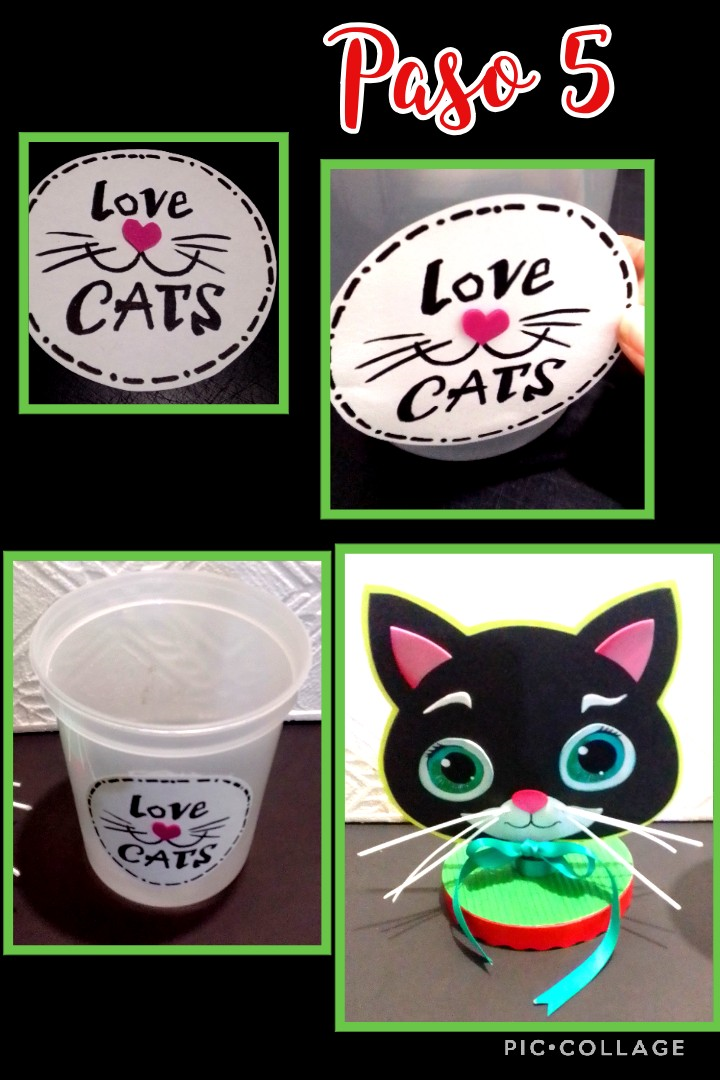
- Cut out a circle, glue the heart on the nose and stitch the edge.
- Apply silicone on the circle and glue to the plastic container.
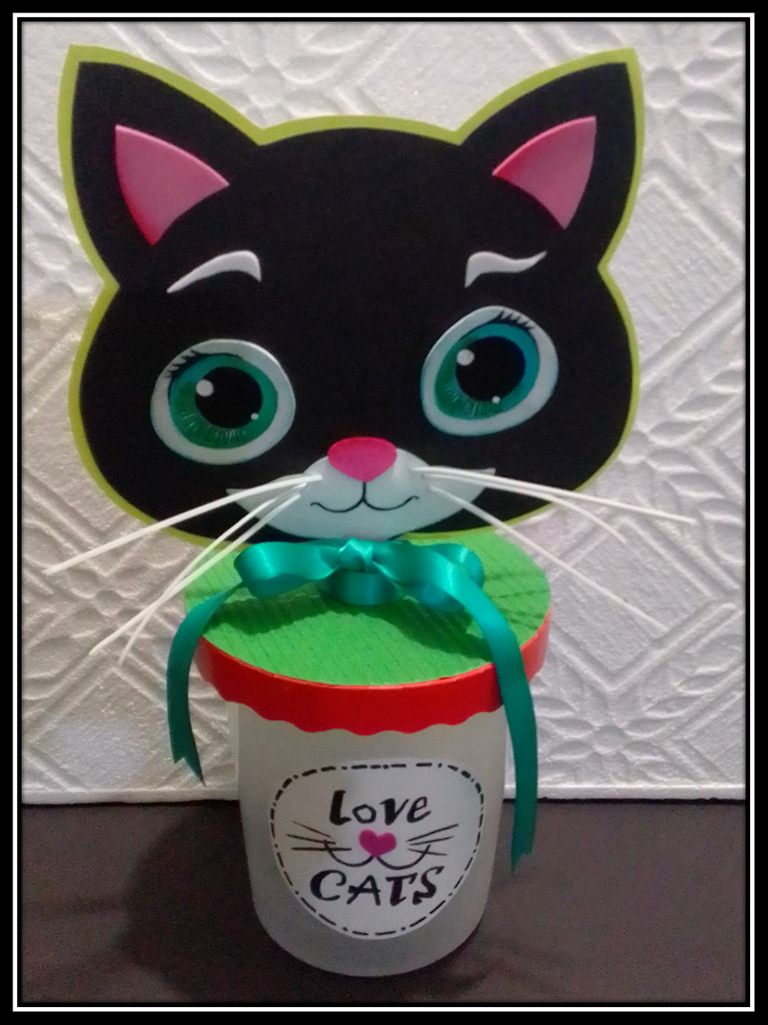
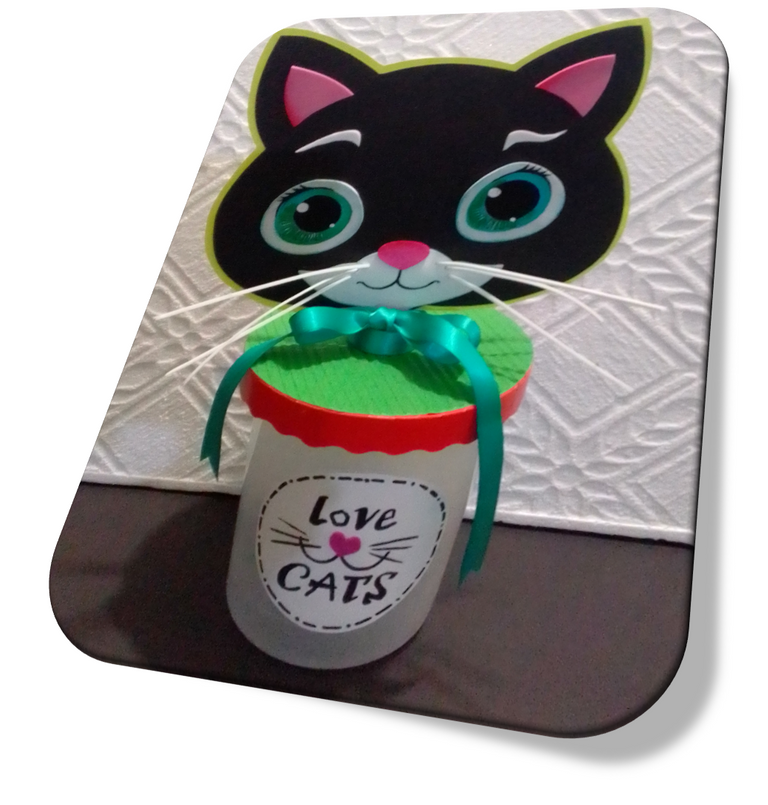
Este es el resultado final de este lindo tutorial.
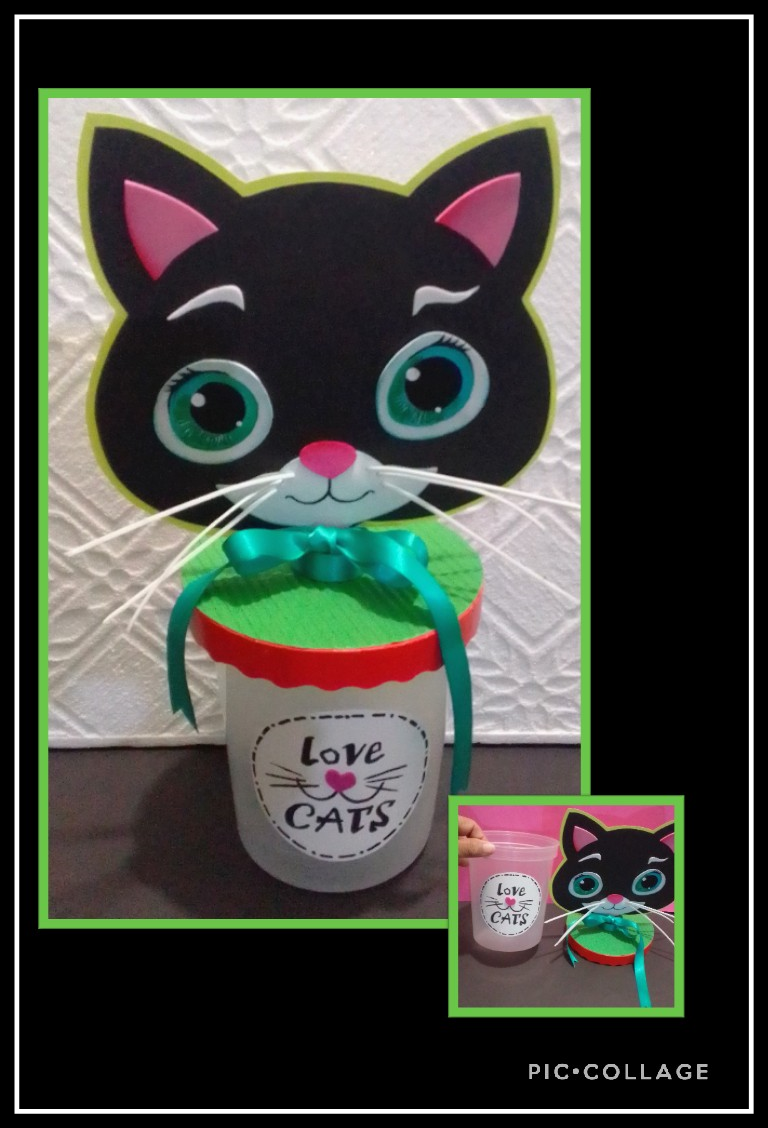
This is the final result of this cute tutorial.
Las fotos y publicación son mías tomadas con un teléfono Blu G5, editadas en Pic Collage y traducido con DeepL y etiquetas de HTML.
Photos and publication are mine taken with a Blu G5 phone, edited in Pic Collage and translated with DeepL and HTML tags.
¡Ahora me despido como siempre esperando les guste este lindo paso a paso!
Now I say goodbye as always hoping you like this cute step by step!