First read this article if you want to know how Communities work.
But let's assume you know how they work and you want to create your own community.
How to use the PeakD.com interface to create a community.
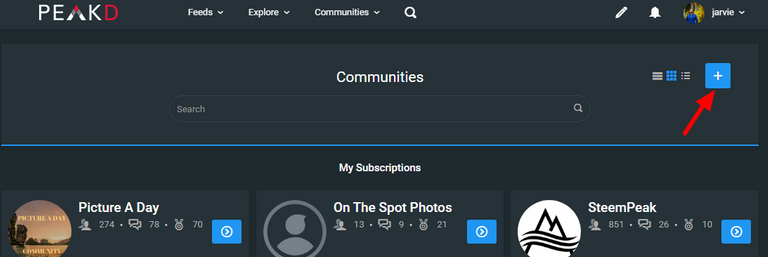
STEP 1: Go to community page
https://peakd.com/communities
STEP 2: Click on the Plus button

STEP 3: Add key information for the community
You can actually change the TITLE and the DESCRIPTION at any time... but why not fill out this info right away.

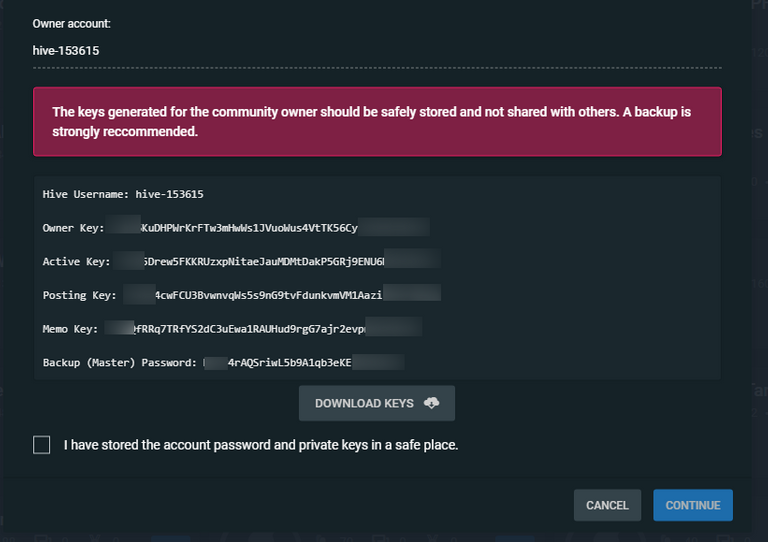
STEP 4: Save the account name and keys
The name and keys are auto-generated and no one but yourself has knowledge of or access to the keys to this account just like your own personal account.
We would suggest either copy paste the keys or download the keys into a text file but then be careful what you do with the text file or the copy paste. Perhaps a secure folder for the text file or a password manager for the text itself. This part is up to you and you are in charge of the security of your keys. No one can recover your account if you loose the keys. Not even us.

STEP 5: Continue when you have stored Keys safely
When you feel good about this go ahead and hit the "CONTINUE BUTTON"
Please note the account has not been created yet just because you have downloaded keys and hit continue
STEP 6: Submit the transaction
When you hit continue (step 5) peakd will help you submit the transaction to create the account using the Login Method you chose when you logged into PeakD.com.
There are 3 login methods: Keychain, HiveSigner and PeakLock
If you are using Keychain make sure Keychain has your Active key stored... then click Confirm on the popup.
If you are using HiveSigner or PeakLock there will be a place to paste your active key.
The transaction requires your ACTIVE KEY from the account that is gonna create and PAY for the community account.
Make sure there is 3 Hive in your account (not Hive Power or HBD)
Those 3 Hive tokens are burned to create the community account.
STEP 7: Things happening in the background
- The account that owns and manages the community is being created
- Your title and details are being added
- Your personal account is being added as an admin
- Your personal account is being automatically subscribed to the community
STEP 8: Wait for a moment and find your community
It will take a little bit for the account to populate in the community list.
You can refresh the page after a little while and since you're already
Also the TITLE of the community may not populate at first but wait for a bit and it will come up. At first you may simply see the name of the ACCOUNT which always starts with "hive-" followed by 6 digits.
If the title and description do not show up you can easily go to ACTIONS > SETTINGS and re-write them.
There are more things to set up anyway so it's important to go to settings regardless
You can read more about setting up a community in this article
ABOUT PEAK FAQ PROJECT
- All articles are posted in this Hive community
- This document will be updated with links to all FAQ articles.
- Project ran by @peakd. Main authors presently: @jarvie
- Please submit more questions here.
Please follow up this post with any other questions you have for this topic
wow, i needed this early on as i didn't know it cost 3 Hive to create a community. Thanks for doing this tutorial. I started a video tutorial on this same topic, when I finish, you can use it if it's to you're liking.....thank you!
Excellent tutorial, @jarvie :), thank you very much for sharing it, it has helped me and will help me a lot later ;)
Thanks for the tutorial! Very helpful. 11/10 for usefulness!
Amazing, I've been looking for these tutorials for a long time.
ThinkYou needed to know how to set up a Community.