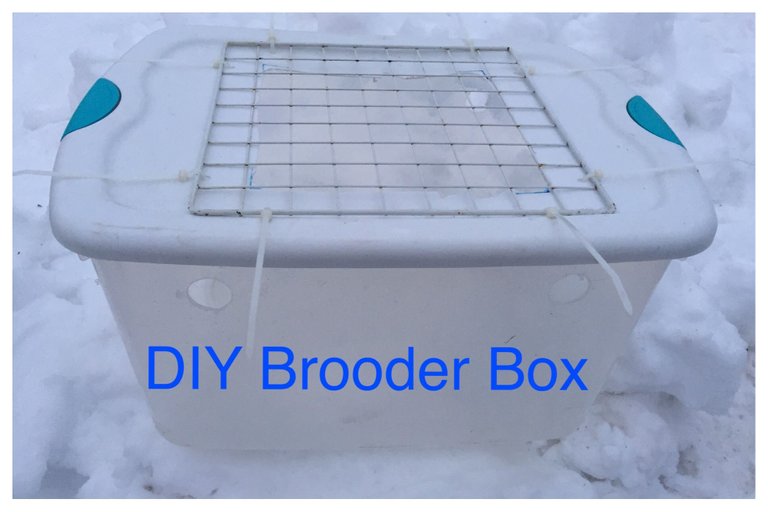
I have made several brooder boxes.
But this kind is the best I have made, it is dog and cat resistant.
I haven’t tried to see if it is dog and cat proof.
What you will need is:
An old tote with a fitting lid, that snaps or locks
The old wire metal cubbies you piece together
1/4” paddle bit
1 3/8” paddle bit
A drill
A jig saw
Large zip ties
A marker
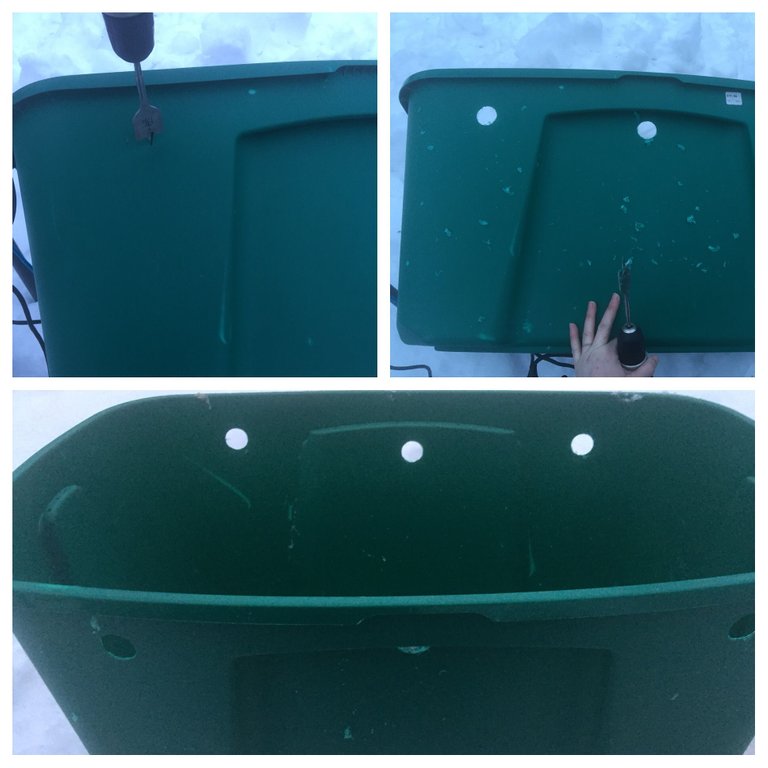
So you are gunna drill a hole with your 1 3/8” paddle bit about 3 inches from the top.
Depending on how large the tub depends on the number of vent holes. This one needs just four, two on each broad side.
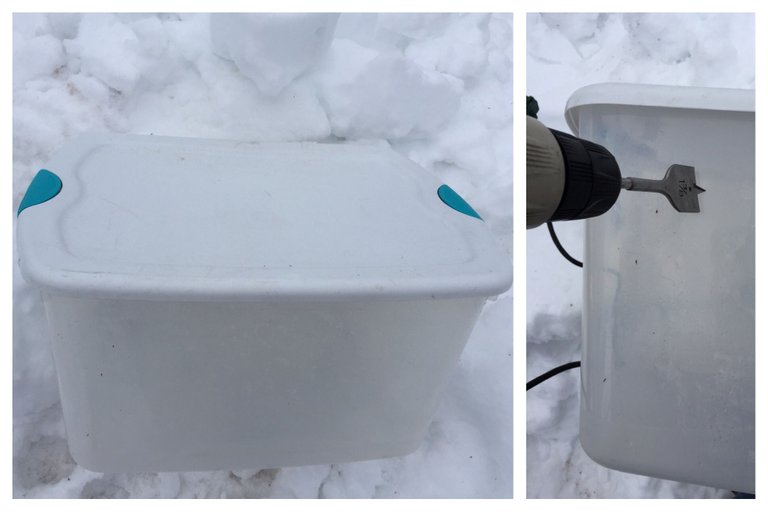
Next you are going to take the wire square and lay it out on the lid of the tote. Depending on the size depends on the location.
Since this is the one for the tiny babies this one is going in the center, we are going to use a smaller reptile heat light for the smaller brooder box.
Then you are going to take a marker and mark the corners of the second row, like shown in picture.
The first row is going to over lap the lid and give structure and security.
Once you have your corners marked out, remove the wire square. Take your 1 3/8” paddle bit and drill all four of your corners for the jig saw.
Key advice when cutting the plastic get the right blades and cut slow, or it will chip. I am sure the cold didn’t help any, because I chipped it a bit.
*My phone died so I took @alaskatacticals *.
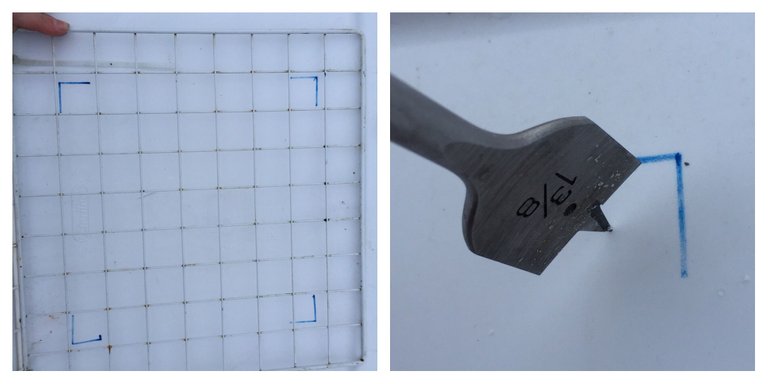
Next you are going to realign the wire square with the opening and mark where you are going to drill holes for the zip ties.
You are going to want them one square from the actual corner to lock the wire square in place, like pictured.
Once you have all your holes drilled you are going to run your zip ties from the top down and back up through the other hole, like pictured.
Next you are going to start tightening the zip ties, but don’t tighten them all the way just yet.
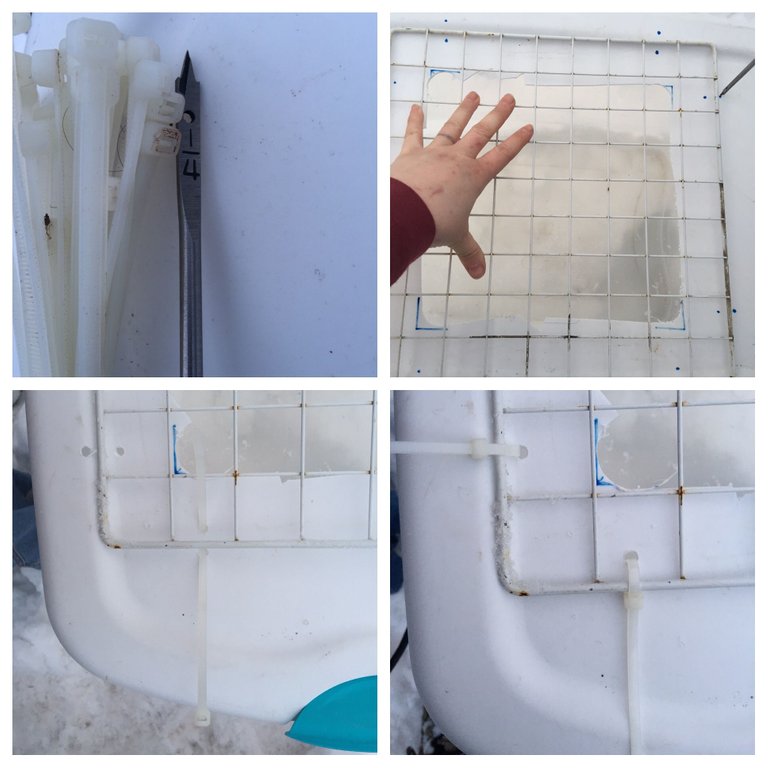
Once you have all zip ties in place, go ahead and go around the whole thing and cinch the zip ties down.
Check of security, I picked the whole thing up with two fingers.
If it’s sound and hold up, your done.
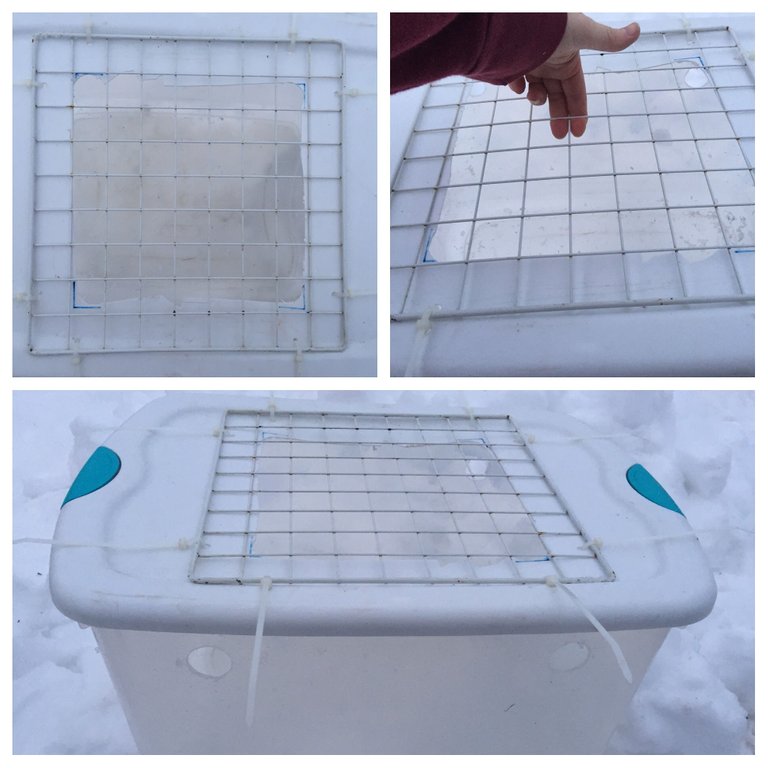
The above one is for the babies, new born to about two weeks. All depending on how quick they grow.
So once they show they need more room they will be moved to a larger box, I made a much larger one while I had all my stuff out.
Oh and it has wheels!
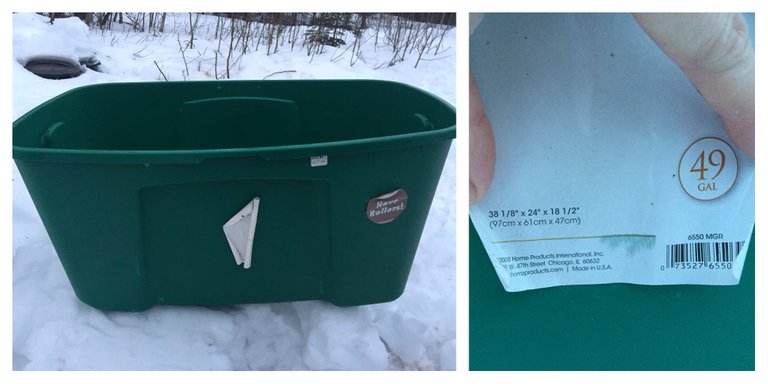
This one will have three holes on each broad side.
I put the wire square on one side of the lid, that way they can get shade and hide.
They will be in the large tub long enough for them to get fully feathered.
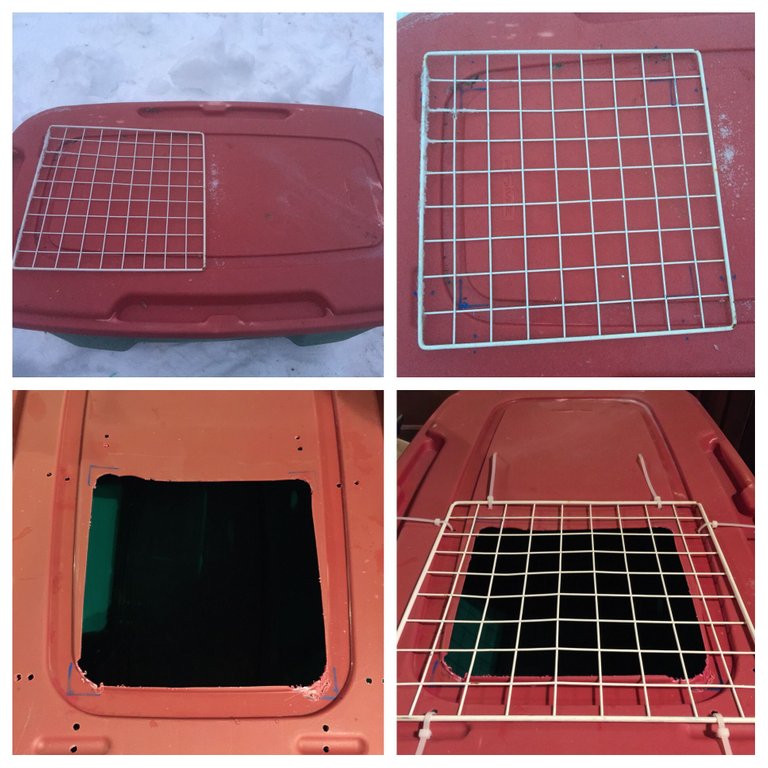
@alaskatactical ‘s phone died, the cold zapped it. So I had to bring the tote into the house and take photos with my phone while it was charging 😣
This is great for ducklings, which are very messy. I tried to just keep duckling in wire cube cage I made, with a plastic courage lining(like card board but plastic). Man they made a mess, plus my cats where asses. They would lay on top and mess with them through all the holes. Scaring them all the time.
My dog thinks all babies are hers and wants to help, so this is awesome to keep her out. The dogs have killed babies before, or it was a cat. Still don’t know who killed our last hatching of chicks. But haven’t lost any since we made these types of boxes.
The large one lets the birds hide, and keep the mess down. Keeps some heat in better too.
It also helps keep the fluff a bit more confined, we keep the babies in the house.
These are all my photos and my original idea.
Life in Alaska
Join our Discord Channel to connect with us and nominate your own or somebody else's posts in our review channel.
Help us to reward you for making it ! Join our voting trail or delegate steem power to the community account.
Your post is also presented on the community website www.steemmakers.com where you can find other selected content.
If you like our work, please consider upvoting this comment to support the growth of our community. Thank you.
That is a great idea! I will have to use this when we start with our chickens.
Thanks, go for it! It’s cheap and easy!
Those boxes look like they'll work really well. Better than the wood box I had back when I was raising chickens.
Thanks, they work well. Clean up is easy, just hose them out.
Congratulations!!
Your post was included in my weekly FRIDAY DIY Day curation post!