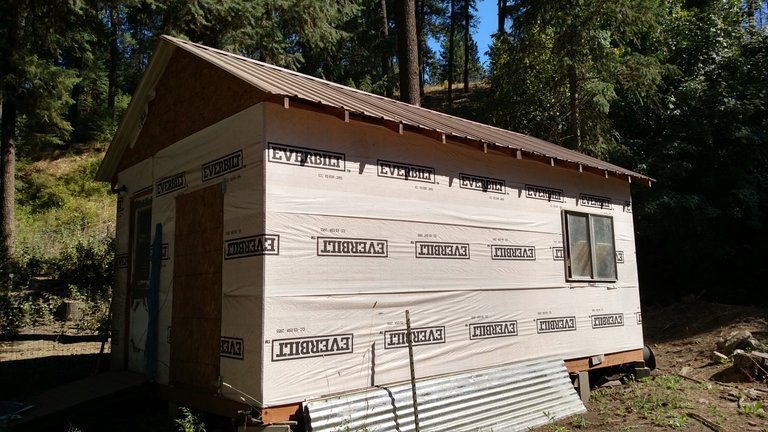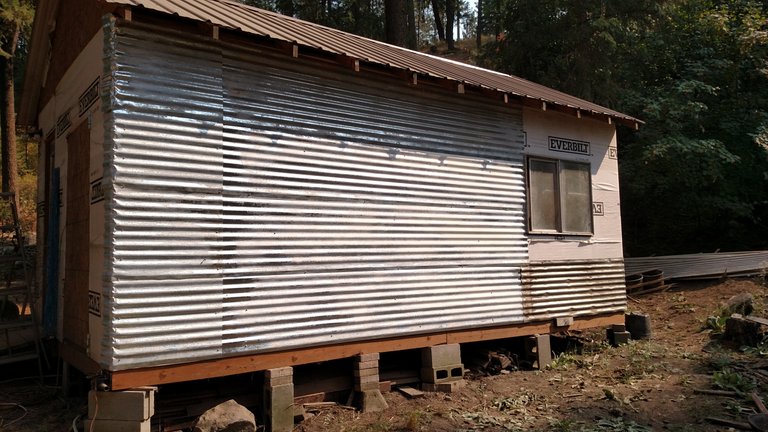
The last couple hours were very productive, hot, but productive. I took advantage of a sudden inspiration to begin the siding of the chicken coop. That is how my life seems to work. I have 50 projects that are all mid stride and each get a bit of attention and furtherance when I get enough ambition to work on them... Today was the day to work on the siding, so in 90F and direct sun I decided to start.
I chose to mount the panels horizontally since they will cover the area of the wood more effectively. The side shown in the picture is 20 ft wide, I have 17 pieces of metal roofing with 5 being 12 feet long and 12 being 11 feet 6 inches. If I were to use the metal vertically it would take 10 8 foot long pieces to cover the side. Horizontally the 12 foot takes only 7 pieces to cover the same area and keeps me from having as many seams. Fewer seams means fewer chances for problems.
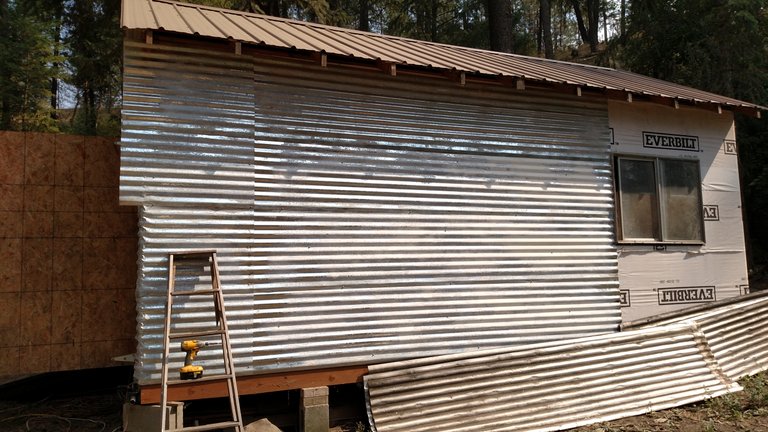
I straight up bent the metal around the corners. I don't want to have to buy corner cover pieces, plus they give a ready place for wasps to build nests which are only removed by removing the corner cover. 12 of the pieces of roofing are recycled from our old carport, so it has nail holes in it, but that shouldn't cause any issue over the years.

You can see in the image below as I was midway through bending the corner pieces. I just used my gloved hands to smack the metal and crinkle it around the corner. I will be covering it with the next sheets and screwing it down so I am pretty comfortable with bending the metal.

I will finish my chicken coop series off then in a next post, once I have made more progress on the siding. Hopefully by that time I will have the coop interior in a more presentable form to show the world.
--If you missed Part 1--
How I built my 12ftx20ft chicken coop by myself - Part 1 - The main structure
OR
--Part 2--
How I built my 12ftx20ft chicken coop by myself - Part 2 - The Chicken's Room
AND
--You can read about building my nest boxes--
How I built my Nest Boxes for my Chicken Coop - A Fleming Family Farm design costing $12 to make


Check out my blog @flemingfarm
OR
You can read my blog series here:
| Time | #1.0 - Back Pain |
| Expectations | #2.0 - Weeds |
| Patience | #3.0 - Pests - Gophers |

Fleming Family Farm
FLEMING FAMILY FARM, LLC
Sustainable & Organic Methods | Heirloom Produce
All images are original works of Fleming Family Farm unless otherwise notated and credited.
If you find this post useful or entertaining, your support is greatly appreciated by upvoting, resteeming, & following!


Join the SteemitHomesteaders Slack Channel! Image is Invite Link.


Those will be happy chickens!
They do like their coop! It is such a far cry from my original setup in an old shed. This was purpose built as a coop so it is much more comfortable for everyone involved.
That will definitely protect your birds unless your raccoon gang uses crowbars and machine guns.
@originalworks should upvote this.
@OriginalWorks Mention Bot activated by @professorbromide. The @OriginalWorks bot has determined this post by @flemingfarm to be original material and upvoted it!
To call @OriginalWorks, simply reply to any post with @originalworks or !originalworks in your message!
For more information, Click Here!
That's my hope! The metal is going to be good protection from predators and from the elements. The eves are large enough to protect the wood the past winters but the metal will be much more of a guarantee.
Looks like it's coming along really good. Be careful working out in the sun and heat like that. Great job!
Fellow Steemians, please support @flemingfarm with your REAL comments and an upvote. I will randomly select one of your comments for a 100% Upvote
gif made by @papa-pepper
Thanks! It has taken me a while to get back to working on it. Other tasks have taken priority since the coop is functioning as is. One of my running intentions is to actually finish tasks, not leave them mid stride for so long.
Great tip about wasps, and corner pieces! Nice looking coop!