It’s already a month ago when I posted my article about stilling and why it makes sense to own one. Here’s the link if you’re interested. https://steemit.com/stilling/@gardenbsquared/make-your-own-bio-fuel-save-money-become-more-self-sufficient-why-still

The reason that I decided to make one myself is because they can be very expensive. Especially when it has to be imported.
I needed a still to make medicinal oil from cannabis. We use alcohol to make this cancer curing oil.
In this post I’m going to show you how to build your own column still for less than a 100,- USD. With this still it’s possible to produce 90% alcohol by volume in one go.
This is what we need:
- A big stainless steel cooking pot. The one I bought has a content of 15 litre.
- A 2 inch copper pipe, 1 meter long
- An copper end-cap for the pipe
- 5 meter of flexible copper pipe, 6 or 8mm in diameter
- A piece of copper sheet, 5 by 10cm.
- Solder, solder paste and a torch
- Sanding paper
- A power drill with a 6 or 8mm drill bit
- A metal grinder
- Safety glasses and protective gloves
I can't remember the prices. The pot was the most expensive around 50,- but in total it was less than a 100,- USD.
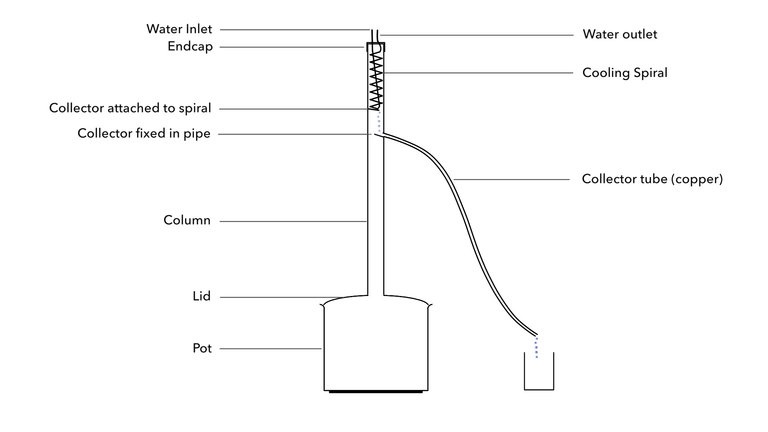
Here’s a schematic overview of what we’re going to build.
This is how my cooling spiral looks like.
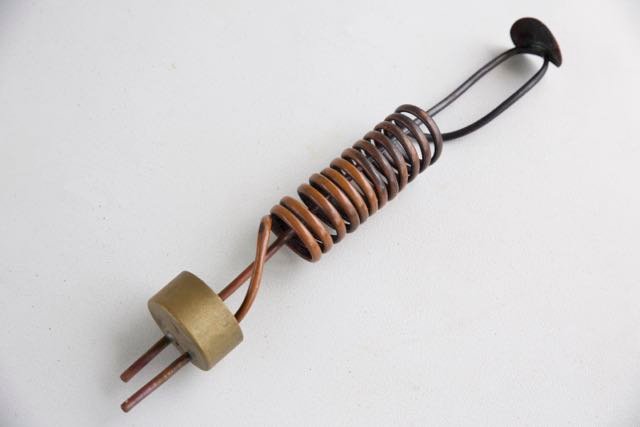
To make a spiral like this use a broomstick or something suitable to bend the flexible copper pipe around. Remember that the spiral must fit into the 2 inch pipe. Bending copper pipe like this is tricky, it can easily fold and then it becomes unusable. To prevent folding I’ve seen people on YT filling the pipe with fine sand or salt and closing the ends before bending the pipe. But I don’t have personal experience doing this so I don’t know how well this works.
- Keep 50cm straight; this will be your water inlet. Temporarily attach this straight piece pipe to the broomstick with some duck tape
- Start bending the flexible pipe. You start at the bottom of the spiral working your way up. Bend the pipe over the water inlet
- Make the spiral not longer than 35 cm
- Make the spiral as compact as you can with as many winds as you can
- Bend the pipe at the end of the spiral so it becomes the water outlet
- Drill two holes in the end cap and stick the water in-, and outlet through the holes and solder them into place
I never soldered before and I didn’t find it easy. If you don’t have experience like me I would suggest to do a bit of research first. To solder: clean the surfaces where the solder is applied, roughen them with sanding paper, apply the solder paste, heat the metal and not the solder.
You can see that attached to the spiral is a collector for the condensed liquid. It’s made out of copper. I had no copper sheet so I bought a copper ring, cut it open and flattened it out and made two more or less identical collectors. The other one is attached in the inside of the pipe just underneath the collector tube.
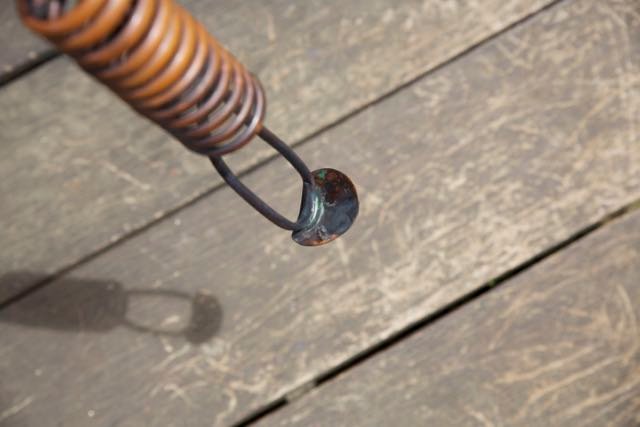
The two collectors are fixed above each other so that the condensed liquid drops on the upper, attached to the spiral and then on the lower, attached inside the column, before it runs through the collector tube.
- Solder the collector on to the spiral under such an angle that the alcohol will drop down onto the next collector inside the column. Make sure that the round end of the collector slides against the column when inserted.
Your cooling spiral is now finished.

Attaching the column to the lid of the cooking pot.
- Remove the lid handle
- Draw out a 2 inch circle at the centre of the lid.
- Use the grinder to make 4 to 6 cuts in the centre never crossing the 2 inch circle
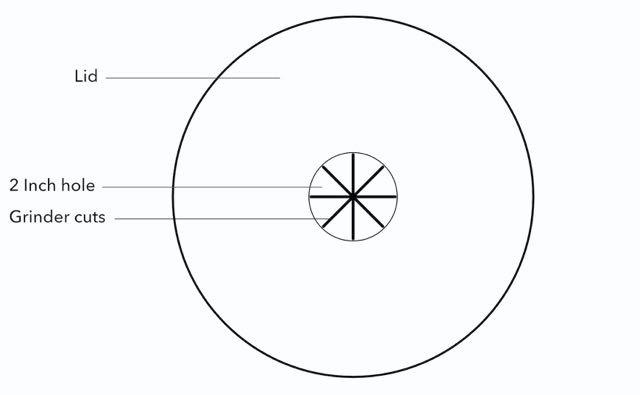
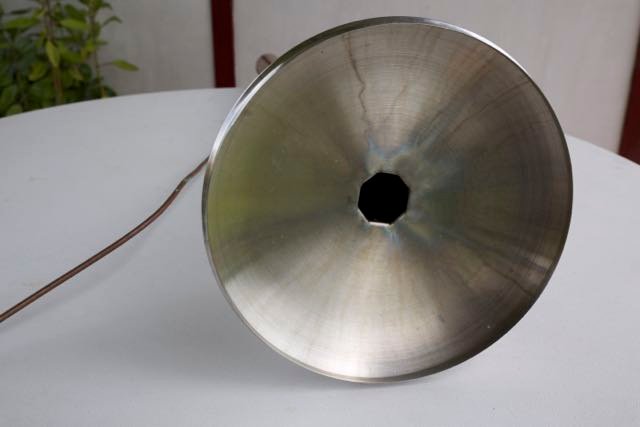
- Bend the metal tooth outwards like a little crown on the top of the lid
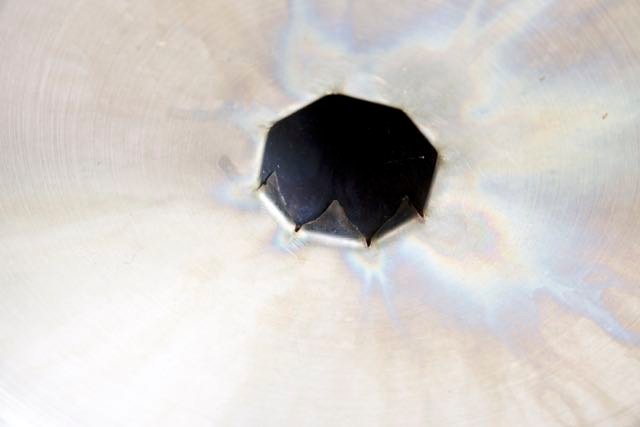
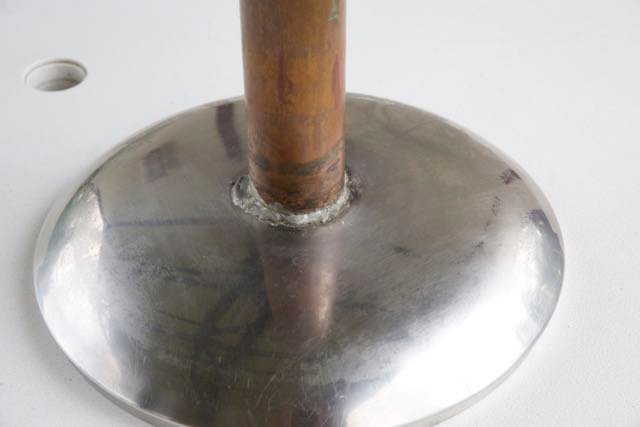
- Fix the 2 inch pipe on top of it and solder it into place
I’m sure that anybody can do it better than this crappy looking solder job.
Now the most difficult part; fixing the collector inside the pipe.
This was a nightmare. How to get the collector in the right place so it becomes possible to solder it. My solution was to drill a little hole in the collector so that I could put stripped installation wire through it that looked something like this:
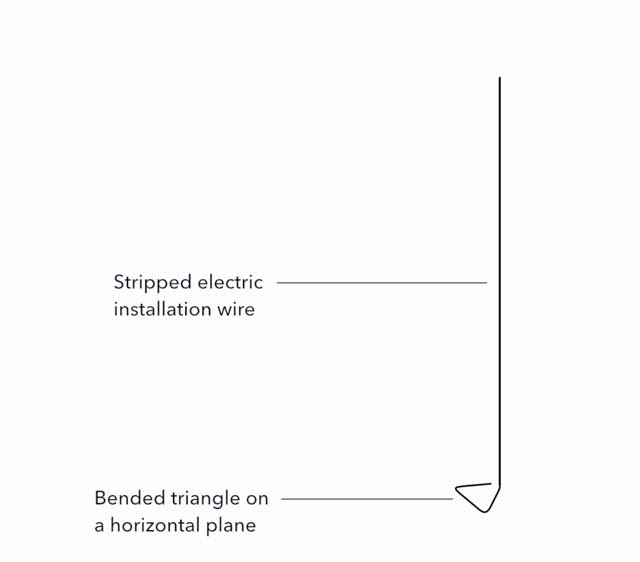
I used this to keep it in place.
Here you can see the collector inside the pipe with the little hole.
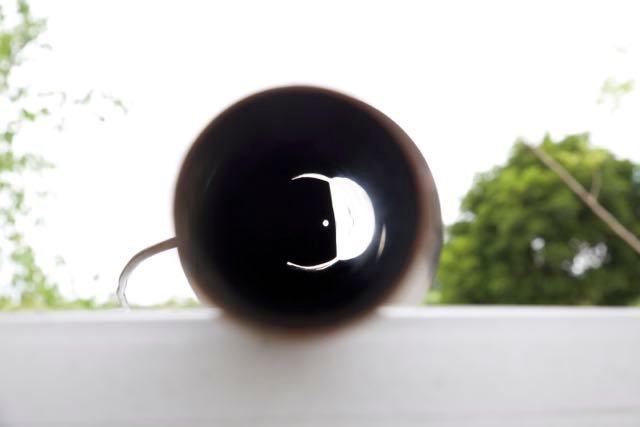
- Drill a hole in the pipe approximately 40cm from the top of the column. Here the collector tube will be fixed. Make sure that the hole is an inch below the collector of the cooling spiral once inserted. The hole must have the same diameter as the collector tube (flexible copper pipe)
- Fix the collector just underneath the hole in the inside of the pipe using the installation wire. The round side of the collector should connect to the inside of the pipe.
- Solder the collector into place by heating the outside of the column while applying solder on the inside.

Attaching the collector tube
- Cut off a suitable length of flexible copper pipe
- Solder it into place in the already drilled hole in the column
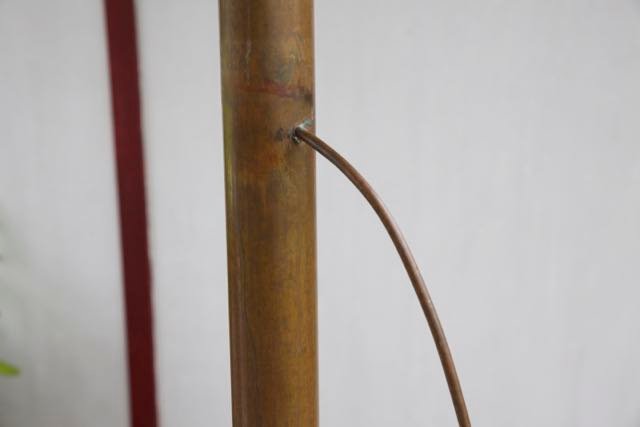
You still is now ready for use.
The downside of this still is that it doesn’t work as it is. The alcohol vapour escapes through the sides of the lid. To seal off the lid I use dough. Mix flour with water and some cooking oil to make a sticky paste to seal it off.
Operating the still
- Insert the cooling spiral into the column. Make sure that the collectors are opposite to each other.
- Fill your still with your sugar mash or any other fermented material
- Attach the water hoses to the inlet and the outlet. Use a tripod or something to keep the hoses up otherwise the weight of the hoses will pull over the column.
- Put your still on a hot plate and turn it on
- Make the dough and seal of the the lid
- Bring it close to a boil. The temperature at the bottom of the column should be around 90 degrees celsius and around 75 to 80 underneath the cooling spiral.
- When the correct temperature is reached turn on the water to cool
- Regulate the temperature of the hot plate as such that it stays constant at 90 degrees at the bottom of the column
For more information about stilling:

Much love,
Gardenbsquared

Yes yes yes! This has been on our homestead bucketlist forever! Thanks for teaching us, I'll be coming back to this one.
Great. I hope you find the information useful. Thank you.
Well detailed instructions, good for anyone that wants/needs one built. Will have to keep this in mind for whenever I have my own place and want to make one thanks!
I'm glad that you liked it. This design worked well for me and I'm sure that you can do a better job than I did. Cheers.
Amazing post! This technique is little known and the use of oil to cure cancer and many ailments is gaining awareness! Many people cant adford to but it though, and so this post is so valuable! Great stuff gardenbsquared !!
I found it a real challenge to build it but it was such a reward to see it work.
Anybody can make their own oil by the way. Just search for "Run from the cure" by Rick Simpson. Thanks.
anyone can make it ... now you've showed us! and Very good to know it works as well.. the end product sure looks right!
Excellent post very informative and may inzpire me to build one of these and brew the good ol brew
It's very satisfying to do so. Thanks
agree with you for yours post..
Wooow goood work
Thanks for post
nice and interesting post!
Thanks for linking to your first article, I had missed that one. I really want to build one. You sold me in the first article, and I only drink about 4 beers a year!
I have a friend who works on model T fords, and those engines were designed to be adjusted to burn diffrent fuels like alcohol!
I would want to use sugar cane juice but we can get into that once I manage to build one. I'm going to have to go over this several times, luckily my brother-in-law can solder.
If you want to produce alcohol for your car than you need a bigger pot and probably a bigger column as well.
An old beer barrel might be a good option with a 3 inch copper pipe.
I don't actually have a car yet! I have a few electric and gas motors for different machines, I'd probably start with the weed wacker which consumes the most gasoline of anyone on the farm!
Great blog, easy to follow and one of the better and easiest designs. Thanks for sharing