Hello everybody!!! Alodia's Crochet Corner is here again to share another tutorial to all of you!!
For today's tutorial I am going to share a very good summer wearable for those who are quiet conservative. If you don't like to wear a cheeky bottom that will combine on your bikini top, you can wear my own version of boyleg shorts!!
Infact you can make your own too, because this is so easy as I used a very common stitch, "double crochet and single crochet".
Same as always, I used my 4mm crochet hook and an acrylic yarn.
Why I always used acrylic? It is because this is what I am comfortable with hehe! Second, it does not absorb too much water, so you don't have to be worried. It will not be removed hahaha! Unlike some cotton, there is possibility to be removed, since cotton yarn is a good absorbent of water.
I am very excited to share this with you, so what are we waiting for? Let's start!!!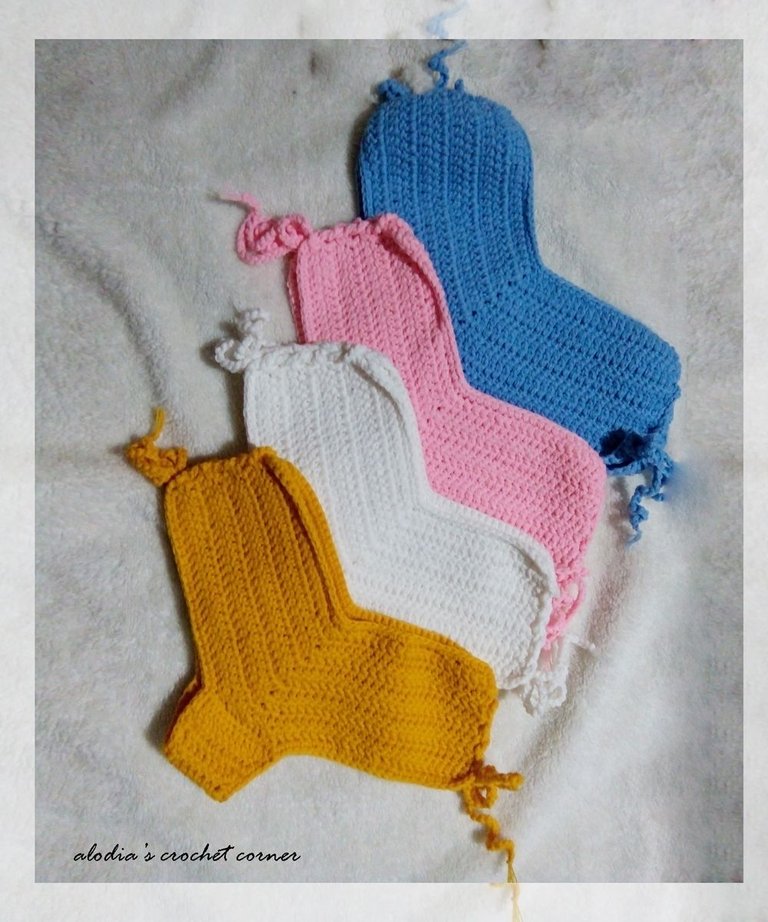

Materials used:
4mm crochet hook
tapestry needle
scissors
yarn (whaterver color you would like)
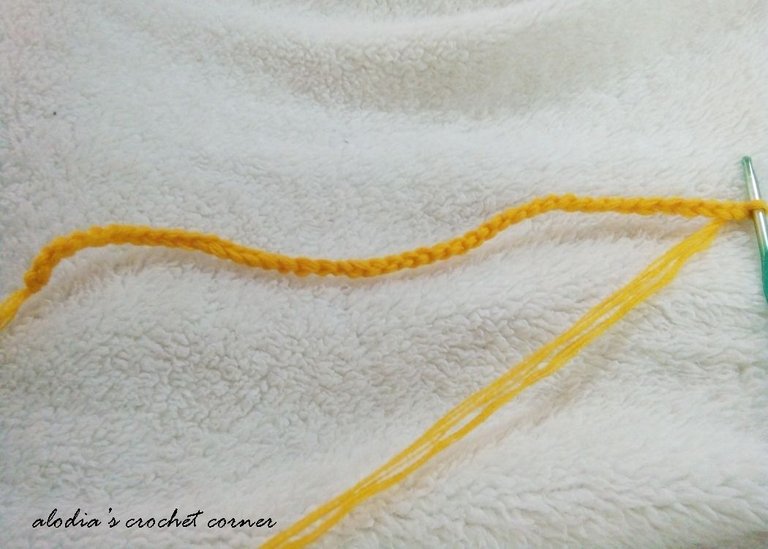
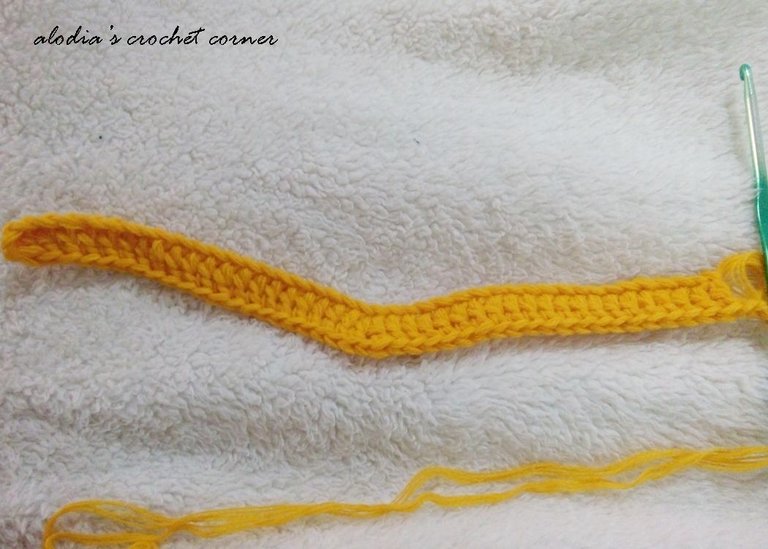
Row 1: chain 43
On the third chain from the hook, double crochet in the next 20 stitches
On the next stitch, double crochet-chain1- double crochet in the same stitch
Then double crochet on the next 20 stitches
| 
|
Row 2: chain 2, then turn
Double crochet in the next 21 stitches
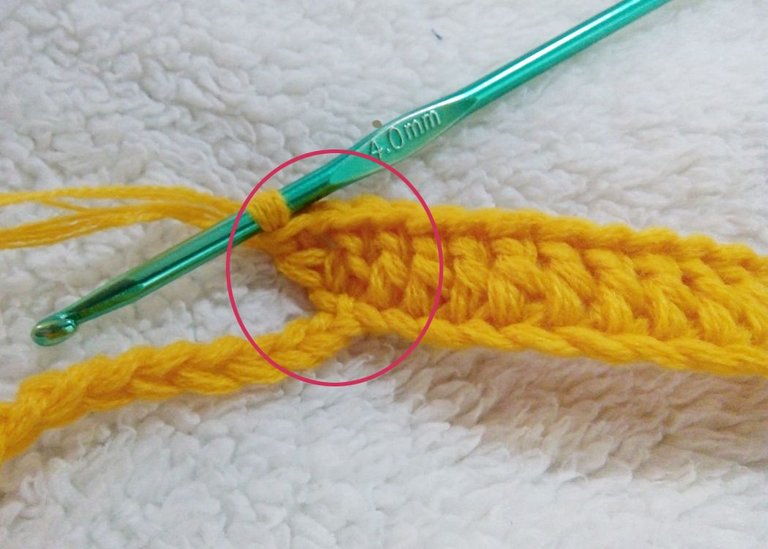
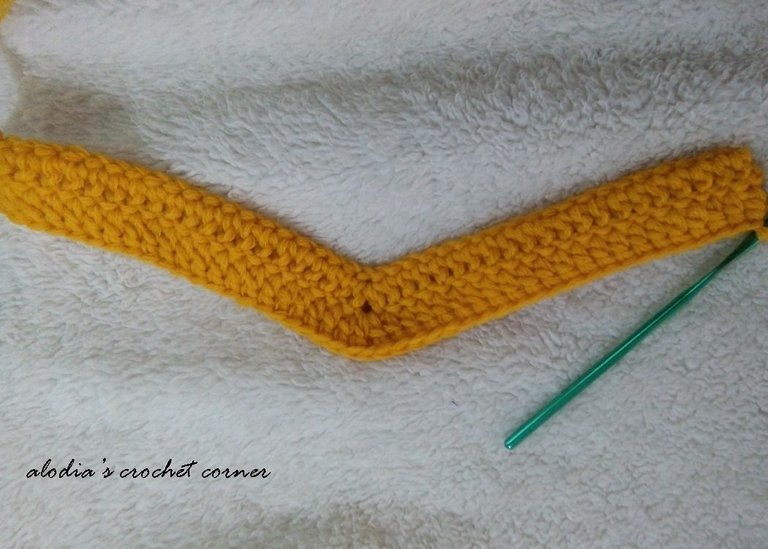
Double crochet - chain 1- double crochet in the next chain1space (V stitch)
Double crochet on the next 21 stitches
(Note: You are making an increasing part.)
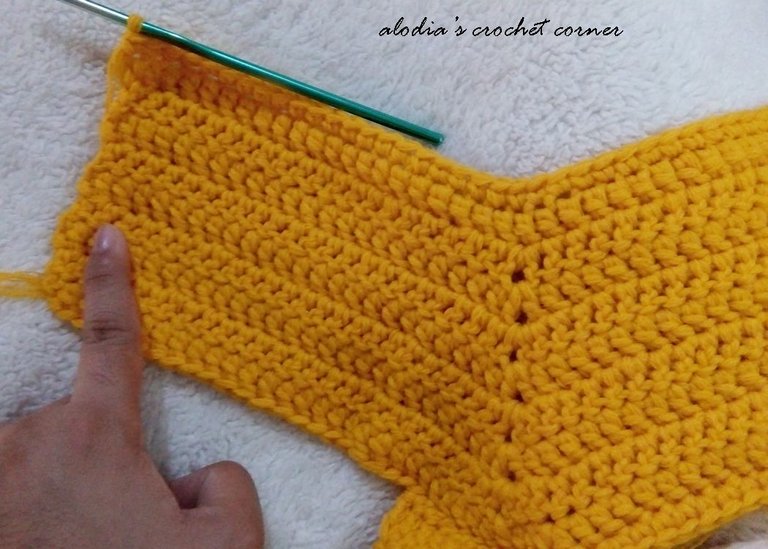
As you can see, I made a circle that is the v-stitch
|  |
Row 3: chain 2, then turn
Double crochet in the next 22 stitches
Double crochet - chain 1- double crochet in the v- stitch
Double crochet in the next 22 stitches
Row 4: chain 2, then turn
Double crochet in the next 23 stitches
Double crochet- chain 1- double crochet in the v-stitch
Double crochet in the next 23 stitches
Row 5: chain 2, then turn
Double crochet in the next 24 stitches
Double crochet- chain 1- double crochet in the v-stitch
Double crochet in the next 24 stitches
Row 6: chain 2, then turn
Double crochet in the next 25 stitches
Double crochet- chain 1- double crochet in the v-stitch
Double crochet in the next 25 stitches
Row 7: chain 2, then turn
Double crochet in the next 26 stitches
Double crochet- chain 1- double crochet in the v-stitch
Double crochet in the next 26 stitches
Row 8: chain 2, then turn
Double crochet in the next 27 stitches
Double crochet- chain 1- double crochet in the v-stitch
Double crochet in the next 27 stitches
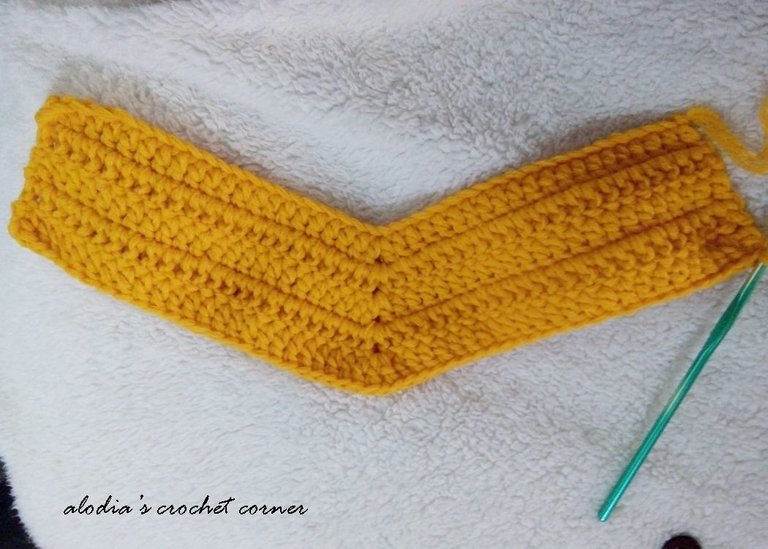
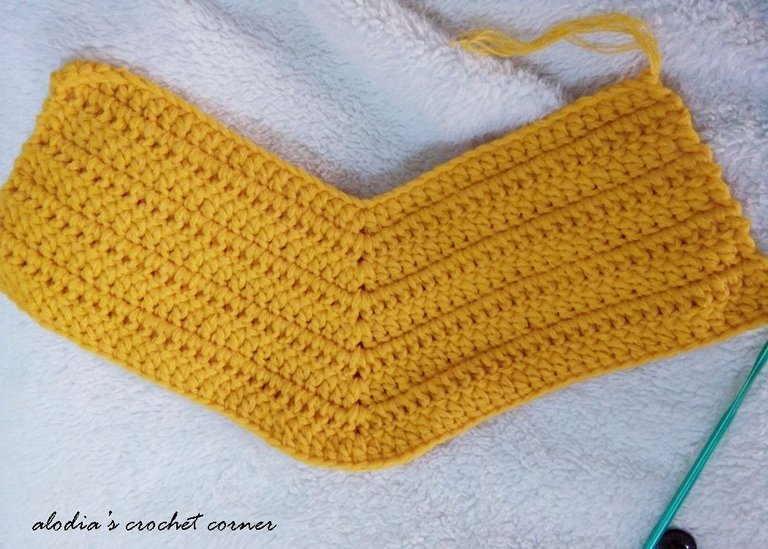
Row 9: chain 2, then turn
Double crochet in the next 23 stitches
Double crochet 2 times in the next stitches
Double crochet in the next 11 stitches
Double crochet 2 times in the next stitch
Double crochet in the next 23 stitches
| 
|
Cut off the yarn and fasten off. Make two if this
For the crotch:
Row 1:
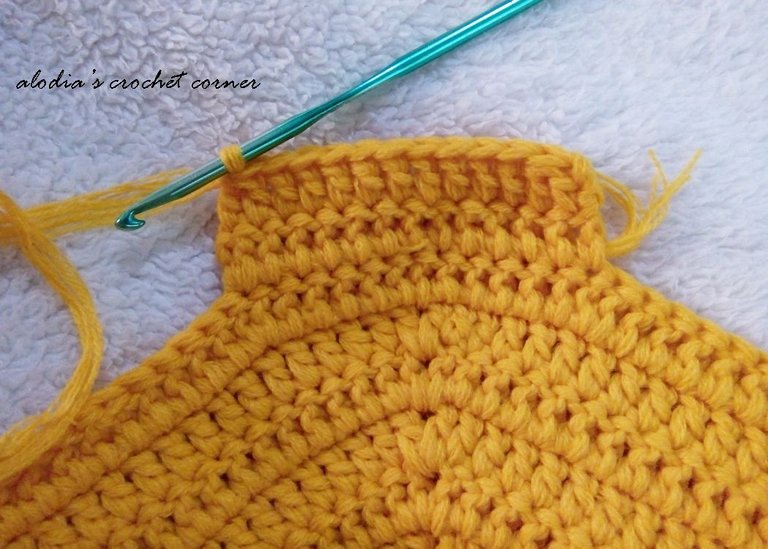
I inserted my yarn on the 25th stitch then from there I start double crochet in the next 13 stitches.
Row 2: chain 2, turn
Double crochet 2 together
Double crochet in the next 7 stitches
Double crochet 2 together last 2 stitches
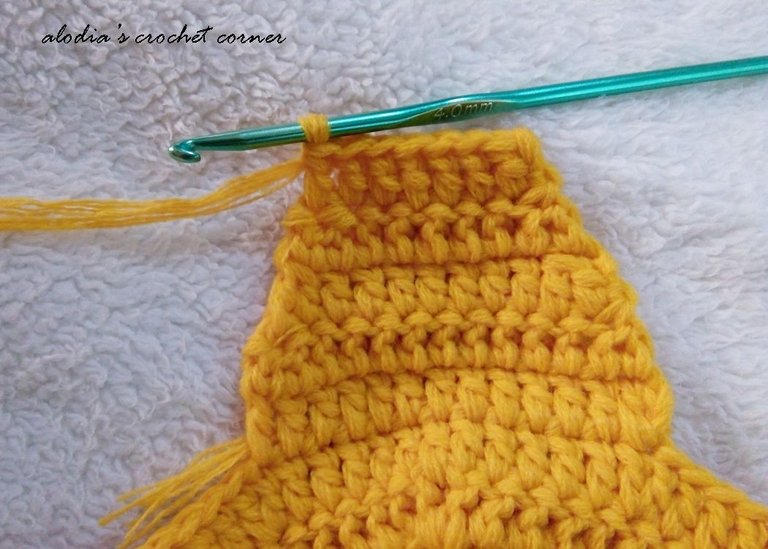
Row 3: chain 2, turn
Double crochet 2 together
Double crochet in the next 5 stitches
Double crochet 2 together last 2 stitches
| 
|
Row 5- 6: Double crochet each 5 stitches
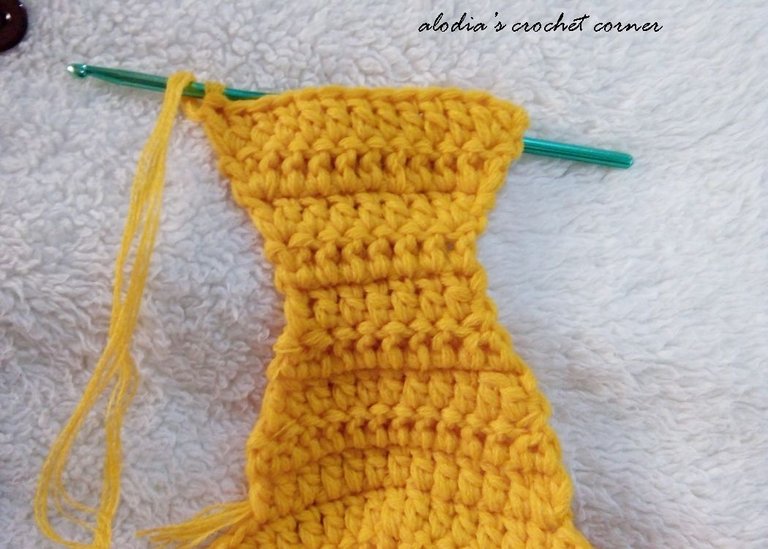
Row 7: chain 2, turn
Double crochet 2 times in the first stitch
Double crochet next 3 stitches
Double crochet 2 times last stitch
Row 8: chain 2, turn
Double crochet 2 times in the first stitch
Double crochet next 5 stitches
Double crochet 2 times last stitch
Row 9: chain 2, turn
Double crochet 2 times in the first stitch
Double crochet next 7 stitches
Double crochet 2 times last stitch
| 
|
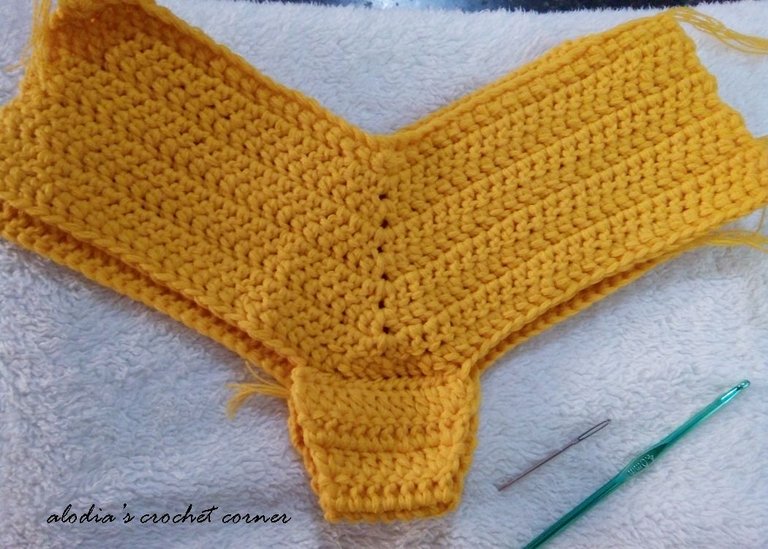
Cut the yarn, then fasten off.
Sew the crotch on the other part of our boyleg. Remember that you should sew it in the middle.. For me to make it easier I sew the crotch on the same 24th stitch on the other side.
Border:
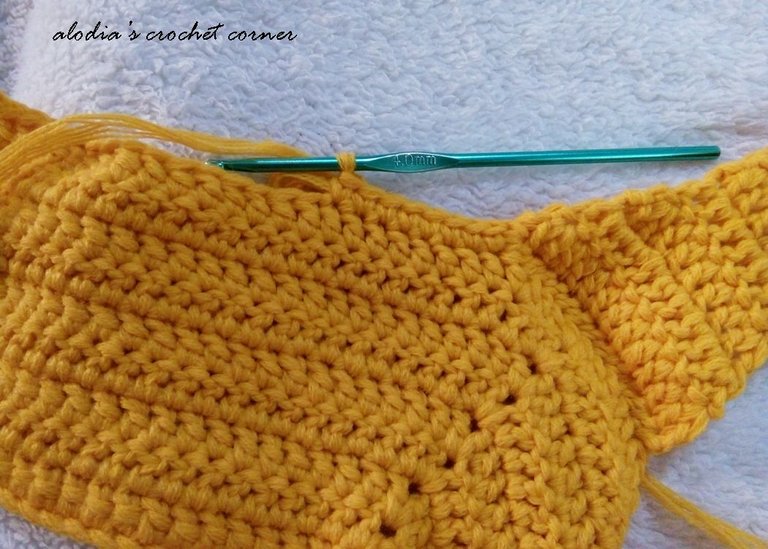
For our border I just single crochet the whole sides, but as you can see I have pointed on the side of our boyleg short. We are going to make a hole in that part which where we can put our strings.
For the sides, I just chain 3, then single crochet every after 2 double crochet. See photo for clearer instruction.
| 
|
It is a continuous round, while making the border, each time you reach the sides you should make a hole.
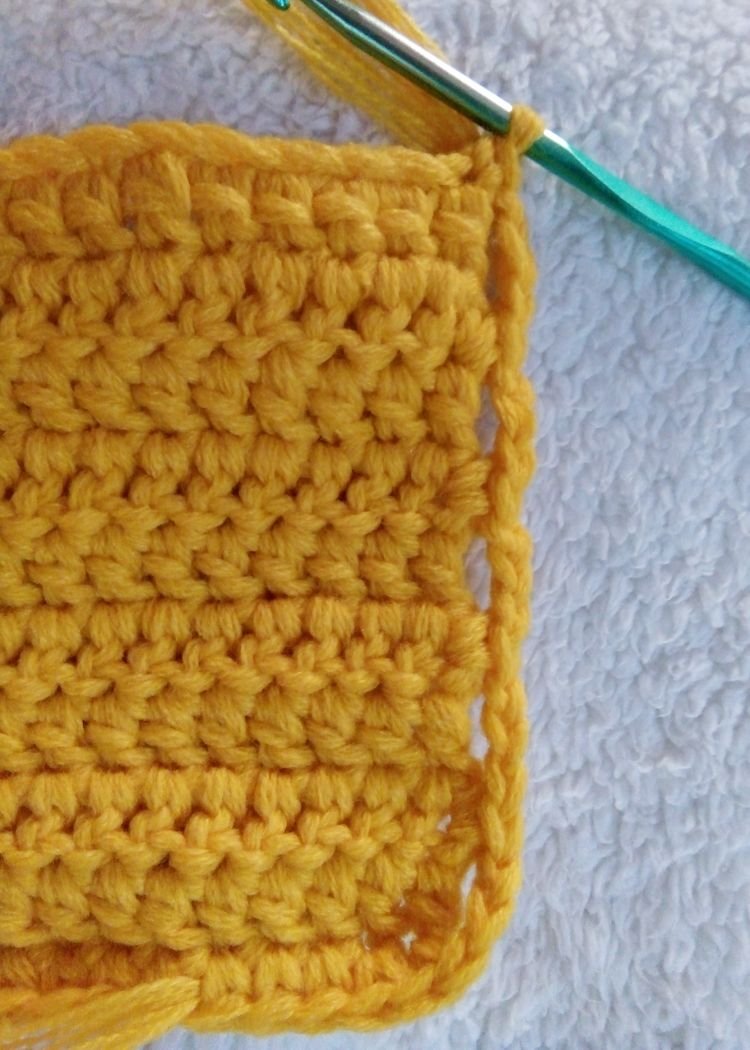
| 
|
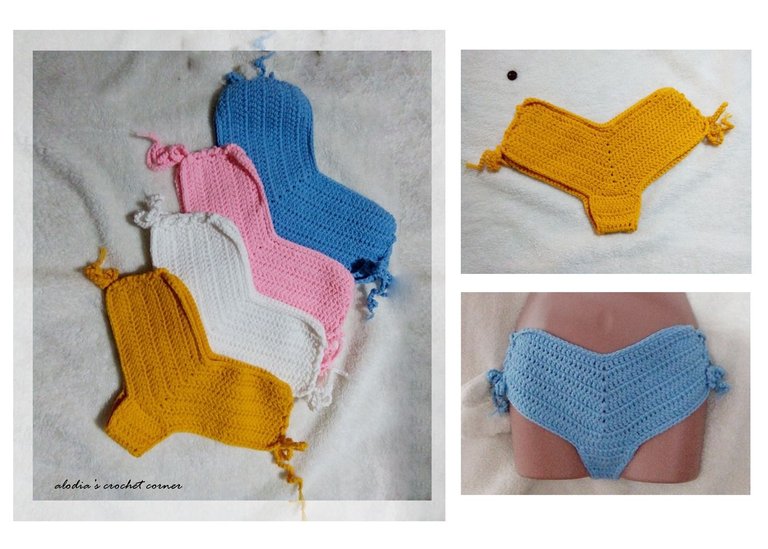
Then I put the strings on both sides of our boyleg!!!
And that's it.. Boyleg Shorts is done!!! Yehey we have a made another successful project!! Hope you enjoy this guys!!
This is so easy, you can make your own now!! As in now.
Note: I am not the only one who make this kind of design, but the pattern I showed you is my own version.

Have a nice day to everyone!!!Thank you so much #steemians!! Watch out for my next tutorials ;)
Have you voted your witness?
To cast your votes, just go to
Consider casting your witness votes for @curie, @surpassinggoogle, @steemgigs, @precise, @cloh76.witness, @ausbitbank, @teamsteem, @gmuxx, @hiroyamagishi, @elizahfhaye, @bayanihan, @papa-pepper, @steemph, @daveks, @jerrybanfield, @boomerang, @teardrops, @donkeypong, @davidpakman, @minnowsupport, @themarkymark, @elizafhaye, @blocktrades and @sndbox @ocd who have been adding invaluable contribution to the community.
https://steemit.com/-witnesses
.png)


Wowww naloka ako sa tutorial mo... Hindi ko pa rin alam gawin ito... Very impressive paggawa mo sis... ganda!!! Parang pwde syang bikini no? Lagyan mo lang top keri na? Hihi. Binebenta mo ba online sis? Nice!👌👌👌
hi ate.. opo merun po yan top ate,, prepare ko din tutorial nian,, pero medyu mapapalaban sa tutorial ng top hhehe,, salamat ate.. opo binebnta ko din online hehe
Your needlework is awesome, @xorexman! Thank you for taking the time to give us a detailed tutorial! Your post is featured in SteemPh Davao Daily Featured Post for March 2.
thank you sooo much po ;)
Ang tyaga nyo po :D
Salamat po :-)
welcome :D
Wow nice
Thank you :-)
Ang husay talaga ng disipulo ng liwanag di lang magaling umawit magaling din sa gantsilyo! Galingan mo ang pangangampanya next Friday.
whahahaha.. para sa ekonpmiya heheh salamat @tpkidkai
Oo tama Para sa Ekonomiya! Hahaha nahahawa na ako sa inyo.