Most people see Microsoft Excel as a dull and monotonic platform, however, there are many ways to perform work in a much more pleasing and creative environment by applying few techniques to create attractive spreadsheets.
I'll attempt to share one such technique in this article which helps me in my workflow.
In this guide, you will learn how to:
- Add a background image to your Excel worksheets
- Automate the process of formatting your Excel worksheet

Add a background image to your Excel worksheets
- The first thing you will have to do is download an image and place it in a dedicated folder on your local PC
- Let's set up a macro to automate the process. Go to Developer tab > Record a macro OR use the shortcut key Alt-L-R

- At the macro window, you can leave every setting on default and press OK

- At this stage, every step you make, the macro will record your action. Let's place the image as your background, use the shortcut keys Alt-P-G and browse for the image on your PC

- At the next step, we will eliminate the gridlines to make our experience more smooth. Use the shortcut keys Alt-W-V-G to disable the gridlines.

- If you chose a dark background image, you will have to set the fonts to white color. To do this, first, highlight the entire spreadsheet with Ctrl+A key. (In case your background image is bright, you can skip this step as the default black fonts are going to work well.)

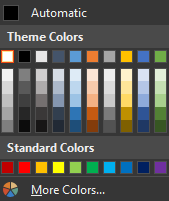
- Next use the shortcut keys Alt-H-F-C and navigate with your directional keys to the white color.

- As the last step, you can stop the macro recording by using the shortcut keys Alt-L-R

Automate the process of formatting your Excel worksheet:
In order to apply our automation to a one-click process, we will put the newly created macro to the Developer tab:
- Select File > More Commands > Customize Ribbon.

- Check the "Developer" box inside the right panel, then click the plus + to expand and close the group under that tab.
- Select the Newly created group button (bottom center of the right panel), and press the "New Group" button at the bottom of the list.
- Next, press the "Rename" button, and enter the name for your new group and select a symbol from the listed icons; click OK when finished.
- Select Macros group from the left panel and all the macros you have available on your system will resemble.
- Pick the macro from the list you want to attach to the Ribbon and click the "Add" button to add it to your new custom group. Press OK after you finished.

- Go to the Developer tab where the Macros group is located (right end of the menu) with your chosen macro functions. This way, you can execute your task quickly with the custom made macro button.

✅ Enjoy the vote! For more amazing content, please follow @themadcurator for a chance to receive more free votes!
@exgap purchased a 5.99% vote from @promobot on this post.
*If you disagree with the reward or content of this post you can purchase a reversal of this vote by using our curation interface http://promovotes.com
You got a 0.38% upvote from @minnowvotes courtesy of @exgap!