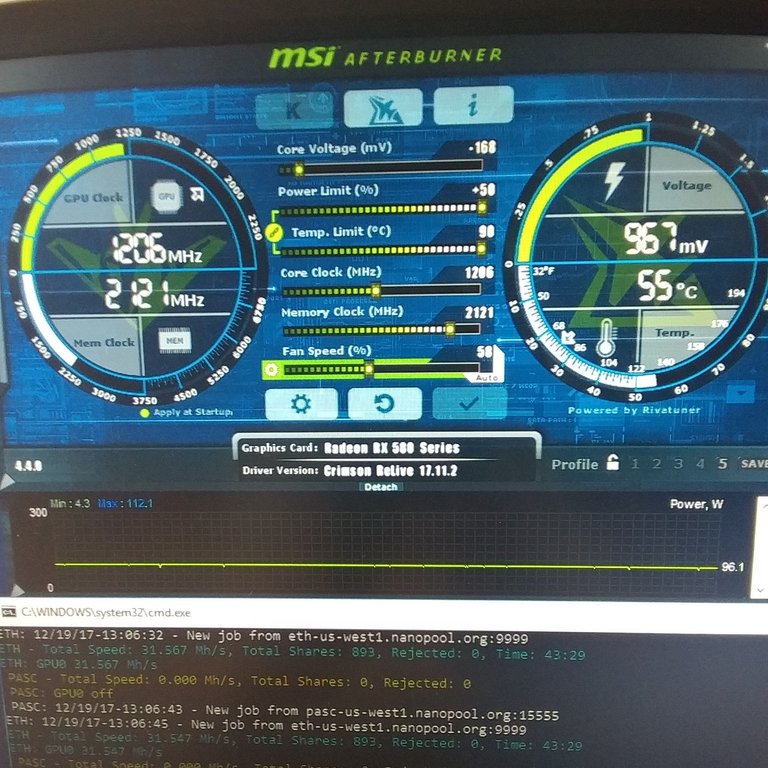
As you can see I was able to take my RX 580 4GB from 18 mh/s to 31.8 mh/s.( )
)
I settled for 31.5 mh/s reducing temperature and power consumption. The miner is running stable now for 43+ hours at 96 watts and 55 degrees Celsius.
I purchased a pre-built desktop computer from SEARS for $700 plus tax.
I'm mining with a Cyberpower PC gamer ultra w/ RX580 MSI ARMOR 4GB on Windows 10
With very little troubleshooting I was able to get these results. Here's how.
1 UPDATE WINDOWS 10.
2 UPDATE AMD DRIVERS.
3 RESTART COMPUTER AND CHECK FOR ANY OTHER UPDATES. REPEAT PROCESS IF NEEDED.
4 GO TO myetherwallet.com CREATE ETHEREUM WALLET. SAVE AND BACKUP YOUR PRIVATE KEY AND ADDRESS.
5 ADD A NEW TEXT FOLDER TO YOUR DESKTOP AND COPY AND PASTE ETHEREUM ADDRESS IN FOLDER.
6 INSTALL THE LATEST VERSION OF MSI AFTERBURNER. MY COMPUTER CAME WITH A DISK COPY OF AFTERBURNER.
7 INSTALL THE LATEST VERSION OF AMD WATTMAN. THIS CAME INSTALLED ON MY COMPUTER.
8 ADD A NEW FOLDER TO YOUR DESKTOP AND NAME IT claymoredualminer.
9 GO TO NANOPOOL WEBSITE AND CLICK Ethereum Quick Start. CLICK ON THE LINK TO DOWNLOAD Claymore DualMiner.
10 GO TO YOUR DOWNLOADS AND EXTRACT ALL FROM COMPRESSED ZIP claymore.s.Dual.Ethereum.Decred_Siacoin...
TO YOUR DESKTOP FOLDER claymoredualminer.
11 GO TO NANOPOOL WEBSITE AND CLICK Ethereum Quick Start. CLICK ON LINK Generate your config.
- Select operating system: windows
- Select GPU vendor: AMD
- Email is needed to alert you if miner goes down: [email protected]
- Main server pick the region closest to you: US West
- First algorithm: Ethereum
-First algorithm address copy and paste your ethereum address:0x95059696ca7E8EA9E109A27FCcdDDb64365fAe6f
- Second algorithm: none (If you want to dual mine a second coin choose coin type and enter coin address)
12 CLICK GENERATE AND COPY DOWNLOADED FILES TO claymoredualminer FOLDER.
13 OPEN claymoredualminer FOLDER. DOUBLE CLICK ON THE BATCH FILE JUST YOU COPIED IN YOUR FOLDER.
14 A WINDOW WILL OPEN AND THE MINER WILL START RUNNING. AS THE MINER STARTS UP IT WILL DISPLAY YOUR ethereum address:0x95059696ca7E8EA9E109A27FCcdDDb64365fAe6f
15 LET THE MINER RUN 10 MINUTES.
16 GO BACK TO Nanopool website CLICK ON Ethereum Overview. COPY AND PASTE YOUR ethereum address:0x95059696ca7E8EA9E109A27FCcdDDb64365fAe6f IN THE SEARCH BOX. THIS WILL DISPLAY HOW MUCH ETHEREUM YOU HAVE MINED. MINIMUM PAYOUT IS 0.2 ETH. YOU WONT SEE ANYTHING IN YOUR myetherwallet until you mine at least 0.2 ETH. (Keep in mind Nanopool also takes 1% )
So now your miner is setup running and you verified your ethereum address is correct on nanopool ethereum overview. The next steps involve adjusting settings, overclocking and flashing the gpu bios. I will update this post soon with the remaining steps. Please list any questions you have in the comments ![20171219_150737.jpg]
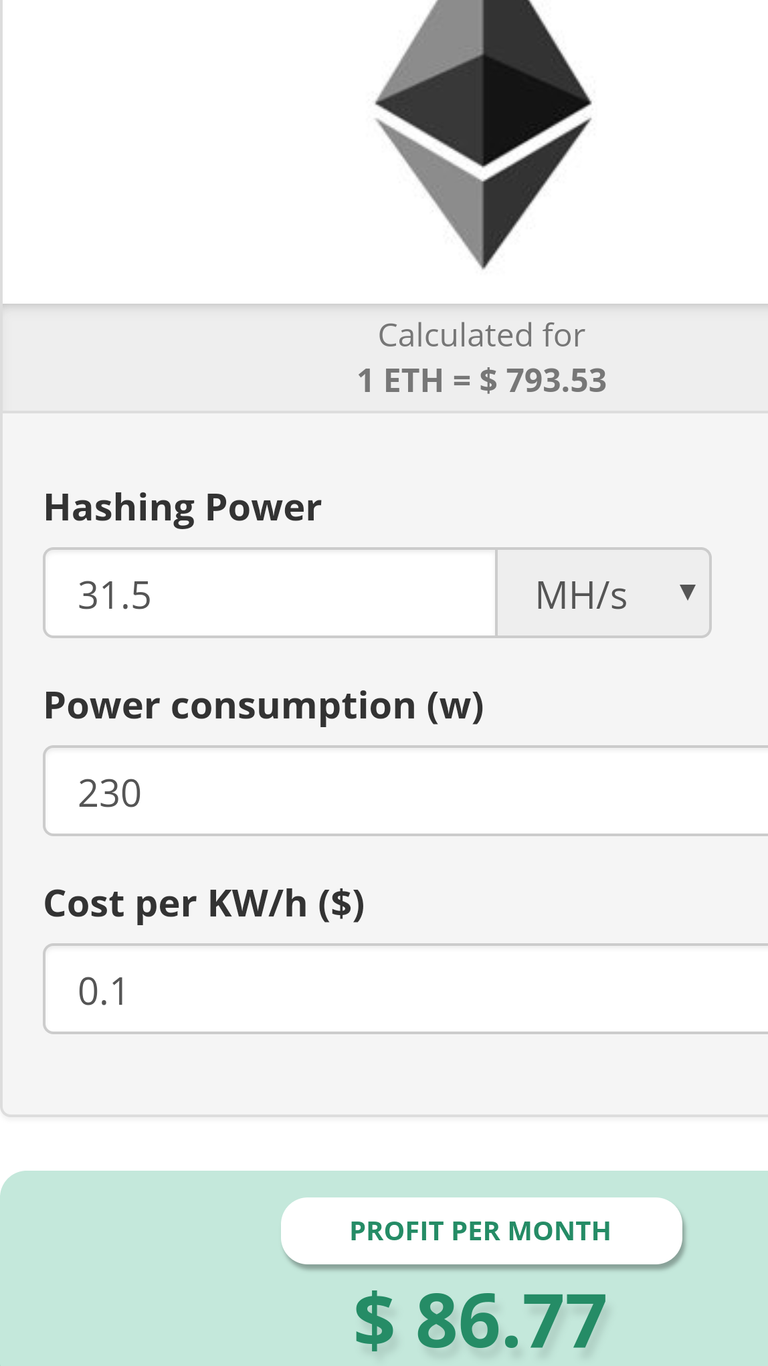
My computer uses about 90 watts at idle from the wall. When the miner is running it draws about 225 watts of power so I figure the GPU is using 135 watts from the wall. I was able to reach 31.5 mh/s. Using a ethereum mining calculator my projections are $86.77 per month profit.
Nice, are you still mining at that hashrate? Mine's only doing about 28 and I'm curious what bios you're using.
Congratulations @cashless! You have completed some achievement on Steemit and have been rewarded with new badge(s) :
Click on any badge to view your own Board of Honor on SteemitBoard.
For more information about SteemitBoard, click here
If you no longer want to receive notifications, reply to this comment with the word
STOPCongratulations @cashless! You have completed some achievement on Steemit and have been rewarded with new badge(s) :
Click on any badge to view your own Board of Honor on SteemitBoard.
For more information about SteemitBoard, click here
If you no longer want to receive notifications, reply to this comment with the word
STOP