I love this time of year because it is the perfect excuse for lazy days spent snuggled up crocheting. The nights are drawing in and the cooler weather is on its way.
The cold weather orders are coming in thick and fast now. People are starting to request ponchos, shawls and jumpers, which means im plenty busy!
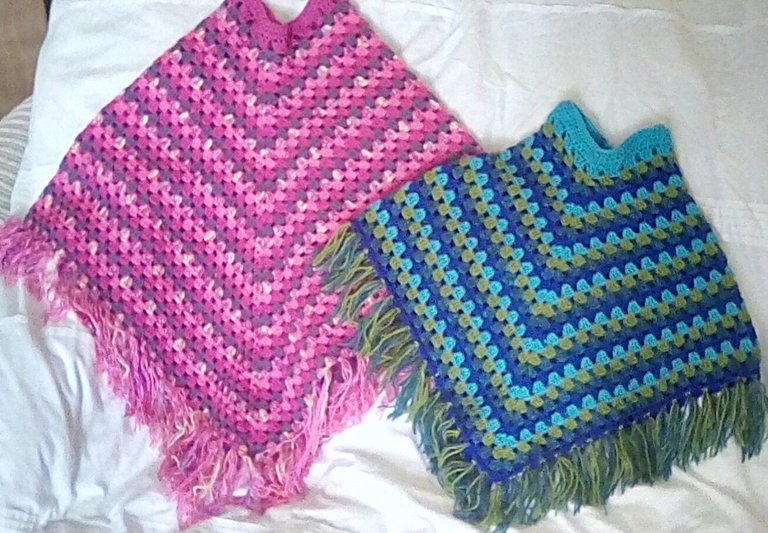
These two kids ponchos are actually for xmas presents, so the orderer is well organised!

The pattern couldnt be easier and the colour combinations are endless. They could also be made in different sized yarns, just the start number of chains would need to be altered.
I chained 72 to start. Double crochet in the 3rd chain from hook, then in next two chains. Chain 1, skip 1 chain then 3 double crochet. Repeat to end. Chain 1 and slip to start chain 2. I wasnt too concerned if i had a chain left uncrocheted into -i just sewed in later.
Change colour here if you wish. Slip stitch to 1st chain space. Chain 3 and 2 dc ch1 3dc in the same space. This will be your first peak on the poncho, and where the pattern increases on each row.
Chain 1, 3dc in each space along until your mid point. 3dc ch1 3dc in next space. Continue ch1 3dc to the first chain 3. You should have an even number of 3dc groups between each increase. With my start ch number i had 8 down each side with two sets of 3dc ch1 3dc.
Slip to 3rd chain and change colour again if desired. Repeat the above row until the poncho is required length. I used dk yarn with a 3.5mm hook which worked out about 2.5inches per 4 colour repeat.
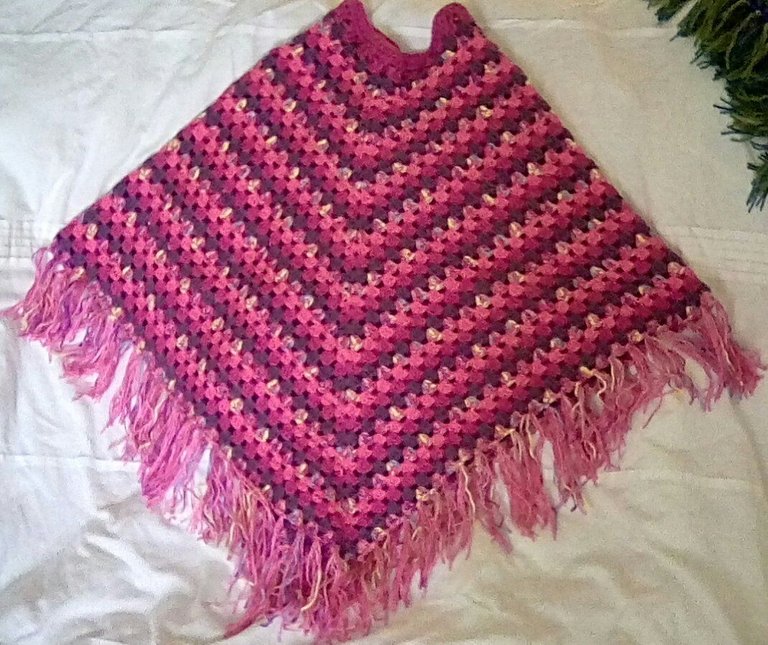
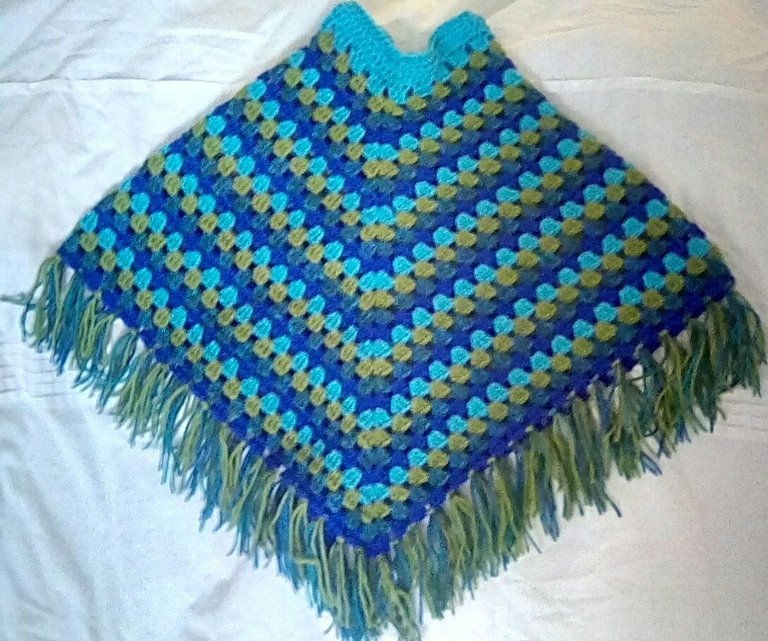
To finish i added a few rows of hdc to the neckline, then fringed them with a contrasting yarn. Finally found a use for some really cute sparkly pink yarn 😍

The pink/purple poncho is for an 11 year old and is 24 inches.

Blue/green is for a 4 year old and is 16 inches.
Hopefully a few more happy customers 😁
Wonderful done!
Beautiful work! I love all the fringe!
Thanks! Its always the bit that takes the longest and is the most fiddly, but makes it look awesome. I usually find it hard to keep the fringe looking even, but this time i used a sturdy book to wrap my yarn around so that the pieces were the same size. I used three strands in each chain space so its nice and thick :)
Nicely done! These are Wonderful! As always I love the color combinations you used. I think you will have very happy customers. Thank you for sharing the instructions with us!
Thanks :) these were really good for stash busting colours that i couldnt find a use for elsewhere, specially the pinks. Some of the shades are a bit garish on their own, but the compliment each other quite nicely in the end! Bright and cheerful 😊
That's awesome! I tend to hold on to every piece of yarn even if I don't think I will ever use it. You just never know when it will be handy. 😁
Im exactly the same! I had big dreams a few years ago of turning my scraps into single rounds of granny square and making a giant blanket from them, but the thought of sewing thousands together meant it never went much further! I now even save my snips rather than put them in the bin. Figure they might make good stuffing one day :)
Oh yes I'm sure that would have been a very big project. That's very true! I didn't think about using them for stuffing! Great idea!
Lovely! Beautiful!
Thank you - please you like them!
So colourful, and I like the way you did the neckline. I'm sure the recipients will be so excited!