This is our tutorial for the secure transaction method for investing Ethereum into our ICO starting on March 29th. We will use the browser plugin MetaMask which is the recommended method connecting to your MyEtherWallet.

This is Tutorial 8 out of 9 for the ONSTELLAR ICO. (overview)

Step 1: Install MetaMask
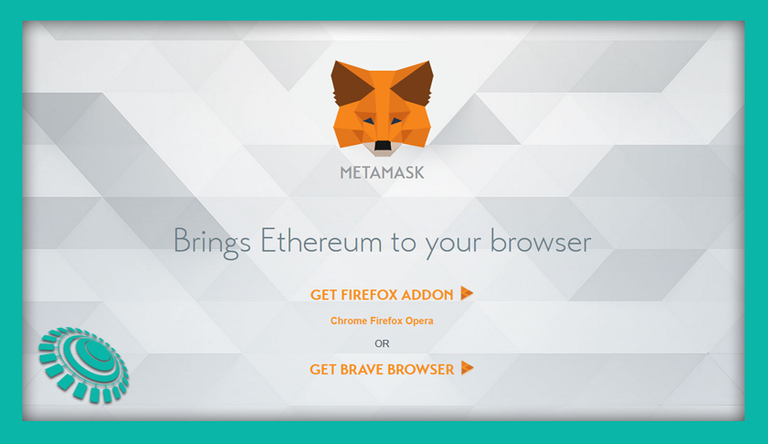
First, you need to install the free MetaMask browser plugin from the MetaMask homepage. There you will find options for Firefox, Chrome and Opera. There you can also download the free Brave browser for even more security which has MetaMask already pre-installed.

Step 2: Open MetaMask
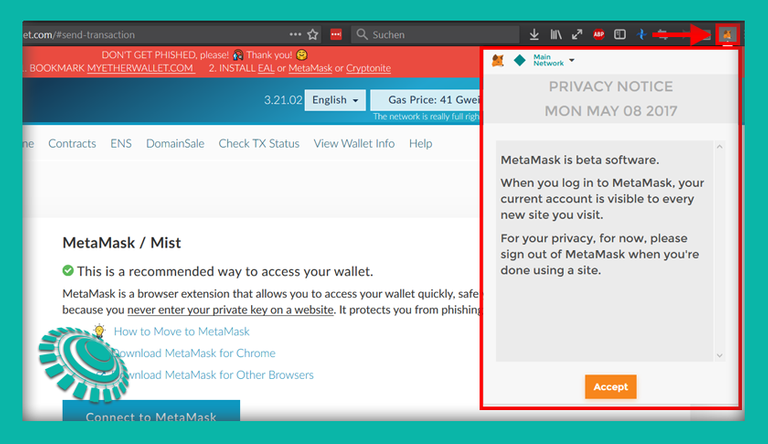
Restart your browser and click on the fox icon in the top right corner. A pop-up window will appear giving you additional infos about MetaMask. Click the orange Accept button to continue.

Step 3: Read and Accept the Terms of Use
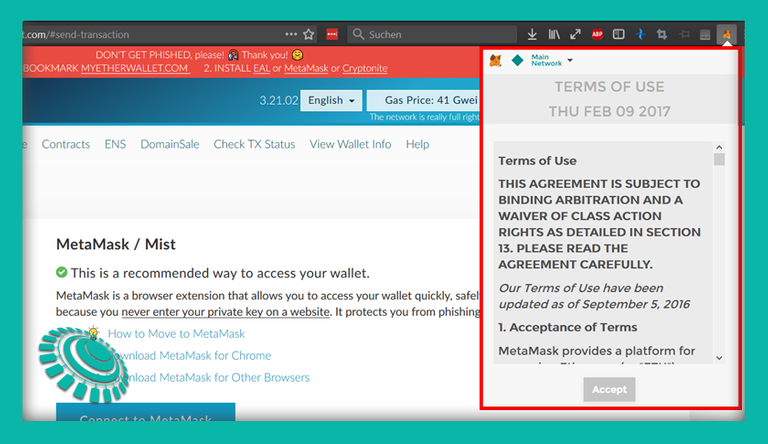
You will now see the MetaMask Terms of Use. After scrolling through them you can click on the now activated Accept button to continue.

Step 4: Create a MetaMask Account
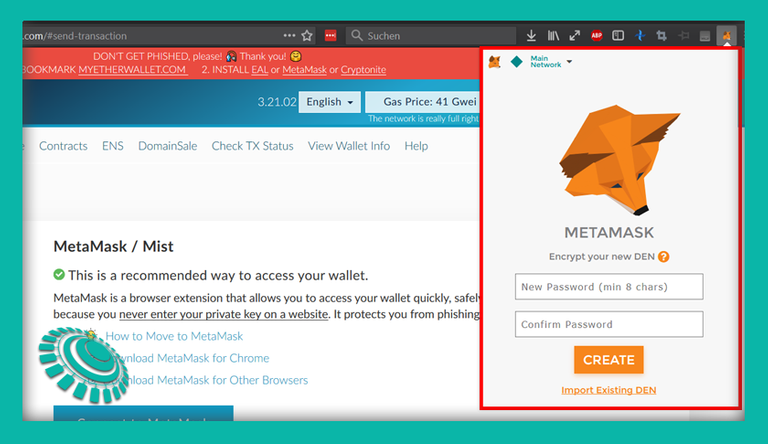
You are now being asked to create a new account. Type in a secure password with at least 8 characters and confirm that password in the field below. After you made sure you have memorized or safed your password click on the Create button.
If you have already a MetaMask account from somewhere else you can import it by clicking on Import Existing Den where you then have to enter your secret twelve word phrase and create a new password for it.

Step 5: Safe Your 12 Word Backup-Phrase
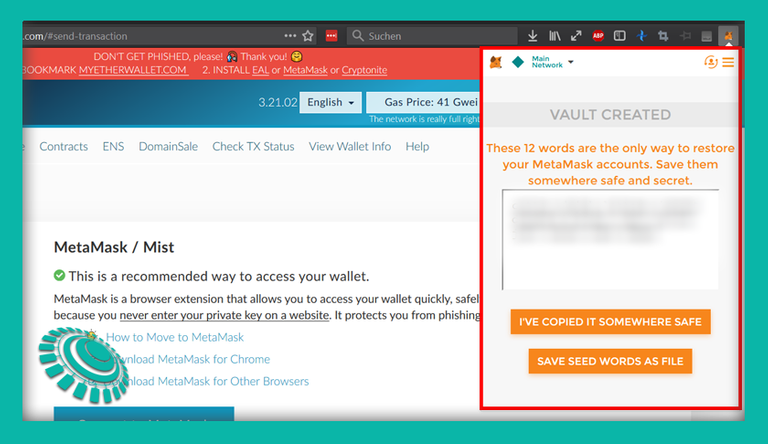
Please memorize or write down your twelve words phrase and keep them safe. Additionally, you can safe your seed words as a file and keep them on a secure flashdrive that is not connected to the internet. After you are done click on I've Copied It Somewhere Safe to continue.
These twelve words are your only backup for your MetaMask account and hence the only way to restore it in case of damage or loss of your computer.

Step 6: You Are Now Logged In
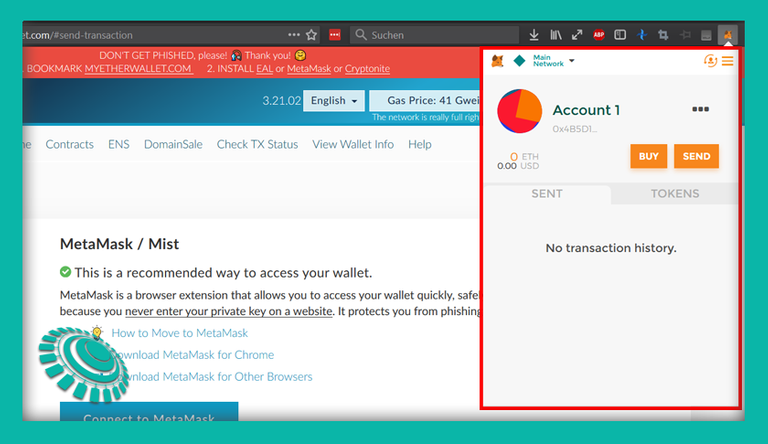
You are now successfully logged into your new MetaMask account and you will see the brand new Ethereum wallet created for you labeled Account 1. If You want to use it to send funds to you can get the full address by clicking on the three dots next to it and select Copy Address To Clipboard.
You can also buy Ethereum directly from your Coinbase account or via using Shapeshift from within the MetaMask plugin. However, this tutorial is not talking about that process.

Step 7 (Optional): Import Your MyEtherWallet Address
You probably have already another MyEtherWallet address with Ethereum funds in it as we have guided you in our tutorial How To Transfer Ethereum From Coinbase to MyEtherWallet For The ONSTELLAR ICO. For the ONSTELLAR ICO you can use the MetaMask wallets as they are compatible with ERC20 tokens. However, you can easily import your already existing one into MetaMask to use it from there as well.
To do so, click on the user account icon in the top right corner of MetaMask and select Import Account.
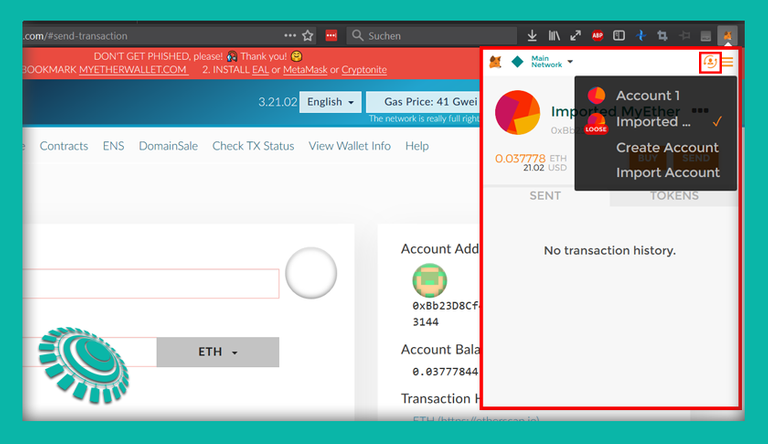
You can now select the type of the import. Leave the default option at Private Key. Below you have to enter your private key of your MyEtherWallet. Double check if you have the correct key. After that click on the orange Import button.
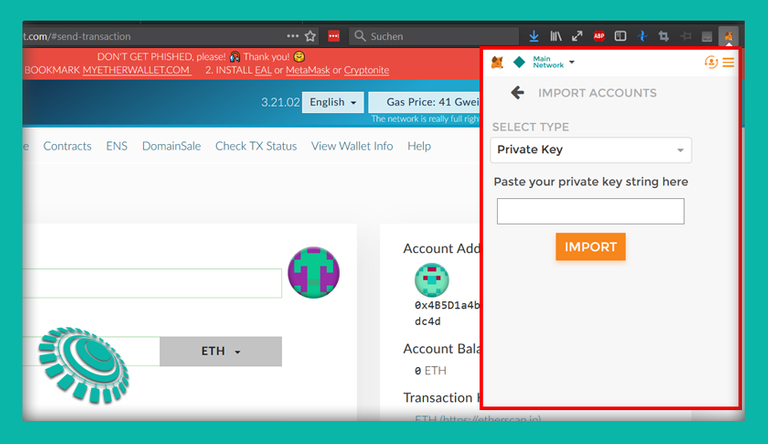
Your imported account is now available in MetaMask. Click again on the user account icon in the top right corner and you will see a second account. Click on it to select it. If that wallet has funds in it you will now see the amount in Meta Mask.
Finished
You have now prepared all neccessary steps to use MetaMask for secure Ethereum transactions via your browser. In our next tutorial we will show you how to use MetaMask to invest into the ONSTELLAR ICO by sending your Ethereum to our ICO address.

Website | Telegram chat | Twitter | Instagram | Facebook

Sooo helpful thanks
wow thanks.. this is helpful
This post has received a 44.56 % upvote from @boomerang.
thanks for the amazing tutorial.
click here.Congratulations @onstellar, this post is the third most rewarded post (based on pending payouts) in the last 12 hours written by a Newbie account holder (accounts that hold between 0.01 and 0.1 Mega Vests). The total number of posts by newbie account holders during this period was 3300 and the total pending payments to posts in this category was $2393.83. To see the full list of highest paid posts across all accounts categories,
If you do not wish to receive these messages in future, please reply stop to this comment.
As always, a very informative article!