Paper is one of the funniest hobbies we can not give up since we were kids. It is a kind of origami made in school, at home and even at work. We all have a secret or style according to our own hand habits in making planes from paper.
But in this article, we have prepared an illustrated guide especially for young children to follow easily. By following our step-by-step guide, you will have fun with your paper planes, which you will prepare with your child.
How to make a plane from paper?
In this article, we have prepared four different color and pattern paper plane templates for you. You can download these templates from your computer and print them easily from your printer. During paper crafting, young children should use cutting tools such as scissors for adult control.
The materials you need:
Scissors
First, print the paper plane template from your printer. Optionally, you can use the template in color or colorless. Then cut off your marked template as shown in the picture below.
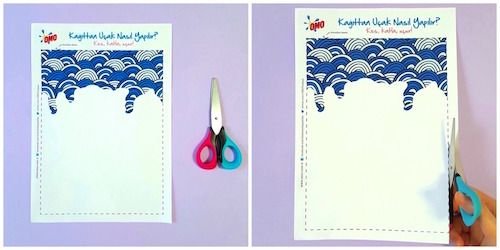
Then double-fold your pattern as you would on the bottom and outer side of the pattern you are wearing and open it again. The purpose here is to make the folding place in the middle part of the paper equal to the sides of your plane. Now on the nose of your plane. First, fold the end of the paper to the inside to form a triangular shape. Check that the part you folded corresponds to the middle of the paper. Thus, the two sides of the nose of your aircraft will be of equal width.
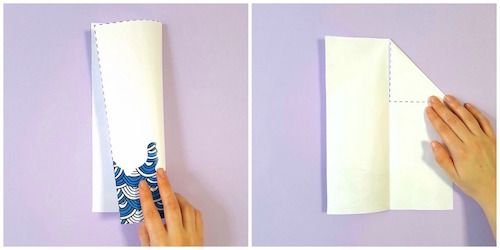
Then fold the other end of your paper in the same way and make sure that the two ends meet in the middle. The next step is to fold the two sides that you bring with the triangular shape down. In this way, you will be preparing the skull of your plane.
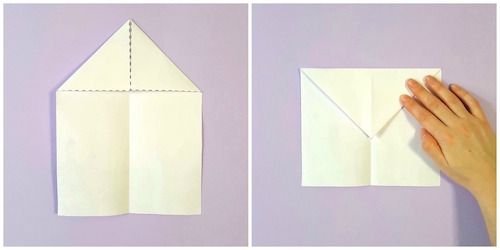
After folding, fold the end parts of the paper inward again as you did in the previous steps. Do not forget to fold both ends of your paper. Then fold the paper out from the center. Thus, the part you triangularly fold will come out.
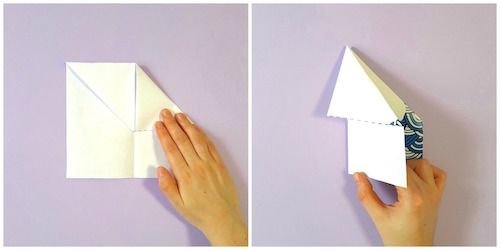
The final stage is to fold the wings of your plane. To do this, double up the end of the paper you fold outward. When you fold the wing, if you bring the folded portion equal to the plane of the plane - that is, if you fold it in half - the wings of your plane will be equal to each other. Do the same for the second wing. Then, if you turn your plane straight, it will look like this.
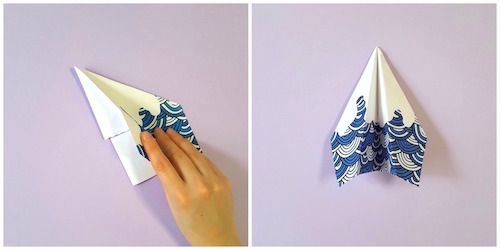
That's it - your plane is now ready for flight! Making a plane from paper is a hand craft that everyone can easily do with small and big. Especially with the different airplane templates you can easily print on your printer, your boys and girls will have fun.
Tip: Attach the inside and the underside of your aircraft's wings with a small adhesive. You can use adhesive tape or double-sided gum adhesive for this. The glue you use in a small amount will keep both your aircraft together and give you a light weight on the center of your plane and make it balance and fly farther.
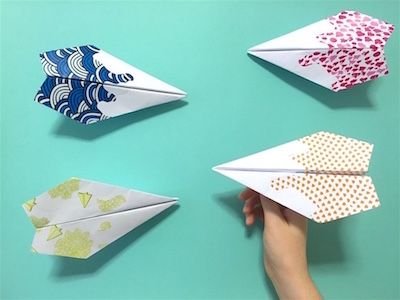
Paper aircraft construction: Extra ornaments
You can decorate your paper plane to make it even more personal. This part is especially fun for your young children. Allow the blank part of the template paper to decorate your child. This can be a great opportunity to improve your imagination and creativity as well as improve your hand skills. Plus, it will undoubtedly find the plane with its own design more fun.
You can use any material here; crayons, pastel, watercolor, sim or self adhesive stickers. Such materials can make your child quite creative planes.
Congratulations @by99! You have received a personal award!
Click on the badge to view your Board of Honor.
Do not miss the last post from @steemitboard:
Congratulations @by99! You received a personal award!
You can view your badges on your Steem Board and compare to others on the Steem Ranking
Vote for @Steemitboard as a witness to get one more award and increased upvotes!