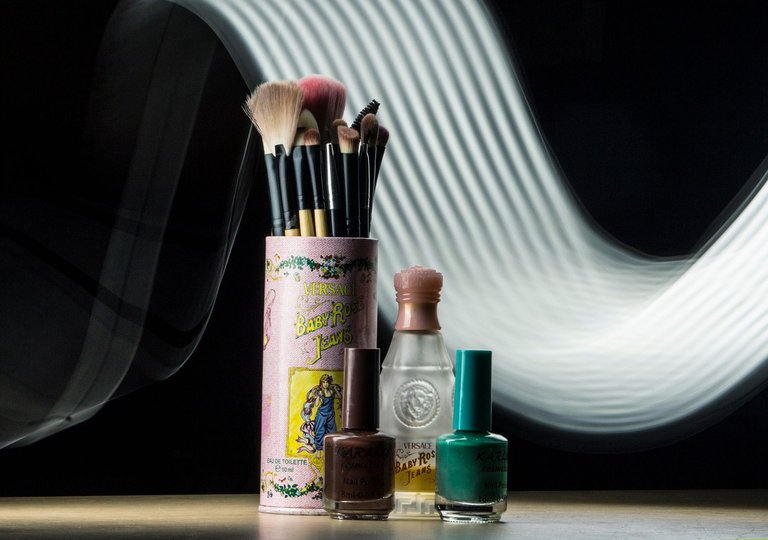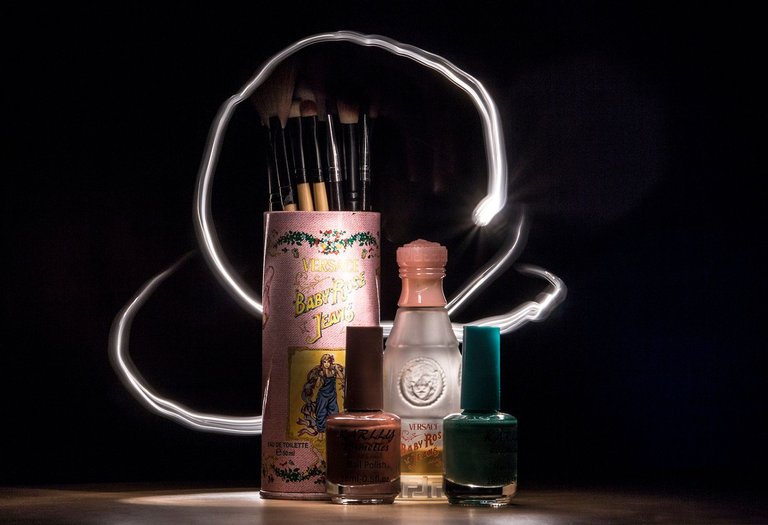
Estas fotografías las tomamos @eliasgrafico y yo, en un arrebato de inspiración y tiempo de ocio, quisimos experimentar con la técnica de Larga Exposición a 8 segundos, la verdad nunca la habiamos puesto en práctica. Esta técnica, la realizamos usando algunos objetos, en mi caso, mi perfume favorito, unos pinceles de maquillaje y esmaltes de uñas, para el efecto de luz, usamos una linterna.
 We took these pictures @eliasgrafico and I, in a fit of inspiration and leisure time, we wanted to experiment with the technique of LONG EXPOSURE to 8 seconds, the truth we had never put into practice. This technique, we made using some objects, in my case, my favorite perfume, some makeup brushes and nail polishes, for the effect of the lights, we use a flashlight.
A continuación, les dejare material extra de la técnica de Larga Exposición.
El funcionamiento de la fotografía de Larga Exposición.
Lo primero que tienes que entender es el funcionamiento de esta técnica. Si eres un lector habitual del blog sabrás ya a estas alturas que la cámara graba (registra, atrapa, captura..) la foto en una fracción de segundo. En el momento en que pulsamos el disparador hay un pequeño agujero en el objetivo de la cámara, muy minúsculo, conocido como “obturador” que se abre y se cierra en un pequeño fragmento de segundo y que permite que la luz penetre en la cámara y que así se grabe la imagen dentro.
¿Qué pasaría si ese obturador se pudiera mantener mucho tiempo abierto, por ejemplo 2 ó 3 segundos? Pues sencillamente se obtendría una foto compuesta por todo lo que sucediera en esos 2-3 segundos. Todo se quedaría capturado y plasmado en la foto, todo, una cosa encima de la otra.
La técnica, explicada paso a paso
Tanto si has entendido el párrafo anterior (ojalá que sí) como si no, pasemos a la acción. No te preocupes, conseguiremos la foto incluso si no hemos entendido el funcionamiento en su totalidad. Simplemente cíñete a los pasos.
Paso 1:Cámara en modo S/Tv y valor elevado en segundos:
Pon el dial de tu cámara réflex en modo semi manual de velocidad de disparo. ¿Cómo se consigue esto? Si tienes Nikon ponte en modo “S” y si eres de Canon ponte en el modo “Tv”.
Ahora mueve la ruedecita de control de tu cámara. Verás que hay un valor que se altera. Ese valor tiene un formato parecido a 1/2000 o algo así (puede ser 1/5000; o también 1/23; etc.). Bien, ese valor lo iremos bajando poco a poco, poco a poco, hasta llegar a 1″ (que significaría 1 segundo), y luego seguiremos girando la ruedecilla hasta que alcancemos 3″ segundos, 20″ segundos, o la cantidad de segundos que queramos.
Resumiendo, este paso consiste en simplemente colocarnos en modo S (o Tv) y empezar a girar la rueda de control hasta poder visualizar un valor como 8″ (segundos) o el número de segundos que nosotros queramos.
La cantidad de segundos de momento da igual. Lo importante es aprender la técnica. Una vez la dominemos, se trata de ir experimentando y probando hasta que encontremos la cantidad de segundos que nos dé el mejor resultado.
Paso 2: Buscar estabilidad
Es importante que la cámara no se mueva mientras esté haciendo la fotos. Aquí se trata de una foto larga en el tiempo, la cual se va a tomar a lo largo de muuuchos segundos, y por lo tanto es IMPRESCINDIBLE que la cámara no se mueva para que no nos resulte la imagen movida. Lo más recomendable sería hacernos con un trípode bien anclado, pero si no se puede también podría servirnos cualquier superficie estable que no tenga vibración ni movimiento alguno.
Paso 3: Disparar sigilosamente
Nos interesa que la cámara no se mueva ni lo más mínimo, ni siquiera aquel tenue movimiento de cuando pulsamos el disparador. Para ello vamos a utilizar un disparador remoto (con cable, con infrarojos) o, para quien no tenga un disparador remoto, también puede servir como solución el utilizar el temporizador de la cámara, de 2 segundos por ejemplo. De este modo nos dará tiempo de pulsar el disparador y de apartarnos para que cuando la cámara empiece a registrar la foto nosotros no influyamos con ninguna vibración, por muy pequeña que sea.
Paso 4: Experimentar
Es imposible conseguir buenas fotos de larga exposición sin experimentar. Nadie ha conseguido, jamás, una espléndida foto de larga exposición sin haber experimentado y probado varias veces antes. Ve experimentando. Primero consigue la técnica. Una vez conseguida, verás que el resultado sale pero no de la manera perfecta (foto movida, demasiado iluminada, demasiado oscura) así que en ese momento tocará perfeccionar, mejorar, corregir los errores.
6 Consejos para conseguir bonitas fotos de larga exposición
No pierdas el tiempo intentando conseguir fotos de larga exposición de día. Necesitas un poco de oscuridad. Experimenta por la noche. Se pueden hacer de día, pero para un principiante es mejor practicar con fotos nocturnas.
Las mejores fotos de larga exposición contienen normalmente objetos con luz en movimiento: coches circulando por una carretera, tiovivo en funcionamiento, etc.
Inspírate en trabajos de otros en Flickr u otras redes y galerías online. Busca por la palabra “fotos de larga exposición”.
Además de la luz que se “mueve” en la foto, intenta que el encuadre contenga elementos destacados: edificios, pancartas, dibujos, pantallas, o incluso personas, etc.
Antes de iniciar una sesión de fotos de larga exposición asegúrate de tener la batería bien cargada. Esta técnica consume mucha batería y conviene que estés preparado.
La mayoría de las cámaras permiten como máximo 30″ de tiempo de exposición. No obstante se puede ir más allá de ese tiempo, llegando a varios minutos si uno lo desea, para lo cual tendrás que poner tu cámara en modo Manual “M”.
Fuente
http://www.blogdelfotografo.com/tutorial-pasos-fotos-larga-exposicion/
Next, I will leave you extra material of the Long Exposure technique.
** The operation of the Long Exposure photograph. **
The first thing you have to understand is the operation of this technique. If you are a regular reader of the blog, you will know by now that the camera records (records, captures, captures ...) the photo in a fraction of a second. At the moment we press the trigger there is a small hole in the lens of the camera, very tiny, known as "shutter" that opens and closes in a small fragment of a second and that allows light to penetrate the camera and so that the image inside is recorded.
What would happen if that shutter could be kept open for a long time, for example 2 or 3 seconds? Well simply get a picture composed of everything that happened in those 2-3 seconds. Everything would be captured and captured in the photo, everything, one thing on top of the other.
** The technique, explained step by step **
Whether you have understood the previous paragraph (hopefully yes) or not, let's move on to the action. Do not worry, we will get the photo even if we have not understood the operation in its entirety. Just stick to the steps.
** Step 1: ** Camera in S / Tv mode and high value in seconds: **
Turn the dial of your SLR camera to semi-manual shooting speed mode. How is this achieved? If you have Nikon, put yourself in "S" mode and if you are from Canon, go to "TV" mode.
Now move the control wheel of your camera. You will see that there is a value that is altered. This value has a format similar to 1/2000 or something like that (it can be 1/5000, or also 1/23, etc.). Well, that value we will go down little by little, little by little, until we reach 1 "(which would mean 1 second), and then we will keep turning the wheel until we reach 3" seconds, 20 "seconds, or the number of seconds that we want
In short, this step consists of simply placing us in S (or TV) mode and starting to turn the control wheel until we can visualize a value like 8 "(seconds) or the number of seconds we want.
The amount of seconds for the moment does not matter. The important thing is to learn the technique. Once we have mastered it, it is about experimenting and testing until we find the number of seconds that give us the best result.
** Step 2: Find stability **
It is important that the camera does not move while you are taking the pictures. Here is a long photo in time, which is going to take a lot of seconds, and therefore it is ESSENTIAL that the camera does not move so that we do not get the image moved. The most advisable thing would be to make a tripod well anchored, but if you can not also serve us any stable surface that has no vibration or movement.
** Step 3: Shoot stealthily **
We are interested in the fact that the camera does not move in the slightest, not even that slight movement when we press the shutter release button. To do this we will use a remote trigger (with cable, with infrared) or, for those who do not have a remote trigger, can also serve as a solution to use the timer of the camera, for 2 seconds for example. This will give us time to press the shutter button and move away so that when the camera begins to register the photo we will not influence with any vibration, however small it may be.
** Step 4: Experiment **
It is impossible to get good long exposure photos without experimenting. No one has ever achieved a splendid long exposure photo without having experimented and tested several times before. Go experimenting. First get the technique. Once achieved, you will see that the result comes out but not in the perfect way (photo moved, too bright, too dark) so in that moment it will touch to perfect, improve, correct errors.
** 6 Tips for getting beautiful long exposure photos **
Do not waste your time trying to get long exposure photos during the day. You need a bit of darkness. Experiment at night. They can be done during the day, but for a beginner it is better to practice with night photos.
The best long exposure photos usually contain moving objects: cars driving on a road, merry-go-round, etc.
Inspire yourself in the work of others on Flickr or other online networks and galleries. Search for the word "long exposure photos".
In addition to the light that "moves" in the photo, try that the frame contains prominent elements: buildings, banners, drawings, screens, or even people, etc.
Before starting a long exposure photo session, make sure you have a fully charged battery. This technique consumes a lot of battery and you should be prepared.
Most cameras allow a maximum of 30 "exposure time. However you can go beyond that time, reaching several minutes if one wishes, for which you will have to put your camera in manual mode "M".
Source
http://www.blogdelfotografo.com/tutorial-pasos-fotos-larga-exposicion/