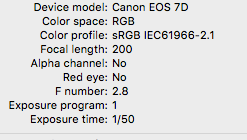
these were taken with an EOS 7D ? You can tweak settings more and make it a lot more impressive. Your framing is also off, pay attention to line up your shots dead straight and follow rule of thirds.
Example work with Canon EOS 7D by @britcoins 2011
Hint - ISO 100 in darkness? Are you ok? Dig into settings and try 800-1600 ISO in low light situation like your sunrise. Then you can also drop the F-stop right down and increase shutter speed with them experiment
Keep going! you'll soon find some tweaks like I suggest and blow your own mind with results ...


Thank you for the tips!
In some of my older photographs posted on SteemIt I was always using the "full auto mode". When the ISO increased the photographs became grainy. I had a few people who wanted to use my photos are screen savers. To provide the best possible photographs I started using ISO 100 for the sunrise photos and other daylight photos.
In the near future, I will be posting some photographs taken inside where there was low lighting. For some shots I stepped up the ISO to much higher settings.
I am still experimenting. In my attempts to remove the slight shifting from one still photo to the next I turned off the "AF" and "Image Stabilizer" on the lens. I have everything locked down tight on a tripod. I hope to eliminate the slight shifting effect with the sunrise photos taken this morning.
The weekend is almost here!
Have a great weekend!
Steem on,
Mike
Thank you for replying, really glad you had a chance to not take my harsh advice badly ... the fact i did do this comment late, on a bad day even!
I think I might have spotted it now tho, what you can do different really simple.
Before I reveal, you can try to shoot up to 400 ISO which will leave some grain, but it can be part of the image and not too much 'digital' noise. You can try 100 then 200 then 400 and do that in combination with the next technique, which is ...
Metering Modes. Leave that autofocus on, set for spot/touch focus and exposure. Try one shot with the focus on the brightest part of the image. This is where you are previewing shot on LCD, and touch any part of the image to focus and expose there. Then try all sorts of shots by picking different areas. Focus+expose for the grey clouds, the sunlight rays and colour should burst ... . This will give completely different images and dramatic results.
Further observation: shots in post are all F20. This explains the dulcit, pastel tones. Lower is always better / sharper at lower F stop. Lower the stop = more light into the lens and more data for the sensor to work with.
I'm no pro either.... I know nothing, really ... this is from my memory trial and error!
Getting carried away now ... last tip ... ditch the filters from that kit lens, unless shooting into blue sky bright light or water ...
Again, thank you for the tips. Looks like I have some more experimenting and manual reading to do.
I used an f-stop of 20 (and higher) to improve the depth of field. There are trees in the photo that are much closer than the far horizon. My limited experience in optics for photography has proven that the higher f-stops improves the sharpness of the images. I compensate with the exposure time (up to 30 seconds).
This morning I was also experimenting with the different metering. I haven't downloaded those pictures yet, but they looked great on the camera's screen.
As for the filters, the circular polarizing filter always enriches my colors and aid in getting good shot of the sun as it rises just above the horizon. The clear filter is mainly for protecting the polarizing filter and the camera lens. It has saved my lens on more than one occasion. The window I have my camera setup in to take bird photos has been broken by golf balls.
I have several sunrises in the can to process and post. I will read up on the selecting the focus points today.
Thanks again for you tips and advice.
Have a great day!
Steem on,
Mike
@opb !delegate 1000
@opb !delegate 50