Have you made the jump to a more professional camera, or are thinking about doing so in the near future? The jump from a mobile phone camera to a mirrorless or DSLR camera can seem a little daunting. This post is in response to several requests for information I have received about the basics of photography.
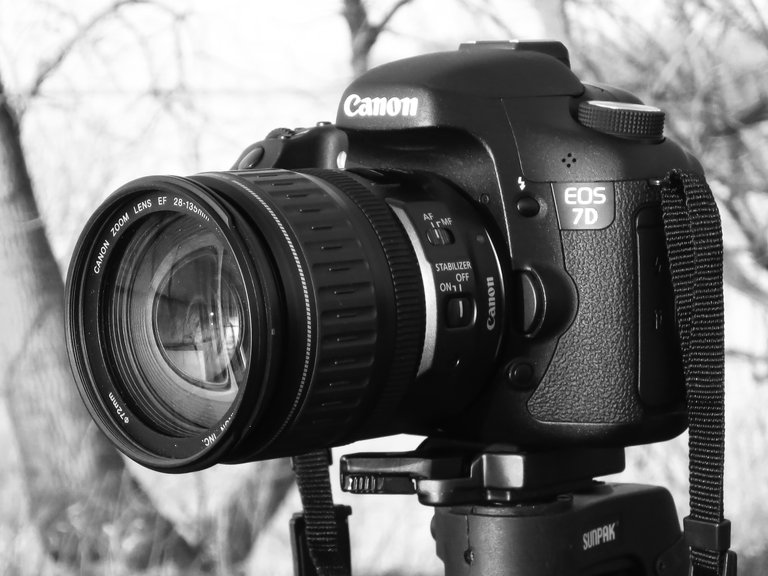
We'll start with exposure. Exposure can be thought of as the amount of light that your camera takes in to make an image. Too much light and your image is too bright. Too little and it will be dark. In order to achieve a happy medium, photographers need to balance three things: shutter speed, aperture, and ISO. These are known as the exposure triangle.
Think of these elements as an average. They all allow more or less light to be absorbed by your camera and you can increase one to compensate for the others. Each of the three also has a secondary effect, which gives a photographer a lot of creative potential with any given shot. Most modern cameras have an automatic setting, but you have much more creative control when you learn how to control these things yourself.
Lets take a closer look at these elements and what they do.
SHUTTER SPEED
Shutter speed is the time that your camera lets in light. The longer the shutter speed, the more light enters the camera and the brighter your image will be, excluding other factors. Shorter shutter speeds are, traditionally, written in fractions of a second (IE 1/100). Modern cameras tend to display only the bottom of the fraction. If your camera displays "250," it means 1/250 of a second. Longer shutter speeds will have a quotation mark after the number. For example, 4" would be a four second shutter speed.
The secondary effect of shutter speed is that it can introduce motion blur. If you use an incredibly short shutter speed, very little time passes during the photograph. Short shutter speeds, like 1/8000th of a second, can be used to freeze a hummingbird's wings in the image. Longer shutter speeds will cause any movement to appear as a blur. Motion blur isn't always unwanted, though! If you mount your camera on a tripod and take long exposure images of moving water, for example, the effect can be quite beautiful.
The following image shows the effects of shutter speed. The top row has been adjusted (using aperture and/or ISO) to maintain the same exposure. The bottom row shows the effect of changing only the shutter speed.
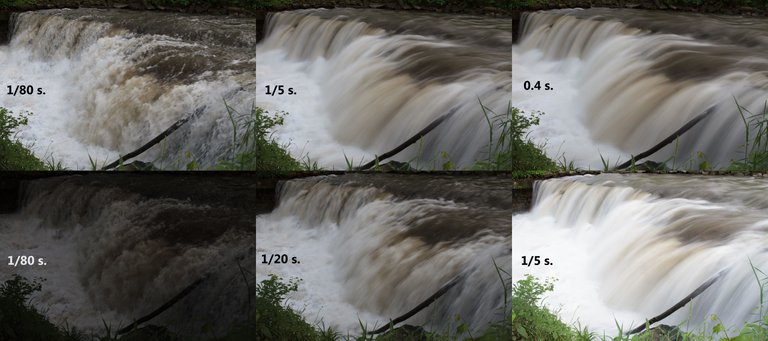
As you can see, faster shutter speeds appear to freeze the water in place, while the longer shutter speeds blur the moving water. It is important to know that an camera movement during exposure will cause blur, as well.
Here are two more examples of motion blur, caused by longer shutter speeds.
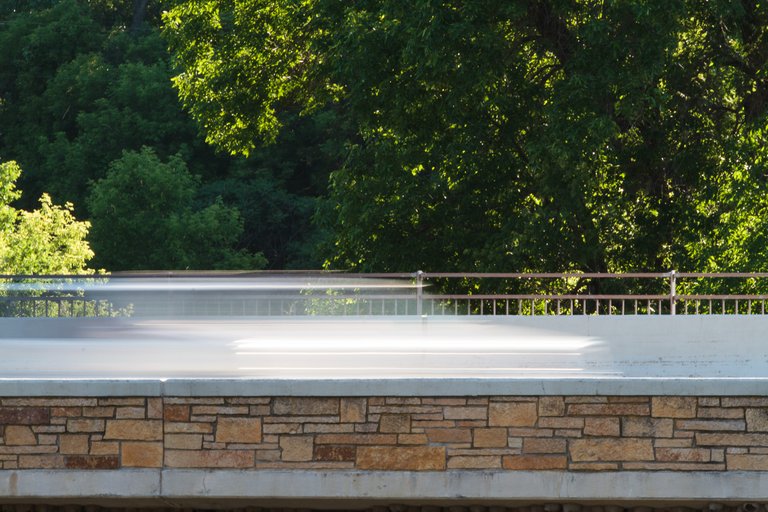
Here, a car was passing during the shot, but the camera remained still.
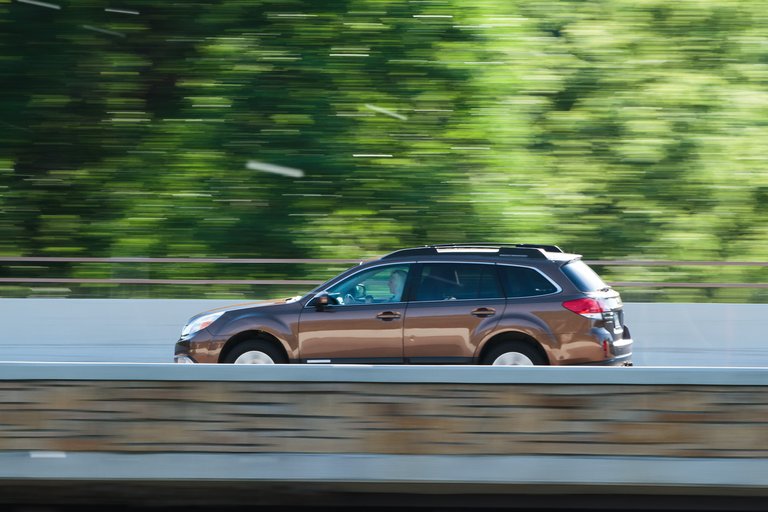
In this image, the camera was following the car's movement and the rest of the image "moved" during the shot.
ISO
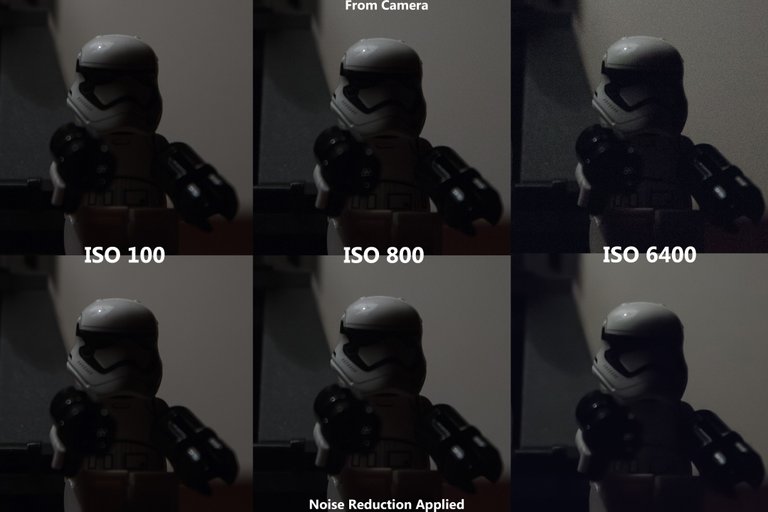
This is sensitivity of your camera sensor. Typically, lower ISO will produce better esults. This is because the higher your ISO sensitivity is the more likely the image will be to have "noise." This noise usually manifests itself as speckles and unnatural color. If you've seen a photo taken in a dark environment that turned out magenta and spotty, you've seen noise!
The following image shows the noise associated with different ISO levels. Look closely in the shadowed areas, like the face of the Lego figure. The bottom row shows the same images after applying noise reduction. Noise reduction can save some images, but it tends to leave an image less sharp and it can only do so much.
This next image shows the effect of only changing the ISO setting.

APERTURE
The aperture setting controls how much light gets through the lens of your camera and controls how much of the image is in focus.
This post is intended as a quick guide, so it won't go into specifics about lens optics and mathematics. It is important to know,, however, that aperture is a ratio. Because of this, lower numbers mean more light is passing through the lens.
As you open the aperture of your lens, the image will be brighter, but less of it will be in focus. The image below shows how how aperture affects your image.

You can see that, as we close the lens' aperture, more of the background is visible behind the weird owl figurine.
Summary
Aperture, ISO, and shutter speed all control how much light your camera records and must be balanced to achieve a properly exposed image. Each of these factors has a secondary effect that a photographer should consider. This isn't very in-depth, but should provide a good starting point.
I hope you found this information useful! Feel free to contact me with any questions and I will try to get provide an answer.
Great article.
Your examples are spot on, also very well structured. Keep it up.
Thank you. Hopefully it reaches the intended audience.
Congratulations @fotosdenada! You have completed some achievement on Steemit and have been rewarded with new badge(s) :
Click on any badge to view your own Board of Honnor on SteemitBoard.
For more information about SteemitBoard, click here
If you no longer want to receive notifications, reply to this comment with the word
STOPBy upvoting this notification, you can help all Steemit users. Learn how here!
Great article. I've taught several photography classes and I thought you did a great job of explaining things so a beginner would understand.
Thank you! I hope someone finds it useful.