Why you need to take control over aperture, shutter speed, and ISO
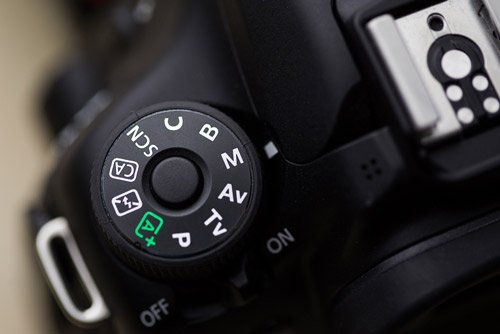
You have probably heard, over and over, that you should be shooting your camera in manual mode.
But what is manual mode, and why is it so important for your photography?
Lets figure it out!
Manual mode is one of the main settings on your camera, and it lets you manually control shutter speed, aperture, and ISO.
These three settings work together to control the how bright or dark your photo is (known as exposure), as well as change the overall look of the image.
Super important stuff!
Now, if you’re just getting into photography you might not even know what shutter speed, aperture, and ISO do, so taking control over them can be overwhelming. But don’t let that stop you from shooting!
Here’s a big secret that I don’t even know if I should be saying here… You don’t need to know how to shoot in manual mode in order to take great photos. Gasp! Yes, it’s true.
The auto modes (Auto, Program), and semi automatic modes (Aperture Priority, and Shutter Priority) on your camera are great places to start.
Manual mode is going to give you much more control over the look of your photos.
So why learn to shoot in manual mode if your camera can automatically adjust settings for you?
Because manual mode is going to give you much more control over the look of your photos. And that, my friend, is a huge deal.
Let’s take a look at the main benefits of shooting in manual mode, and just how that can help you improve the look of your photos!
- Take Creative Control
The biggest advantage of shooting in manual mode is that it lets you take creative control over aperture and shutter speed, and just brightness in general.
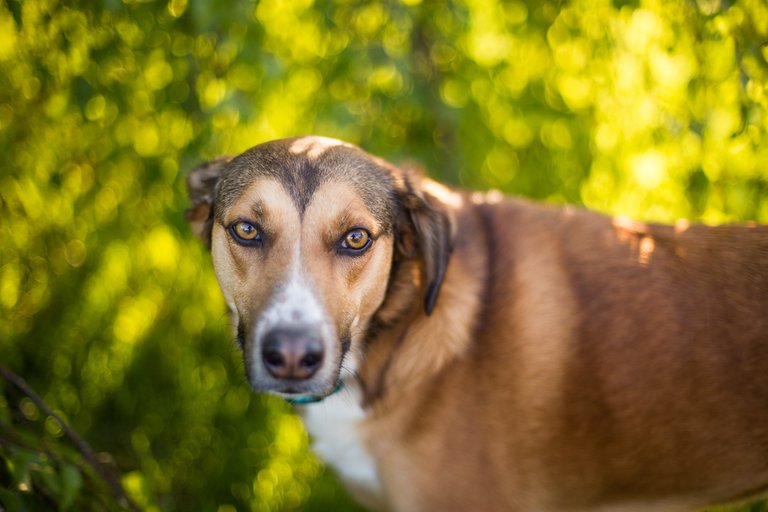
ISO 100, 50mm, f/1.6, 1/500s
APERTURE
By manually controlling aperture you’ll have more control over the depth of field in your image. (That is, how much of the image is in sharp focus). This can be super helpful when taking portraits. A large aperture (smaller f/number) will help you create shallower depths of field, which can massively help your subject to stand out from the background – not to mention helping you create some amazing bokeh!
On the other hand, you might want to select a smaller aperture (bigger f/number) if you want more of your photo in focus. This can be useful for many situations, like in landscape photography where you want to capture both foreground and background in reasonably sharp focus. Shooting in manual mode let’s you make the choice based on what result YOU want!
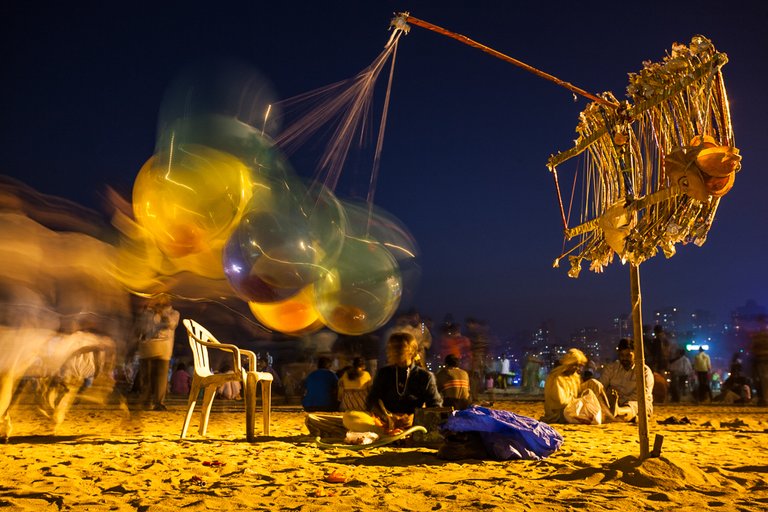
ISO 500, 37mm, f/8.0, 1.3s
SHUTTER SPEED
As for shutter speed, being able to control it can help you capture motion in more creative ways. By selecting slower shutter speeds you can capture shots where your subject shows some motion blur. Think about those neat nighttime city shots of cars making trails of light, or waterfalls with smooth flowing water. Slow shutter speeds are what let you capture that!
Or maybe you want to completely freeze some kind of action, like a child jumping in midair. Using a fast shutter speed will help you freeze that instant in time. Being able to choose your shutter speed let’s you decide just how you want movement to be portrayed in your image.
EXPOSURE
There are also times you’ll want to take creative control of the overall brightness of an image (by manually adjusting shutter speed, aperture, and ISO).
One example would be creating silhouettes. This requires having your subject stand in front of a bright background, and then deliberately underexposing your subject so that they appear quite dark.
Another example is star photography. In this situation you typically need to shoot with a large aperture (small f/number), have the shutter open for a long time (10-30 seconds), and shoot at a higher ISO.
These are two different scenarios that each require a specific approach to choosing your settings in order to get the look you want! But it isn’t just unique situations like silhouettes and star photography that benefit from control over exposure. More broadly speaking, the brightness of your photo is a personal preference, and an artistic choice. Being able to choose the exposure in your image is a big part of getting your message across!
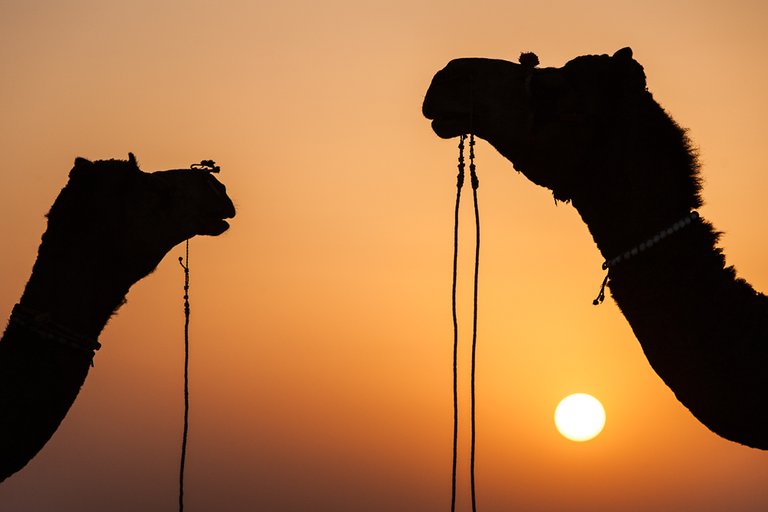
ISO 125, 200mm, f/7.1, 1/500s
- Deal with Tricky Lighting Situations
Now here’s a huge reason to learn to shoot in manual mode: Some lighting situations are simply too difficult for the camera’s auto modes to handle! Trying to shoot these scenarios with an automatic mode can straight up give you the wrong exposure, and be an exercise in frustration.
Some lighting situations are simply too difficult for the camera’s auto modes to handle!
The biggest problem is with backlit situations. If the light behind your subject is much brighter than your subject itself, then your camera will try to adjust the settings in order to capture the brighter light. This will result in your subject being completely underexposed, and hard to see. Not good.
The reverse of the above situation can also be difficult for the camera’s auto setting to correctly expose for. If your subject has really bright light on it, but the background is quite dark, then your camera may choose to expose for the darker background. Here your subject will be totally over exposed.
If you’ve ever shot in an automatic mode, or even just shot with a camera phone (as they almost always shoot in automatic modes), you’ll have a good idea just how frustrating these situations can be! Personally they make me want to throw my camera out, or maybe just sulk for a while…
Luckily for cranky photographers like me, there’s a solution. Yep, you guessed it. Manual mode. Being able to manually adjust your settings will let you guarantee that your subject is properly exposed, instead of struggling to get your camera to cooperate.
Another classic problem is shooting in low light. It seems like the auto modes of most cameras are designed to activate the camera’s flash at even the slightest hint of darkness. The thing is that on-camera flash looks terrible! If you’re shooting in manual mode you can set the camera to a higher ISO (increasing the sensitivity of the sensor). Higher ISOs do tend to produce more image noise, but personally we would prefer more noise (which can often be corrected in post-processing) vs. icky camera flash.
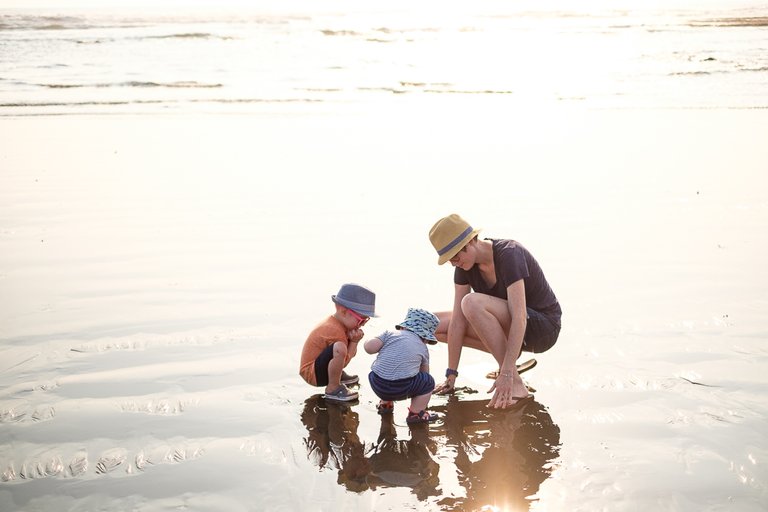
ISO 200, 35mm, f/1.4, 1/8000s
- Get Consistent Exposures
If you’re shooting in Auto mode then you’re letting your camera decide how bright or dark the photo should be for each and every photo. The problem is that it’s a bit like rolling the dice every time you press the shutter release.
Basically your camera has a light meter inside of it that takes measurements of the light coming in through the lens. In auto mode the camera takes that light meter information and determines what it thinks the ideal settings are for are shutter speed, aperture, and ISO in order to hopefully produce a good exposure when you take the photo. As the frame changes (because you move the camera, your subject moves, or the lighting changes) the exposure may also change. That means that two shots taken one after the other in the same scene might have very different exposures. It can create a pretty inconsistent set of images.
But, if you’re shooting in manual mode, then your shutter speed, aperture and ISO settings won’t change from shot to shot unless you change them. You can be certain that you’ll get consistent exposures.
Getting consistent exposures might not seem like a big deal at first, but think about how it affects your photography. If you are able to get predictable and repeatable results then you’re no longer rolling the dice – you’re just winning every time!
Getting consistent results is especially important when shooting professionally. It can look pretty awful if a sequence of photos in an album, or gallery are inconsistent in brightness. Some of this can be corrected with editing (especially if you’re shooting in raw), but really it’s a waste of your time to be trying to correct mistakes in editing that you could have easily gotten right in camera.
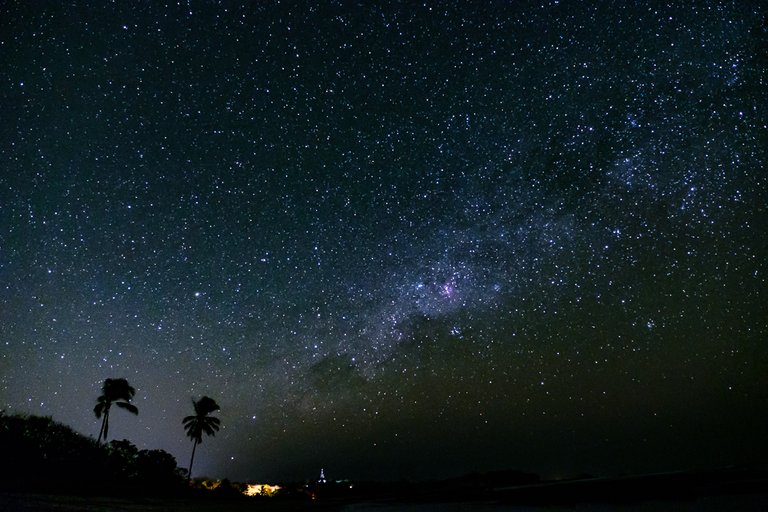
ISO 4000, 16mm, f/2.8, 16.0s
Tips for Shooting in Manual Mode
Hopefully by now you’ve seen just how awesome it can be to shoot in manual mode! You can have more control over the look of your image, and not have to fight the camera to get your shot looking the way you want! So now let’s chat about some tips for turning into a manual mode ninja.
IT JUST TAKES TIME
The first thing to know is that it might take a little while before you get really comfortable shooting in manual mode, especially when you’re first learning photography. You have so much to think about, like composition, lighting, subject interaction, etc., that it can be tough to constantly keep your aperture, shutter speed and ISO in mind as well.
When we were first shooting we actually stayed away from manual mode for a long time. It just seemed too hard! We shot in Aperture Priority for a couple years until we realized that it was important to learn Manual mode if we wanted that creative control.
But the big thing to keep in mind is that eventually it will feel natural and intuitive! With enough practice you will start to adjust your settings quickly and easily. So stick with it!
START WITH PROGRAM MODE
If you’re just getting started with photography, you may want to slowly work your way up to Manual mode. You can start off by shooting in the Program mode (usually “P”). This is like Auto mode but it gives you access to exposure compensation. Basically exposure compensation allows you to tell camera to make a photo brighter or darker than the automatic settings (by adjusting a dial up or down while shooting). So if you’re shooting in Program mode and the photo seems too dark you can increase the exposure compensation and then take another photo and it will be brighter. It’s a very simple way to start taking more control over the look of the photo.
MOVE UP TO APERTURE PRIORITY
Once you get comfortable with Program mode you can move up to Aperture Priority mode. With aperture priority you set your aperture, and ISO, but the camera automatically sets the shutter speed. It’s pretty easy to get the hang of Aperture Priority mode and it gives you a lot more control over the depth of field in your photos. With Aperture Priority you also have access to exposure compensation, so you can also control brightness. Now you’re in charge of a few things! Look at you go! Once you’re really comfortable in Aperture Priority mode it’s just a little hop up to Manual mode!
APERTURE PRIORITY VS. MANUAL MODE
Now I actually think there are some situations where it’s better to use Aperture Priority over Manual mode! Sometimes light conditions are changing so quickly (or you’re moving through varied lighting conditions) that you might miss a shot if you’re trying to adjust your settings manually. This is often the case when shooting photojournalistically, in scenes with a lot of variety. So don’t think Manual mode is the only way to go. The key is to be comfortable in every mode, and then choosing the best one for the situation!
The key is to be comfortable shooting in every mode, and then to choose the best one for the situation!

THANK YOU FORM @REDROSEE FROM COMING AND READING THIS :))
nice photography.....and the photo owsome......please.
Hi! I am a robot. I just upvoted you! I found similar content that readers might be interested in:
https://photographyconcentrate.com/3-reasons-shoot-manual-mode/
Thank you for the detailed explanation on the difference between Manual and Automatic mode. I personally haven't tried manual mode but I should give it a try and see for myself whether I like it and like you said we need to find the right one for the situation.You taught me about shutter speed, exposure and aperture.
Thank you for contributing to the Steemit Community.Keep up the great work and I'm looking forward to your next posts.