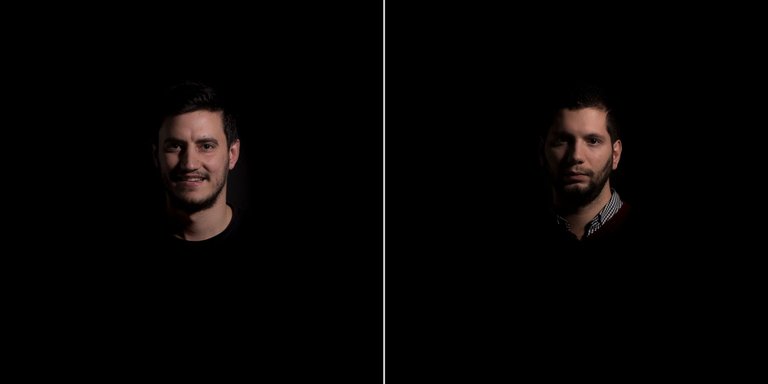
Hi #photography lovers on steemit! 📷 After some period of inactivity here I am again with a step by step guide to low key portrait photography.
But let's see first what is low key photography; When defining a photograph as low key you mean that the capture you have is consisting mainly of black tones, using as a key light any natural or artificial light source to highlight specific areas of the photo. Low key photography has it's origins from Chiaroscuro technique in painting and used from famous from artists like Rembrandt, Leonardo da Vinci, and Caravaggio.
What you will need
You can achieve low key photography by investing on expensive studio lights, light modifiers and light stands, but for this project I have used only home made material, ending up spending less than 1 extra euro for my set up:
- A white lamp shade to increase the size your light source
- A tracing paper to cover your lamp shade and diffuse light
- A reflector or anything like a white board to act as a reflector
- A flash that can be triggered as a slave like my Nissin Speedlite Di622
- A dslr camera of course
- A tripod
- A friend to act as a model
- A friend to act as a light stand 😊
- The famous ducks to overlook the process
What to consider
In this type of photography you need to have a black background for your model and also a big light source with diffused light. If you don't have a black background as in my case, you can achieve the desired effect by having your model standing some meters away from the walls. Finally it is essential to have a small aperture in order to have fair depth of field and reduce any ambient light. In the example I am demonstrating I am using as a key light my external flash triggered from my built in flash and fired through the DIY softbox to highlight the face of my models.
Let's see the results
Below you can see my final photos slightly edited in Adobe Photoshop CC. My picture is taken with my Canon EOS 70D with settings f11, 1/250, ISO:100 at 70mm.

Click on the image to view full screen
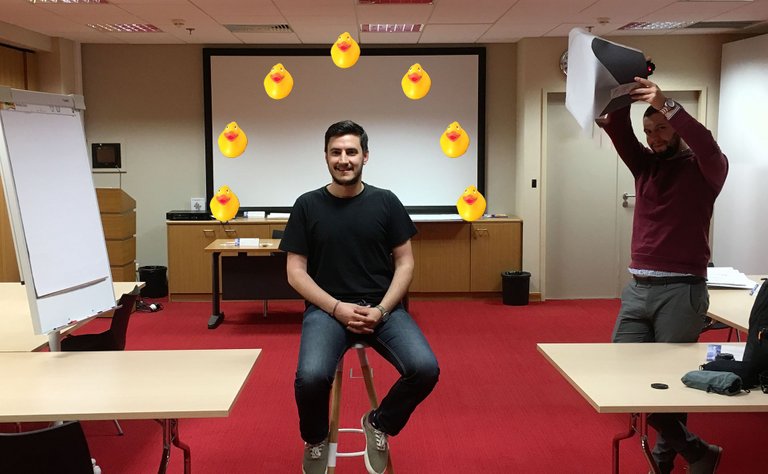
And some backstage
In the backstage photo you can see my model standing far away from the wall so light is not reflected and my human DIY light stand holding the homemade softbox! On the left of the model you can see a typical office white board that I have used as a reflector. Of course there is no need to mention that the ducks over-viewed the process and the picture was taken with the lights off, so the only light source on the picture was the softbox light falling directly to models face.

That's all for today! I hope you enjoyed my DIY studio and found the results interesting. Until next time take your camera, enjoy photography and feed the ducks with some love 💗!
Hard work ha
Nice to have you back!