
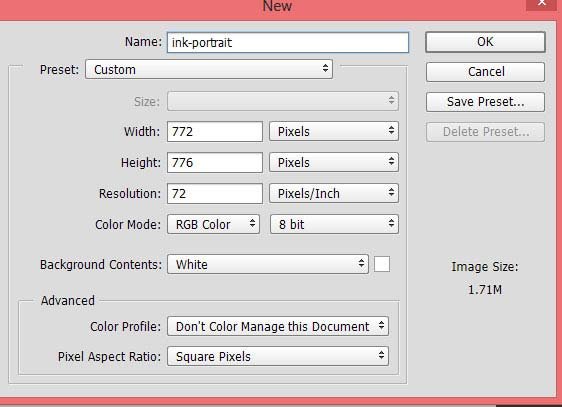
First, create a new document in Photoshop. Go to File > New and use the following settings:
Step 2
Fill the newly created document with gray color. I chose the #b9b9b9 color to fill the document. So first, set the foreground color to gray and then press ALT + Backspace to fill the document.

Hit CTRL + SHIFT + N to create a new layer. Use a white soft brush to paint on the middle of the document.

Step 3
Use a Hue/Saturation adjustment layer to colorize the document color from gray to yellow.
You can make an adjustment layer by selecting Layer > New Adjustment Layer.
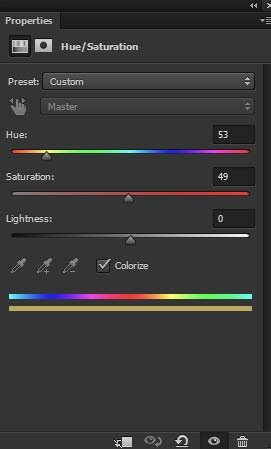
Changed background color:

Step 4 – Add the Woman
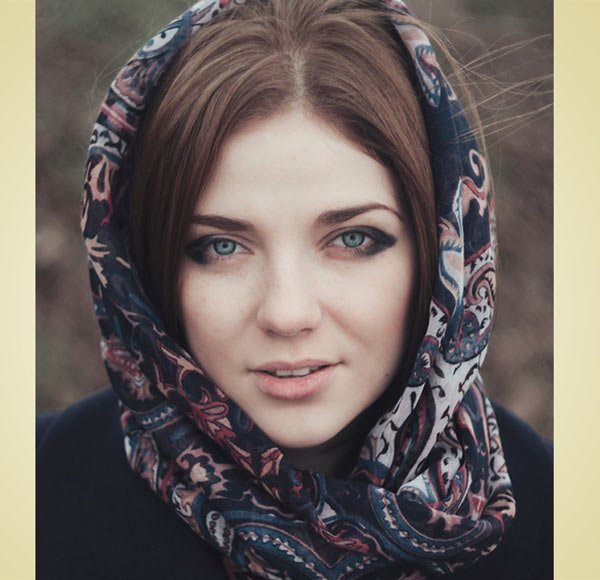
Now add the woman portrait using the File > Place Embedded command. You can use your portrait image here as well.
 Step 5 – Copy and Hide Model Layers
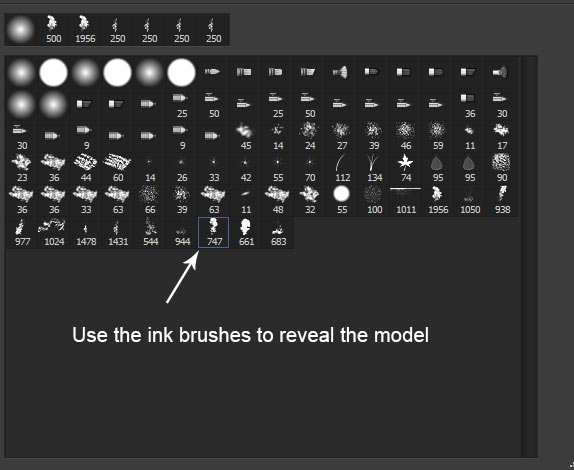
The trick of achieving this kind of effect is the use of brushes and texture. To use brushes we need to hide the model layer with a layer mask and then we’ll use each layer parts by revealing them with the use of the ink brushes.
So now press CTRL + J and duplicate the model layer multiple time. Each time add a Hide All mask to model by going Layer > Layer Mask > Hide All.
Once you did it then hide all model layers visibility by clicking on the eye icon. For now, only visible model original layer.
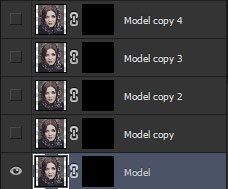
Step 6 – Using Ink Brushes
Load the ink brushes in Photoshop and then use any ink brush to reveal the model. Remember whenever you use the ink brush choose the white color and then paint on the layer mask of the model to reveal the parts.

Once you pick the brush, now start revealing the model by painting on the layer mask of the model with white color.
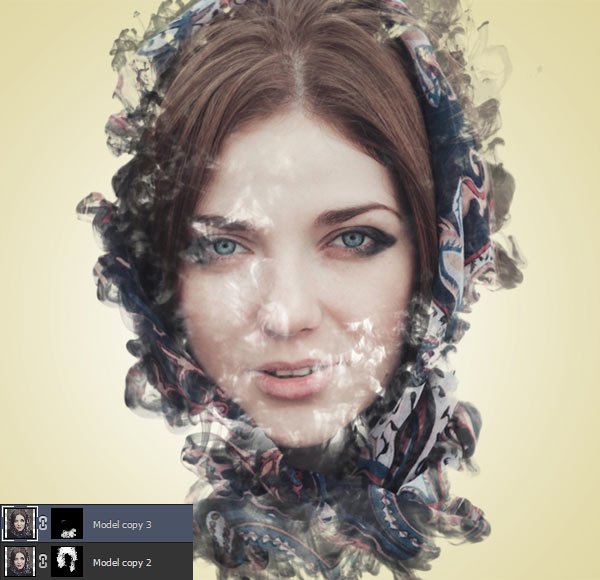
Here you can see how I used the brush:
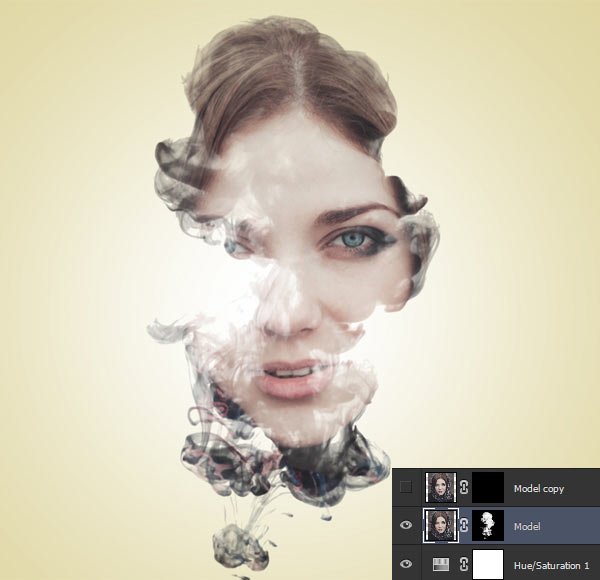
Step 7
Now you need to keep revealing the model using the different ink brushes. There are 13, so choose the different brushes every time and then paint on the layer mask and each time use the different model layer as we have many.
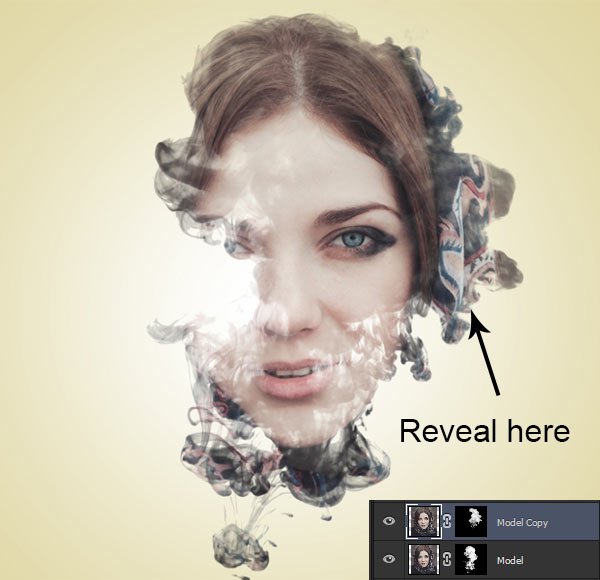
Step 8
Now I painted on the third copied layer of model:
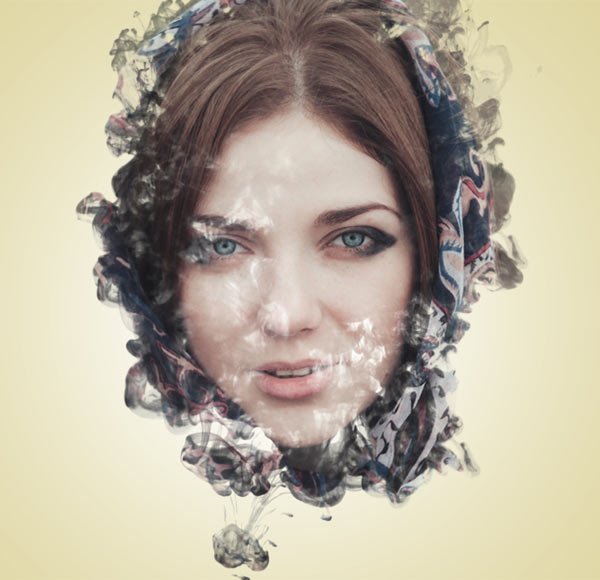
Here I used the fourth duplicate layer of model:
Step 9 – Using the Texture
This step is important as it will add the colors to the portrait. So you should use a colorful ink texture which has ink in water. I found this image on Google as the other free sites don’t have this kind of texture in colors.
So you can search on Google for the texture and you can download a low-quality version which I am using (I have to). Sorry I am not giving you the link.
Put the texture to main document and use the Free Transform Tool (CTRL + T) to resize and rotate it. It depends on which parts of the texture you want to use.
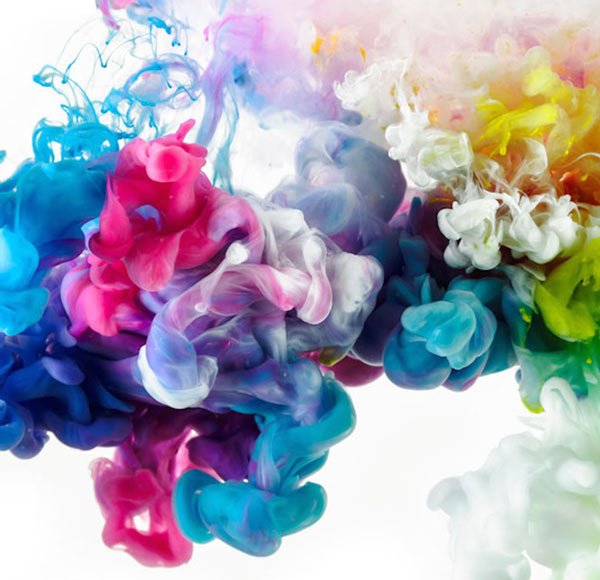
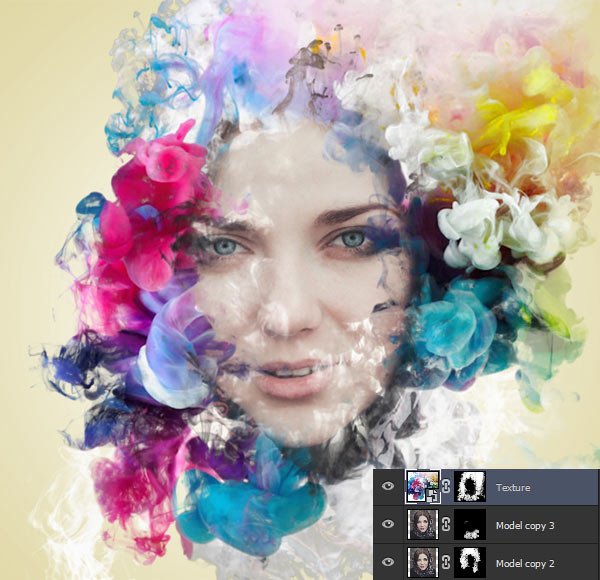
Once you placed the texture, add a Hide All mask to it and then use the ink brushes to reveal it. The process is exactly the same as we did with the woman layer.
Step 10
I duplicated the texture layer and then I used it on other parts.
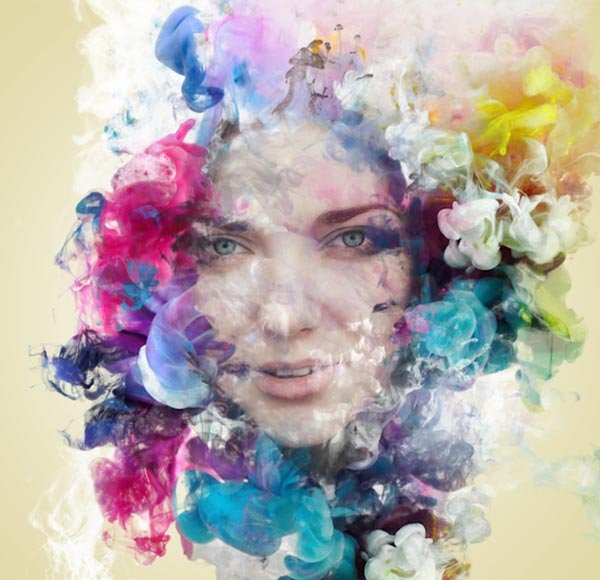
Lastly, I used it on the top left side:

So this is how I blend the texture with the woman face.
Step 11
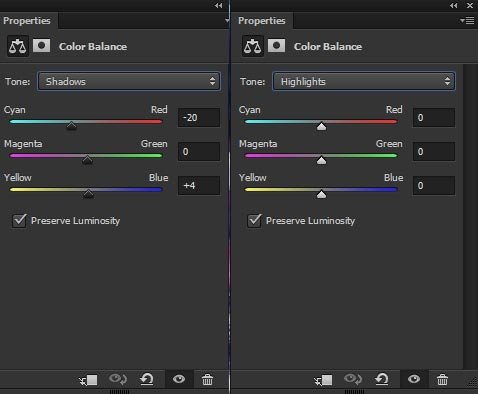
Now I used a bunch of adjustment layers for colors. First, I used the Color Balance adjustment layer to mostly adding the blue tones to portrait. Don’t forget to put this layer on top of all layers.
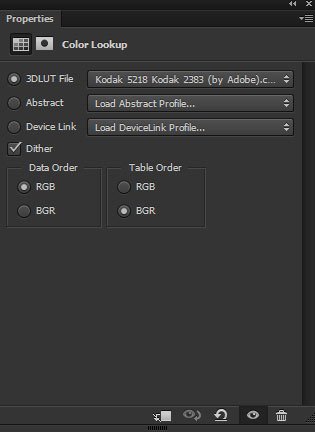
I used the Color Lookup adjustment to balance the contrast.
And the final result is :

i hope you find this useful ,, if you do . please vote up and follow my blog for more :)
Nice Post...this article educate me...Follback and Vote
Congratulations @adhamhafez! You have completed some achievement on Steemit and have been rewarded with new badge(s) :
Click on any badge to view your own Board of Honor on SteemitBoard.
For more information about SteemitBoard, click here
If you no longer want to receive notifications, reply to this comment with the word
STOP