I will show you the steps on how you can make a moving graphic that says "Follow | Upvote | Resteem". I call that the "FUR" (go figure, hehe).

Here are the steps:
- Open Photoshop and create a plain white elongated rectangle like this:
Reveal spoiler

- Then use the text tool to start adding the words in it, we will do "Follow" first:
Reveal spoiler

- Then we add "Upvote" using the same process:
Reveal spoiler

- Then we add "Resteem":
Reveal spoiler

- After adding the texts, let's add a divider too:
Reveal spoiler

Animating Your Graphic!
- Start by using the "Motion" set of tools in Photoshop:
Reveal spoiler
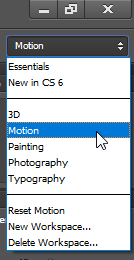
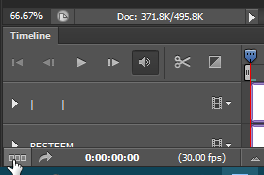
- The Timeline panel will show up at the bottom, I like using the frame per frame option, so just click that:
Reveal spoiler
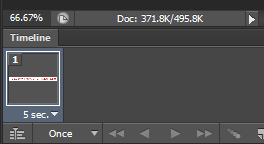
- You'll have your first frame, like this:
Reveal spoiler
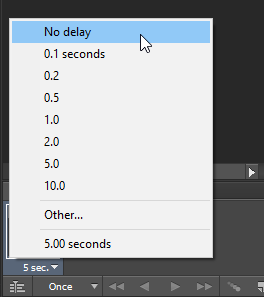
- Just adjust it by changing the timeframe to No Delay and hiding all the layers:
Reveal spoiler
Reveal spoiler
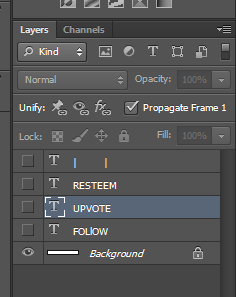
- Now, copy the frame using the duplicate tool:
Reveal spoiler
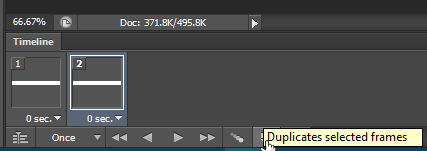
- Then make the "Follow" layer visible:
Reveal spoiler

Reveal spoiler
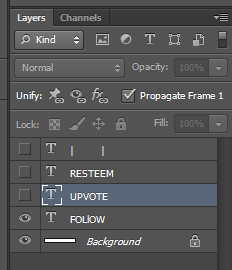
- After that you need to 'Tween' the layers (it's like adding transitions to it):
Reveal spoiler

- I chose "9" layers for this one:
Reveal spoiler
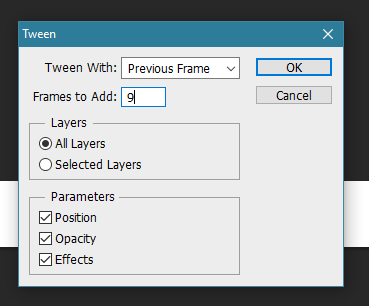
- It will give you something like this:
Reveal spoiler

- It looks like this when animated:
Reveal spoiler

- After that, duplicate the layer again and make the "Upvote" layer visible:
Reveal spoiler

- Tween it with 9 layers and it looks like this when animated:
Reveal spoiler

- Do the exact same thing for "Resteem" (Duplicate, make visible, tween with 9 layers) and it will look like this:
Reveal spoiler

- Again, do the exact same thing with the dividers (except for tweening I only chose 5 layers):
Reveal spoiler

- Lastly, duplicate the frame again but this time hide all of the layers (Follow, Upvote, Resteem, & the dividers):
Reveal spoiler
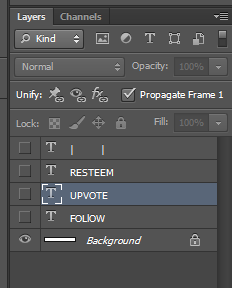
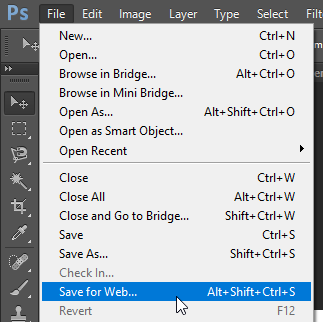
- Same thing, add tweening with 5 layers and you're almost done. Just save it by choosing File > Save for Web:
Reveal spoiler
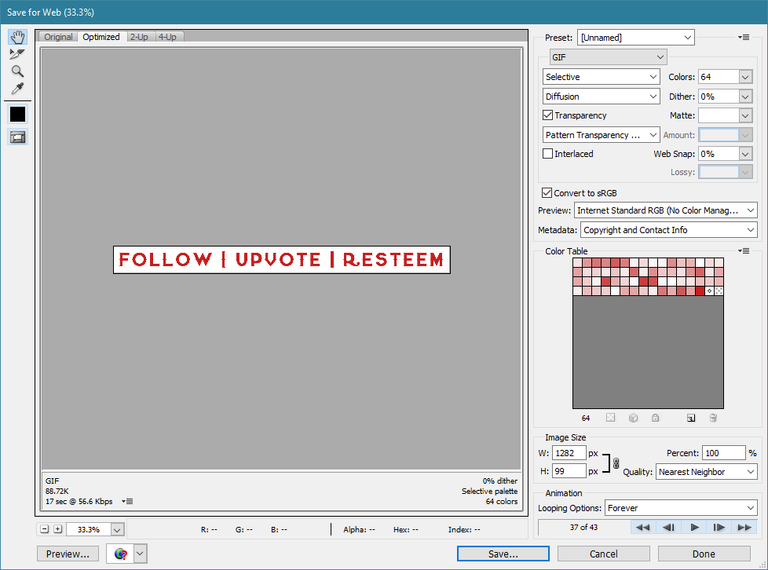
- If the file is too large play with the settings you see here, the important thing is make sure the width and height is sufficient and that it's looped to Forever:
Reveal spoiler
- Name it and Save it:
Reveal spoiler

- There you have it! Just add it to your blog posts:
Reveal spoiler

Reveal spoiler

Reveal spoiler

Reveal spoiler

Reveal spoiler

- Start by using the "Motion" set of tools in Photoshop:
Reveal spoiler

- The Timeline panel will show up at the bottom, I like using the frame per frame option, so just click that:
Reveal spoiler

- You'll have your first frame, like this:
Reveal spoiler

- Just adjust it by changing the timeframe to No Delay and hiding all the layers:
Reveal spoiler

Reveal spoiler

- Now, copy the frame using the duplicate tool:
Reveal spoiler

- Then make the "Follow" layer visible:
Reveal spoiler

Reveal spoiler

- After that you need to 'Tween' the layers (it's like adding transitions to it):
Reveal spoiler

- I chose "9" layers for this one:
Reveal spoiler

- It will give you something like this:
Reveal spoiler

- It looks like this when animated:
Reveal spoiler

- After that, duplicate the layer again and make the "Upvote" layer visible:
Reveal spoiler

- Tween it with 9 layers and it looks like this when animated:
Reveal spoiler

- Do the exact same thing for "Resteem" (Duplicate, make visible, tween with 9 layers) and it will look like this:
Reveal spoiler

- Again, do the exact same thing with the dividers (except for tweening I only chose 5 layers):
Reveal spoiler

- Lastly, duplicate the frame again but this time hide all of the layers (Follow, Upvote, Resteem, & the dividers):
Reveal spoiler

- Same thing, add tweening with 5 layers and you're almost done. Just save it by choosing File > Save for Web:
Reveal spoiler

- If the file is too large play with the settings you see here, the important thing is make sure the width and height is sufficient and that it's looped to Forever:
Reveal spoiler

- Name it and Save it:
Reveal spoiler

- There you have it! Just add it to your blog posts:

Thanks!
