In this part, we're going to build a react application that connects to the API we created in part 1.
In this part, I assume that you have followed along in part 1 where we built the backend of this application using nodejs and Postgres. If you haven't, head there now before you continue reading this part.
Building a frontend web application
So you have a web server and a database, now you need a frontend application to talk to your backend. We will be building a small react app that will display our tasks, mark them as done and delete them.
What is react?
React is a User Interface Javascript library created by Facebook.
According to the official website:
React makes it painless to create interactive UIs. Design simple views for each state in your application, and React will efficiently update and render just the right components when your data changes.
Using react in a project
There are multiple ways to start using react. You can add a script tag to your existing webpage and use react to render elements inside one of your HTML elements, or you can install a toolchain that creates a new web app for you and build your app on top of it.
Using a toolchain is not just beginner friendly, but also creates a better development environment. It requires fewer configurations, allows us to install and use npm packages and see our changes live as we modify our code.
There are multiple toolchains for creating react apps:
- Create React App: Best toolchain for beginners just starting out and learning.
- Next.js: For building server-rendered websites with Node.js.
- Gatsby: Site generator for react.
- And others.
We will be using Create React App to create our app.
How to create a react app
First, you need to install Create React App. To do so run the following command in your terminal:
npm install -g create-react-app
This will install the package globally on your machine so you can run commands from any directory in your terminal.
Now let's create a new app, but first, if you are still running your server stop it by pressing control + C (command + C on macOS) in the terminal that is running it. Then run the following command in the same directory of your project:
create-react-app to-do
This will create a new directory called to-do, set up a react app inside of it and download all the dependencies needed for our app to run.
The output should be similar to this:
Creating a new React app inc/path/to/project/to-do.

Installing packages. This might take a couple of minutes.
Installing react, react-dom, and react-scripts...

...

Initialized a git repository.

Success! Created to-do at /path/to/project/to-do
Inside that directory, you can run several commands:

...

We suggest that you begin by typing:

  cd to-do
  yarn start

Happy hacking!
Don't worry about yarn we won't be using it, but if you wanna know yarn is a dependency manager just like npm with its own features.
If you open the created directory (to-do), you will find that it's a node project just like our server. It has a node_modules folder that contains the project dependencies, a package.json file, and the app files.
In the package.json file, there's a couple of react dependencies and pre-defined scripts that Create React App placed for you. If you wanted to create a react app on your own you would have needed to initial a new node-project, install these dependencies and define your scripts.
Now you should be able to run your new app by running the following commands:
cd to-do
npm start
This will start the development environment open a new browser window that looks like this
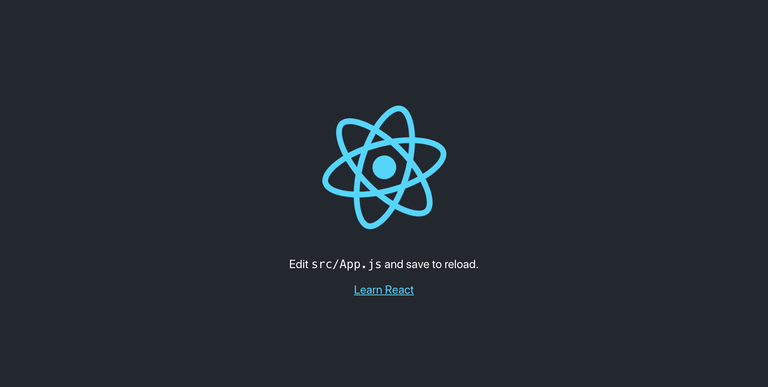
This is what your app looks like right now.
The code for this app is located in /to-do/src/ directory. We will be modifying two files only, /to-do/src/App.js and /to-do/src/App.css.
Open App.js in your code editor, the code will be similar to this:
import React, { Component } from 'react';
import logo from './logo.svg';
import './App.css';

class App extends Component {
  render() {
    return (
      <div className="App">
        <header className="App-header">
          <p>
            Edit <code>src/App.js</code> and save to reload.
          </p>
          <a
            className="App-link"
            href="https://reactjs.org"
            target="_blank"
            rel="noopener noreferrer"
          >
            Learn React
          </a>
        </header>
      </div>
    );
  }
}

export default App;
React uses ES6 syntax and classes. If you know nothing about ES6 syntax I recommend reading this book.
For now, all you need to know about this code is the part inside the render function. React components gives you access to multiple functions like render which handles the UI elements of the component and other functions that handle the lifecycle of the component.
The render function returns what is called JSX, at first glance you would think these are HTML elements, but they are not. While JSX looks like HTML, it is actually just a terser way to write a React.createElement() declaration. When a component renders, it outputs a tree of React elements or a virtual representation of the HTML elements this component outputs.
Now change the render function to display a simple heading and delete the logo import.
import React, { Component } from 'react';
import './App.css';

class App extends Component {
  render() {
    return (
      <h1>To-Do</h1>
    );
  }
}

export default App;
Save the file and head over to the browser to see your changes live.
Fetching data from your API
Now that you have a react app running you need to fetch and display, create, update and delete tasks. To do so your app should send HTTP requests to the routes you created on your server.
We will be using an npm package called axios to send requests to the server. To install it run npm install --save axios inside the to-do directory.
At this point, you need to make sure that your app, server, and database are running. Let's assume that you have just booted your machine and everything is closed. Close everything and follow these steps:
Open three terminals (CMDs on windows).
On your first terminal type docker ps to check if postgres-container is running. If it's not running type docker start postgres-container to start it.
On your second terminal navigate to your server directory cd /path/to/project-folder/ then run npm start to start your node server.
On your third terminal navigate to your react app directory cd /path/to/project-folder/to-do then run npm start to start the react app.
Note: React uses port 3000 to run a development server but we are using port 3000 for our node server, so when you run
npm startin the react app directory you will be asked if you want to use another port. Answer yes and hit enter to continue.
First, let's import axios into our app. Add the following line at the top of the file just after the imports.
import axios from 'axios';
Now we need to fetch all tasks from the server and display them. To do so we will need to send a get request to the URL we defined before http://localhost:3000/api/tasks/.
But where do we place this code?
React components have different lifecycle methods. The most used methods are:
- componentDidMount: component has been mounted and ready.
- componentWillUnmount: called just before the component is unmounted and destroyed.
We want to get our tasks when the component is ready so we will do this in the componentDidMount method. Add the following code just above the render method:
componentDidMount() {
    // Now we can fetch data
}
Next, we need a place to store the data we will fetch (tasks). React components have a state object that holds the component's state, the component will re-render only when the state is changed. We have to initialize a new state for the component then update it when we fetch the tasks.
Add the following code just above the componentDidMount method:
constructor(props) {
    super(props);
    this.state = {
        tasks: []
    };
}
By default, any react component have a constructor that receives some properties through props. To override this constructor we should call super and pass in the props. Then we can create our state object that has one key called tasks containing an empty array that will be replaced by the tasks we fetch from the server.
Now let's fetch the tasks:
componentDidMount() {
    // Now we can fetch data
    axios.get('http://localhost:3000/api/tasks/')
      .then(response => {
        this.setState({ tasks: response.data })
      })
      .catch(err => console.error(err))
}
Let me explain what we just did:
First, axios.get is a function that takes a URL, sends a get request to that URL and returns a promise.
Javascript promises are like callbacks but have different syntax. A promise can resolve data or reject with an error. You can access the resolved data by using Promise.then(data => (do something with data)). You can also catch any errors by using .catch(error => (do something with error)) just after .then or even without it.
When axios.get resolves with a response we need to change the state of the app component to have the new tasks we just fetched. To do so we have to use the component's setState method. This method takes a new state object.
In the new state, we set the tasks to be the data in the response we received (The response contains other information like headers, but we only need the data).
Rendering state variables
We can access the tasks array inside the render method by using this.state.tasks.
To write javascript code inside JSX we have to use curly braces
{ }Example:
const someString = 'Hello World';

class Example extends Component {
  render() {
      return (
          <h1>{someString}</h1>
      )
 }
}
To render the tasks we need to convert the array of tasks into an array of JSX elements.
render method expects to receive one parent JSX element that may contain multiple children
Let's change the render method to become
render() {
    return (
        <div>
            <h1>To-Do</h1>
        </div>
    )
}
Now let's render a list of tasks
render() {
    return (
        <div>
            <h1>To-Do</h1>
            <ul>
                {
                    this.state.tasks.map(task => <li key={task.task_id}>{task.task_name}</li>)
                }
            </ul>
        </div>
    )
}
We added an unordered list and inside it we use curly braces to insert javascript code. We then access the tasks inside the state and map them to an array of list items containing the name of the task.
In react arrays, each element in a array should have a unique key. So we set the key of each list item to the task id.
Array.map will iterate over each element of the array and apply a transformation based on the callback function you provide
You can now save the file and head to the browser. Nothing has changed!. That's because we haven't added any task yet.
Handling user input
Now we need some tasks to display, so we have to create them. To do so we need a form with one text input and a submit button.
Add the following code between the h1 element and the ul element.
<form onSubmit={this.handleSubmit}>
    <input onChange={this.handleChange} type="text" placeholder="Add a new task"/>
    <button type="submit">Add</button>
</form>
Now we have to implement the handleSubmit method which will run when the user clicks the button or press enter inside the text input and the handleChange meth.
Now we have to implement two methods:
- handleChange: Whenever the value of the text input has changed we need to set a state variable called taskName.
- handleSubmit: When the form is submitted we have to send the new task name to our server to save it in the database.
The onChange and onSubmit events are Synthetic Events, to use them we have to bind their handlers to the component inside the constructor (To be able to use this inside the event handler). For more info on handling events in react, have a look at the official docs.
Add the following lines to the end of the constructor:
this.handleSubmit = this.handleSubmit.bind(this);
this.handleChange = this.handleChange.bind(this);
We also need to modify the initial state inside the constructor to hold the text value of the new task.
this.state = {
    tasks: [],
    taskName: ''
};
We then have to set the value of the input to the taskName variable in our state.
<input onChange={this.handleChange} type="text" placeholder="Add a new task" value={this.state.taskName} />
Now we can implement the event handlers. Add the following methods above the render method:
handleSubmit(e) {
    e.preventDefault()
    console.log(this.state.taskName)
}

handleChange(e) {
    this.setState({ taskName: e.target.value })
}
Both methods take a Synthetic Event as an input, which gives us access to the element that initiated the event and to a couple of methods we can use like preventDefault.
The
preventDefautmethod will prevent the element's default action. For more info on this method check out MDN's docs.
e.targetis the native element that initiated the event.
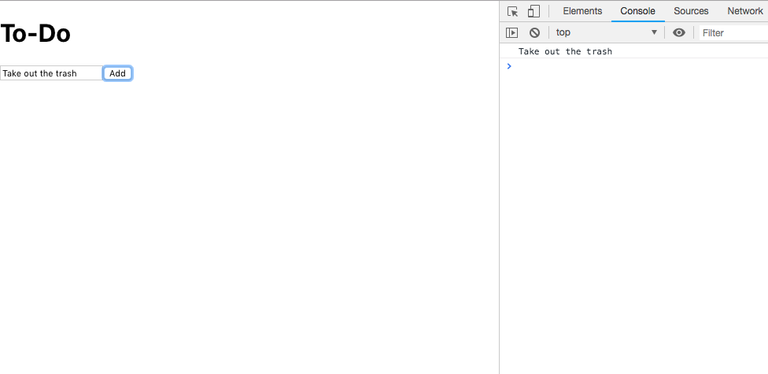
In the handleChange method we set the taskName to the text input value whenever it changes. And in the handleSubmit we are logging it to the console to check if our code works.
In your browser, open your dev tools to see the console, insert some text in the text input and press the add button. The text should be logged to the console like this:
Now that we are sure our code works. We should send the taskName to the server instead of logging it.
handleSubmit(e) {
    e.preventDefault()
    if (this.state.taskName === '' || this.state.taskName === null) {
        return
    } else {
        axios.put('http://localhost:3000/api/tasks/', { name: this.state.taskName })
            .then(response => {
                this.setState(state => ({
                    tasks: state.tasks.concat(response.data),
                    taskName: ''
                }));
            })
            .catch(err => console.error(err))
    }
}
First, we validate the name, if the input has now value we do nothing. Then we make a put request to http://localhost:3000/api/tasks/ and pass in the body the name of the new task.
When we get a response back we use the setState method but this time with a callback. The callback takes the current state and returns a new state where we add the task to the array of tasks and set the taskName to an empty string.
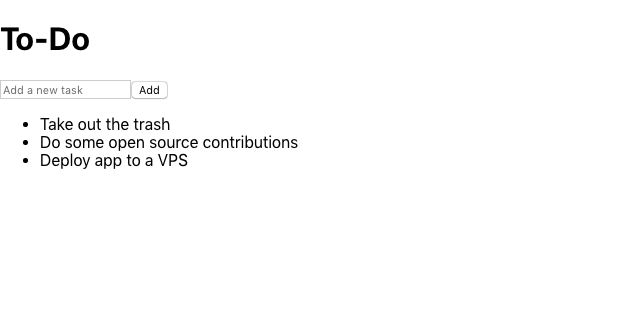
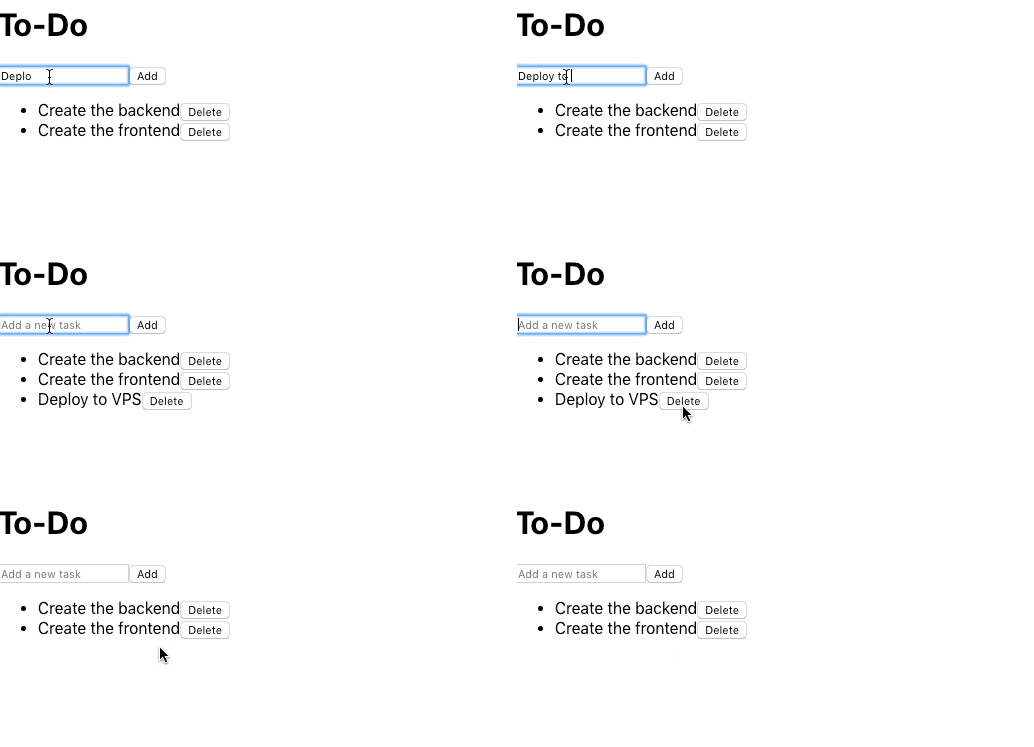
Save the file, head back to the browser and try adding a couple of tasks. The result should look like this:
Deleting tasks
Now we want to be able to delete a task. Change the code for the tasks list to be:
<ul>
    {
        this.state.tasks.map(task => (
            <li key={task.task_id}>
                {task.task_name}
                <button onClick={() => this.handleDelete(task.task_id)}>Delete</button>
            </li>
        ))
    }
</ul>
We added a delete button and attached an onClick listener to it. inside the onCLick listener, we add a function that calls a method called handleDelete and passes task_id as an argument.
Add the following method above the render method:
handleDelete(id) {
    axios.delete(`http://localhost:3000/api/tasks/${id}`)
        .then(response => {
            if (response.data === 'OK') {
                this.setState(state => ({
                    tasks: state.tasks.filter(task => task.task_id !== id)
                }))
            }
        })
        .catch(e => console.error(e))
}
Inside the handle delete method, we're making a delete request to the URL http://localhost:3000/api/tasks/:id that we defined when we created the API.
You can use single quotes (`) in javascript to place javascript variables inside a string
`http://localhost:3000/api/tasks/${id}`Is equivalent to
'http://localhost:3000/api/tasks/' + id
When the promise resolves and we receive a response, we check if the response data (body) is the word OK (As we defined in the API). If it is, we set the state tasks to be the old tasks filtered on the id of the deleted task.
Arrat.filter returns the elements of the array that meets the condition specified in the callback.
Lastly, since we are using this.setState inside the handleDelete method, we have to bind it to the component. Add the following at the end of the constructor:
this.handleDelete = this.handleDelete.bind(this);
Save the file, head to the browser and test the delete button.
Updating tasks
Until now, we can add and delete tasks. We want to be able to update them (Mark them as done).
First, let's add a checkbox to each task.
<li key={task.task_id}>
    <input type="checkbox" checked={task.is_done} onChange={() => this.handleToggle(task)} />
    {task.task_name}
    <button onClick={() => this.handleDelete(task.task_id)}>Delete</button>
</li>
We set the checked value of the checkbox to be the task's is_done value and we add an event listener similar to that of the delete button but instead we listen to the onChange event and pass the whole task as a parameter.
Next, we have to implement the handleToggle method. Add the following code above the render method:
handleToggle(task) {
    axios.post(`http://localhost:3000/api/tasks/${task.task_id}`, { isDone: !task.is_done })
        .then(response => {
            const updatedTask = response.data
            this.setState(state => ({
                tasks: state.tasks.map(taskk => {
                    if (taskk.task_id === updatedTask.task_id) {
                        return updatedTask;
                    }
                    return taskk;
                })
            }))
        })
        .catch(e => console.error(e))
}
Inside the handle toggle method we're making a post request to the url http://localhost:3000/api/tasks/:id that we defined when we created the api.
When we receive the updated task we store it in a constant and set the sate to a new instance of the tasks array where we map it as follows:
If the task in the array has the same id as the task we're updating, we return the new updated task.
Else, we return the same task in the array (No changes to the task).
We end up with a new array where all elements of the array are the same except for the task we're updating.
Lastly, since we used this.setState in this method, we have to bind it to the component. Add the following at the end of the constructor:
this.handleToggle = this.handleToggle.bind(this);
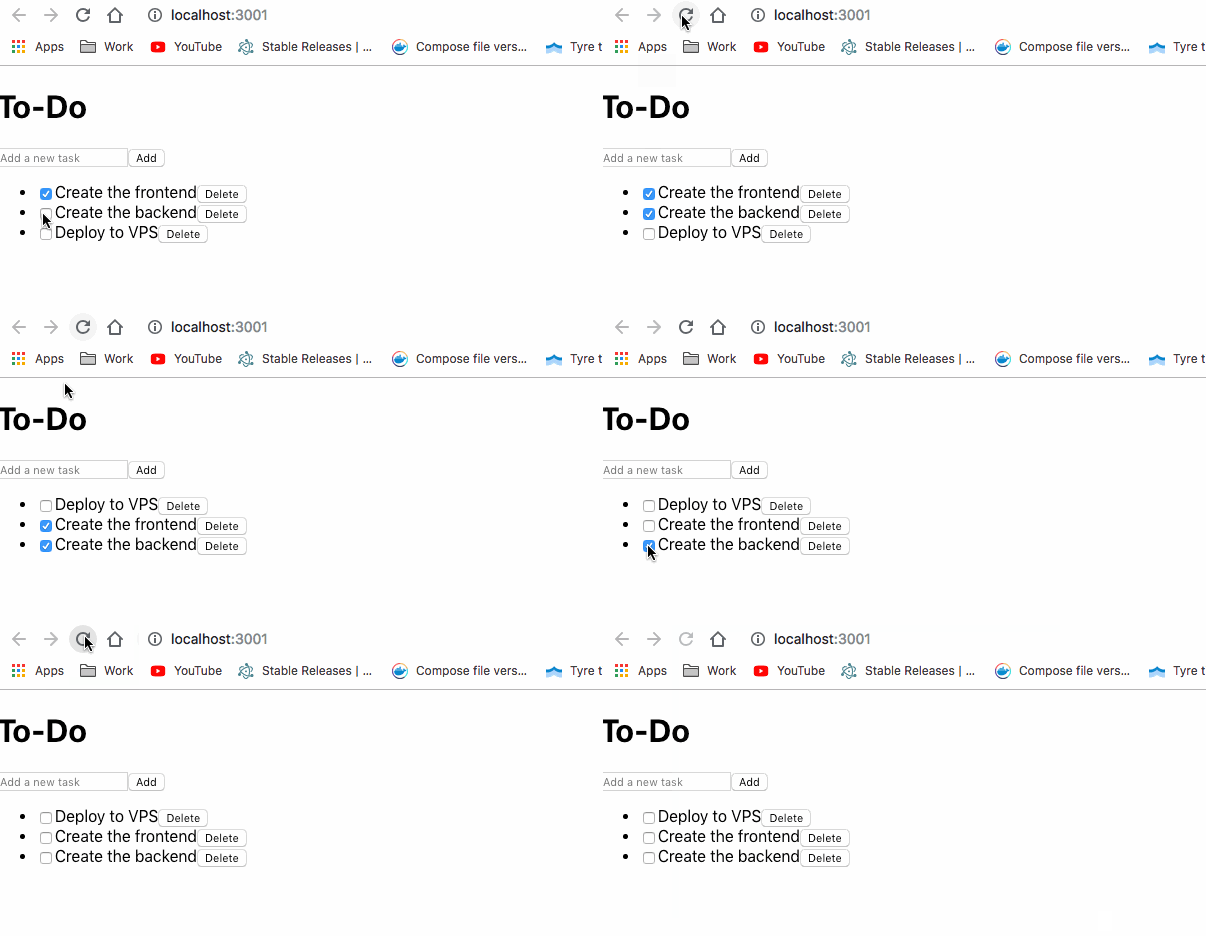
Now you can save and try it in your browser.
Styling the app
Delete everything in the App.css file and paste the following CSS code:
body {
  margin: 1em;
  color: #171717;
}

form {
  display: grid;
  grid-template-columns: 1fr auto;
}

button {
  margin-left: 1em;
  padding: 0.5em;
  border: none;
  border-radius: .5em;
  box-shadow: 0 0 1em rgba(0, 0, 0, 0.25);
  background-color: rgb(75, 245, 165);
}

input {
  padding: .5em;
  border: 2px solid #b9b9b9;
  border-radius: .5em;
}

ul {
  margin: 1em 0;
  padding: 0;
}

li {
  list-style: none;
  display: grid;
  grid-template-columns: auto 1fr auto;
  align-items: center;
  margin: .5em 0;
}

li p {
  margin: 0;
}

.task_done {
  text-decoration: line-through;
}


li button {
  background-color: rgb(250, 104, 93);
  color: white;
}
Now we need to add the class task_done to tasks that are done. Modify the list item inside App.js to become:
this.state.tasks.map(task => (
    <li key={task.task_id}>
        <input type="checkbox" checked={task.is_done} onChange={() => this.handleToggle(task)} />
        <p className={task.is_done ? 'task_done': ''}>{task.task_name}</p>
        <button onClick={() => this.handleDelete(task.task_id)}>Delete</button>
    </li>
))
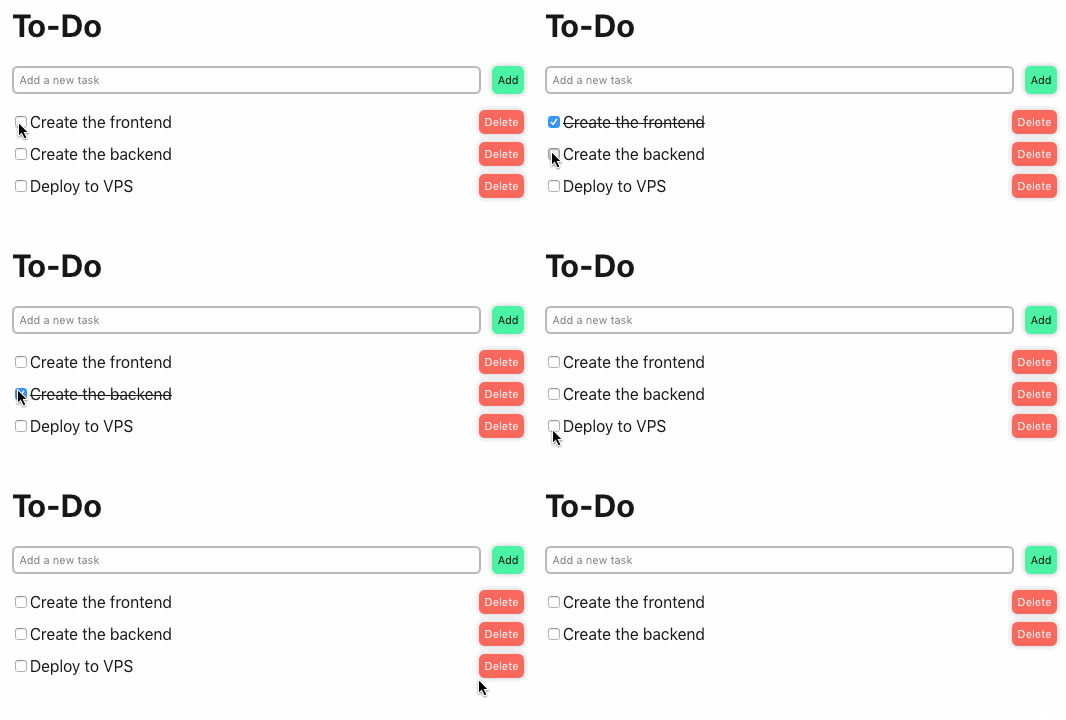
We wrapped the task name in a paragraph element with a className of task_done if task.is_done is truthy and nothing if it's not.
Save the file and try the app again.
Generating static files
Our application is now done but it's running in development mode. To use this app in production we have to convert it into a bundle of HTML, javascript and CSS files.
First, stop react development server using control + C or command + C on macOS, then run the build script:
npm run build
Create React App will create an optimized production build and place it in a new folder called build inside the to-do directory.
Serving the static files from the server
To run the production build, it should be served by a server. We will modify our server code to serve the app when the user navigates to the server IP address or domain. To do so we will use a method of express called static.
Modify the first line of the app.js file from:
const app = require('express')();
To:
const express = require('express');
const app = express();
app.use(express.static('./to-do/build'));
Here we are telling express that the static files for our app are located in the to-do/build directory. When the user navigates to the root of our server, express will look for an index.html file inside this directory and return it.
Save the file and if the server is still running, stop it using control + C or command + C on macOS and run it again using npm start.
Now in your browser navigate to http://localhost:3000 and your app is served in production mode.
What's next
Our app is almost ready for deployment. In the next part, we will configure deployment using Docker, deploy the app to a digital ocean droplet, install Nginx and configure the reverse proxy to be able to access the app from port 80 instead of 3000.
Thank you for reading and if you have any questions or you have found any issues in this article don't hesitate to contact me.
Code avalilable at github.
Hi! I am a robot. I just upvoted you! I found similar content that readers might be interested in:
https://hassansaleh.info/p/6
Congratulations @hassansaleh31! You have completed the following achievement on the Steem blockchain and have been rewarded with new badge(s) :
You can view your badges on your Steem Board and compare to others on the Steem Ranking
If you no longer want to receive notifications, reply to this comment with the word
STOPDo not miss the last post from @steemitboard:
Vote for @Steemitboard as a witness to get one more award and increased upvotes!
Hi, how are you doing?
May i please ask if you will be interested in helping me with some development task requests related to vuejs or reactjs?
I am writing a number of tasks out on 'https://github.com/steemgigs/steemgigs/issues', and 'https://github.com/surpassinggoogle/UlogsV2/issues'; each has an ‘additional steem bounty’ in conjunction with some curation support from utopian, where you do a development post
Hi bro, I have some tasks related to vue and react all on Github and utopian approved. Can you help me with some? I have some steem bounty too and the bounty isn’t big as I am really short on funds but I will love to tip additional steem especially where contributions are timely. I really need help basically.
Here is a list:
https://steemit.com/utopian-io/@surpassinggoogle/in-dire-need-of-help-are-you-ready-to-make-your-picks-1500-steem-and-20-000-teardrops-shared-among-a-collection-of-development
Most of the assigned tasks havent really been taken yet as those who were assigned became unavailable.
The projects are steemgigs.org and ulogs.org