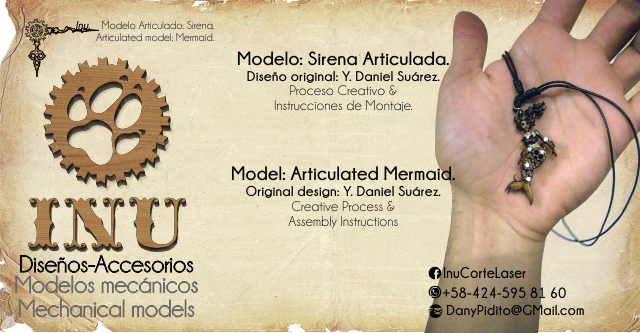
Original Photography: Y. Daniel Suárez. Camera: Panasonic, Model: DMC-FX01. Resolution: 72ppp 24bits. Original dimension: 2112x2816 sin Flash. 03/05/2018 Edited and Designed in: COREL Draw X6.
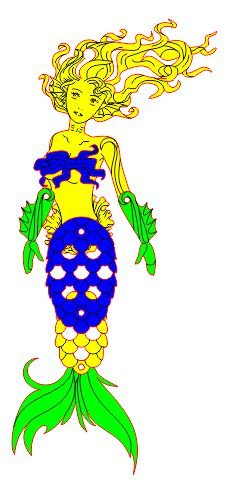
 Modelo: Articulated Mermaid.
 Original design: Y. Daniel Suárez.
 Creative Process & Assembly Instructions.

Creative Process:
Articulated Mermaid, His Story:

Everything arises by Naturalness, Chance, Causality, Spontaneity, Creativity, Curiosity or Necessity. In my case all together, by the sum of the union of many elements and the study of the form.
Let's have an idea Together.
One night through Facebook messaging, I was talking to Alvany Guerreiro, which caught my attention, his nickname which was Mermaid (or Siren in English), and she explains that since she was a girl when they took her to swimming class, her relatives called her Mermaid, and from there she started; as the days passed, one conversation led to another, until we touched on the theme of creating a piece in MDF shaped tail, and I thought, why settle for a tail, and rather not make a mermaid? and I raised the project, and it was received with pleasure..
Articulated Mermaid, Putting together a Puzzle of Ideas.
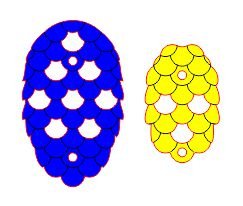
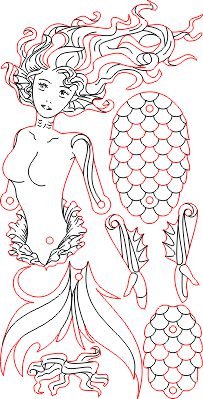
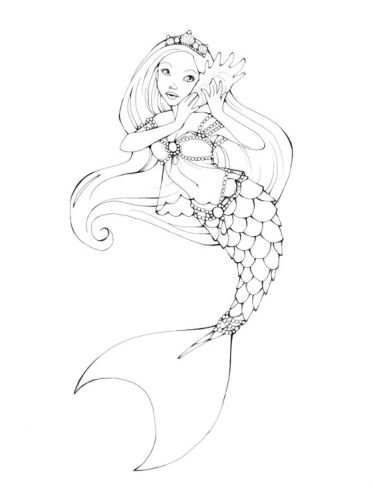
One as a simple mortal thinks, if it is a Mermaid what we want to do, the first thing we should do is to start by knowing its anatomy, and mainly what characterizes it is strong and pronounced tail, so I started by structuring it. and I found a simple but striking reference (Refencial Image # 1) which based on the structure of its scales I decided to start with the pattern that they had, using only the basic form of a circle, starting from this, three (3) circles of the same size were extracted, in both laterals and in their upper part, giving as form, the scale (Referential Image # 2)

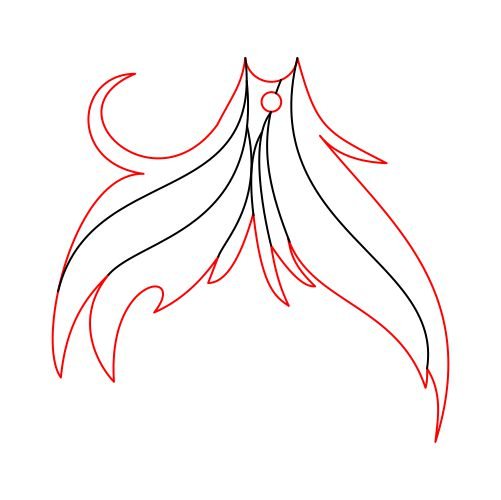
The shape of the fin was taken from the Referential Image # 4, making with this a simple outline of graphic synthesis, and a delineation of its internal part.
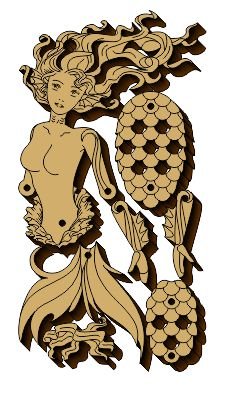
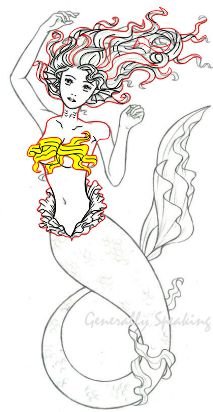
What would be the part of the torso and the face, a single sampling was taken (Referential Image # 5), that, likewise that in the tail, a simple outline of graphic synthesis and a delineation of its internal part was made, adding to it an additional piece for the bust, in the shape of something, this piece allows us to give a limitation to the movement of the arms, for that does not get to have a non-anatomical displacement of the figure.
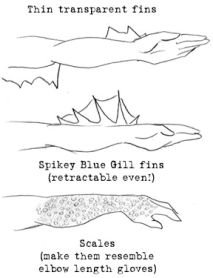
In the arms it was wanted to obtain a dynamic form and with movement, that these also could be pieces with axes like the fin and the tail. for this it was necessary to choose both the form and the elements that would confirm it. The desired shape for this had to have fins in retractable form (Referential Image # 6), but at the same time stylized, that was consistent with the visual elements desired, so these fins were attached to the Referential Image # 7, once obtained the visually desired, we proceeded simply to duplicate the image and reverse it horizontally, in order to obtain both right and left extremities.
Once the part of the torso-head and arms was obtained, it was time to adapt the size of both pieces so that they could match each other, but nevertheless the area of the torso-head had to be added the arms, in order to be able to give it mobility that the forearm was desired, since leaving the arm free the movement that it generated was not anatomically and visibly correct (Referential Image # 8).

Assembly instructions:
Articulated Siren

Recommendations:
Reveal spoiler
 Make sure you have all the cutting elements, since there are very small pieces.
 Check the location of each of the pieces.
 Before assembling, you can lubricate the tacks with a common candle (rub with the candle).
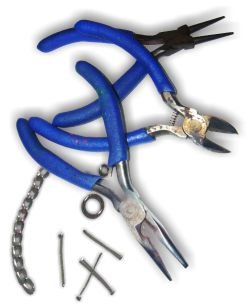
Materials:
We will need the following for the realization of this piece:
 Jewelery tweezers.
 5 Costume jewelery tacks.
 1 Medium ring.
 The pieces cut in 3mm MDF. or the material in which you want it.
 Carpentry glue or some strong glue.
 Brush or toothpick for glue
These can be easily obtained at any jewelery store
Let's start with the armed.
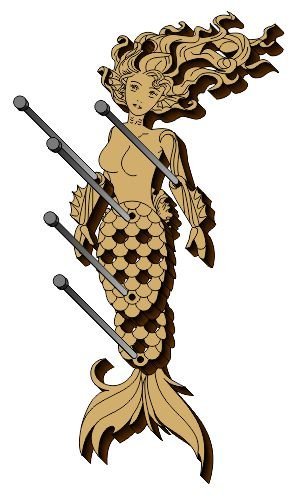
Step 1: We must place the mobile elements on the base, where we must take into account the right and the reverse of the piece, not going to be that we accidentally put one of the pieces turned over or vice versa, once put the pieces, we will pass the jewelery tacks through the holes of the axis located in their corresponding place. With the help of one of the jewelery tweezers, in the back of the piece we will make a doubles in the tacks, placing the tip towards the inside of the base, so that in this way it does not tear the skin or the clothes.
As the pieces are 3 millimeters deep, it is recommended to use studs of 9 millimeters long, so that they can pass through the 2 pieces and then be bent. In the case that the studs are longer they can be cut once inside the shaft, so as not to have trouble with
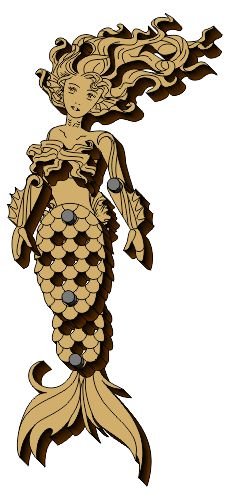
Step 2: With the help of a brush or toothpick, glue was placed on top of the base and on the back of the bra piece on the bust, for its subsequent placement, this small piece, apart from being aesthetic, it is used so that the arms are kept in an axis appropriate to the moment of their movement.
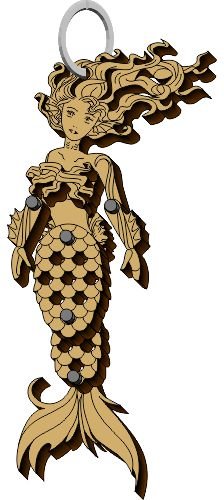
Step 3: With the help of the costume jewelery tweezers, the medium ring is placed in the circular hollow groove on the head.
Once the piece of the bust is completely dry and the ring is finished, we can put on it the chain, necklace or string of our preference.

The process of creation, structuring, extrusion, design, assembly and edition of both the parts and this document were made in the Corel DRAW X6 program.


My name is Yorvy Daniel Suarez Matheus, Venezuelan, and I like to create mechanical or articulated models using different types of gears or simple but colorful moving parts at the ornate level, be possible to Style SteamPunk.
Thank you for having traveled the road with us.

Mechanical models.
Barquisimeto, Venezuela (2018)


This work is under aLicencia Creative Commons Atribución-CompartirIgual 4.0 Internacional.
Maybe you may also be interested:
🎨Mechanical Model: SteamPunk Owl🎨
Know a little about me:
Do not forget to leave your comment and opinions below, also that idea you have together we can make, so do not be sorry and contact us.



Muy buenos tus diseños. Me encanta lo qué haces, te agreguen Facebook Pensaba si se puede hacer con cuerda o con batería algunos. De modo que se muevan solos y además con luces. Ideas para ampliar el mercado.
Me agrada el que te aya gustado, y si, los puedo hacer, pero como trabajo más que todo con dijes, collares y pulseras, en mdf de 3 mm, tendría que hacerlas muy gruesas, y esteticamente no serian muy funcionales,. pero tambien he hecho cosas como lamparas y cofres con mecanizmos,. que pronto publicare para que todos los vean