
Hola a todos los amigos y creadores que hoy me visitan.
¿Cómo están pasando estos días de carnaval?
Para esta corona vas a necesitar:
Foami amarillo, pinturas y pinceles.
Silicón, lápiz y tijera.
Regla, Cartulina amarilla, cinta gross.
Palito de madera y dibujo o impresión.
Comencemos:
Paso 1:
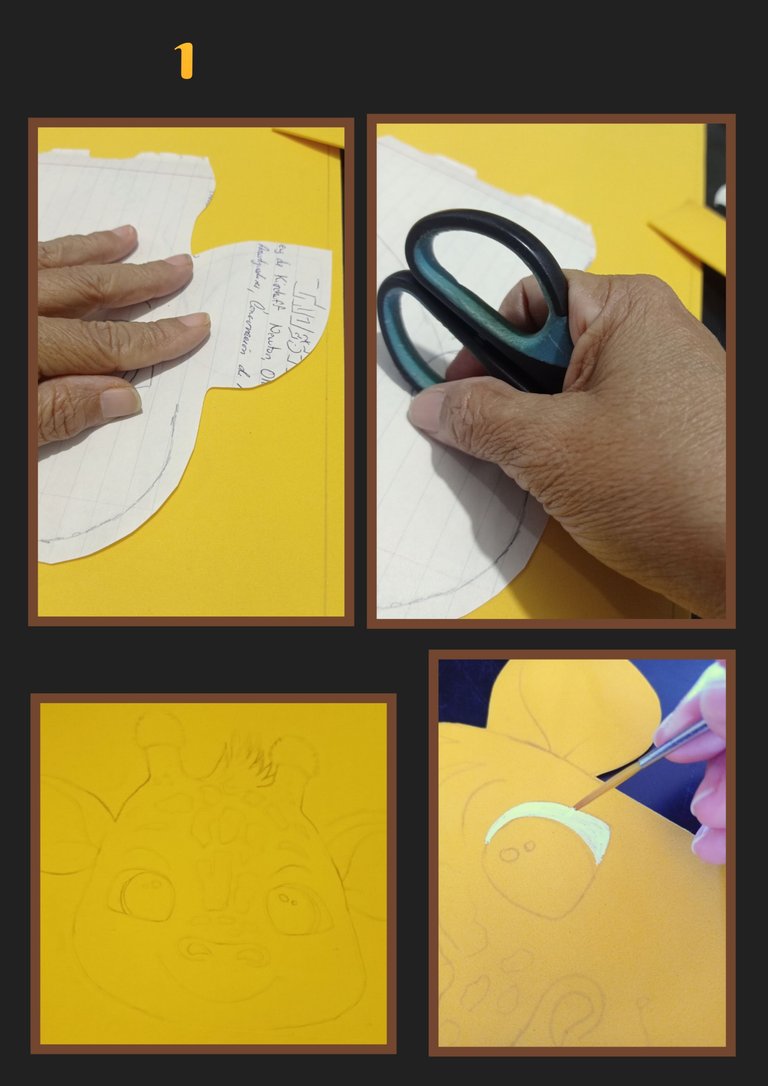
- Coloca el dibujo sobre el foami amarillo y luego frota haciendo un poco de presión para que se transfiera el dibujo.
- Retira el papel y asegúrate de que haya quedado marcado y recorta por todo el borde.
- Luego comienza a pintar rellanando los ojos con pintura blanca.
Paso 2:
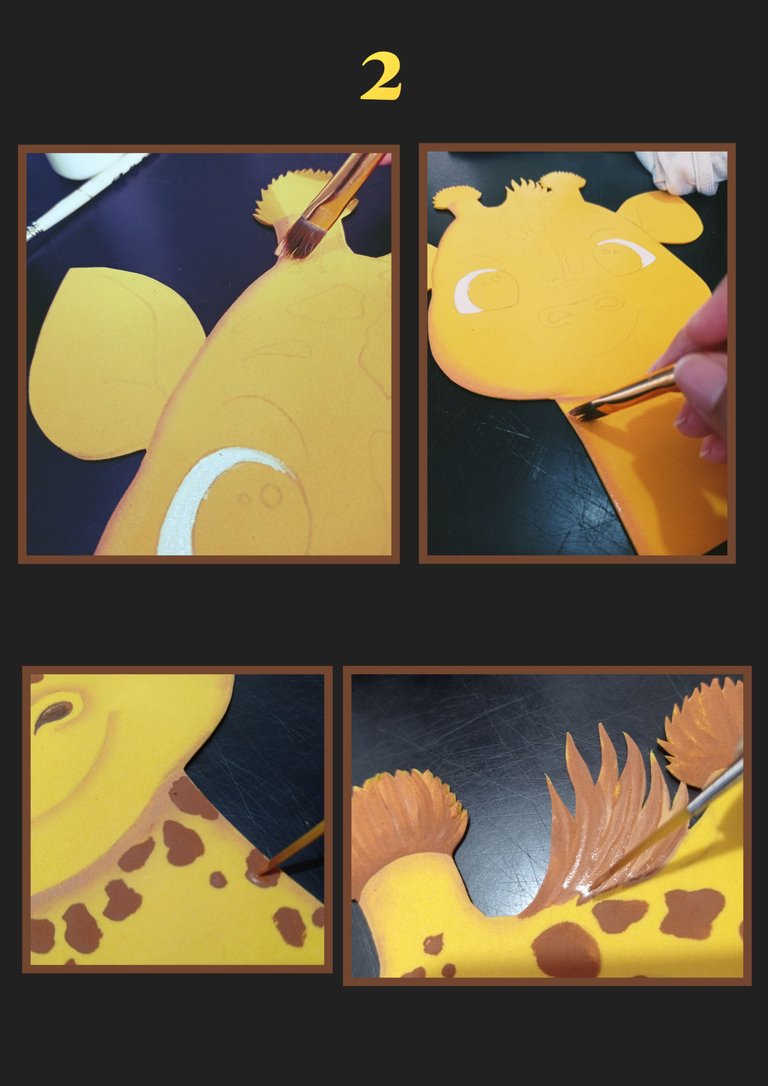
- Ahora humedece un pincel angular o recto y moja la punta en el color que vas a aplicar y pasa por todo el contorno y las líneas marcadas de la jirafa.
- Luego rellena las manchas con marrón y deja secar.
- Ahora pinta los cuernos y cerdas.
Paso 3:
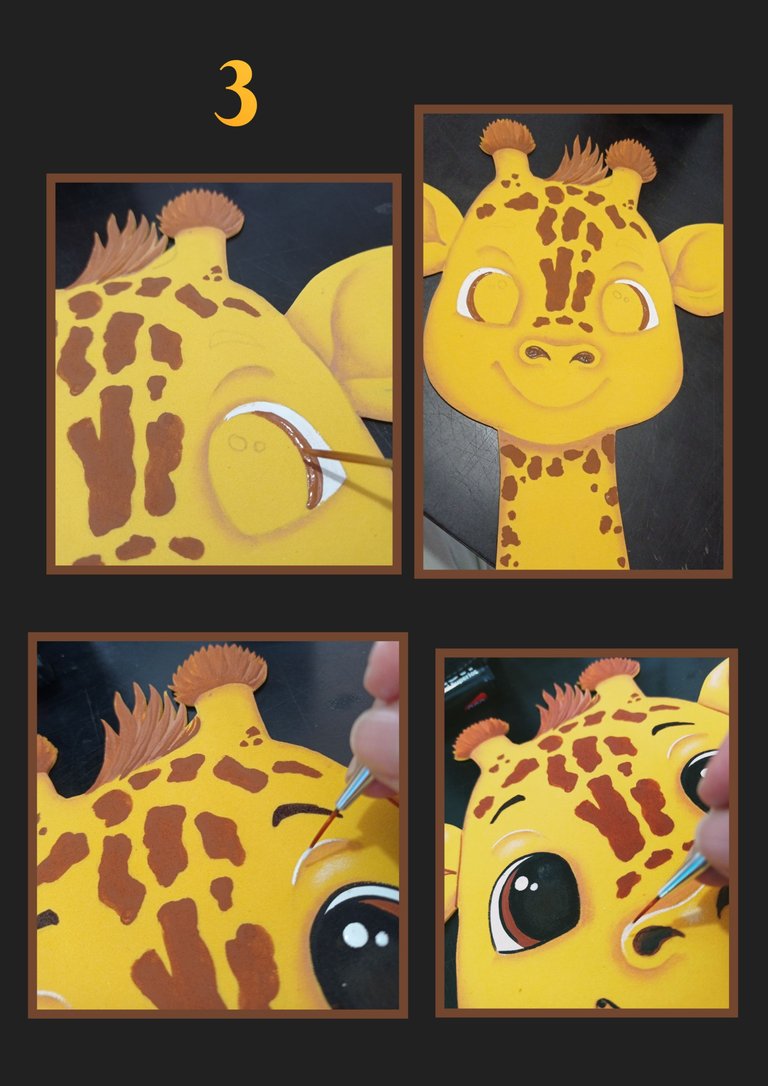
- Continúa pintando los ojos y deja secar, también rellena los orificios de la nariz, cejas y el resto de la cara.
- Luego pasa líneas de luz con pintura blanca en párpados, nariz y orejas y deja secar bien.
Paso 4:
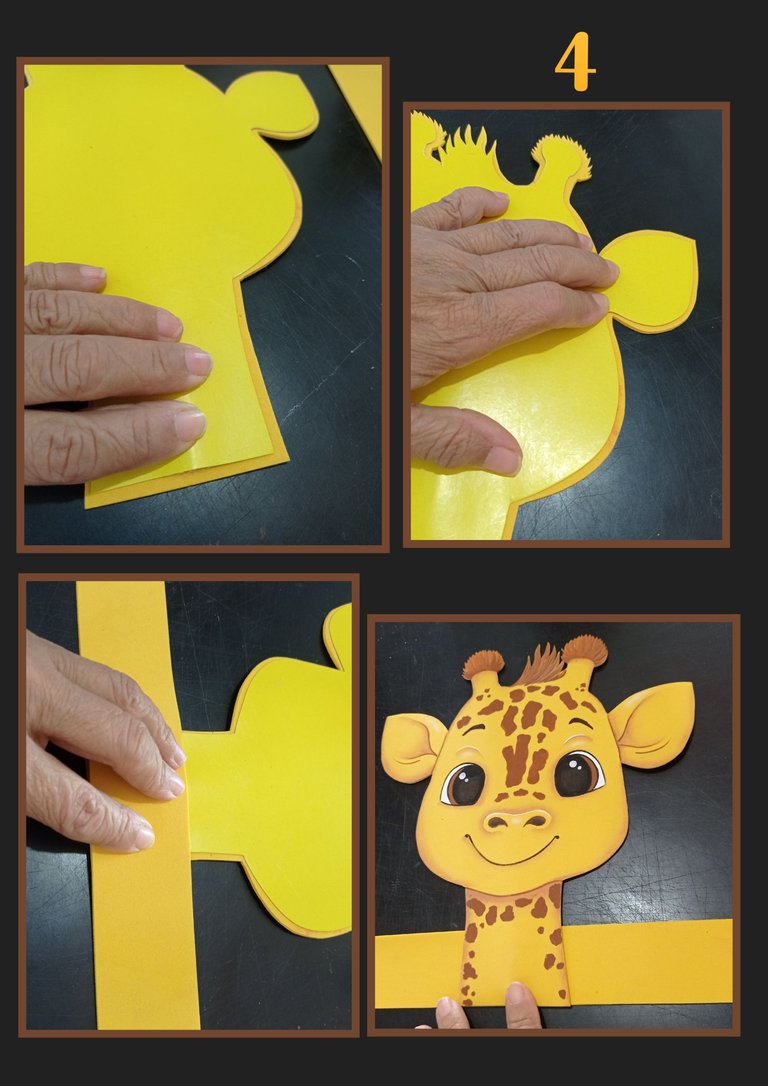
- Marca todo el contorno de la jirafa sobre la cartulina amarilla y recorta dos (2)milímetros más adentro.
- Aplica silicón e inserta un palito de madera y pega al foami, luego presiona por todo el contorno hasta que pegue bien.
- Aparte recorta una tira de 4cms de ancho por el largo que será la medida del contorno de la cabeza del niño y pega en el centro del cuello.
Paso 5:
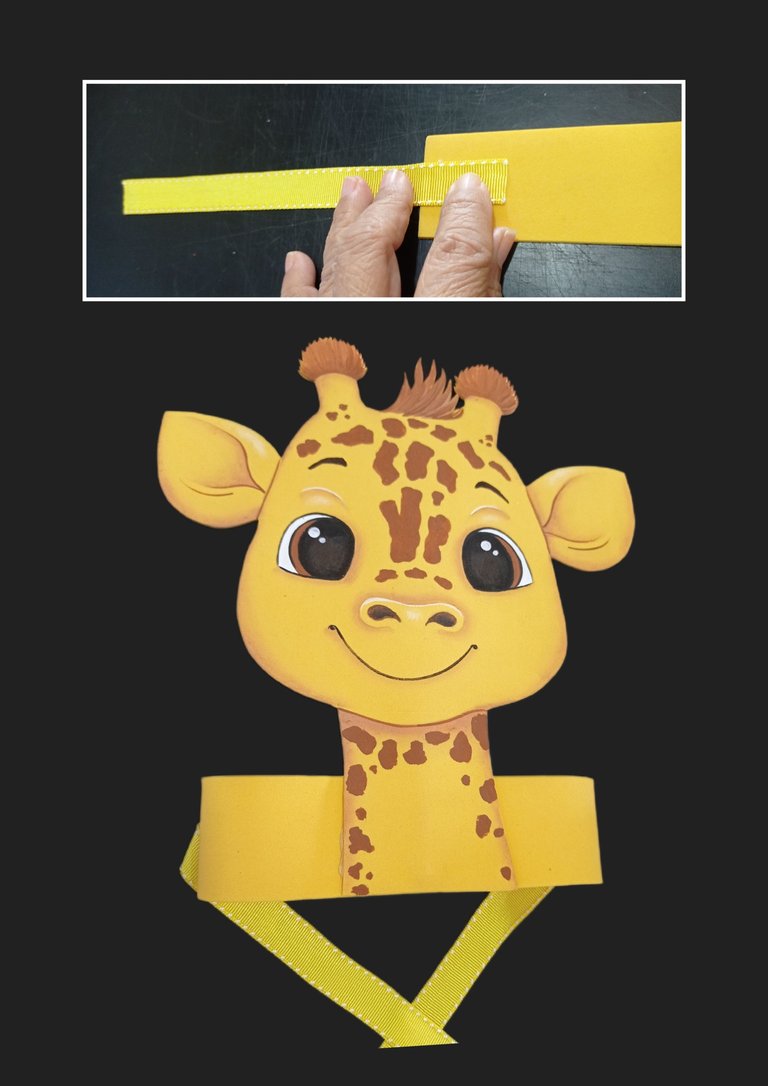
- Ahora aplica silicón en un pedazo de cinta y pega a la tira de foami, así harás en los dos extremos.
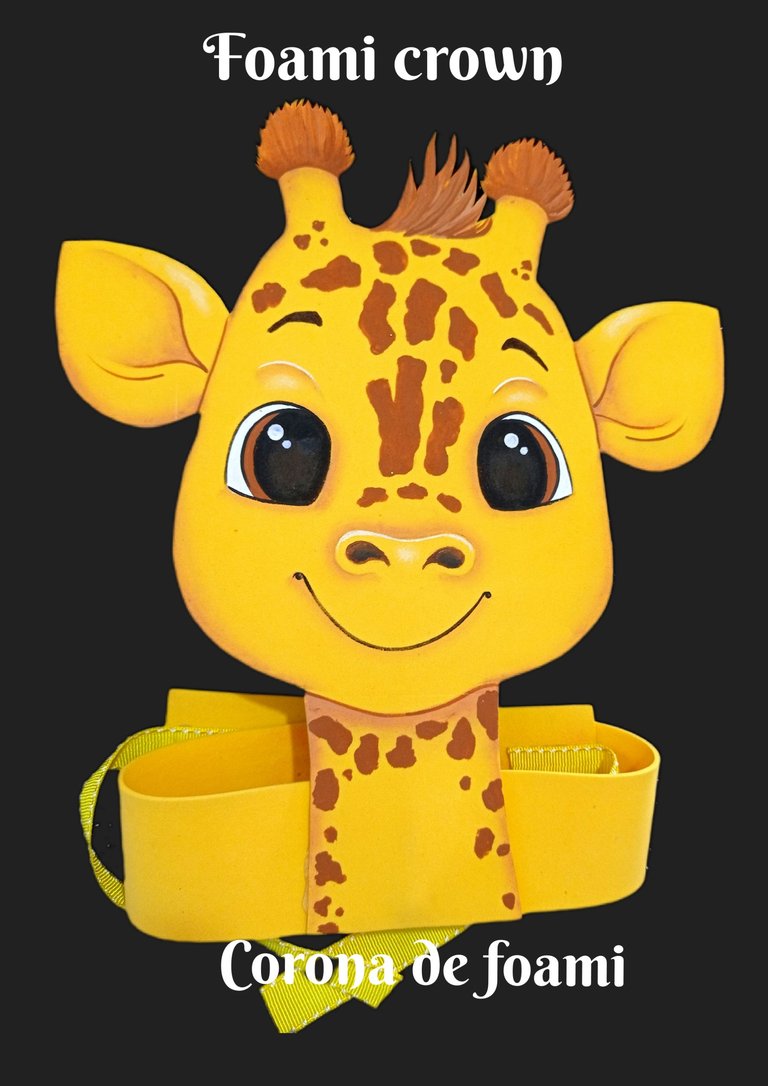
Ahora te muestro el resultado final.
Como puedes ver es muy fácil de realizar, solo te queda poner sobre la cabeza y ajustar con la cinta y listo.
Editor de fotos: GridArt
Teléfono Redmi Note 9.
 Fuente:https://es.pinterest.com/pin/806214770818883642/
Ahora solo queda despedirme, feliz de haber compartido con ustedes esta bonita corona que puedes realizar con el motivo de tu preferencia o la que el/la niño(a) desee.
Muchas gracias por tu compañía y si es de tu agrado comentar con mucho gusto te responderé.
Saludos y hasta mi próximo paso a paso.
English:
Hello to all friends and creators who visit me today.
How are you spending these carnival days?
I hope and wish that you can enjoy and make the most of them.
Today I will share with you a wreath that I made with foami and the Giraffe motif, you will see that it is very easy to make and inexpensive.
For this wreath you will need:
Yellow foami, paints and brushes.
Silicone, pencil and scissors.
Ruler, yellow cardboard, gross tape.
Wooden stick and drawing or print.
Let's get started:
Step 1:
- Place the drawing on the yellow foami and then rub it with a little pressure to transfer the drawing.
- Remove the paper and make sure it has been marked and cut all around the edge.
- Then start painting by filling in the eyes with white paint.
Step 2:
- Now wet an angled or straight brush and dip the tip into the color you are going to apply and go all around the outline and the marked lines of the giraffe.
- Then fill in the spots with brown and let dry.
- Now paint the horns and bristles.
Step 3:
- Continue painting the eyes and let dry, also fill in the nostrils, eyebrows and the rest of the face.
- Then pass light lines with white paint on eyelids, nose and ears and let dry well.
Step 4:
- Mark the entire outline of the giraffe on the yellow cardboard and cut two (2) millimeters further inside.
- Apply silicone and insert a wooden stick and glue to the foami, then press all around the outline until it sticks well.
- Cut a strip of 4cms wide by the length that will be the measurement of the contour of the child's head and glue in the center of the neck.
Step 5:
- Now apply silicone on a piece of ribbon and glue it to the foami strip, this is how you will do it on both ends.
Now I show you the final result.
As you can see it is very easy to do, just put it on the head and adjust with the tape and that's it.
Photo editor: GridArt
Redmi Note 9 phone.
Fuente:https://es.pinterest.com/pin/806214770818883642/
Now it only remains to say goodbye, happy to have shared with you this beautiful wreath that you can make with the motif of your choice or the one that the child wishes.
Thank you very much for your company and if you like to comment I will gladly answer you.
Greetings and until my next step by step.
Esta muy linda esta creación amiga , me gusta mucho esa corona y la forma que lo has dibujado.
Hola amiga, muchas gracias, que bueno que te gustó.