Introduction
Hi everyone! Welcome to another edition of The Jedo's Splinterlands Brawl Report. This post will explain how I approach my battles in Tier 4 Brawls while representing TeamPH. Keep in mind this is a Wild Gold Fray where cards are limited to Advanced Level caps. I will walk you through my thought process in deciding which Summoners and Monsters to select in different combinations of Rulesets and Mana Caps. Now, I am not an expert player by any means and I will have some misplays from time to time. Any comments or suggestions that could help me improve my decision making and rules analyses are welcome and will be very much appreciated! Whether you're a seasoned veteran or a new player in the game, I would like to hear from you! We can all be better together! Let's get into it!
Clarification
The following Brawl results are from the most recent Brawl Cycle. I waited a few days after the cycle ended before publishing this article since I just posted another report not too long ago. Previous post HERE for reference. I will also start tracking the Brawl Cycle numbers moving forward.
Prologue
I recently wrote about Training Mode (link to post HERE) and decided that now is a perfect time to use this game feature to get in some battles before entering the Brawl Arena. I played some battles to "fight off the rust" and get some sort of stretching and warmup before the games start. I set the training to Hard Difficulty, allowing use of All Cards I have available, with Advanced Level for Summoners since I will be in the Wild Gold Fray arena.
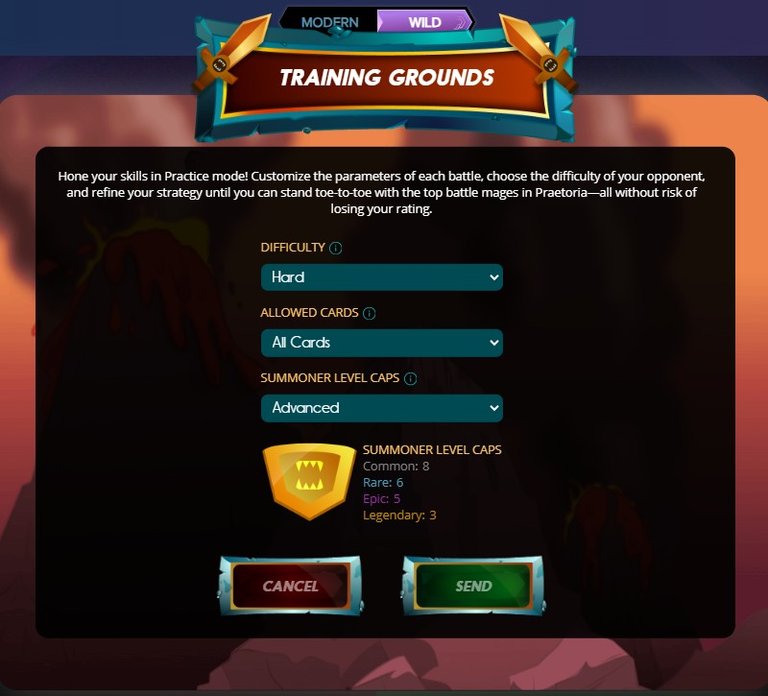
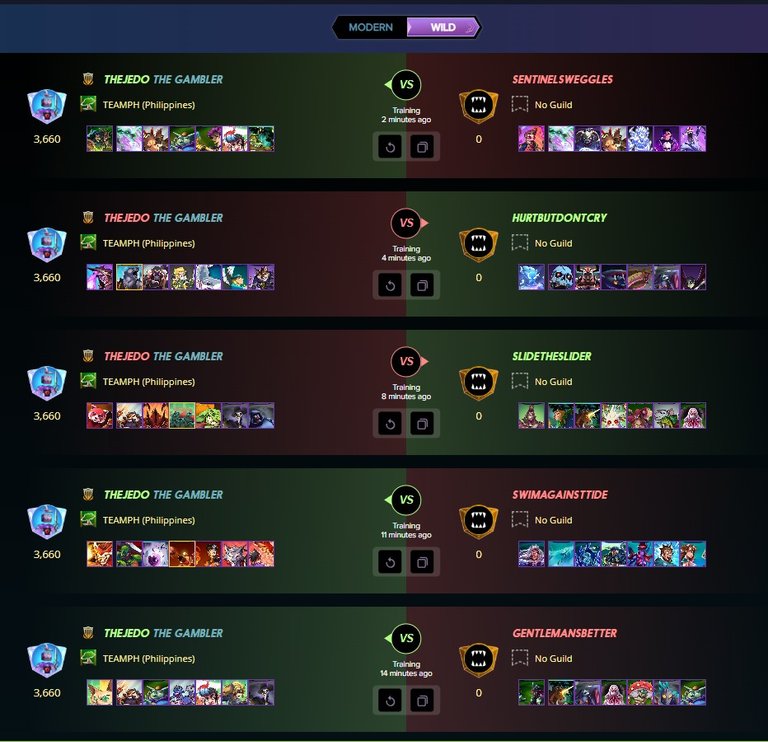
As you can see above, I played 5 games and won 3 of them. Not bad for a quick warmup. One thing I realized as I was training was that I could not use Gladiator cards! How can I prepare for Brawls without these? Maybe a future update can include an option or a toggle switch to include Gladiator cards during training. I bet a lot of brawlers would find that useful! What do you think??
Anyway.. Back to our regular programming! I hope you enjoy this article and please don't hesitate to reach out and let me know your thoughts!
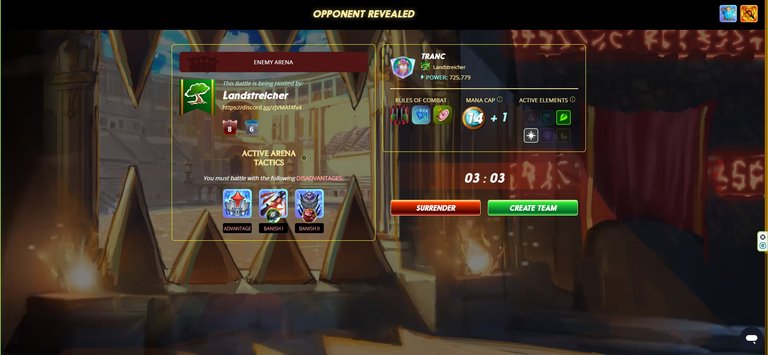
Battle 1 vs @tranc
My opening battle was a low mana match with Earth and Life as the only available Splinters. Keep Your Distance means I can't play any melee monsters and Even Stevens limits the monsters I can summon to an even-numbered mana cost. The last ruleset of this battle is Aim True, ensuring none of the attacks miss.
I considered using Llama or Kron for this battle but that meant I would have fewer options to select from my pool of even-numbered monsters. In the end, I went with Chuul Jujinchi, a 3-mana, dual element summoner that allowed me to select monsters from both of the active splinters. I carefully chose which monsters to pick - I wanted to use weapons training and chose Aves Sturgis as the "trainer." Pelacor Conjurer took the first position and Helmet Kharafax on 3rd. Both these monsters gained magic attack from Aves' ability.
I added Failed Summoner to my lineup but looking back, maybe I should have picked a different card instead. Something like Acid Shooter. I also debated on renting and using Khmer Princess for some Tank Heal. I took too long to decide and didn't have enough time to replace my lineup after I had rented the card. Furious Chicken was included as a filler and Elanor Bravefoot stood in the back to deal Ranged Damage and hoping that was enough to bring me my first win.
My opponent selected General Sloan as the summoner and went with the same Weapons Training play with Pelacor Conjurer, Aves Sturgis, and Helmet Kharafax. I'm assuming Tranc did not have any other Life summoner available considering the monsters he chose did not get any benefit from Sloan's ability.
Lots of Magic Reflect in this match! Every fireball thrown meant it was coming back to the attacker! His Conjurer attacked first and removed my Conjurer's Divine Shield. The magic attack bounced back to my opponent and cancelled his own Divine Shield, leaving him vulnerable to my first attack. The back and forth kept going until both our Conjurers and Aves were eliminated. Time for the Gladiators to show us what they got.
As the the Gladiators were going at it throwing fireballs at each other, my Elanor started chipping away the remaining enemy's armor. She eventually dealt a single point of damage bringing the opposing Kharafax's life total to 2. Just enough for it to die from a final magic attack from my own Kharafax. First battle goes to me.

Battle 1 link HERE
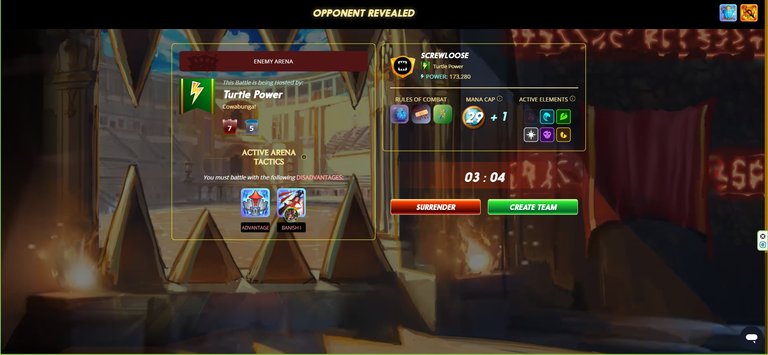
Battle 2 vs @screwloose
The 2nd battle was against ScrewLoose from the Turtle Power guild. Cowabunga!
Limit is 30 mana, with Fire as the only inactive Splinter. Rulesets include Lost Magic (no magic attack monsters), Healed Out (no healing), and Fire & Regret (units have Return Fire). I expected a melee team meaning utilizing Thorns would be a good play.
I chose Mylor as the summoner and opted for a Sneak Play with Katrelba, Uraeus, and Elven Cutthroat. I placed Warborn Chieftain in front for some Shield and Failed Summoner in the last position for Sneak protection. Thanalorian Blade, with the Lookout ability, ensured that my Failed Summoner would take fewer damage from an opposing sneak play, just in case. Regarding my tank choice, I thought my Chieftain already had Demoralize that could reduce enemy melee damage. Would have been nice to have a double Demoralize since Failed Summoner also has this ability. Pelacor Mercenary, a flying, self-healing tank for the Earth Splinter, could have been the better tank choice in this scenario. I really should pay attention to my cards and their abilities at their current levels!
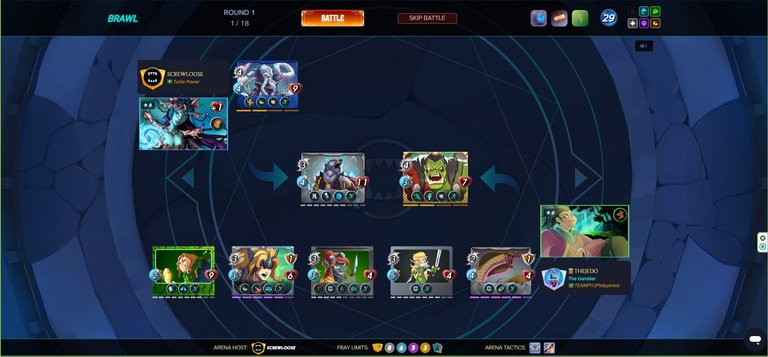
ScrewLoose picked Pembrook Nymph as his summoner. I think Kelya would have been the better choice to lead his team but maybe he does not have this summoner available to play with. Arkemis stood up front providing protection to his whole team with an additional 2 armor and Kulu Mastermind, with Opportunity and Shield, stayed behind. Both of these cards are high mana monsters and I guess he did not have enough mana to play whatever units he has available.
My sneak attacks made quick work on the opponent's Kulu Mastermind and started feasting on Arkemis. Relentless attacks awarded me with my 2nd win of this Brawl cycle.
Battle 2 link HERE
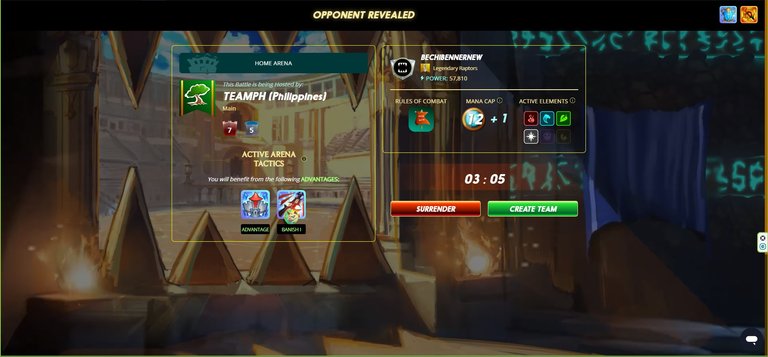
Battle 3 vs @bechibennernew
My 3rd battle was a bonus since my opponent fled this match. Let's get into the match details regardless.
13-mana match with a Standard ruleset. I thought about using Kron here but went with Venka and some low mana monsters. Mylor was the chosen summoner to give my whole team Thorns. Not sure if this was the best play here. Before my timer was up, I noticed I have not used Quora in a while. I didn't have enough time to switch up so I turned in my Venka lineup and hoped for the best. I guess we'll never know if my play would have worked.
Battle 3 link unavailable due to opponent fleeing.
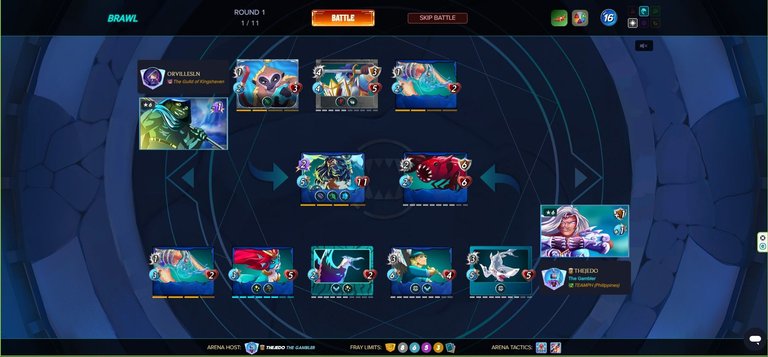
Battle 4 vs @orvillesln
4th Battle was another low mana match with only 2 Splinters available. Water and Life were active and limit was 17 mana. Rules of the match are: Close Range (ranged monsters can attack from the first position) and Taking Sides (no neutral monsters can be played). I thought about an all magic play with Alric at the helm but didn't like my low mana magic monsters. Baakjira would be fine, I thought, but which offensive monster do I play? I scrapped both ideas and selected Kelya with a couple of sneak monsters, a couple of sustain monsters, a decent low mana tank, and a filler card as sneak protection.
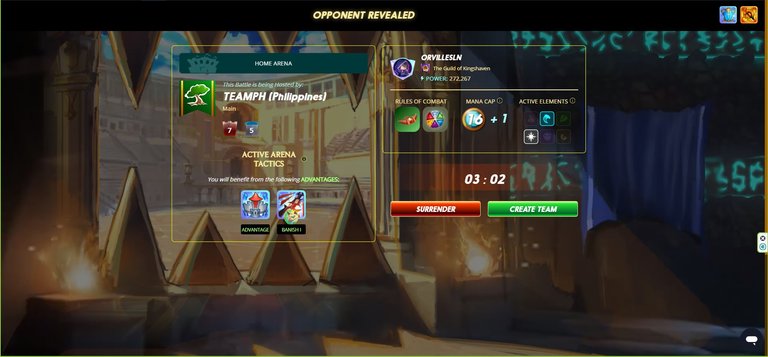
On the opposite end of the battlefield was Bortus, a summoner that reduces the enemy's magic attacks by 1. I'm glad I didn't go with the magic play I initially thought about. My opponent placed Djinn Oshannus as a tank in the 1st position. Endless Gibbon, even though in 2nd position, would still be able to attack due to its Reach ability. Isgald Vorst was also present to deal melee attacks to my monster that had the lowest health. He also brought in his own Fiend as a sneak protection.
My swift, sneak attacks quickly eliminated the Fiend and took out Isgald Vorst's armor. My Kelya's bonus armor protected my Albatross from being exposed to Opportunity attacks and survived the first attempt from the enemy Isgald. Pelacor Mercenary and Sabre Shark did not like how Isgald picked on Albatross and they swiftly got rid of Isgald. Though Djinn Oshannus' magic attack was ignoring my Sethropod's armor, Merdaali Guardian sustained my Sethropod, healing my little tank from magic damage and repairing its armor from the Gibbon's melee damage. My little sneakers quickly moved on from killing the Gibbon and joined forces with the shellfish to deal with the Djinn. Another Jedo win.
Battle 4 link HERE
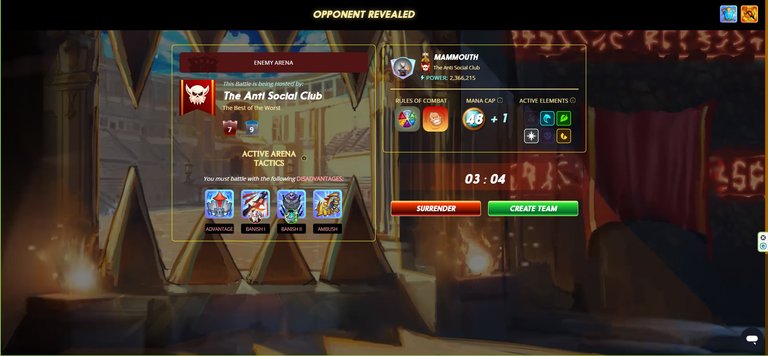
Battle 5 vs @mammouth
I faced Mammouth on my 5th brawl match. Fire and Death Splinters were inactive. 49 mana match with Taking Sides (no neutrals) and What Doesn't Kill You (all units have Enrage). I wanted to play a fast tank like Almo Cambio which would benefit from the increased stats from Enrage but I couldn't play neutrals in this battle. Void Dragon would work, I thought to myself.
I selected Lily Shieldpaw as my summoner to give all my units Camouflage so that my opponent will only attack my tank. As mentioned, I placed Void Dragon in front, hoping it can be fast enough to dodge any attack, including magic, due to its Phase ability.
I chose Life as my secondary Splinter after Dragon. I wanted to utilize Iziar's Taunt and with Lily's Triage, hoping Iziar would survive long enough to be a distraction. Oshuur Costantia was also present to provide some healing to my tank. Rage served as my main damage dealer and Sevaya, while being trained by Rage, could further support Void Dragon with Cleanse and Blind.
I noticed my opponent had a Level 1 Agor Longtail. I thought this was interesting considering all his other units were maxed up to the Advanced Level Cap. Even though Agor did not have heal (he gets it at level 3), he had support from both his own Oshuur and his Goblin Psychic. I COULD NOT get past his Agor. There was too much Tank Heal and Repair. Aside from struggling to deal with the enemy tank, my lineup did not have an answer to the Goblin Psychic's Affliction. Iziar could not be healed anymore and after she got eliminated twice, all my opponent's attacks went straight to my Void Dragon, who was overwhelmed with damage and did not get enough healing chances from Oshuur. The rest of my team got exposed to the opposing team's relentless firepower while his Level 1 Agor still stood (after being resurrected once)! Well played!! Mammouth took home the win here.
Battle 5 link HERE
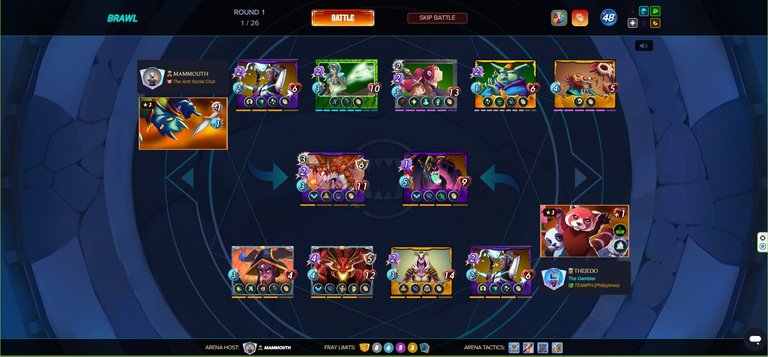
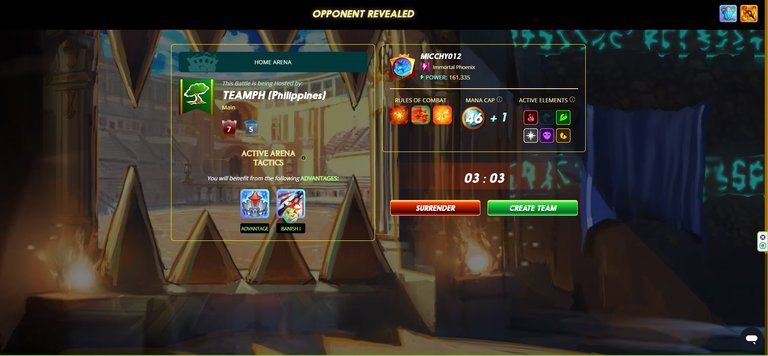
Battle 6 vs @micchy012
The 6th battle of this brawl also ended up with my opponent fleeing. Similar to the other match, let's get onto analyzing the parameters of this match.
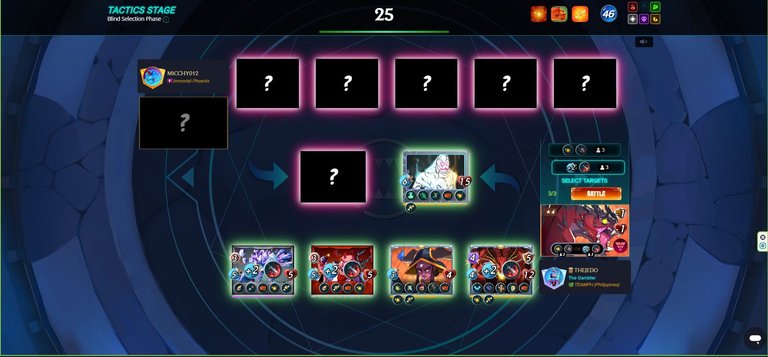
Mana Cap is 47 with a very interesting set of rules: Explosive Weaponry (all units have Blast), Heavy Hitters (all units have Knock Out), and 'Tis But Scratches (all units have Cripple). I completely ignored the other 2 rulesets and focused on what I could do with the Blast rule. I thought it was a good opportunity to use Nidhoggr and use his Speed + Execute tactics in tandem with Blast. I understand that this summoner is a situational card and I would like to use him whenever I find that "situation." The question now is: What else do I play him with?
I wanted to play Rage since his kit is insane. High magic damage with Void, Weapons Training, and Life Leech would all be helpful in the event my tank dies and Rage can act as a secondary tank. Almo Cambio was selected for be the frontline and Runeseer Sevaya was placed behind Rage. Both these units gained Magic Attack from Rage.
The thing with Brawls is that you enter the Tactics Stage blind. You don't see what your opponents played so you do not have the ability to counter your opponent after lineups have been revealed. I considered adding Speed and Execute to Almo so that there's a higher chance of dodging attacks (Sevaya also has the Blind ability). Almo, Rage, and Sevaya can also focus fire on the enemy tank and deal massive blast damage to the unit behind it, assuming there's no taunt monster that would redirect all my non-melee damage from the backline to the monster with this ability. In the end, I gave Rage, and my 2 speedy, ranged attack monsters the Speed and Execute buff. My reason behind this is so that Almo, Rage, and Sevaya can focus on killing the opposing tank and Blood Maker and Gem Meteor can cause chaos in the enemy backline (and at random times, frontline) with Blasted Scattershot. What do you think about this play?
Battle 6 link unavailable due to opponent fleeing
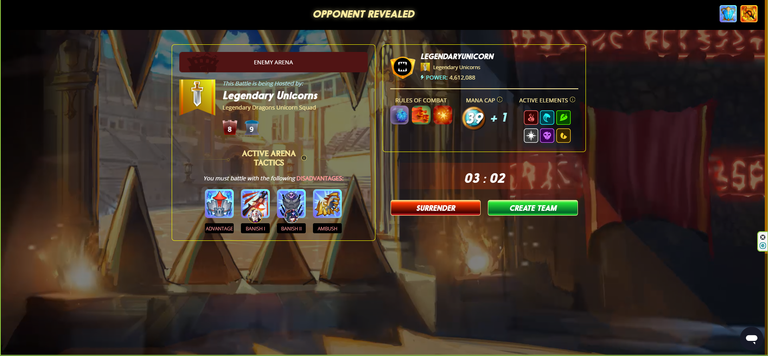
Battle 7 vs @legendaryunicorn
My last match was against LegendaryUnicorn. I also faced this account in the previous brawl. Interesting how we were paired together in back to back brawl cycles.
Mana Cap was 40 and all Splinters were active in this battle. Rules were: Lost Magic, Heavy Hitters, and Explosive Weaponry. I thought about Nidhoggr and his Execute again but no magic monsters were allowed and therefore no bypassing armor that would deal direct damage to health that could amplify the effectiveness of the Execute ability. I picked Eternal Tofu as my summoner and selected monster units with double attacks (more hits = more blast damage) and units with Reflection Shield (completely negates blast damage).
I wanted a Tank with Shield so that enemy melee and ranged attacks are reduced. Shieldbearer was perfect for this role since he also has Taunt, directing all damage toward him while protecting all my monsters from damage. Venator Kinjo was strategically placed behind Shieldbearer to absorb blast damage from opponent attacks. Katrelba and Silvershield Assassin were chosen to be the main damage dealers for this match, along with my trusty Runi, which can lock on direct attacks to my opponents weakest monster. Venari Crystalsmith is there to sustain Shieldbearer. Katrelba was also given Tofu's Triage and Scavenger to offer survivability and sustainability to the backline.
I was shocked to see Conqueror Jacek on the other side rendering my Taunt play useless against his ranged monsters, at least. Since Scattershot doesn't affect melee units, these units still ended up attacking Shieldbearer. Still, I was concerned with my backline and with the effectiveness of my plan.
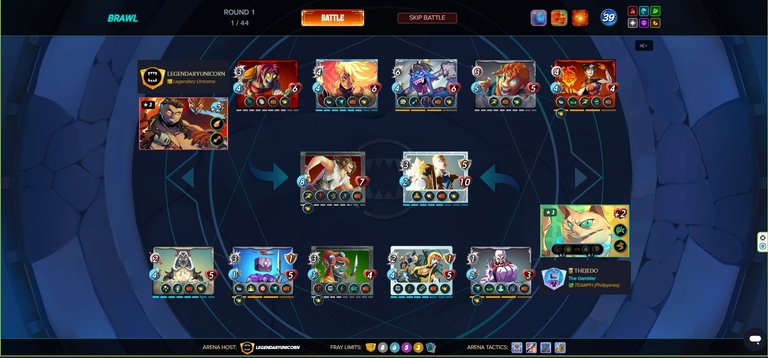
The first attack of the match came from Supply Runner due to its 9 speed. Luckily, the ranged attack hit Shieldbearer and not random monster in my backline. Countess Sinash attacked next and dealt 4 solid damage to my Katrelba and dealt blast damage to Silvershield Assasin, deducting 1 armor and 1 health due to Piercing. Runi did not take any damage because of Reflection Shield. Also, if it weren't for Tofu's +2 health, Katrelba would have died instantly. Venka, Torch Vizier, and Radiated Brute attacked next, focusing on Shieldbearer. Tofu's thorns pricked Venka and the Brute, angering the latter and further boosting up his speed.
My first few attacks missed, both aimed towards the 1st and second to the last position units, and I knew if I kept on missing, I would be in trouble. I was on the edge of my seat. Luckily, Katrelba, after Triaging herself, connected one of her attacks dealing 3 damage to Supply Runner and 2 blast damage to both Venka and Sinash who were both adjancent to the Runner. Runi then attacked and eliminated Venka taking with it the already injured Supply Runner. Torch Vizier was left unaffected by Blast.
The next Sinash attack went straight to Shieldbearer, letting my backline recover from havoc. Silvershield Assassin and Katrelba both connected 1 of their 2 attacks and hit Torch Vizier, eventually killing the 2 units beside it: Radiated Brute and Countess Sinash. Katrelba then went on to feast on the remaining units as she got stronger from previous ones she has defeated. Victory goes to Jedo.
Battle 7 link HERE
Summary
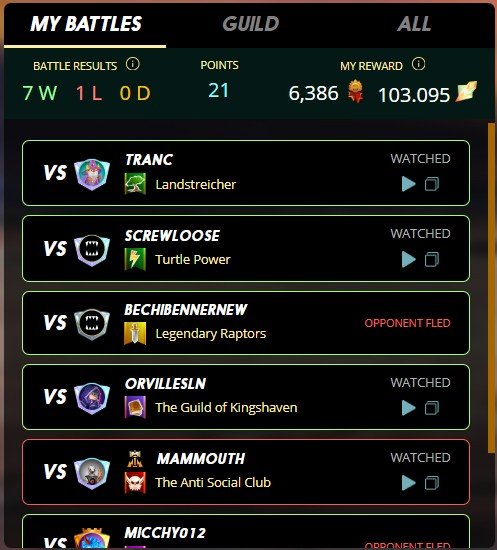
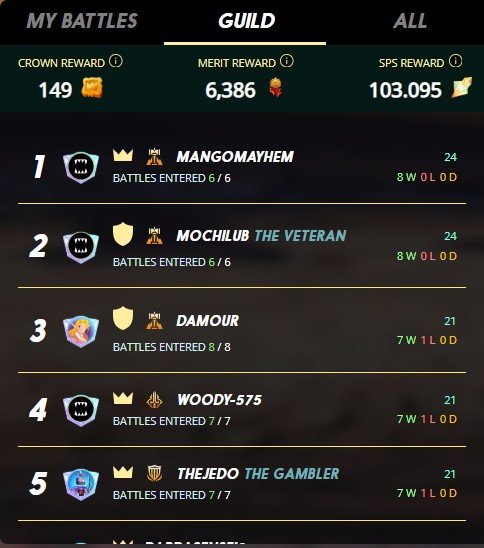
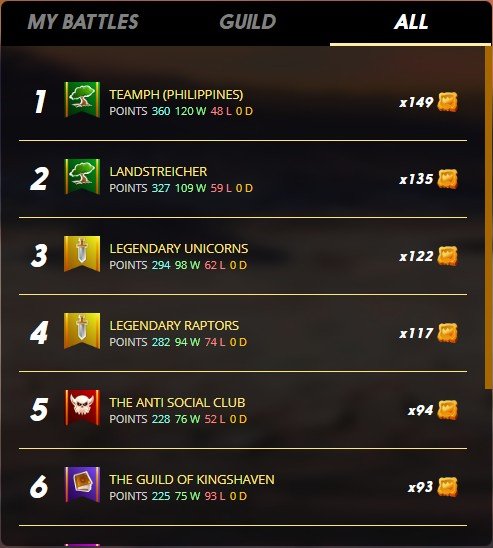
The Brawl ended with me winning 6 matches and only losing 1. My total wins bumped up to 7 due to another guild's empty fray. Overall, TeamPH took another 1st place finish! Great showing after a not-so-fun 5th place in the previous brawl. I would like to congratulate the top guilds the performed in this brawl! See you again next time!
Final Thoughts
As always, playing Brawls are so much fun! I understand that I have still so much to learn. Some of my wins might have been because of luck. Some might be actual good plays that other players can learn from. Either way, I hope you guys enjoyed this article and if you have questions, comments, or feedback for me, please let me know! Let's all learn and grow together and set each other up for success! Vonak! Together We Thrive, Kapamilya!
Congratulations @thejedo! You have completed the following achievement on the Hive blockchain And have been rewarded with New badge(s)
Your next payout target is 50 HP.
The unit is Hive Power equivalent because post and comment rewards can be split into HP and HBD
You can view your badges on your board and compare yourself to others in the Ranking
If you no longer want to receive notifications, reply to this comment with the word
STOP