Repository
https://github.com/beetlevc/climber
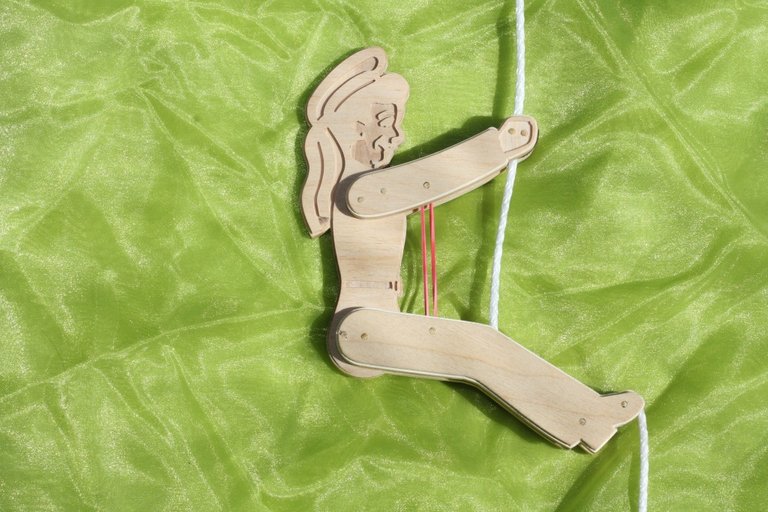
Introduction
Friday night, when I was feeling especially nostalgic, I found a few old issues of a magazine I used to read as a kid. I was browsing through the pages, recalling old days. Then I stumbled upon an article about making a simple toy. It was a funny wooden sailor climbing a rope. I remembered this toy right away. It was in April issue of the magazine and I got it soon after my 12th birthday.

Even then I already liked making stuff and articles like this were my favorite. I remembered making two of these toys. The first one came out a bit crooked, and I later traded it to a classmate for a length of rubber cord, I needed for my other projects. The second one came out perfect and worked just fine, so I left it for myself. For a moment, I thought about finding this old toy but gave up the idea. Chances I could find it after almost 30 years were pretty slim. I went for the next best thing and decided to remake the toy. Today with modern tools it should be much easier.
Here is a post about this quick weekend project. You will find all the files needed to reproduce this toy in the project repository.
Designing and making the toy
I cleaned up the scanned sketch and removed the background. Then I imported raster image into Inkscape vector editor. I used "Trace Bitmap" tool to vectorize raster image.
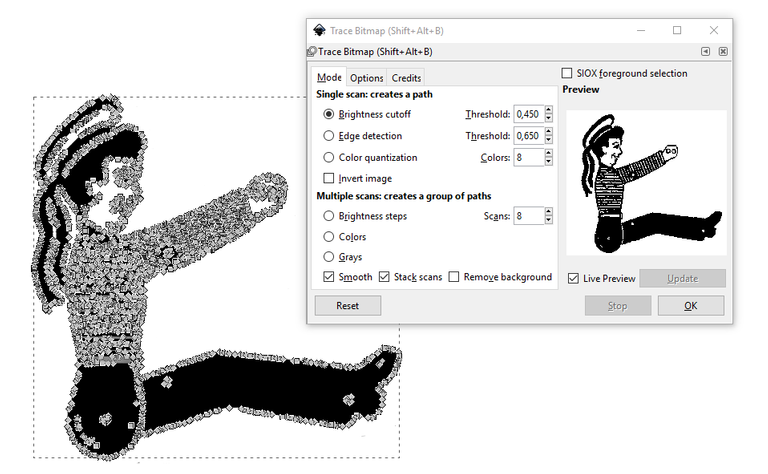
As you can see it produced too many points. A sketch with such a large point count won't work smoothly in the CAD. We need to cut down point count significantly before we can proceed further. The "Path - Simplify" tool in Inkscape does exactly that! I simplified generated path, then tweaked a few points here and there. Then I split it into layers, with arms, legs, and body each in a separate layer. Here is my final result.
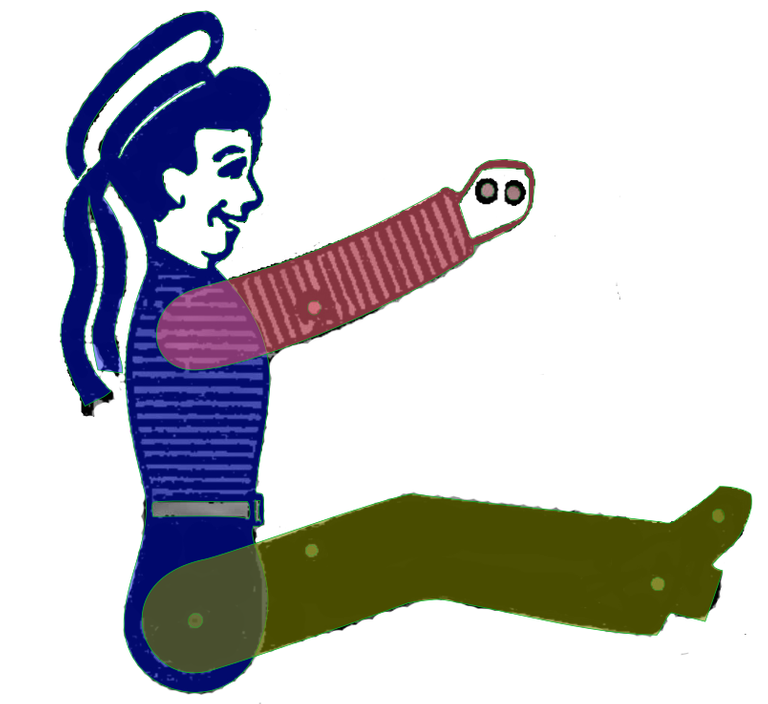
Now it's time to design the CAD model. My CAD of choice is Autodesk Fusion 360. It's a complete CAD/CAM solution, and it's free for hobbyist users!
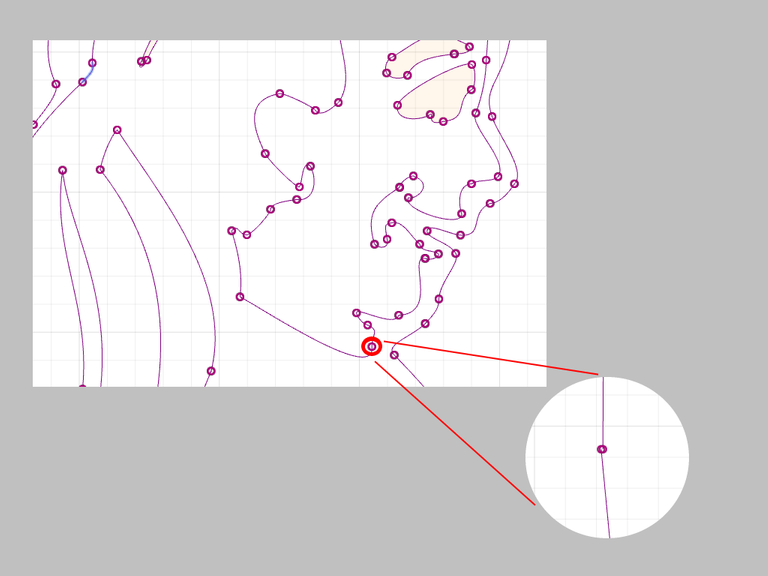
First, let's create a sketch and import our SVG into this sketch. Sometimes SVG import may produce broken outlines. This has to be fixed before extruding imported geometry. It is not always easy to pinpoint the problem part of the outline. An algorithm we all know and love from CS can help us to pinpoint the problem, it's binary search! Simply divide problem contour in two with a line and check which of two parts still has the problem spot. Repeat this step several times to narrow down the search area, then look at it closely with maximum zoom level. When you find this open contour, close it with a short line segment.
The rest was easy. I extruded parts, created components, joined them together. You'll find all the steps in the Design history in Fusion 360.
With the CAD model completed let's make this thing! As a proud owner of a cheap Chinese CNC router, I'm always trying to find an excuse to use my favorite toy. I used 1 mm endmill for all operations, simply because I'm lazy and don't like changing tools. While I was generating the toolpaths, I had to move a few sketch lines, because the endmill could not get into some narrow spots. This step would not be necessary with a laser cutter.
Milling is a messy process and it requires a lot of attention, so I didn't make any pictures of it. Anyway, after a little bit of sanding here is the finished parts.

I assembled the toy and tested it...and it didn't work! The legs moved, but my climber stayed in one place, not willing to climb up the rope as it was expected to do.
Fixing problems
After investigating the problem I found out that there was not enough friction between hands to grab the rope. As a result, rope kept slipping back. To fix that I glued small foam pads to toy's hands.
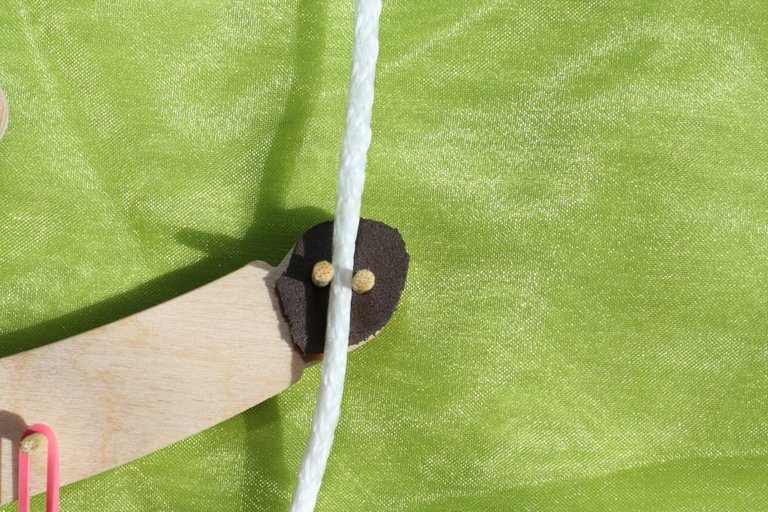
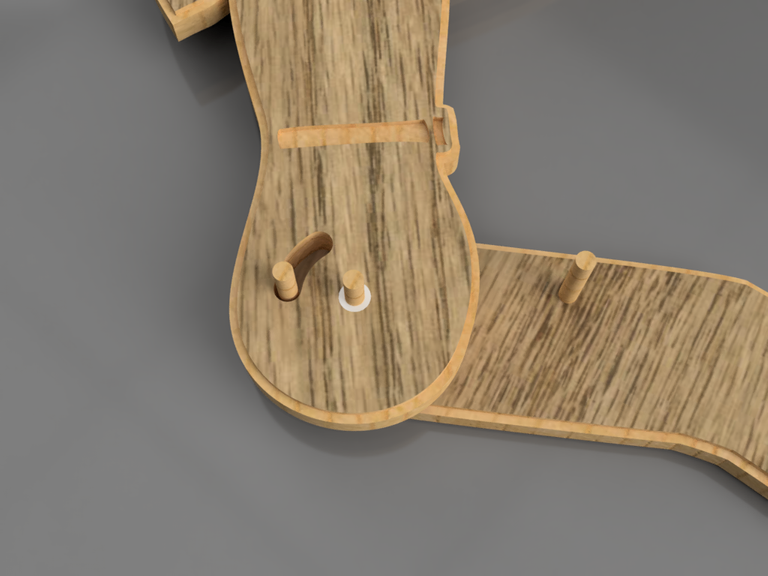
I also noticed that it was a bit too hard to lower the legs from their initial uppermost position and get the toy moving. To fix that I decided to constrain leg joint movement. It is done with track and a pin following this track. See picture below.
Conclusion
You will find this CAD model along with cutting toolpaths in the project repository.
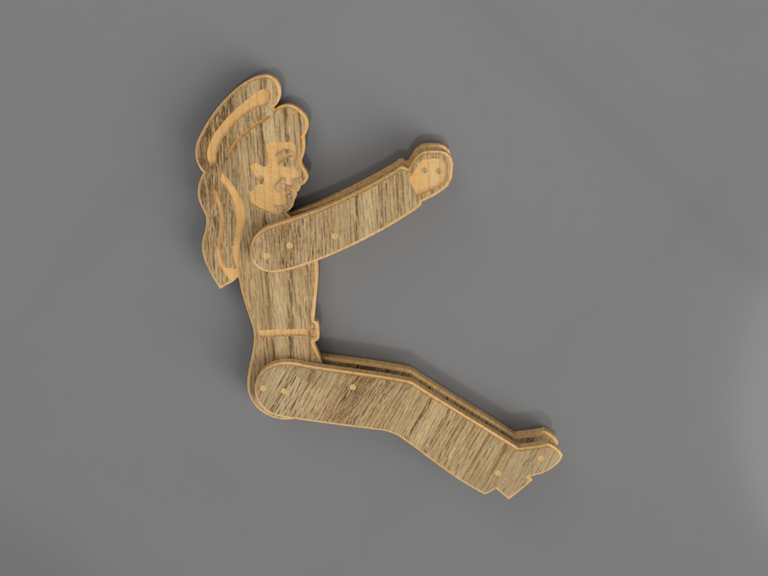
Here is a short animation of the toy in action.
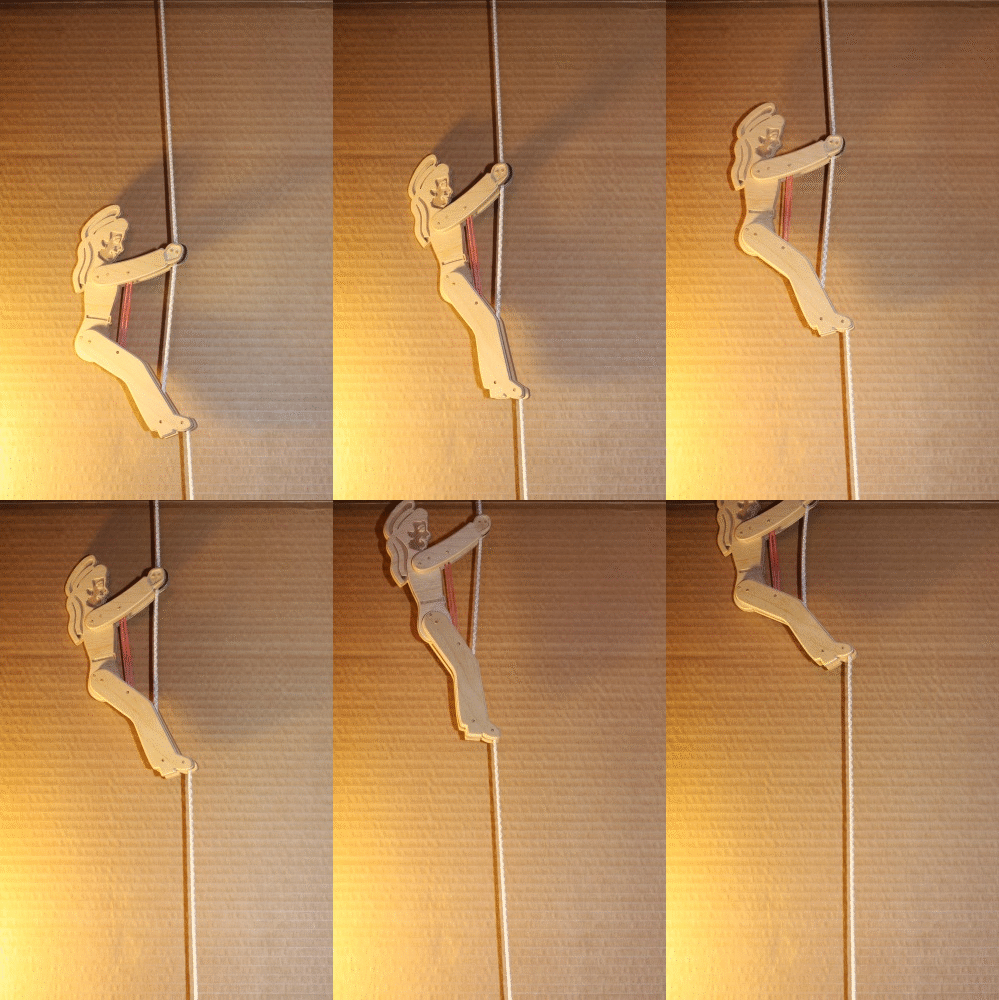
If you're still reading this, then I guess you liked my story :) Please leave a comment and tell me about your recent projects, or your childhood memories...or just anything really. I'll be happy to chat!
How to contribute?
Do you have a question or suggestion for this project?
Feel free to contact me on Discord or Github! Or simply leave a comment.
Resources
Inkscape vector editor: https://inkscape.org
Autodesk Fusion 360: https://www.autodesk.com/products/fusion-360/free-trial
Join our Discord Channel to connect with us and nominate your own or somebody else's posts in our review channel.
Help us to reward you for making it ! Join our voting trail or delegate steem power to the community account.
Your post is also presented on the community website www.steemmakers.com where you can find other selected content.
If you like our work, please consider upvoting this comment to support the growth of our community. Thank you.
My father was a high school wood shop teacher. I wish he could have seen this post.
My school shop teacher was a nice guy too. I liked his classes a lot, I even remember signing up for additional classes after school.
They don't teach boys working with tools in my old school anymore. Now it's drawing in Windows Paint, and cooking, and sewing... Frankly, I like the old way better. In my opinion, boys should know how to use hand tools or a drill press or a lathe...Thanks, @h-p-oliver! :)
This is a wonderful post! I like the nice story behind the project, the detailed description of the steps involved and the troubleshooting process :)
Just wondering what the text in the image says... is it a story about the sailor or just some instructions?
The original article does not say much, just a few words on how the author found out about the toy and some very basic (and not very usable) assembly instructions. I guess, the picture was supposed to be self-explanatory...Thank you, @plushzilla!
This is amazing!!!
Thanks!
I just have realized I was not following you this whole time. That's weird, I specifically remembered hitting Follow button first time I read your blog... Fixed it now :)
all good man, nice to see you around here! and keep up the good work! :)
I remembered this toy. I used to see a man in the church ground selling this toy. I think i bought my son Mark one when he was still very young. This toy brings back sweet memories...
Thank you for sharing your nice story! Bringing back memories is exactly what I was aiming for with this post :)
Thank you @beetlevc . Appreciate your upvote too.
Congratulations @beetlevc! You have completed some achievement on Steemit and have been rewarded with new badge(s) :
Click on the badge to view your Board of Honor.
If you no longer want to receive notifications, reply to this comment with the word
STOPTo support your work, I also upvoted your post!
Do not miss the last post from @steemitboard!
Participate in the SteemitBoard World Cup Contest!
Collect World Cup badges and win free SBD
Support the Gold Sponsors of the contest: @good-karma and @lukestokes
Wow. This is so cute toy.
I think my daughter will like it so much.
Wish you were here so I could ask you for making it one more
Congratulations @beetlevc! You have completed the following achievement on Steemit and have been rewarded with new badge(s) :
Click on the badge to view your Board of Honor.
If you no longer want to receive notifications, reply to this comment with the word
STOPDo not miss the last post from @steemitboard:
SteemitBoard World Cup Contest - Round of 16 - Day 4
Participate in the SteemitBoard World Cup Contest!
Collect World Cup badges and win free SBD
Support the Gold Sponsors of the contest: @good-karma and @lukestokes
Congratulations @beetlevc! You have completed the following achievement on Steemit and have been rewarded with new badge(s) :
Click on the badge to view your Board of Honor.
If you no longer want to receive notifications, reply to this comment with the word
STOPDo not miss the last post from @steemitboard:
SteemitBoard World Cup Contest - Russia vs Croatia
Participate in the SteemitBoard World Cup Contest!
Collect World Cup badges and win free SBD
Support the Gold Sponsors of the contest: @good-karma and @lukestokes
Congratulations @beetlevc! You have completed the following achievement on Steemit and have been rewarded with new badge(s) :
Click on the badge to view your Board of Honor.
If you no longer want to receive notifications, reply to this comment with the word
STOPDo not miss the last post from @steemitboard:
SteemitBoard World Cup Contest - Semi Finals - Day 1
Participate in the SteemitBoard World Cup Contest!
Collect World Cup badges and win free SBD
Support the Gold Sponsors of the contest: @good-karma and @lukestokes
this is SOOOOOOO GREAT!!! i mean, i don't have that creativity and precision to make this toy. I have designes that i maybe will post!!