The world is changing at a very fast pace and for the coders it is always important to start your web projects with ease. In this post, I shall introduce you to an amazing tool which has helped me get started with my web development in no time.
AMPPS
*What is AMPPS?*"AMPPS is a software stack from Softaculous enabling Apache, Mysql, MongoDB, PHP, Perl, Python and Softaculous auto-installer on a desktop. This includes everything you need for website development. Start developing your website from open source web applications or just start writing code yourself."
All images were taken from their site and from screen shots taken on the local installation of Ampps in my computer
You might have heard of other solutions but there is something special about Ampps which most developers can benefit from:
1 - Ampps comes with one click Software installations, including and not limited to, WordPress, Joomla and many more PHP applications.
2 - Ampps comes bundled with openssl which allows to have self signed certificates on localhost, thus allowing the developer to focus on developing more than setting up the perfect environment.
3 - My favorite feature about Ampps is that you can create custom domain names!. Once you have Ampps installed, you may create any domain name you want and it will re-write your hosts file (given you grant the proper permission) thus allowing you to have your awesomeweb.dev domain for example. There is a cool trick I love doing though, and it is to create a domain which will match your Top Level Domain such as https://myawesomedomain.com. The reason behind this is that whenever you wish to import your dev site into your production site, you will have to change nothing at all!.
4 - It comes with a PHP versioning option, meaning you can switch between different versions of PHP including 7.1, 5.4 and more.
5 - It comes with an easy to install FTP server, thus allowing you to upload from anywhere on internet (provided your localhost is reacheable though port forwarding or using solutions such as ngrok).
6 - Ampps control panel is very intuitive and its user interface is truly a blessing to work with.
7 - It works for Windows, Linux and Mac.
8 - You may install Apache as MySql and services which start on your system start up.
In order to use this awesome free software just head over to the Downloads section, choose your desired Operating System and install it.
It is important to have internet connection when you install it because there are forum posts that have reported some weird behaviors when it does have it.
Since I am on Windows my screen shots will not be on another OS.
Once installed, you should have something that looks like this:
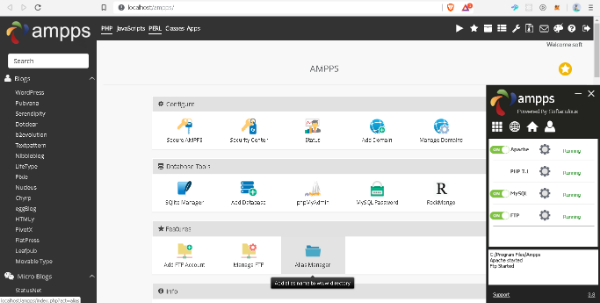
For this guide, I will install WordPress locally using their software installation:
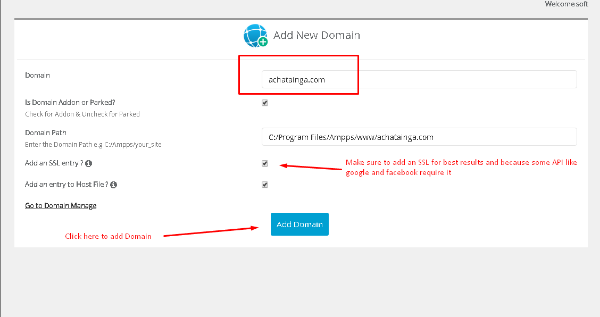
1 - First, let us create a custom domain. Let us pretend that we purchased a nice .com domain and we will be developing locally to later upload our WordPress to a server. Let us also pretend that our .com domain is for example: https://achatainga.com
The reason behind using our real purchased domain name here is that once I finished developing my local website to later upload it, I will not have to edit the Web App nor its database, I will be ready to upload it as it is and later remove my domain at my local Ampps:
If you have issues accessing your site in your custom domain just restart Apache like this:
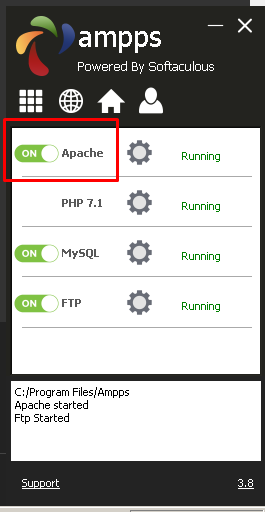
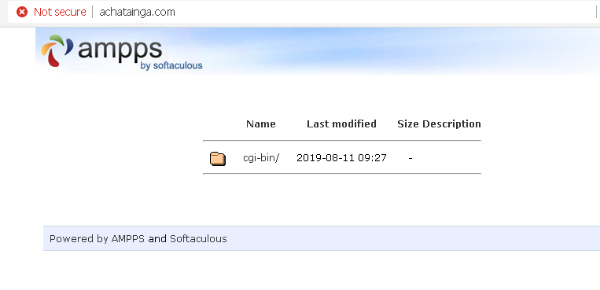
Just turn it off and then back on again. Now, when you go to https://achatainga.com you will see the default message of the server.
You could start coding your web application/website already by serving your file in the folder path/to/ampps/www/achatainga.com, but in this post I will use WordPress like mentioned above so let us do just that.
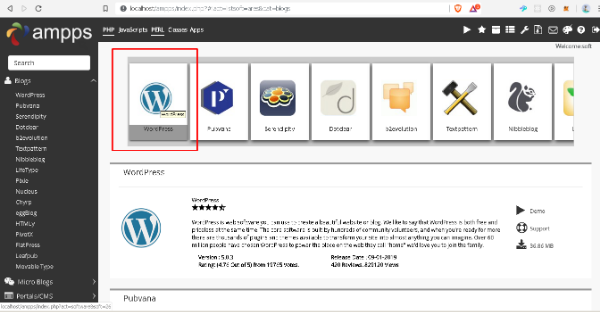
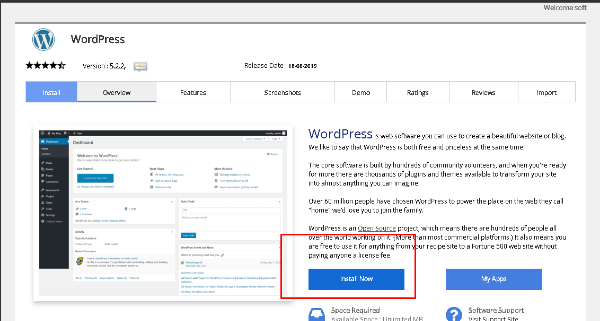
Click on Install now:
Now, you must fill in the form with the necessary information. I would suggest the latest WordPress installation (5.2.2 today) and make sure to select your recently created domain name, and delete WP from the subfolder to install WordPress at the root of your domain. After that, scroll down and fill in the information of your blog as you desire. You can already prepare your installation to be production ready, so make sure to be prepare to fill in the right information (it can be modified later within WordPress so do not panic if you have not made that decision yet).
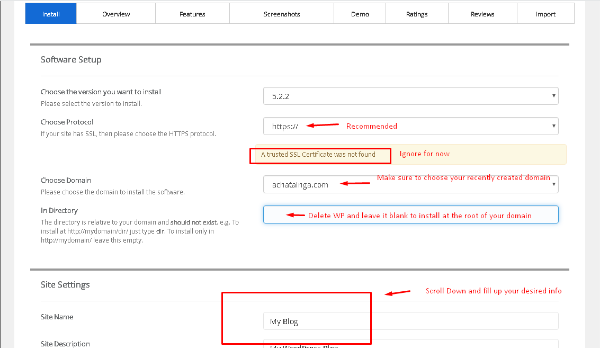
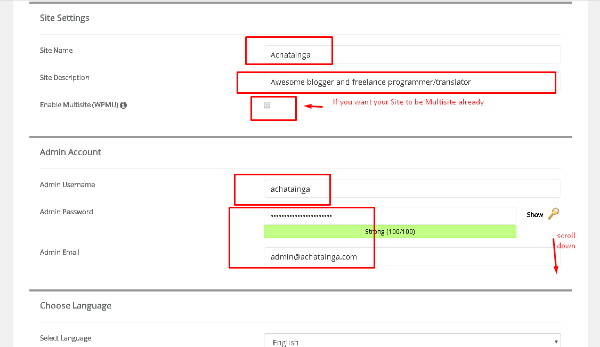
Scroll down a bit and fill in the info (my suggestions are on the screen shot)
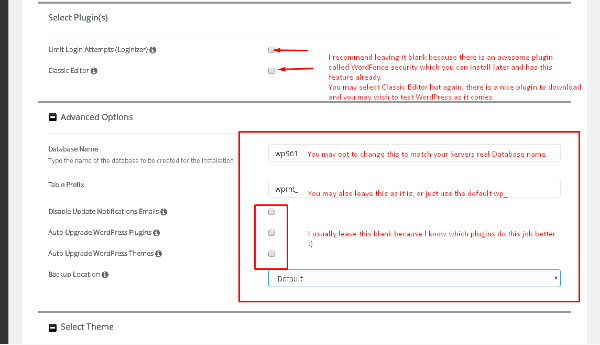
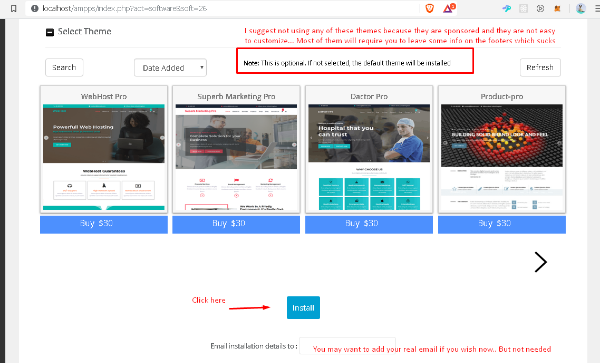
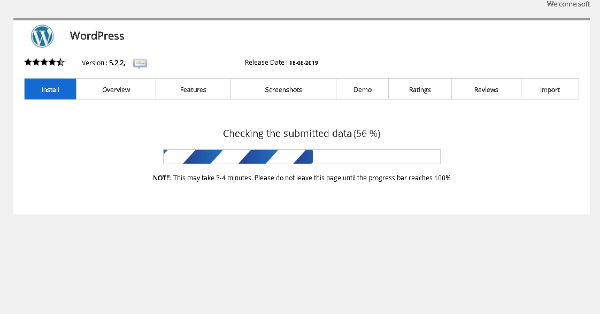
Once you click install, the latest WordPress will be downloaded and you must not close the current web page:
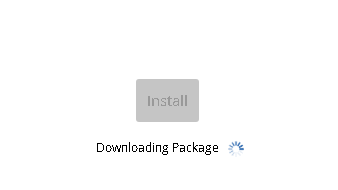
Once WordPress is downloaded, you will be redirected to the installation page where it will automate the database creation and everything needed until it is ready. Do not close the current web page until it is 100% done! (it will take 1-2 minutes approximately depending on your internet speed).
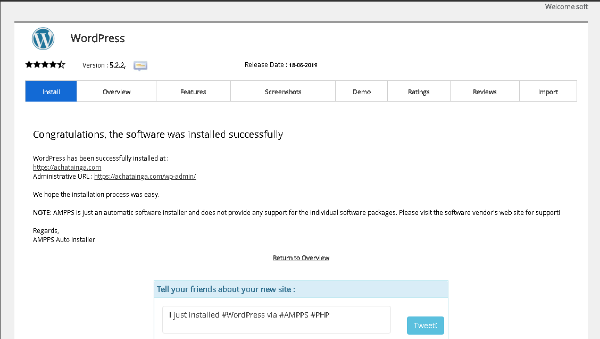
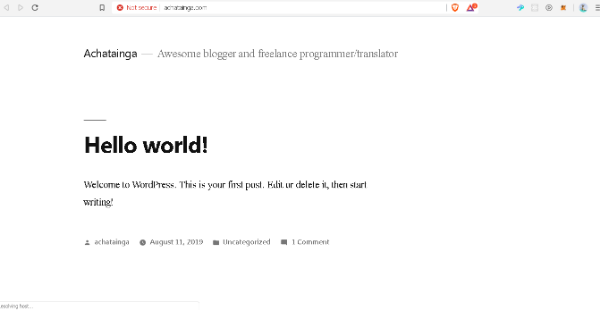
And voila! Your awesome WordPress is now installed in your custom domain name!. Let us check it out:
And the admin page:
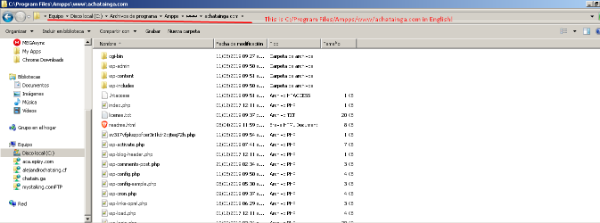
Now, you may be wondering where the WordPress files are. Well, they are in path/to/ampps/www/achatainga.com/:
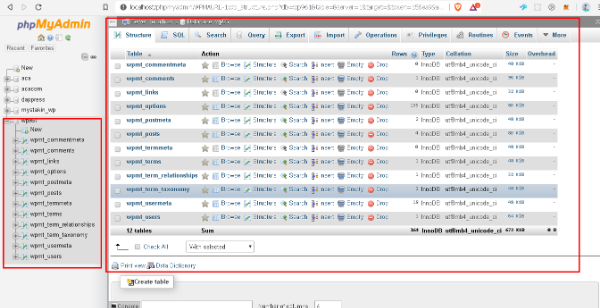
WordPress can be customized without having to code whatsoever using plugins such as Elementor, or even picking up a nice theme and just customize it using WordPress awesome customizer.Go to http://localhost/ampps and in the left side bar click on Blogs > WordPress: If you want to access your WordPress database then they can be found at http://localhost/phpmyadmin:
I have made several post which are specially designed for the non-programmers. Make sure to check them out also:
2 Great ways to create an outstanding landing page for free using WordPress and Elementor.
If you want to get your hands into coding, make sure to check out this post too:
2 great websites to learn to Code for Free.
I could not end this post without recommending yet another post of mine which will help your recent WordPress come bundled with very important features:
10 must-have plugins for any WordPress website.
I know this post is a long read, but rest assured it is worth it. If you made this far, congrats!, you have yourself a nice set of tools to get you started in like 30 minutes or so!.
That is it for now!. If you find this very useful consider upvoting which will help a brother Venezuelan out!. Also, ReSteem it for this will help this guide reach those who are developers or even non-developers, they will use this solution to create their website and later import it to their servers without having to rename its domain or the database!.
You can also consider delegating some SP to me in order to boost my daily post production!.
Steem on!.

Seria importante pensar en realizar los trabajos en los 2 idiomas. Por las recompensas en spaco me refiero.
Gracias por compartirlaExcelente aporte amigo @achatainga
Congratulations @achatainga! You have completed the following achievement on the Steem blockchain and have been rewarded with new badge(s) :
You can view your badges on your Steem Board and compare to others on the Steem Ranking
If you no longer want to receive notifications, reply to this comment with the word
STOPVote for @Steemitboard as a witness to get one more award and increased upvotes!
Muy buen post. Excelente información para quienes inician en el mundo de la programación. Thanks for sharing
To learn more.This post earned a total payout of 13.926$ and 10.471$ worth of author reward which was liquified using @likwid.