This tutorial will focus on how to get predictable color outcomes in your images when installing them in The Uplift World. It will not cover how to correctly size your images etc. There are already good tutorials for this available in The Uplift Discord server.
I'll admit I was a bit disappointed after the delivery of my first picture installation on one of my plots in The Uplift. I had ordered one of my favorite photos installed - Here's how it came out:
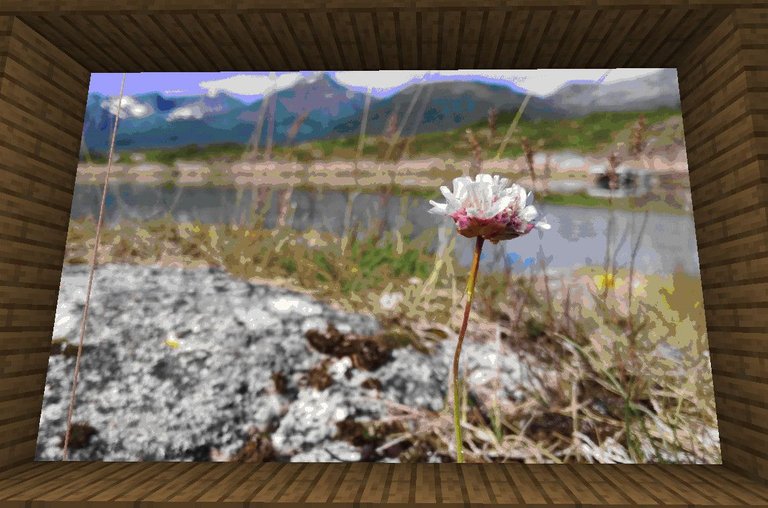
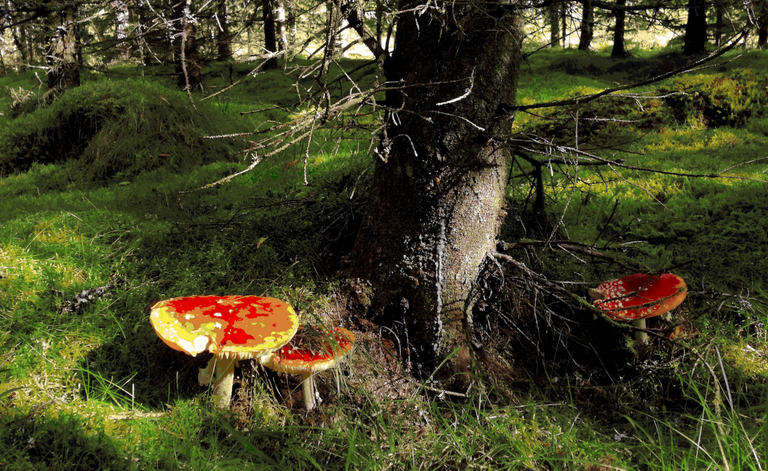
And here's the original that I sent in to Uplift-service:
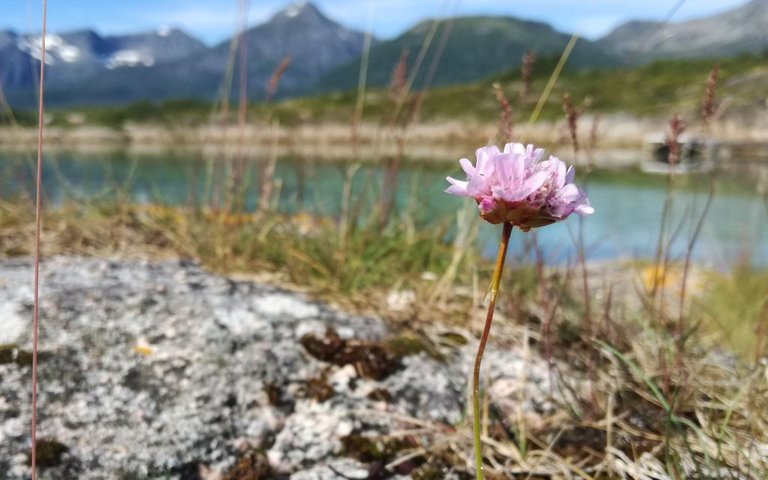
The result wasn't terrible, but definitely not the same as the original. And I'll admit I was surprised of the poor result, even if I probably should have known better.
So.. Since each picture install costs 400k Upliftium (and I don't have a whole lot of it), I figured I need a way to see how any picture would look in-game BEFORE installing them, so as to avoid any future surprises like this. And I'm happy to say I found a solution that works close to perfectly. I hope the following will be helpful for any Uplifter looking to do a picture install for the first (or whatever'th) time
Background info
The reason we get unexpected outcomes when it comes to the colors in our images, is because Minecraft only supports a limited number of colors (about 233 specific colors as of v1.16.5). So when a picture is installed, and a color that is not one of those 233 colors are present, they are automatically converted to the color closest to that in the available palette.
So for us to be in full control of the outcome, we need to convert our image to the Minecraft color palette before installation.
After doing a bit of searching, I found this page on a site called Lospec.com, which supposedly contains a downloadable color palette for Minecraft 1.16.4 (lospec.com), that can be imported into any image editing software, including PhotoShop and GIMP (gimp.org). The latter is my preferred image editing software to use, as it's free and open source software and runs on any operating system. It is also the software I'll be using for the rest of this tutorial, but the same principles will work in whatever editing software you prefer to use.
PS: If you prefer to not download anything from random websites, here's the entire color palette in a regular image, so that you create your own custom palette. Though this is a bit more tedious than just downloading the palette from the above link, it will also get the job done.

Step-by-step (in GIMP)
Download the color palette (or create a custom color palette using the colors in the image above)
Start GIMP
Open the Palettes Dialog (Windows > Dockable Dialogs > Palettes).
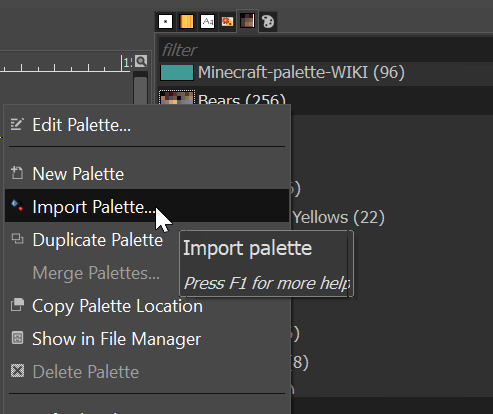
Right click anywhere in the Palettes window and select Import Palette. Select the Palette you downloaded in step 1.
You now have the Minecraft 1.16.4 color palette installed, and can start working on your image.Open your image.
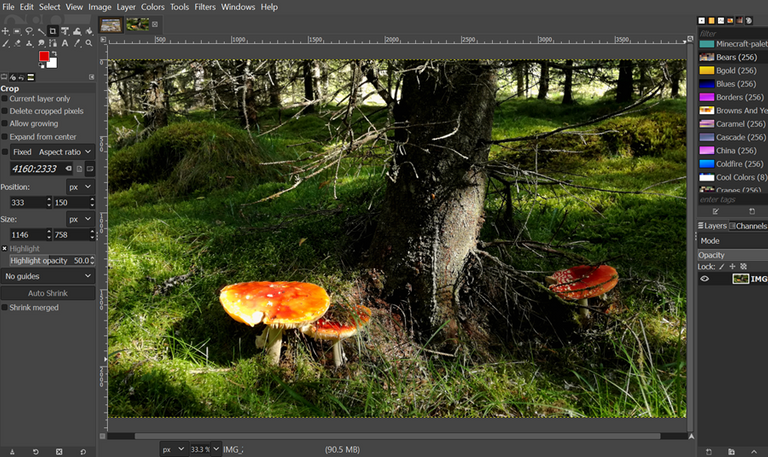
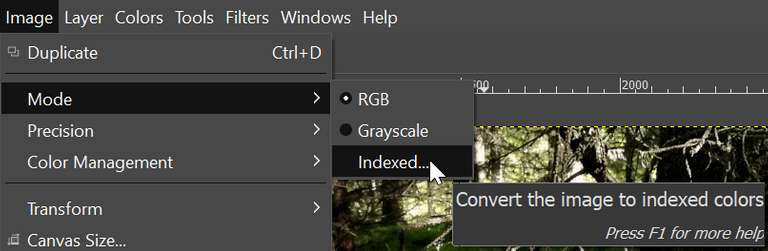
Select Image > Mode > Indexed
Select Use Custom Palette and select your imported/created Minecraft color palette
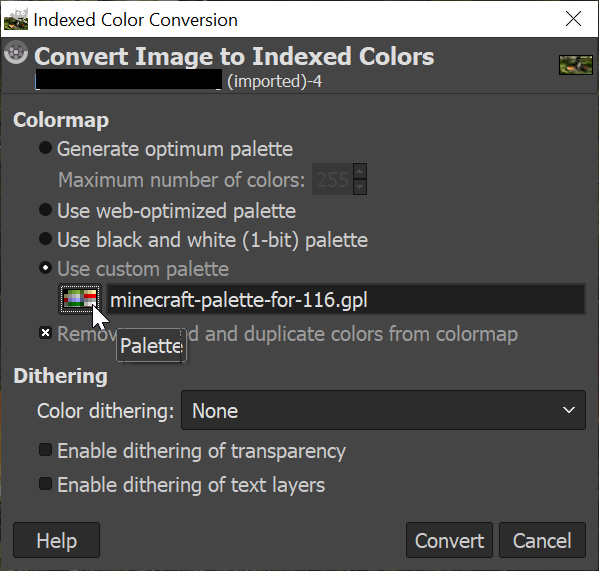
Final step, click Convert. All the colors in your image are now converted to the closest corresponding colors available in Minecraft. That is to say, what you are looking at now is how it will look in-game. You may now tweak your image further to optimize it, but that's beyond the scope of this tutorial.
Edit: This post was reworked and reposted with my permission at theuplift.world-blog after its publication.
All the best,
@mightpossibly
Coming from a fellow Uplifter who has installed 100s of images on my plot already, this is very helpful.
That's awesome to hear. Thanks for sharing
Congratulations @mightpossibly! You have completed the following achievement on the Hive blockchain and have been rewarded with new badge(s):
Your next target is to reach 25000 upvotes.
You can view your badges on your board and compare yourself to others in the Ranking
If you no longer want to receive notifications, reply to this comment with the word
STOPCongratulations @mightpossibly! You received a personal badge!
Wait until the end of Power Up Day to find out the size of your Power-Bee.
May the Hive Power be with you!
You can view your badges on your board and compare yourself to others in the Ranking
Check out the last post from @hivebuzz:
Congratulations @mightpossibly! You received a personal badge!
Participate in the next Power Up Day and try to power-up more HIVE to get a bigger Power-Bee.
May the Hive Power be with you!
You can view your badges on your board and compare yourself to others in the Ranking
Check out the last post from @hivebuzz:
This is a one-time notice from SCHOOL OF MINNOWS, a free value added service on hive.
Getting started on hive can be super hard on these social platforms 😪 but luckily there is some communities that help support the little guy 😊, you might like school of minnows, we join forces with lots of other small accounts to help each other grow!
Finally a good curation trail that helps its users achieve rapid growth, its fun on a bun! check it out. https://som-landing.glitch.me/