Welcome to this tutorial where I will show something you'll be able to quickly do yourself.
dieses Videotutorial an.******Wenn ihr ein deutsches Tutorial für die Joomlainstallation auf dem lokalen Windows Rechner sucht schaut mal bei @tutorialgarage
For my little gaming project I want a frontend to have my own design and style to show things. Steemit isn't much like Medieval Fortresses and Magic Creatures. If you don't know what I'm talking about check on my introduction post.
The bot will be in Python and I'm a totally beginner there. Thought to choose something I know for the frontend part. So I choose you Joomla!
Joomla! is a popular content management system with a design well thought through, lots of features working straight out of the box and for the best part: It is awesome if you want to write you custom extensions with lots of tutorials and a nice API-documentation.
let's get started
First of all we need the installation files. And this is where I need to split the Guide. If you happen to have access to the server via ssh use this. File transfer with FTP is awful when uploading lots of files and you'll have to unzip them before uploading because you usually cant access the tools to unzip when uploading just the zipped file.
FTP
- go to joomla.org and download the latest archive
- unzip it to a place you know how to reach quickly.
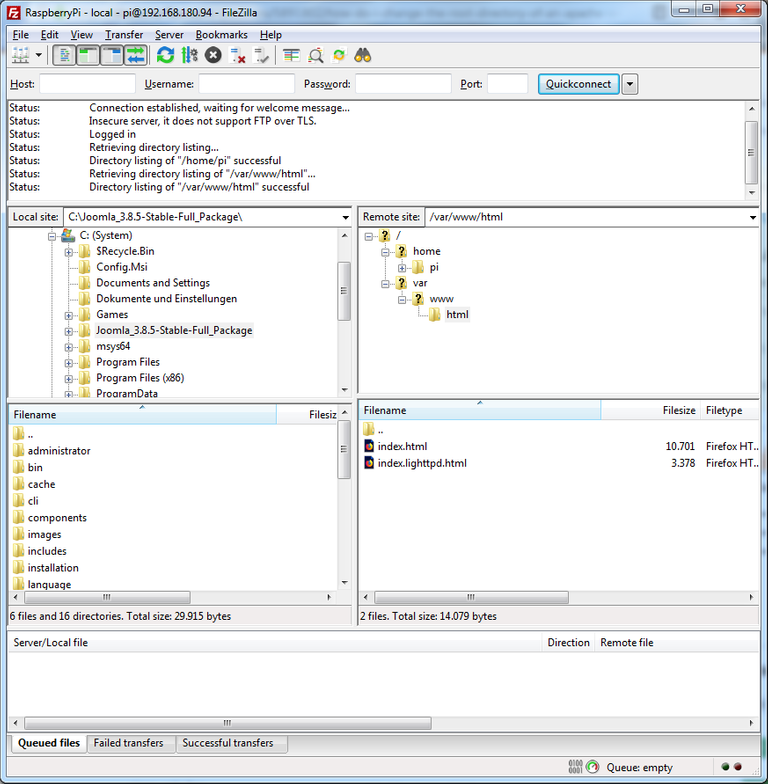
I'm using FileZilla as an FTP-Client.
- run FileZilla and connect to your server
- switch local directory to where you unzipped your file
- switch server directory to /var/www/html
- delete index.html
- select all Files and drag them to the right
- wait about 15 minutes
SSH
I'm using PuTTY to access my RaspberryPi.
Do not write the $.
Do not write [TAB] press the actual key on the keyboard.
- go to joomla.org
- copy the link of the latest File
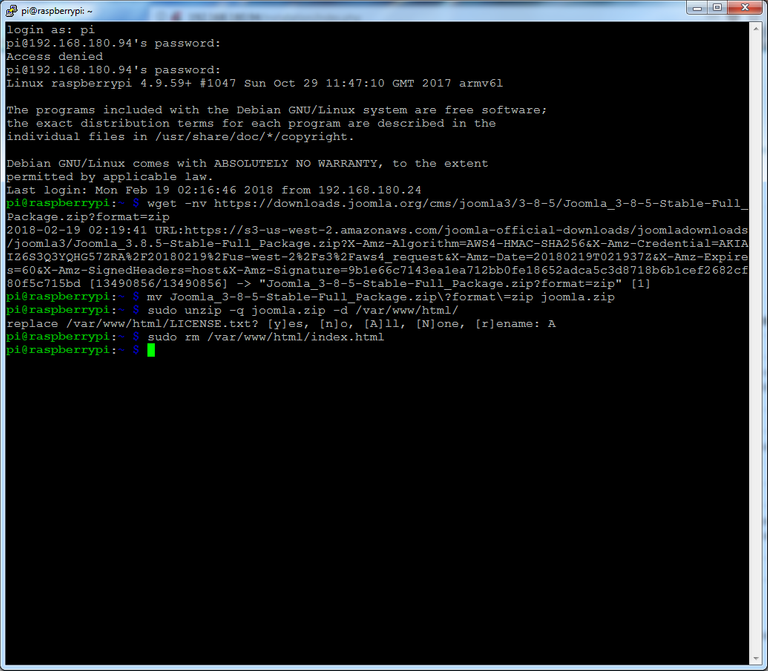
- open PuTTY and login
$wget
Right click right after that, it should fill in the full link. Press enter to confirm.
$mv joomla[TAB] joomla.zip
$sudo unzip joomla.zip -d /var/www/html/
$sudo rm /var/www/html/index.html
This should take well under 3 minutes.
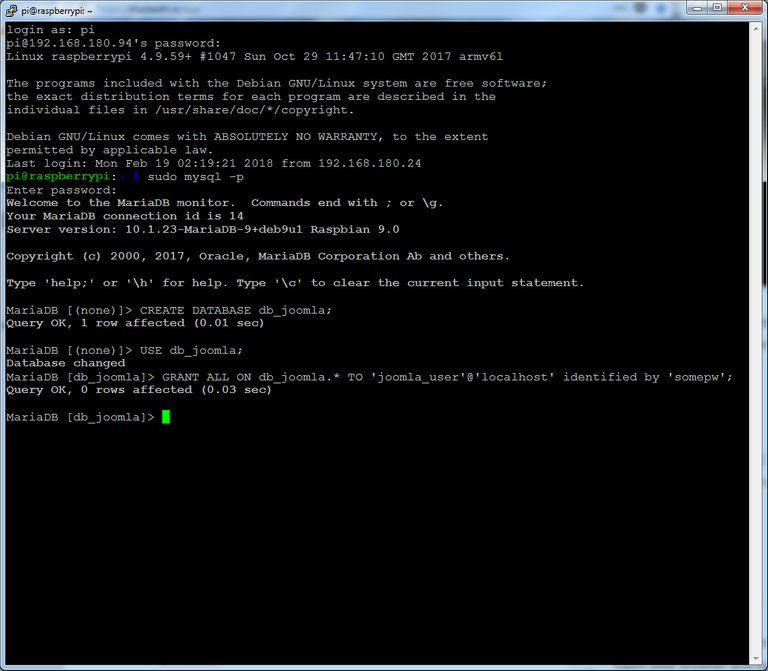
If you are not provided with a mysql database with username and password you should create one at this point.
Login to mysql.
$sudo mysql -p
>CREATE DATABASE db_joomla;
>GRANT ALL ON db_joomla.* TO joomla_user'@'localhost' identified by 'somepw';
And you are good.
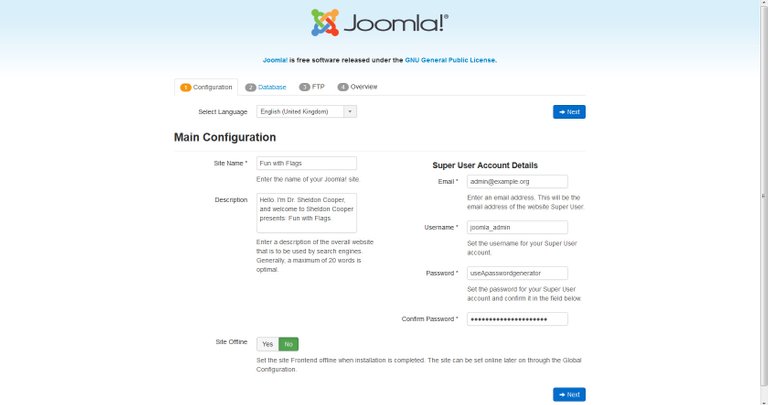
setup joomla
Joomla! is now on your server but needs to be configured.
Open your browser and type the adress your server can be reached.
Fill in all the information needed.
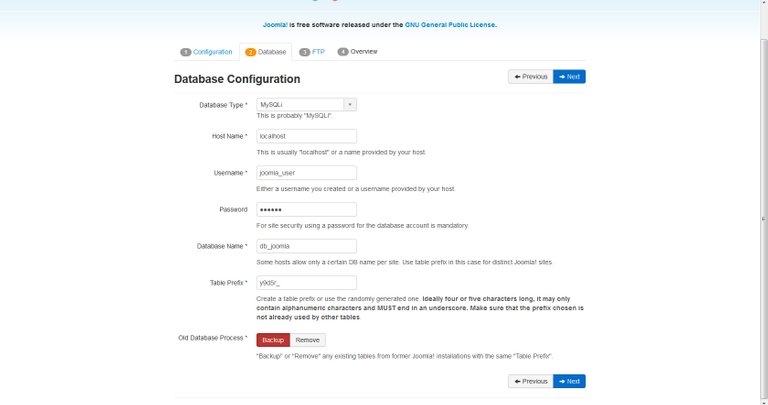
Fill in the Information your hoster provided you with or use database and user you created.
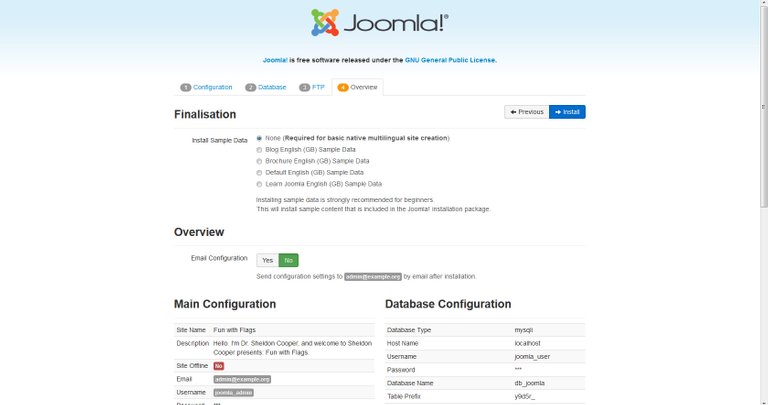
Skip step three, it is not necessary and you always can configure it in the admin panel later on.
And there it is. We are done. You should remove the installation folder like they suggest. After that you can browse to your frontend or start configuring the site in your administration panel.
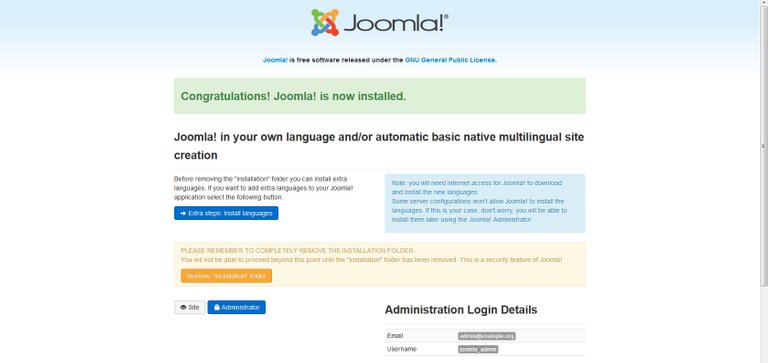
Congratulations, you can now start using Joomla! as a Blog or whatever you want. It will take you a little bit more time to get used to everything compared to a WordPress but you will have way more possibilities.
Hope that helped.